
Related Manuals for Bosch FWA 4650


Summary of Contents for Bosch FWA 4650
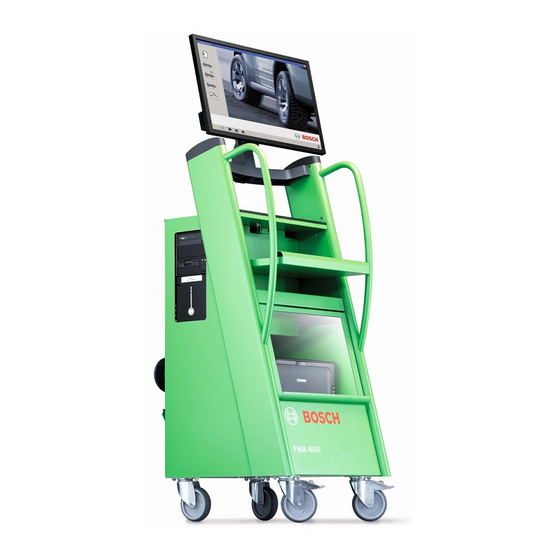
- Page 1 FWA 4650 Erstinbetriebnahme en Initial Operation und Nachrüstung and Retrofit Kit WLAN-Box für 3D-12Cam WLAN-Box for 3D-12Cam Achsmessgerät Wheel Alignment System...
- Page 2 2 | FWA 4650 | 1 690 706 220 2014-01-31 Robert Bosch GmbH...
- Page 3 | FWA 4650 | 3 de Inhaltsverzeichnis Deutsch Contents English Robert Bosch GmbH 1 690 706 220 2014-01-31...
-
Page 4: Table Of Contents
4 | FWA 4650 | Inhaltsverzeichnis deutsch Installation 6.2.1 Anmeldung 6.2.2 Vorbereiten Verwendete Symbolik 6.2.3 Durchführen In der Dokumentation 1.1.1 Warnhinweise – Aufbau und Bedeutung 5 Bluetooth-Adapter 1.1.2 Symbole – Benennung und Bedeutung 5 installieren Auf dem Produkt Beschreibung 7.1.1... -
Page 5: Verwendete Symbolik
Sie in der separaten Anleitung "Wichtige Hinweise und meidung. Warnhinweise haben folgenden Aufbau: Sicherheitshinweise zu Bosch Wheel Test Equipment". Diese sind vor Inbetriebnahme, Anschluss und Bedie- nung von FWA 4650 sorgfältig durchzulesen und zwin- Warn- SIGNALWORT – Art und Quelle der Gefahr! gend zu beachten. -
Page 6: Wlan-Box
Fig. 1: WLAN-Box Montageposition 4-Säulen- Scheren- Grube Die WLAN-Box ermöglicht die kabellose und bei Bedarf hebebühne hebebühne Fahrwagen freie Anbindung des FWA 4650 Achsmessys- Bediensäule √ tems an ein PC-System: 4-Säulenhebe- bühne Die Achsmesssoftware (Messprogramm und Fahr- R Oberseite Vordere Quertra- zeugsollwerte) wird auf einem Desktop-, Laptop- R Außenseite... -
Page 7: Pc/ Laptop/ Tablet
WLAN-Box | FWA 4650 | 7 PC/ Laptop/ Tablet Datenübertragung WLAN-Box <-> PC-System: 3.2.1 Hardware Daten Funkart PC/ Laptop/ Tablet- Mindestanforderung 3D-Messsystem WLAN IEEE 802.11n mit 5 GHz Komponenten CCD-Referenzsystem Bluetooth 2,4 GHz Dual Core 2 x 2,4 GHz: R Intel Celeron (empfohlen) Tab. -
Page 8: Installation Vorbereiten
8 | FWA 4650 | Installation vorbereiten Installation vorbereiten Software und Treiber Lieferumfang Bei Erstinbetriebnahme von Achsmessgeräten mit Hersteller-PC/ Laptop ist die Anwendersoftware Lieferumfang versionsabhängig. (Messprogramm, Fahrzeugsollwerte und Treiber) bereits installiert und konfiguriert. 1. WLAN-Box auspacken. 2. Lieferumfang gemäß Lieferschein prüfen. -
Page 9: Mechanische Und Elektrische Installation
Mechanische und elektrische Installation | FWA 4650 | 9 Mechanische und Installation an Bediensäule 4-Säulenhebebühne (Vorschlag 1) elektrische Installation 5.1.1 Montage WLAN-Box-Montage gültig für 4-Säulenhebebühne. Montageposition: Fig. 3: WLAN-Box Vor dem Öffnen der WLAN-Box muss der Netzstecker gezogen sein. Nachfolgende Montagepositionen für die WLAN-Box sind Vorschläge. -
Page 10: Verkabelung
10 | FWA 4650 | Mechanische und elektrische Installation 5.1.2 Verkabelung 1. Befestigungsschrauben (6 x) des Gehäusedeckels der WLAN-Box lösen: Fig. 6: Gehäusedeckel WLAN-Box demontieren Fig. 5: Bohrbild Befestigungsleisten WLAN-Box 1 Gehäusedeckel 2 Befestigungsschrauben (6 x) 1 Abstand Bohrungen = 620 mm 2 Durchgangsbohrung (2 x) Bohrloch-Ø... - Page 11 Mechanische und elektrische Installation | FWA 4650 | 11 16900021_Re Fig. 8: Kabeldurchführung WLAN-Box 1 LAN-Kabel-1 3D-Messsystem 2 LAN-Kabel-2 3D-Messsystem 3 Kabel CCD-Referenzsystem 4 Länge durchgeführter Kabelstrang = 340 mm 5 Komponenten Kabelverschraubung 10. Kabelstrang vor der Kabelbohrung an der Gehäuse- außenseite der WLAN-Box in 3 Kabeldurchführun-...
-
Page 12: Installation An Quertraverse 4-Säulenhebebühne (Vorschlag 2)
12 | FWA 4650 | Mechanische und elektrische Installation Installation an Quertraverse 4-Säulenhebebühne (Vorschlag 2) 5.2.1 Montage WLAN-Box-Montage gültig für vordere Quertraverse an 4-Säulenhebebühne. Montageposition: Oberseite Quertraverse Außenseite Quertraverse Innenseite Quertraverse Fig. 10: Kabelanschlüsse in der WLAN-Box 1 Anschluss 3 + 4 LAN-Kabel (2 x) linker Messwertaufnehmer... -
Page 13: Verkabelung
Mechanische und elektrische Installation | FWA 4650 | 13 Installation an Bedieneinheit 1. Montageposition an Quertraverse wählen. Scherenhebebühne (Vorschlag 3) 2. Bohrungen (je 1 x) an beiden Befestigungsleisten gemäß Bohrbild markieren. 5.3.1 Montage Bohrbild siehe Kapitel 5.1.1 Montage, Fig. 5. -
Page 14: Wandinstallation (Vorschlag 4)
14 | FWA 4650 | Mechanische und elektrische Installation Wandinstallation (Vorschlag 4) 1. Befestigungsschrauben (6 x) des Gehäusedeckels der WLAN-Box lösen. 5.4.1 Montage Befestigungsschrauben lösen siehe Kapitel 5.1.2 WLAN-Box-Montage gültig für: Verkabelung, Fig. 6. 4-Säulenhebebühne 2. Deckel abnehmen. Scherenhebebühne Grube Fig. -
Page 15: Verkabelung
Mechanische und elektrische Installation | FWA 4650 | 15 5. Bohrungen (4 x) gemäß Bohrbild markieren: 7. Dübel (4 x S 8) befestigen. Fig. 16: Wandmontage WLAN-Box 1 Schlitz-Flachkopfholzschrauben (4 x 5 x 50 mm) 2 Dübel (4 x S 8) 8. -
Page 16: Wlan-Adapter Installieren
16 | FWA 4650 | WLAN-Adapter installieren WLAN-Adapter installieren 6.1.5 Speicherort Beschreibung Die Software befindet sich an folgenden Speicheror- ten: 6.1.1 Adapter Im Software-Center Auf der EDIS-CD Auf der dem Achsmessgerät bzw. der WLAN-Box beiliegenden Treiber-CD 6.1.6 Aktualität Die neueste Treiberversion befindet sich im Fig. -
Page 17: Vorbereiten
WLAN-Adapter installieren | FWA 4650 | 17 6.2.2 Vorbereiten 6.2.3 Durchführen Programme beenden WLAN-Box muss eingeschaltet sein. 1. Die Programmoberfläche "Aligner" beenden. Reihenfolge beachten: 2. Die Programmmodule Mess-Server, RemoteContro- Zuerst mit der Treiberinstallation beginnen und dann lEx, ILSV-Server, Demo-Server, und Lizenz-Server in nach Aufforderung während der Installation den... - Page 18 18 | FWA 4650 | WLAN-Adapter installieren Installationsassistent startet: Auswahlfenster Zielverzeichnis wird geöffnet: Fig. 21: Sprachauswahl - WLAN-Adapter Treiberinstallation Fig. 23: Auswahl Zielverzeichnis 3. Sprache wählen. 6. Button "Weiter" anklicken. Auswahlfenster Programmverzeichnis wird geöff- 4. Button "Weiter" anklicken.
- Page 19 WLAN-Adapter installieren | FWA 4650 | 19 Hinweisfenster "WLAN-Adapter anschließen" wird Auswahlfenster "Assistent für drahtlose Verbin- geöffnet: dungen" wird geöffnet: Fig. 25: WLAN-Adapter anschließen Fig. 27: Auswahlfenster Assistent für drahtlose Verbindungen 8. WLAN-Adapter anschließen. 10. Punkt "Geben Sie die Netzwerk-Kennung (SSID) und das Kennwort (Verschlüsselungsschlüssel) ein"...
- Page 20 20 | FWA 4650 | WLAN-Adapter installieren Auswahlfenster "Drahtlose Netzwerke" wird geöff- Hinweisfenster "Vor Installationsabschluss" wird net: geöffnet: Fig. 29: Auswahlfenster drahtlose Netzwerk Fig. 32: Hinweisfenster vor Installationsabschluss 14. Drahtloses Netzwerk wählen. 18. Button "Weiter" anklicken. Abschlussfenster WLAN-Adapter Treiberinstallati- Drahtloses Netzwerk = WLAN-Router in der WLAN-Box.
-
Page 21: Bluetooth-Adapter Installieren
Bluetooth-Adapter installieren | FWA 4650 | 21 Bluetooth-Adapter 7.1.3 Treiber installieren Bluetooth-Serial-Port Der Treiber stellt einen virtuellen (= per Software) Beschreibung seriellen COM Anschluss zur Verfügung. Der physikalische Anschluss des Bluetooth-Adap- 7.1.1 Adapter ters am PC/ Laptop erfolgt per USB. -
Page 22: Installation
22 | FWA 4650 | Bluetooth-Adapter installieren Installation 7.2.2 Durchführen 7.2.1 Vorbereiten Reihenfolge beachten: Zuerst die Software und den Treiber installieren und Programme beenden dann nach Aufforderung den Bluetooth-USB-Adapter Bosch 2.0 am PC/ Laptop anstecken. 1. Achsmessgeräte-PC/ Laptop starten. 2. Die Programmoberfläche Aligner beenden. - Page 23 Bluetooth-Adapter installieren | FWA 4650 | 23 Fig. 38: Startseite - InstallShield Wizard Fig. 40: Bereit zur Installation - InstallShield Wizard 2. Button "Weiter" wählen. 4. Button "Installieren" wählen. Fig. 39: Lizenzvereinbarung - InstallShield Wizard Fig. 41: Installation - InstallShield Wizard ...
- Page 24 24 | FWA 4650 | Bluetooth-Adapter installieren Fig. 42: Installation Bluetooth-Treiber Fig. 44: Installation fertigstellen - InstallShield Wizard Bluetooth-Treiber wird installiert. 9. Button "Fertigstellen" wählen. Fig. 43: Anschließen des Bluetooth-USB-Adapters 5. USB-Verlängerungsleitung am PC/ Laptop anschlie- Fig. 45: Neustart PC ßen.
-
Page 25: Überprüfen
Bluetooth-Adapter installieren | FWA 4650 | 25 7.2.3 Überprüfen Die korrekte Installation des Bluetooth-Treibers prüfen: 1. Start>>Systemsteuerung>>System wählen. Fig. 47: Bluetooth-Port Belegung Gerätemanager Fig. 46: Systemeigenschaften 4. Im Gerätemanager prüfen, ob der Bluetooth-Serial- 2. Zur Registerkarte "Hardware" wechseln. Converter korrekt installiert wurde. -
Page 26: Konfiguration
26 | FWA 4650 | Bluetooth-Adapter installieren Konfiguration 7.3.2 Verbinden 7.3.1 Vorbereiten 1. Mit der rechten Maustaste das "Bluetooth Manager" Symbol in der Taskleiste wählen. Bei FWA 4650-Achsmessgeräten muss die WLAN-Box eingeschaltet sein. Der Bluetooth-Manager sollte sich nach der Installati- on im Autostart befinden: Fig. - Page 27 Bluetooth-Adapter installieren | FWA 4650 | 27 Bluetooth-Modul in der WLAN-Box: Fig. 55: Etikett Bluetooth-Modul am Gehäuse WLAN-Box Die Angaben zum Bluetooth-Modul befinden sich auf einem Etikett auf der Gehäuseoberseite der WLAN-Box: Bluetooth-Name (BT-Name), Bluetooth-Adresse (BT-Addr) Bluetooth-Schlüssel (BT-PW) Fig. 53: Bluetooth-Geräte werden gesucht...
- Page 28 28 | FWA 4650 | Bluetooth-Adapter installieren Fig. 57: Dienstauswahl Fig. 59: Manuelle Zuweisung COM-Port 8. Dienst wählen. 11. Prüfen ob ein Häkchen bei "Automatische Verbin- 9. Button "Weiter" betätigen. dung" vorhanden ist. 12. COM Port wählen. Dienstauswahl: 13. Button "Weiter" betätigen.
- Page 29 Bluetooth-Adapter installieren | FWA 4650 | 29 Fig. 60: Einrichtung abgeschlossen. Fig. 62: Fertigstellen des Assistenten 14. Button "Weiter" betätigen. 16. Button "Fertigstellen" betätigen. Programm "Bluetooth-Einstellungen" mit neuer Verbindung wird angezeigt: Fig. 61: Verbindungsnamen eingeben 15. Button "Weiter" betätigen.
-
Page 30: Wiederherstellen
30 | FWA 4650 | USB-Hardlock installieren USB-Hardlock installieren 7.3.3 Wiederherstellen Funktion: Überwachung der Bluetooth-Verbindung Wiederherstellung der Bluetooth-Verbindung Das Programm "COM Re-Connect" muss für einen einwand- und störungsfreien Betrieb gestartet und Fig. 66: USB-Hardlock konfiguriert sein. Programmpfad: Der USB-Hardlock enthält die Lizenz zur Nutzung und C:\PROGRAM FILES (x86)\TOSHIBA\BLUETOOTH Installation der Software einer bestimmten Geräte-... -
Page 31: Softwareinstallation
Softwareinstallation | FWA 4650 | 31 Softwareinstallation 9.1.5 Programme Voraussetzung Vor der Installation Programme beenden: 1. Messprogramm schließen. 9.1.1 Hardlock 2. In der Taskleiste die Programmsymbole für ILSV-, Licence-, Demo-, Mess-Server und IR-Fernbedienung Hardlock muss am PC/ Laptop angeschlossen sein. -
Page 32: Messprogramm
32 | FWA 4650 | Softwareinstallation Messprogramm 9.2.2 Download 9.2.1 CD/ DVD 1. Die aus dem Internet oder Firmen-Netzwerk gelade- ne Datei (Installation und/ oder Lizenzschlüssel) auf Achsmessgerätehersteller ein Speichermedium (z.B. USB-Datenträger) kopie- ren. 1. Installations-CD/ DVD des Messprogramms in das 2. -
Page 33: Installationsprogramm
Ordner für das Messprogramm. Die Software ist auch in den Autostart-Ordner verlinkt worden und startet nach dem Booten des PC/ Laptops automa- tisch. Bei FWA 4650-Achsmessgeräten muss nach der Ins- tallation des Messprogramms das Netzwerk konfigu- riert werden. Netzwerkkonfiguration siehe Kapitel "Netzwerk". -
Page 34: Fahrzeugsollwerte
34 | FWA 4650 | Softwareinstallation Fahrzeugsollwerte 9.3.2 Download 9.3.1 CD/ DVD 1. Die aus dem Internet oder Firmennetzwerk geladene Datei (Installation und/ oder Lizenzschlüssel) auf ein Achsmessgerätehersteller Speichermedium (z.B. USB-Datenträger) kopieren. 2. Speichermedium am PC/ Laptop anschließen. 1. Installations- CD/ DVD Fahrzeugsollwerte ins Lauf- 3. - Page 35 Softwareinstallation | FWA 4650 | 35 Das Protokollfenster für die Installation der Fahr- zeugsollwerte wird angezeigt. Das Installationsprogramm vergleicht alle auf der Fahrzeugsollwerte CD/ DVD oder der Download- datei enthaltenen Sätze der Fahrzeugsollwerte mit den Einträgen im Lizenzschlüssel.
-
Page 36: 10. Netzwerk Konfigurieren
36 | FWA 4650 | Netzwerk konfigurieren 10. Netzwerk konfigurieren 4. Punkt "Internet Protocol (TCP/IP) wählen. 5. Button "Eigenschaften" anklicken. Fenster "Eigenschaften von Internet Protocol Das LAN-/ WLAN-Netzwerk zur Kommunikation mit dem 3D-Messsystem des FWA 4650-Achsmessge- (TCP/IP)" wird geöffnet: räts muss manuell konfiguriert werden, bevor es in... -
Page 37: Wlan-Netzwerkverbindung Konfigurieren
Netzwerk konfigurieren | FWA 4650 | 37 10.2 WLAN-Netzwerkverbindung Fenster "Eigenschaften von Internet Protocol konfigurieren (TCP/IP)" wird geöffnet: 1. Start>>Systemsteuerung>>Netzwerkverbindungen wählen. Fenster Netzwerkverbindungen wird geöffnet: Fig. 82: Netzwerkverbindungen 1 WLAN-Netzwerkverbindung (= drahtlose Netzwerkverbindung) 2 LAN-Netzwerkverbindung 2. Mit rechter Maustaste "Drahtlose Netzwerkverbin- dung"... -
Page 38: 11. Technische Daten
38 | FWA 4650 | Technische Daten 11. Technische Daten 11.1 Maße und Gewichte WLAN-Box Funktion Einheit Wert Abmessungen (L x B x H): 627 x 250 x 131 Abmessungen (L x B x H) 647 x 250 x 131... - Page 39 | FWA 4650 | 39 Contents English 6.1.5 Storage location 6.1.6 Current version Installation Symbols used 6.2.1 Log-on In the documentation 6.2.2 Preparation 1.1.1 Warning notices - 6.2.3 Procedure Structure and meaning 1.1.2 Symbols in this documentation Installing Bluetooth On the product...
-
Page 40: Symbols Used
The FWA 4650 is a class/category A product as defi- Multi-step Instruction consisting of several steps. ned by EN 61 326. The FWA 4650 may cause high-fre- operation quency household interference (radio interference) One-step Instruction consisting of one step. -
Page 41: Wlan-Box
Fitting location 4-column Scissor The WLAN-Box permits wireless connection of the lifting lift FWA 4650 wheel alignment system to a PC system wit- platform hout having to use a trolley if so required: 4-column lifting √ platform control The wheel alignment software (measurement... -
Page 42: Pc/ Laptop/ Tablet
42 | FWA 4650 | WLAN-Box PC/ Laptop/ Tablet Data transmission WLAN-Box <-> PC system: 3.2.1 Hardware Data Wireless transmission PC/ Laptop/ tablet Minimum requirement 3D measurement system WLAN IEEE 802.11n with 5 GHz components CCD reference system Bluetooth 2.4 GHz Dual Core 2 x 2.4 GHz:... -
Page 43: Preparation For Installation
Preparation for installation | FWA 4650 | 43 Preparation for installation Trolley Scope of delivery For further information on start-up of the trolley, refer to the document Commissioning of FWA 4630 The scope of delivery varies depending on the versi- 1690706006. -
Page 44: Mechanical And Electrical Installation
44 | FWA 4650 | Mechanical and electrical installation Mechanical and Installation at control column of 4-column lifting platform (suggesti- electrical installation on 1) 5.1.1 Fitting WLAN-Box fitting procedure for 4-column lifting plat- form. Fitting location: Fig. 3: WLAN-Box The mains connector must be unplugged before ope- ning the WLAN-Box. -
Page 45: Wiring
Mechanical and electrical installation | FWA 4650 | 45 5.1.2 Wiring 1. Unfasten the screws (6 x) securing the housing cover of the WLAN-Box. Fig. 6: Removing WLAN-Box housing cover Fig. 5: Drilling pattern for WLAN-Box fastening strips 1 Housing cover... - Page 46 46 | FWA 4650 | Mechanical and electrical installation 16900021_Re Fig. 8: WLAN-Box cable penetration 1 3D measurement system LAN cable 1 2 3D measurement system LAN cable 2 3 CCD reference system cable 4 Length of cable assembly pulled in = 340 mm 5 Cable gland components 10.
-
Page 47: Installation At Cross Member Of 4-Column Lifting Platform (Suggestion 2)
Mechanical and electrical installation | FWA 4650 | 47 Installation at cross member of 4-column lifting platform (suggesti- on 2) 5.2.1 Fitting WLAN-Box fitting procedure for front cross member on 4-column lifting platform. Fitting location: On top of cross member... -
Page 48: Wiring
48 | FWA 4650 | Mechanical and electrical installation Installation at operating unit of 1. Choose a fitting location on the cross member. scissor lift (suggestion 3) 2. Mark holes (1 x each) on both fastening strips in accordance with the drilling pattern. -
Page 49: Wall Installation (Suggestion 4)
Mechanical and electrical installation | FWA 4650 | 49 Wall installation (suggestion 4) 1. Unfasten the screws (6 x) securing the housing cover of the WLAN-Box. 5.4.1 Fitting Refer to Section 5.1.2 Wiring, Fig. 6 for unfastening WLAN-Box fitting procedure for: the securing screws. -
Page 50: Wiring
50 | FWA 4650 | Mechanical and electrical installation 5. Mark the holes (4 x) in accordance with the drilling 7. Fit the wall plugs (4 x S 8). pattern. Fig. 16: WLAN-Box wall mounting 1 Slotted flat head wood screws (4 x 5 x 50 mm) 2 Wall plugs (4 x S 8) 8. -
Page 51: Installing Wlan Adapter
Intended use Depending on the version of the wheel alignment unit, the operating system starts up with or without The driver is used on FWA 4650 wheel alignment user log-on. units for connecting the WLAN-Box to the WLAN adapter at the PC/ Laptop. -
Page 52: Preparation
52 | FWA 4650 | Installing WLAN adapter 6.2.2 Preparation 6.2.3 Procedure Ending programs The WLAN-Box must be switched on. 1. Close the program user interface "Aligner". Keep to the sequence: 2. Use the right mouse key to select the program modu-... - Page 53 Installing WLAN adapter | FWA 4650 | 53 The installation wizard starts up: The target directory selection window opens up: Fig. 21: Language selection – WLAN adapter driver installation Fig. 23: Selection of target directory 3. Select the required language.
- Page 54 54 | FWA 4650 | Installing WLAN adapter The "WLAN adapter connection" info window The "Wireless link wizard" selection window opens up: opens up: Fig. 25: Connection of WLAN adapter Fig. 27: Wireless link wizard selection window 8. Connect the WLAN adapter.
- Page 55 Installing WLAN adapter | FWA 4650 | 55 The "Wireless networks" selection window opens The "Before concluding installation" info window opens up: Fig. 29: Wireless network selection window Fig. 32: Before concluding installation info window 14. Select the required wireless network.
-
Page 56: Installing Bluetooth Adapter
56 | FWA 4650 | Installing Bluetooth adapter Installing Bluetooth 7.1.3 Driver adapter Bluetooth serial port The driver provides a virtual (= by means of soft- Description ware) serial COM port. Physical connection of the Bluetooth adapter to 7.1.1 Adapter the PC/ Laptop is by way of USB. -
Page 57: Installation
Installing Bluetooth adapter | FWA 4650 | 57 Installation 7.2.2 Procedure 7.2.1 Preparation Keep to the sequence: First install the software and the driver and then Ending programs connect the Bluetooth-USB adapter Bosch 2.0 to the PC/ Laptop when prompted to do so. - Page 58 58 | FWA 4650 | Installing Bluetooth adapter Fig. 38: Start mask – InstallShield Wizard Fig. 40: Ready for installation – InstallShield Wizard 2. Press the "Continue" button. 4. Press the "Install" button. Fig. 39: Licence agreement – InstallShield Wizard Fig.
- Page 59 Installing Bluetooth adapter | FWA 4650 | 59 Fig. 42: Installation of Bluetooth driver Fig. 44: Completion of installation – InstallShield Wizard The Bluetooth driver is installed. 9. Press the "Finish" button. Fig. 43: Connection of Bluetooth-USB adapter Fig. 45: PC re-start 5.
-
Page 60: Checking
60 | FWA 4650 | Installing Bluetooth adapter 7.2.3 Checking Check correct installation of the Bluetooth driver: 1. Select Start>>Control panel>>System. Fig. 47: Device manager Bluetooth port assignment 4. In the Device manager check whether the Bluetooth Fig. 46: System properties serial converter has been correctly installed. -
Page 61: Configuration
Installing Bluetooth adapter | FWA 4650 | 61 Configuration 7.3.2 Connection 7.3.1 Preparation 1. Use the right mouse key to select the "Bluetooth manager" icon in the task bar. With FWA 4650 wheel alignment units the WLAN-Box must be switched on. - Page 62 62 | FWA 4650 | Installing Bluetooth adapter Bluetooth module in WLAN-Box: Fig. 55: Bluetooth module label on WLAN-Box housing The Bluetooth module data can be found on a label on the top of the WLAN-Box housing: Bluetooth name (BT name)
- Page 63 Installing Bluetooth adapter | FWA 4650 | 63 Fig. 57: Service selection Fig. 59: Manual COM port assignment 8. Select the service. 11. Check whether there is a tick against "Automatic 9. Press the "Continue" button. connection". 12. Select COM port.
- Page 64 64 | FWA 4650 | Installing Bluetooth adapter Fig. 60: Set-up completed. Fig. 62: Ending wizard 14. Press the "Continue" button. 16. Press the "Finish" button. The "Bluetooth settings" program with the new link is displayed: Fig. 61: Entering link name 15.
-
Page 65: Re-Connection
Installing USB hardlock | FWA 4650 | 65 Installing USB hardlock 7.3.3 Re-connection Function: Monitoring of Bluetooth link Re-connection of Bluetooth link The "COM Re-Connect" program must be started and configured to ensure proper, trouble-free operation. Fig. 66: USB hardlock... -
Page 66: Software Installation
IR remote control. 3. End with "Exit" in the menu. " 9.1.2 WLAN-Box Programs ended. With FWA 4650 wheel alignment units the WLAN-Box 9.1.6 Installation software must be switched on. The installation software for wheel alignment units 9.1.3... -
Page 67: Measurement Program
Software installation | FWA 4650 | 67 Measurement program 9.2.2 Download 9.2.1 CD/ DVD 1. Copy the file loaded from the internet or company network (installation and/or licence key) onto a sto- Wheel alignment unit manufacturer rage medium (e.g. USB data carrier). -
Page 68: Installation Program
Desktop. The software is also linked to the Autostart folder and starts up automati- cally after booting the PC/ Laptop. In the case of FWA 4650 wheel alignment units, the network has to be configured after installing the measurement program. -
Page 69: Vehicle Target Data
Software installation | FWA 4650 | 69 Vehicle target data 9.3.2 Download 9.3.1 CD/ DVD 1. Copy the file loaded from the internet or company network (installation and/or licence key) onto a sto- Wheel alignment unit manufacturer rage medium (e.g. USB data carrier). - Page 70 70 | FWA 4650 | Software installation The protocol window for installation of the vehicle target data is displayed. The installation program compares all the vehicle target data records contained on the vehicle tar- get data CD/ DVD or in the download file to the entries in the licence key.
-
Page 71: 10. Configuring Network
5. Click onto the "Properties" button. The "Properties of internet protocol (TCP/IP)" The LAN/ WLAN network for communication with the 3D measurement system of the FWA 4650 wheel window opens up: alignment unit has to be manually configured before it can be started up. -
Page 72: Configuring Wlan Network Link
72 | FWA 4650 | Configuring network 10.2 Configuring WLAN network link The "Properties of internet protocol (TCP/IP)" window opens up: 1. Select Start>>Control panel>>Network links. The Network links window opens up: Fig. 82: Network links 1 WLAN network link (= wireless network link) 2 LAN network link 2. -
Page 73: 11. Technical Data
Technical data | FWA 4650 | 73 11. Technical data 11.1 WLAN-Box dimensions and weights Function Unit Value Dimensions (L x W x H): 627 x 250 x 131 Dimensions (L x W x H) 647 x 250 x 131... - Page 74 74 | FWA 4650 | Configuring network 1 690 706 220 2014-01-31 Robert Bosch GmbH...
- Page 75 Configuring network | FWA 4650 | 75 Robert Bosch GmbH 1 690 706 220 2014-01-31...
- Page 76 Robert Bosch GmbH Diagnostics Franz-Oechsle-Straße 4 73207 Plochingen DEUTSCHLAND www.bosch.com bosch.prueftechnik@bosch.com 1 690 706 220 | 2014-01-31...