Sony HVL-F60RM Operating Instructions Manual
Hide thumbs
Also See for HVL-F60RM:
- Operating instructions manual (64 pages) ,
- Help manual (80 pages) ,
- Help manual (92 pages)
Table of Contents
Advertisement
Quick Links
Flash
"Help Guide" (Web manual)
Refer to "Help Guide" for in-depth instructions
on the many functions of the flash.
« Guide d'aide » (Manuel en ligne)
Consultez le « Guide d'aide » pour obtenir des
instructions détaillées au sujet des nombreuses
fonctions du flash.
http://rd1.sony.net/help/ilc/1730/h_zz/
HVL-F60RM
4-735-282-12(1)
Operating Instructions GB
Mode d'emploi
FR
Advertisement
Table of Contents

Related Manuals for Sony HVL-F60RM


Summary of Contents for Sony HVL-F60RM
- Page 1 Refer to “Help Guide” for in-depth instructions on the many functions of the flash. « Guide d'aide » (Manuel en ligne) Consultez le « Guide d’aide » pour obtenir des instructions détaillées au sujet des nombreuses fonctions du flash. http://rd1.sony.net/help/ilc/1730/h_zz/ HVL-F60RM...
-
Page 2: Check Out The Help Guide
Scan here http://rd1.sony.net/help/ilc/1730/h_zz/ HVL-F60RM Help Guide Before using this flash unit Update the software of your camera to the latest version before use. Refer to the dedicated support site for information on camera compatibility. - Page 3 For Customers in the U.S.A. Directive 2014/53/EU. The full text of the EU declaration For question regarding your product of conformity is available at the or for the Sony Service Center nearest following internet address: you, http://www.compliance.sony.de/ call 1-800-222-SONY (7669).
-
Page 4: Table Of Contents
Table of Contents Check out the Help Guide!............2 Before use ................6 Before Photographing Unpacking ................7 Locating parts and controls ............. 7 Basic operations............... 9 Using the control wheel ..........9 Using the Quick Navi screen .........10 Using the MENU screen ..........12 Preparations ................14 Inserting batteries ............14 Attaching/removing the flash unit to/from the camera ...15... - Page 5 On-screen indicators List of on-screen icons ............26 TTL flash mode ............. 26 MANUAL flash mode ............ 26 MULTI flash mode ............26 Wireless commander mode (radio control) ....27 Wireless receiver mode (radio control) ......27 Wireless controller mode (optical wireless communications) ......27 Wireless remote mode (optical wireless communications) ......27 Technical and other information...
-
Page 6: Before Use
Shoe. using the flash unit. • For details on compatible camera models of this flash unit, visit the Sony website in your area, or consult your Sony dealer or local authorized Sony service facility. • See the operating instructions of this unit and refer to the operating instructions of your camera. -
Page 7: Before Photographing
Before Photographing Unpacking Locating parts and controls If you find anything missing, please contact your dealer. The number in the parentheses The number in the parentheses indicates the page number where indicates the quantity. you can find the description. • Flash unit (1) ... - Page 8 • To disable the LCD backlight, press the MENU button and select [BACKLIGHT], and then [OFF]. Bounce indicator (upper/lower angle) LINK lamp (24) ...
-
Page 9: Basic Operations
Basic operations Using the control wheel Operations Functions Descriptions Changes the ZOOM flash coverage (zoom). Changes the Down MODE flash mode. By rotating the control wheel or pressing the direction buttons, you No function can move the focus or change the is assigned to setting item value on the Quick this button at... -
Page 10: Using The Quick Navi Screen
Using the Quick Navi screen You can press the Fn button on the Select the setting item flash unit to change the settings of your choice with the for photography, such as the selected flash mode, in accordance direction buttons. with the on-screen indications. - Page 11 Setting items Descriptions Setting options TTL(*)/MANUAL/MULTI/flash Flash mode setting off/GROUP WL OFF(*)/CMD/RCV (radio control) Wireless mode setting WL OFF(*)/CTRL/RMT (optical control) High-speed sync setting ON(*)/OFF Flash coverage (zoom) AUTO(*)/20-200 setting Calling up pre-registered OFF(*)/MR1/MR2 settings Flash compensation setting -3.0 - +3.0 Flash power level setting 1/1 - 1/256, OFF, CMD LINK Flash frequency setting for...
-
Page 12: Using The Menu Screen
Using the MENU screen You can press the MENU button Change the setting option on the flash unit to change the with the direction buttons settings on the MENU screen. Move the focus to the setting item and press the center button. of your choice with the direction buttons, and then press the center button to select the item. - Page 13 Groups Setting items Descriptions Setting options FLASH STD(*)/CENTER/ Flash distribution setting DISTRIBUT. EVEN LIGHT MODE LED light ON/OFF setting ON/OFF Registration of the desired MEMORY MR1/MR2 modes and settings AF LED LEVEL AF illuminator level setting HIGH/LOW(*) Flash charge-up setting when CHARGE SET the External Battery Adaptor is EXT.+INT.(*)/EXT.
-
Page 14: Preparations
Preparations Inserting batteries The flash unit can accommodate Insert the batteries into either set of the following: the battery chamber as • Four AA-size alkaline batteries • Four AA-size rechargeable illustrated ( nickel-metal hydride (Ni-MH) indicate the direction batteries of the batteries.) Before you use the rechargeable nickel-metal hydride batteries, be sure to fully charge the batteries... -
Page 15: Attaching/Removing The Flash Unit To/From The Camera
Attaching/removing the flash unit to/from the camera To attach the flash unit to Rotate the lock lever toward the camera “LOCK” to secure the flash unit on the camera. Turn off the power of the flash unit. • If your camera is equipped with a built-in flash, make sure that the camera flash is not released. -
Page 16: Turning On The Power To The Flash Unit
Turning on the power to the flash unit Turn the power switch to ON. the flash unit goes into power- saving mode in 60 minutes. When the flash unit is powered, • Turning off the power switch on-screen indicators are displayed on the connected camera* on the LCD panel. - Page 17 Notes on continuous flashes If this flash unit fires in quick succession for a short period of time, its built-in safety circuit will be triggered to suspend flash firing. On the LCD panel, displayed. In addition, if the temperature inside the flash unit rises further, (overheat indicator) will light on the LCD panel to indicate that flash firing is disabled for a while.
-
Page 18: Pairing With A Radio Wireless Commander/Receiver (For Radio Wireless Flash Photography)
Pairing with a radio wireless commander/receiver (for radio wireless flash photography) To perform radio wireless flash • To specify a flash unit as photography with this flash the commander unit, select unit, you need another flash [CMD]. unit that supports radio wireless communications in addition to this flash unit and must pair them both together. - Page 19 Note • On the commander unit, the following screen is displayed. • The instructions provided so far are based on the assumption that this flash unit uses default radio wireless communications. • When you have changed the setting of the commander unit and specified it as a receiver unit, or vice versa, be sure to reestablish paring •...
- Page 20 • On the receiver unit, the following screen is displayed. The pairing is established. When the pairing is established, the LINK lamp lights in green. To establish a pairing with 2 or more devices Set each device to be paired with this flash unit as the receiver unit and repeat steps 3 and 4.
-
Page 21: Photographing
Photographing Photographing TTL flash photography • Take photos within the Select the flash mode. indicated flash range. Press the MODE button ( This flash unit is capable of and rotate the control wheel to indicating distances within select [TTL]. the range from 0.7 m to 28 m. - Page 22 Selecting the flash mode • This function works when [Auto] or [Flash] is specified for the You can press the MODE button white balance on the camera. and rotate the control wheel to select the following flash modes TTL* flash mode besides TTL flash mode.
-
Page 23: Wireless Flash Photography (With Radio Wireless Communications)
Wireless flash photography (with radio wireless communications) Radio wireless flash • To specify the flash unit as the commander unit, select [CMD]. photography This flash unit supports radio wireless communications for flash photography. Specify [CMD] for the commander unit attached to the camera; and [RCV] for the receiver unit ... - Page 24 Place the camera and this Commander unit (CMD) flash unit. HVL-F60RM As the commander unit, you can use this flash unit or a radio Make sure that the flash unit wireless commander. on the camera (commander unit) and this flash unit are...
- Page 25 Press the shutter button to take a photo. • To fire a test-flash, press the TEST button on the commander unit. Hint • On the receiver units, the flash mode of the commander unit is applied. • During manual flash photography, you can press the Fn button and specify [CMD LINK] for the flash power level setting to allow...
-
Page 26: On-Screen Indicators
On-screen indicators List of on-screen icons The following screen images are given as examples and may look different from what you actually see on the LCD panel. Flash mode TTL flash mode High-speed sync setting Flash range ... -
Page 27: Wireless Commander Mode (Radio Control)
Wireless commander Wireless remote mode mode (radio control) (optical wireless communications) Wireless receiver mode Wireless mode (radio control) Lighting ratio control setting Wireless channel Flash distribution setting/ Commander/Control unit flash setting ... -
Page 28: Technical And Other Information
Technical and other information Specifications Guide number Normal flash/STD flash distribution (ISO 100) Manual flash/35mm-format Flash Flash coverage setting (mm) power BA*¹*² BA*¹ 14*² 135 200 level 11.3 16.3 17.7 18.4 19.8 21.2 26.2 32.5 34.6 38.2 42.4 11.5 12.5 18.5 24.5 9.9 10.6 13.1 16.3 17.3 19.1 21.2... -
Page 29: Flash Frequency/Count
HSS flat flash/STD flash distribution (ISO 100) Manual flash/35mm-format Flash coverage setting (mm) Shutter BA*¹*² BA*¹ speed 14*² 135 200 1/250 8.4 10.8 12.9 15.3 16.7 1/500 9.9 10.8 11.8 1/1000 1/2000 1/4000 1/8000 1/16000 *¹ When the bounce adaptor is attached. *²... -
Page 30: Other Specifications
Other specifications Radio wireless features: Autoflash at low Frequency band: 2.4 GHz illuminator contrast and low Number of channels: 14 channels brightness Communication distance: Operating range (While Approximately 30 m (98.4 ft.) a 50mm lens with the (Acquired under our measurement aperture set at F5.6 is conditions.) attached and [AF LED... - Page 31 Four AA-size rechargeable nickel- metal hydride batteries Functions in these operating instructions depend on testing conditions at our firm. Design and specifications are subject to change without notice. Trademarks “Multi Interface Shoe” is a trademark of Sony Corporation.
- Page 32 ©2017 Sony Corporation Printed in China...
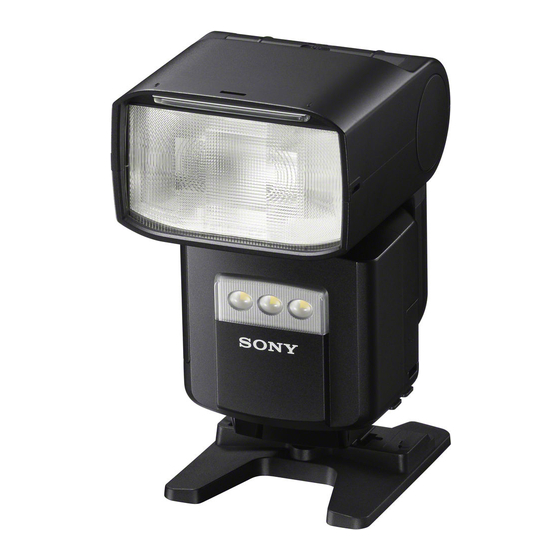
- Page 34 20mm to 200mm wide to tele focal lengths (14mm with wide panel). Whether you’re professional or enthusiast, it’s the versatile small flash that’s ideally suited for use with Sony’s mirrorless cameras.
- Page 35 The HVL-F60RM also provides a memory setting function (MR1/MR2) to register frequently used modes and combinations of adjustable values for easy recall. Simplify manual workflow and save time since the TTL Level Memory can be memorize flash output and be recalled when needed for immediate use or use after minor adjustment.
- Page 36 More than 150 times(Alkaline battery)/More than 220 times(Ni-MH battery) *The number of flashes is the number of times that maximum light output can be emitted once in 30 sec.(Sony test conditions) Number of Flashes Continuous flash performance: 40 flashes at 10 flashes per second * *Normal flash, power level 1/32, 105mm, Ni-MH battery.
- Page 37 Lighting distance (Approx.): 2 m (when recording movies, set to ISO 3200 & F5.6) Focal length supported: 35mm (35mm-format angle of view) Continuous lighting time (Approx.): 1hour (with Sony AA-size alkaline battery) Color temperature (Approx.): 5500K Power Level switching: 15 steps...
- Page 38 Four AA-size alkaline or Ni-MH batteries 200mm at ISO100 in meters With NiMH batteries. Sony test conditions Sony test conditions 40 flashes at 10 flashes per sec. With normal flash, power level 1/32, and Ni-HM battery. When using interchangeable-lens cameras’ mechanical shutter only.