Sony TU-1041U Operating Instructions Manual
Tv tuner unit
Hide thumbs
Also See for TU-1041U:
- Operating instructions manual (10 pages) ,
- Operating instructions manual (10 pages)
Table of Contents
Advertisement
Available languages
Available languages
3-859-703-13 (1)
TV Tuner Unit
TU-1041U
Operating Instructions
Before operating the unit, please read this manual thor-
oughly and retain it for future reference.
Mode d'emploi
Avant la mise en service de cet appareil, prière de lire
attentivement ce mode d'emploi et de le conserver pour
toute référence ultérieure.
Manual de instrucciones
Antes de emplear la unidad, lea detenidamente este manual
de instrucciones, y consérvelo para futuras referencias.
© 1997 by Sony Corporation
Advertisement
Chapters
Table of Contents

Related Manuals for Sony TU-1041U


Summary of Contents for Sony TU-1041U
-
Page 1: Operating Instructions
3-859-703-13 (1) TV Tuner Unit TU-1041U Operating Instructions Before operating the unit, please read this manual thor- oughly and retain it for future reference. Mode d’emploi Avant la mise en service de cet appareil, prière de lire attentivement ce mode d’emploi et de le conserver pour toute référence ultérieure. - Page 2 English Owner’s Record The model and serial numbers are located on the bottom. Record the model and serial numbers in the spaces provided below. Refer to them whenever you call upon your Sony dealer regarding this product. Model No. Serial No. For the customers in the USA and Canada RECYCLING NICKEL-CADMIUM BATTERIES NICKEL-CADMIUM BATTERY.
-
Page 3: Table Of Contents
Table of Contents Features ... 3 Locations and Function of Parts and Controls ... 4 Front ... 4 Rear ... 5 Side ... 5 Remote Commander ... 6 Power Sources ... 7 Presetting Channels ... 8 Specifications ... 9 Precautions On safety Operate the unit on 120 V AC or 12 V DC. -
Page 4: Locations And Function Of Parts And Controls
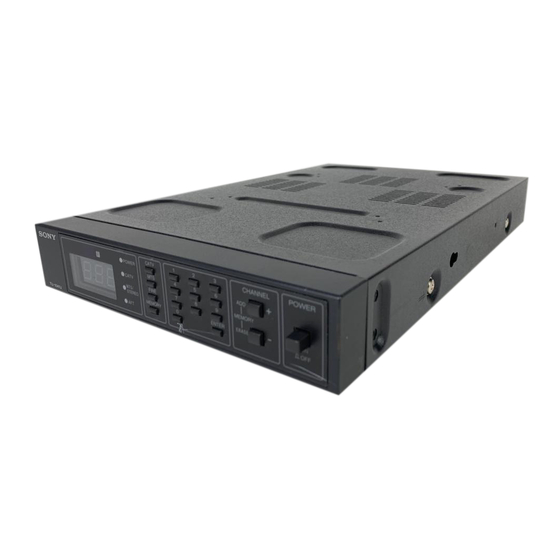
Location and Func tion of Par ts and Controls Front 1 Program indicator Indicates the selected channel number. 2 Remote Control sensor 3 AFT indicator Usually this indicator lights. When you do fine tuning manually it goes off. 4 MTS/STEREO indicator The indicator lights in four modes as follows: Green : The tuner is receiving main sound when the broadcast is not in stereo, and is ready to... -
Page 5: Rear
Rear BATTERY 1 BATTERY compartment Insert the NP-1B battery pack (not supplied). 2 EJECT button Push the button to remove the battery pack. 3 AC IN socket Connect the AC power cord (supplied) to the socket and to a wall outlet. 4 VIDEO output connector (BNC) Connect to the video input of a monitor. -
Page 6: Remote Commander
Location and Function of Parts and Controls Remote Commander MUTING DISPLAY POWER RGB1 RGB2 LINE MTS/MPX 10/0 DEGAUSS STILL ZOOM POWER SELECT MENU ENTER ID MODE Inserting batteries Insert two size AA (R6) batteries (supplied) by matching the + and – on the battery to the diagram inside the battery compartment. -
Page 7: Power Sources
Power Sources House Current Connect the AC power cord (supplied) to the AC IN socket and to a wall outlet. AC IN EJECT BATTERY to AC IN to a wall outlet To connect an AC power cord securely with an AC plug holder VI DE O LI NE OU CO NT RO... -
Page 8: Presetting Channels
Presetting Channels Automatic and manual programming are available. Automatic programming presets receivable channels automatically from the lowest frequency to the highest. With manual programming, the active channels can be preset in any desired sequence. Automatic Programming While pressing the MEMORY button, press the 1 button. All receivable channels will be tuned in and memorized automatically from the lowest-frequency channel to the highest. -
Page 9: Specifications
Cable TV channel chart* Cable TV systems use letters or numbers to designate channels. To tune in a channel, refer to the chart below. Number on this tuner Corresponding cable TV channel W+57 W+58 W+59 W+60 W+61 W+82 W+83 W+84 * This designation of cable TV channels conforms to the EIA/ NCTA recommendation. - Page 10 Sony Corporation Printed in japan...
- Page 11 Français AVERTISSEMENT Afin d’éviter tout risque d’incendie ou d’électrocution, ne pas exposer cet appareil à la pluie ou à l’humidité. ATTENTION: POUR PREVENIR LES CHOCS ELECTRIQUES, NE PAS UTILISER CETTE FICHE POLARISEE AVEC UN PROLONGATEUR, UNE PRISE DE COURANT OU UNE AUTRE SORTIE DE COURANT, SAUF SI LES LAMES PEUVENT ETRE INSEREES A FOND SANS EN LAISSER AUCUNE PARTTE A DECOUVERT.
- Page 12 Table des matières Caractéristiques ... 3 Emplacement et fonction des éléments et des commandes ... 4 Avant ... 4 Arrière ... 5 Côté ... 5 Télécommande ... 6 Modes d’alimentation ... 7 Présélection des canaux ... 8 Spécifications ... 9 Précautions Sécurité...
-
Page 13: Avant
Emplacement et fonction des éléments Avant 1 Indicateur de programme Affiche le numéro du canal sélectionné. 2 Capteur de télécommande 3 Indicateur AFT Cet indicateur est généralement allumé. Il s’éteint lorsque vous procédez manuellement à la syntonisation fine. 4 Indicateur MTS/STEREO Cet indicateur s’allume différemment selon les quatre modes suivants : Vert :... -
Page 14: Arrière
et des commandes Arrière BATTERY 1 Compartiment destiné au bloc batterie Destiné à recevoir la batterie NP-1B (non fournie). 2 Touche EJECT Permet l’éjection du bloc batterie. 3 Prise d’alimentation secteur (AC IN) Branchez le câble d’alimentation secteur (fourni) dans cette prise et dans une prise murale. -
Page 15: Télécommande
Emplacement et fonction des éléments et des commandes Télécommande MUTING DISPLAY POWER RGB1 RGB2 LINE MTS/MPX 10/0 STILL ZOOM DEGAUSS POWER SELECT MENU ENTER ID MODE Installation des piles Insérer deux piles de format AA (R6) (fournies) en respectant les polarités illustrées par le diagramme situé à l’intérieur du logement. -
Page 16: Modes D'alimentation
Modes d’alimentation Alimentation secteur Reliez l’une des extrémités du câble d’alimentation à la prise AC IN, à l’arrière du tuner. Branchez l’autre extrémité dans la prise murale. AC IN EJECT BATTERY à AC IN vers la prise murale Pour brancher convenablement le câble d’alimentation avec l’attache de fiche VI DE O LI NE OU CO NT RO... -
Page 17: Présélection Des Canaux
Présélection des canaux Deux modes de programmation s’offrent à vous: automatique et manuel. En automatique, l’ensemble des canaux est présélectionné, de la plus basse à la plus haute fréquence. En mode manuel, la sélection peut être effectuée dans l’ordre de votre choix. Programmation automatique Maintenez la touche MEMORY enfoncée et appuyez sur la touche 1. - Page 18 Tableau des canaux du réseau câblé* Les chaînes de télévision par câble utilisent des lettres ou des numéros pour désigner les canaux. Consultez le tableau de correspondance ci-dessous pour accorder un canal déterminé. Numéro sur le Cânal câblé tuner correspondant W+57 W+58 W+59...
- Page 19 Español Para clientes en EE. UU. y Canadà RECICLADO DE BATERÍAS DE NÍQUEL-CADMIO BATERÍAS DE NÍQUEL-CADMIO. DEBERÁN SER DESECHADAS DE FORMA ADECUADA. Las baterías de níquel cadmio pueden reciclarse. Usted podrá ayudar a conservar el medio ambiente devolviendo las baterías que no desee utilizar a un centro de reparaciones Sony o a una fábrica Sony para su recopilación, reciclado, y eliminación...
- Page 20 Indice Características ... 3 Ubicación y función de componentes y controles ... 4 Panel frontal ... 4 Panel posterior ... 5 Panel lateral ... 5 Control remoto ... 6 Fuentes de alimentación ... 7 Programación de canales ... 8 Especificaciones ... 9 Precauciones Seguridad •...
- Page 21 Ubicación y función de componentes y Panel frontal 1 Indicador de programa Indica el número de canal seleccionado. 2 Sensor de control remoto 3 Indicador AFT Normalmente, este indicador se encuentra iluminado. Si realiza la sintonización con precisión manualmente, se apagará.
- Page 22 controles Panel posterior BATTERY 1 Compartimiento BATTERY Inserte el paquete de baterías NP-1B (no suministrado). 2 Tecla EJECT Presiónela para extraer el paquete de baterías. 3 Clavija AC IN Conecte el cable de alimentación de CA (suministrado) a esta clavija y a una toma mural. 4 Conector de salida VIDEO (BNC) Conéctelo a la entrada de video de un monitor.
- Page 23 Ubicación y función de componentes y controles Control remoto MUTING DISPLAY POWER RGB1 RGB2 LINE MTS/MPX 10/0 STILL ZOOM DEGAUSS POWER SELECT MENU ENTER ID MODE Inserción de las pilas Inserte dos pilas tamaño AA (R6) (suministradas) de forma que las indicaciones + y – de las pilas coincidan con las del diagrama del interior del compartimiento.
- Page 24 Fuentes de alimentación Corriente doméstica Conecte el cable de alimentación de CA (suministrado) a la clavija AC IN y a una toma mural. AC IN EJECT BATTERY a AC IN a una toma mural Para conectar firmemente el cable de alimentación con un portaenchufes de CA VI DE O LI NE OU CO NT RO...
- Page 25 Programación de canales La programación puede realizarse automática o manualmente. La programación automática programa los canales que se reciben de forma automática desde la frecuencia inferior hasta la superior. Mediante la programación manual, los canales activos pueden programarse en la secuencia que desee. Programación automática Presione la tecla 1 mientras presiona la tecla MEMORY.
- Page 26 Tabla de canales de TV por cable* Los sistemas de TV por cable emplean letras o números para designar los canales. Para sintonizar un canal, consulte la siguiente tabla. Número en Canal de TV por cable este sintonizador correspondiente W+57 W+58 W+59 W+60...