Table of Contents
Advertisement
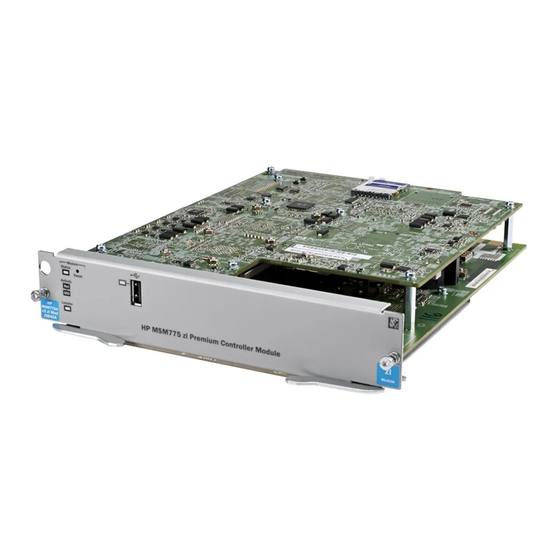
HP MSM775 zl Controller Installation Guide
Abstract
This document describes how to install and initially configure the MSM775 zl Premium Controller (J9840A), hereafter referred
to as controller. See also the MSM7xx Controllers Configuration Guide.
HP Part Number: 5998-8264
Published: November 2015
Edition: 1 (Software Version 6.6.2.0)
Advertisement
Table of Contents

Related Manuals for HP MSM775 zl


Summary of Contents for HP MSM775 zl
- Page 1 HP MSM775 zl Controller Installation Guide Abstract This document describes how to install and initially configure the MSM775 zl Premium Controller (J9840A), hereafter referred to as controller. See also the MSM7xx Controllers Configuration Guide. HP Part Number: 5998-8264 Published: November 2015...
- Page 2 © Copyright 2013, 2015 Hewlett-Packard Development Company, L.P. The information contained herein is subject to change without notice. The only warranties for HP products and services are set forth in the express warranty statements accompanying such products and services. Nothing herein should be construed as constituting an additional warranty. HP shall not be liable for technical or editorial errors or omissions contained herein.
-
Page 3: Table Of Contents
Configure the switch for the controller..................10 Configure the controller......................15 Restarting and resetting the controller..................17 4 Support and other resources..............18 Online documentation......................18 Contacting HP........................18 HP websites...........................18 Typographic conventions......................18 A Regulatory information................19 Turkey RoHS material content declaration...................19 Ukraine RoHS material content declaration................19 B Replacing hardware components..............20... -
Page 4: Preparing For Installation
1 Preparing for installation The MSM775 zl Premium Controller is a Services zl Module-based WLAN controller that plugs into switches such as the 5406 zl and 8212 zl. New switches need to be prepared according to their documentation. NOTE: The MSM775 zl Controller requires software Version K.15.13 or later on the switch. -
Page 5: Switch Leds
3. Module Status LEDs Serial number The serial number is required when contacting HP or a reseller for warranty assistance or for coverage under a service agreement. Record the serial and product number for future reference. See the warranty information for coverage details. -
Page 6: Installation Precautions
Figure 4 Locating the controller serial number 1. Controller serial number (SN: SGxxxxxxxx) Installation precautions Static electricity can severely damage the electronic components on the controller. When handling and installing the controller, follow these procedures to avoid damage from static electricity: Handle the controller by its bulkhead or edges and avoid touching the components and the circuitry on the board. -
Page 7: Installing
A module of a different type is any module other than the MSM775 zl Controller (J9840A), Advanced Services v2 zl Module with HDD (J9857A), or Advanced Services v2 zl Module with SSD (J9858A). - Page 8 NOTE: At power-on and during module self-tests, all LEDs will turn on for at least 7 seconds and go through their range of colors. After the self-tests complete, all LEDs will return to behaving normally. Location of LED Display for a properly installed controller Test Switch Off.
-
Page 9: Initially Connecting And Configuring
3 Initially connecting and configuring This chapter describes how to connect to the switch, configure the switch for the controller, and then perform initial controller configuration. Finally, information on restarting and resetting the controller is provided. Connect to the switch Although full information on the switch command line interface (CLI) is provided in the switch documentation, the basic switch CLI commands needed to work with the controller are provided in this document. -
Page 10: Configure The Switch For The Controller
Press any key to continue. The switch CLI prompt appears. It looks similar to: HP-5406zl# NOTE: If the switch menu appears instead, return to the top-level menu and select Command Line (CLI). The switch CLI prompt appears, similar to: HP-5406zl# Verify switch software version Before configuring the controller, verify that the switch software is Version K.15.13 or later. - Page 11 This guide, and the MSM Controllers Configuration Guide, use the terms Internet port and LAN port to refer to the Ethernet interfaces on the controller, instead of the port names on the switch. NOTE: The “i” suffix on the ports indicates that it is an internal port. A third internal port (D3i in the example) is displayed, but is nonfunctional.
- Page 12 Select VLAN Names. Add two VLANs, one for the Internet port and another for the LAN port. For example, use VLAN ID 10 with name MSM775_Int for the Internet port and VLAN ID 15 with name MSM775_LAN for the LAN port. Select Back to return to the VLAN Menu.
- Page 13 Select VLAN Port Assignment. Select Edit, and then use the arrow keys to select the DEFAULT_VLAN column of port D1i. (Ports D1i and D2i respectively define the VLAN assignment for the controller Internet and LAN ports.) NOTE: In addition to DEFAULT_VLAN, columns are now present for the two VLAN names (MSM775_Int and MSM775_LAN) defined in the previous steps.
- Page 14 1 1. Use the arrow keys to select the DEFAULT_VLAN cell for port A1. 12. Assign MSM775_Int to port A1, and MSM775_LAN to port A2. Use the space bar to change values and the arrow keys to move between items. Moving from left to right, set port A1 to No, Untagged, No.
-
Page 15: Configure The Controller
192.168.1.1/24 Press Ctrl+Z to return to the switch CLI. NOTE: For proper functioning of the MSM775 zl, the LAN port must not be left at its default address of 0.0.0.0. Perform initial controller configuration On your computer, disable the wireless port and configure the Ethernet port to use the static IP address 192.168.1.2. - Page 16 On the Login page, enter admin for both Username and Password, and then select Login. A workflow to set initial controller settings starts automatically. After you accept the HP Licence, read the instructions and respond to the prompts on each page, and select Next to continue to the next workflow page.
-
Page 17: Restarting And Resetting The Controller
(in less than four seconds) release the button. Resetting the controller to factory defaults HP recommends that you use the web interface to reset the controller to factory defaults as follows: Simplified UI Select Views > Software Settings > Backup & Restore > Restore. -
Page 18: Support And Other Resources
4 Support and other resources Online documentation You can download documentation from the HP Support website at: www.hp.com/support/manuals. Search by product number or name. Contacting HP For worldwide technical support information, see the HP support website: www.hp.com/networking/ support Before contacting HP, collect the following information:... -
Page 19: A Regulatory Information
This product is a Class A device, pursuant to Part 15 of the FCC Rules. For important safety, environmental, and regulatory information, see Safety and Compliance Information for Server, Storage, Power, Networking, and Rack Products, available at www.hp.com/ support/Safety-Compliance-EnterpriseProducts. Turkey RoHS material content declaration Türkiye Cumhuriyeti: EEE Yönetmeliğine Uygundur... -
Page 20: B Replacing Hardware Components
B Replacing hardware components Replacing or removing a controller HP recommends that the controller be shut down before removing or replacing it. The preferred method of shutting down the controller is through the CLI: services <slot-id> shutdown Where <slot-id> identifies the switch slot containing the controller. A confirmation message appears. - Page 21 Figure 6 Replacing the controller SSD Res et Sta tus Mo de Mb ps off = 10 100 Mb Link Spd mo fla sh = 00 + Mb on = 10 Po we r M bp s FO x of f = 10 Sta tus 10 0 M bp Mo de...