Table of Contents
Advertisement
Instruction
Manual
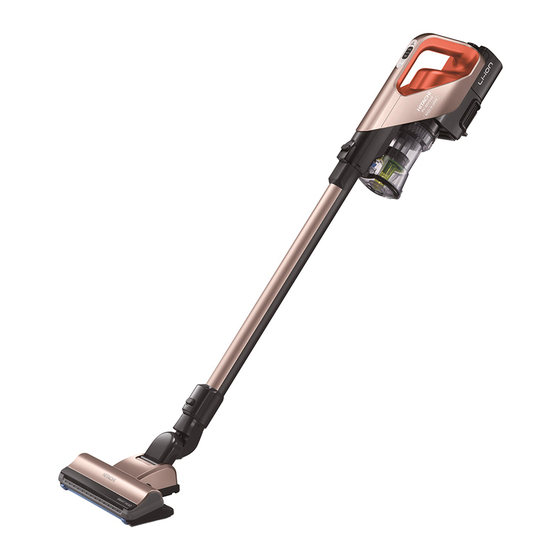
Hitachi Cordless
Vacuum Cleaner
Model
PV-XEH900
Thank you for purchasing a Hitachi Cordless
Vacuum Cleaner.
This cleaner is for household use only.
Do not use for business purposes, purposes other
than cleaning, or outdoors. For proper use, please
read these Operating Instructions thoroughly
before using the cleaner.
Keep this manual for future reference in an easily
accessible place.
For proper use, please read "Safety
Precautions" →(P.E-4-E-8)
Contents
Before use
Part names and assembly .....................
Safety precautions .................................
Notes on use ...........................................
How to use
Control part and indicator part .............
Indicator lamp during operation .....................
How to charge ........................................ E-11
How to operate ....................................... E-12
Attachments and assembly ................... E-13
How to clean ........................................... E-14
Power head ........................................... E-14
Mini power head ................................... E-15
Crevice brush ........................................ E-17
Broom brush ......................................... E-18
Handy nozzle ........................................ E-19
Hard brush ............................................ E-19
When Finished cleaning
Disposing the dust ................................. E-20
Checking the Max line .......................... E-20
Emptying the dust case ........................ E-20
Removing dust from filters .................... E-23
Attaching the dust case ........................ E-25
Stowing the cleaner ............................... E-25
How to store ......................................... E-25
Maintenance ........................................... E-26
Maintaining the filters ............................ E-27
Maintaining the power head ................. E-30
Maintaining the mini power head .......... E-32
Appendix
Troubleshooting ...................................... E-34
Replacement of the battery .................. E-37
Disposing of the product ...................... E-38
Replacement Parts ................................. E-39
Specifications ......................................... E-39
E-2
E-4
E-9
E-9
E-9
Advertisement
Table of Contents

Related Manuals for Hitachi PV-XEH900


Summary of Contents for Hitachi PV-XEH900
-
Page 1: Table Of Contents
Body, attachments, attachment accessories ... E-26 Parts that might be washed with water ... E-26 Maintaining the filters ......E-27 Thank you for purchasing a Hitachi Cordless Maintaining the power head ....E-30 Vacuum Cleaner. Maintaining the mini power head ..E-32 This cleaner is for household use only. -
Page 2: Part Names And Assembly
Part names and assembly Handy cleaner Stick cleaner Exhaust direction shutter Battery → (P.E-8, E-37, E-38) Push in the direction of Battery release the arrow until you Switching the exhaust direction shutter from button hear a click. left to right changes the direction of the exhaust. Click Handle Control switch... - Page 3 Charging station → (P.E-11) Attachment Hose stand groove The broom brush, mini power head, and hard Protrusion brush can be attached to two locations: the Click stand recess or the protrusion of the charging station base. Hook Click Smart hose Protrusion Stand Broom brush Mini power...
-
Page 4: Safety Precautions
Do not disassemble, repair, or alter. Doing so might cause leaking, heat generation, fire, or injury. For repairs, please consult with the Hitachi authorized service agent. Keep the body and charging station away from water and other liquids. - Page 5 Disconnect the plug from the socket when performing charging station maintenance. If the cord is damaged, it must only be replaced by the Hitachi authorized service agent in order to avoid a hazard. For the purposes of recharging the battery, only use the charging station provided with this cleaner.
- Page 6 Safety precautions (Continuation) Caution Socket, plug, cord Hold the plug Hold and pull the plug at the end, not the cord. Holding and pulling by the cord might damage and short it, causing electrical shock or fire. Do not use while the cord is wound around the charging station. Damaging the cord might cause electrical shock or fire.
- Page 7 Others When carrying the body, do not hold the dust case. The body might fall and cause injury or damage the floor. Keep away from fire. A short circuit due to body deformation might cause electrical shock or fire. Flames might grow larger due to exhaust and cause fire.
- Page 8 Safety precautions (Continuation) Battery (lithium-ion battery) DANGER Do not connect the battery to devices other than this body. Also, do not disassemble, modify, or solder the battery, or charge the battery on its own. Do not touch the metal contacts, or short-circuit with any metal items such as a wire and pin. ...
-
Page 9: Notes On Use
Notes on use To prevent malfunctions, etc., follow the directions below. Note Also, for proper use, please read the thoroughly. Do not subject the body, the power head, extension pipe, charging Do not ride on the body, power head, or the charging station. station, or attachment accessories to strong physical shock. - Page 10 Control part and indicator part (Continuation) D o not touch the contacts of the charging station or body. Doing so might cause electric shock or injury. WARNING D o not set the body on the charging station while the battery is removed. Doing so might cause malfunctions or electric shock.
-
Page 11: How To Charge
How to charge The battery is not sufficiently charged at the time of purchase. Please charge it before use. (Charge time is approx. 3.5 hours.) Insert the plug of the charging station into the socket. Plug CAUTION Socket Hold and pull the plug at the end, not the cord. -
Page 12: How To Operate
How to charge (Continuation) To prolong battery life Make sure to charge when you are finished cleaning, regardless of the operating time. If you will not use the cleaner for a month or more, fully charge and store it, and charge it once a year. (Storing it when there is no remaining battery level will cause the battery performance and life to deteriorate.) If the battery is depleted and operation stops during cleaning, the cleaner might be operable for a short while by pressing the control button again. -
Page 13: Attachments And Assembly
Attachments and assembly Attachments can be attached to the body, extension pipe, and smart hose. Power head→ (P.E-14) Extension pipe Smart hose Mini power head→ (P.E-15,E-16) Crevice brush→ (P.E-17) Extension pipe and smart hose Broom brush → (P.E-18) The extension pipe can be attached to the tip of the smart hose. -
Page 14: How To Clean
You cannot replace the "brushes and wheels" by yourself, So please consult with the dealer where you purchased the cleaner or the Hitachi authorized services agent. You can purchase the "rotary brush and roller" as replacement parts. → (P.E-39) -
Page 15: Mini Power Head
You cannot replace the "brushes and wheels" by yourself. So please consult with the dealer where you purchased the cleaner or the Hitachi authorized services agent. You can purchase the "rotary bsurh and roller" as replacement parts.→... - Page 16 How to clean (Continuation) Risk of damage Use on bedding, mattresses, bed covers, pillows, seat cushions, fabric sofas, and other fabric products. Do not use on wood furniture, wood floors, or locations with a glossy surface that is easily damaged. ...
-
Page 17: Crevice Brush
Crevice brush Swiftly perform cleaning with the brush on the tip. The mode can be switched to crevice nozzle mode with one touch so it is useful when cleaning book shelves and crevices. The length can be adjusted to fit your needs. The length of the crevice nozzle can be adjusted to 2 levels. -
Page 18: Broom Brush
How to clean (Continuation) Broom brush Useful when cleaning locations such as the grooves of a sash due to its broom-like brush and thin tube. The nozzle angle can be changed depending on the location you are cleaning. You can change the angle. Risk of injury When changing the angle, do not hold the rotating section. -
Page 19: Handy Nozzle
Handy nozzle Attach to the body before use. Attachments can be applied while the handy nozzle is attached to the body. How to detach How to attach Match the position of the projection on the side Press the recess and projection of the handy of the handy nozzle with the groove on the body. -
Page 20: Disposing The Dust
Disposing the dust Cyclonic cleaners have the advantage of not requiring paper bags, but to clean with high suction power, we recommend frequent disposal of dust and filter maintenance. Empty the dust case before exceeding the "Max line" (guideline). If the "Max line" is exceeded, the dust might be difficult to remove from the dust case. -
Page 21: Emptying The Dust Case
Remove attached dust. Remove the dust and fine dust using soft cloths, etc. CAUTION Risk of injury You might have unintentionally vacuumed sharp objects such as glass shards or pins. Be careful when performing maintenance. Close the dust case lid. Close until you hear a "click"... - Page 22 Disposing the dust (Continuation) Emptying the dust case [When removed] (Continuation) Open the dust case lid and empty the dust case. Turn the dust case lid downward and press the dust disposal button. Dust disposal Dust case button Note Dust might be hard to remove Dust depending on the type of dust and how it accumulates.
-
Page 23: Removing Dust From Filters
Removing dust from filters Clean filter Open the filter cover Open the filter cover while holding Set the dust case on the floor. the lower part of the lock cramp. Clean lter Filter cover Dust case Lock cramp Remove dust from the clean filter Remove attached dust by using the Detach the clean filter. - Page 24 Disposing the dust (Continuation) Inner cylinder filter Open the dust case lid → (P.E-22) and remove the inner cylinder filter. Turn the ▽ Remove mark on the Lift the inner cylinder filter straight up. cap to face the △ mark on the dust case.
-
Page 25: Attaching The Dust Case
Attaching the dust case Attach the dust case Firmly attach the dust case until you hear a Attach the groove of the dust case to "click" sound. the protrusion of the body. Click Dust case Dust case Groove Protrusion Stowing the cleaner How to store button of the body to stop operation. -
Page 26: Maintenance
Stowing the cleaner (Continuation) Risk of injury WARNING Do not leave the body leaned up against furniture and place it horizontally on a flat surface. Risk of injury or damage to the floor. When carrying the cleaner while it is set on the charging station, the body might detach. CAUTION Do not move the cleaner on the floor while it is set on the charging station. -
Page 27: Maintaining The Filters
Maintaining the filters Wash with water when the "filter indicator lamp flashes" or "suction power is weak". Clean filter, sponge filter Wash with water using the maintenance brush. Detach the clean filter and wash it with water. → (P.E-23) Wash away the dust stuck deep in the folds of the clean filter with water. Clean filter Risk of injury You might have unintentionally vacuumed sharp objects such as glass shards or pins. - Page 28 Maintenance (Continuation) Inner cylinder filter Remove the inner cylinder filter. → (P.E-24) Wash the inner cylinder filter and dust case with water. Inner cylinder filter Dust case Inner cylinder cap Move the inner cylinder cap in the arrow direction approx. 10 times and wash it with water. Remove the attached dust lightly before washing with water.
- Page 29 In this case, please consult with the Hitachi authorized service agent. If the suction power is weak even after washing the filters with water, the clean filter, sponge filter, protective filter, etc. might be worn. To request for replacement, please consult with the Hitachi authorized service agent. E-29...
-
Page 30: Maintaining The Power Head
Maintenance (Continuation) Maintaining the power head Perform maintenance when suction power is weak or when you are concerned about dirt. We recommend periodic maintenance (about once a month). Dust stuck to the safety switch, rotary brush, roller, brushes, wheels, air inlet, and rotating sections might cause reductions in suction power or malfunctions. - Page 31 Rotary brush maintenance. Remove the brush holder. Flip over the power head and open the lever. Remove the brush holder. Brush holder Lever Detach the rotary brush and roller and remove dust. Cut and remove dust Remove dust. Remove the dust tangled in the tangled in the rotary brush groove using tweezers, etc.
-
Page 32: Maintaining The Mini Power Head
The "wheel or rotary brush" might be worn out due to long-time usage, etc. CAUTION Using the power head while they are worn out might damage the floor. You can purchase the "rotary brush" for replacement. So please consult with the Hitachi authorized service agent at your earliest convenience. Note Do not subject the safety switch to excessive force. - Page 33 Rotary brush maintenance. Remove the brush holder. Flip over the mini power head and open the lever. Remove the brush holder. Lever Brush holder Detach the rotary brush and remove dust. Tweezers Remove the dust The rotary brush can Remove dust. tangled in the groove be washed with water.
-
Page 34: Troubleshooting
Troubleshooting Before requesting for repair Check the following points again The cleaner does not operate, stops during operation, the suction power is weak, or the rotary brush does not rotate The safeguard might be operating. Release the safeguard with the following instructions. Suction power becomes weak or stops during operation. - Page 35 Is the battery exhausted? with water, the battery is exhausted. Please consult P.E-27 to E-29 with the Hitachi authorized service agent. The exhaust or body gets The motor is being cooled via air flow, which is normal. warm (during operation)
- Page 36 Did you not operate the body and leave it unattended for a long period of time without charging charging station. it? When leaving it unattended, the battery might have to be replaced because its performance and life might be deteriorated. Please consult with the Hitachi authorized service agent. E-36...
-
Page 37: Replacement Of The Battery And Disposing Of The Product
The battery is a consumable item. When the usage time of the battery becomes short even when properly charging, the life of the battery has reached its end. Please replace the battery. Consult with your Hitachi authorized service agent when replacing the battery without disposing of the unit due to the life of the battery reaching its end, etc. -
Page 38: Disposing Of The Product
Replacement of the battery and disposing of the product (Continuation) Replacement of the battery Detach the attachments → (P.E-13) from the body. Detach the battery. Hold the handle, pull the battery release button in the direction of the arrow, hold the side of the battery, and pull it out in the CAUTION direction of the arrow. -
Page 39: Replacement Parts
Replacement Parts Available at Hitachi home appliance dealers. Following replacement parts can also be purchased. Crevice brush Broom brush Sponge filter Maintenance brush Protective filter Service parts Service parts Service parts Service parts Service parts PV-XEH900-032 PV-BEH900-033 PV-BEH900-013 PV-BE700-005 PV-BE700-012... - Page 40 E-40...