Table of Contents
Advertisement
TABLE OF CONTENTS
1 Safety Precautions----------------------------------------------- 2
2 Specifications ----------------------------------------------------- 3
3 Location of Controls and Components ------------------- 4
4 Operating Instructions------------------------------------------ 5
5 Service Mode -----------------------------------------------------17
6 Troubleshooting Guide ----------------------------------------21
7 Disassembly and Assembly Instructions ---------------31
8 Measurements and Adjustments---------------------------37
9 Dimensions--------------------------------------------------------38
10 Block Diagram----------------------------------------------------39
11 Wiring Connection Diagram ---------------------------------40
12 Exploded View and Replacement Parts List -----------42
Model No.
Destination
PAGE
© Panasonic Corporation 2018 Unauthorized copy-
ing and distribution is a violation of law.
Order Number MOD1806497CE
NE-1878BPQ
: United Kingdom
PAGE
Advertisement
Table of Contents

Related Manuals for Panasonic NE-1878BPQ


Summary of Contents for Panasonic NE-1878BPQ
- Page 1 7 Disassembly and Assembly Instructions ---------------31 8 Measurements and Adjustments---------------------------37 9 Dimensions--------------------------------------------------------38 10 Block Diagram----------------------------------------------------39 11 Wiring Connection Diagram ---------------------------------40 12 Exploded View and Replacement Parts List -----------42 © Panasonic Corporation 2018 Unauthorized copy- ing and distribution is a violation of law.
-
Page 2: Safety Precautions
1 Safety Precautions... -
Page 3: Specifications
2 Specifications Models: NE-1878 Power Source: 230-240V AC Single Phase 50 Hz Power Requirement: 2650W, (11.6A) *Output: HIGH (P10) 1800 W MEDIUM (P9) HIGH (P8) (P7) (P6) MEDIUM (P5) (P4) (P3) (P2) DEFROST (P1) 340 W (P0) HEAT FROM (PU1) TOP DOWN (PU2) HEAT FROM... -
Page 4: Location Of Controls And Components
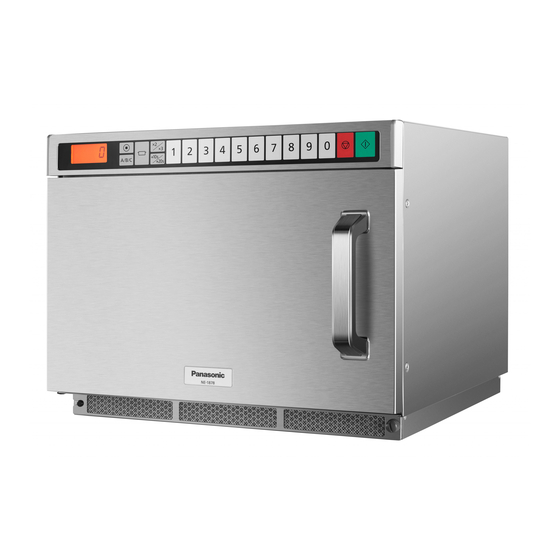
3 Location of Controls and Components 3.1. Outline diagram... -
Page 5: Operating Instructions
4 Operating Instructions 4.1. Operation procedure... -
Page 17: Service Mode
5 Service Mode To prevent accidents during repair and ensure your safety after the repair, be sure to read or refer to “Safety Precautions” describing precautions that you must observe when repairing. 5.1. Failure code function In the event of a failure, a failure code is displayed to stop the operation. •... - Page 18 5.1.1. Failure code list F □□ : Device failure / U □□ : User error DISPLAY CONDITIONS RESET CAUSES / REMEDIES Upper circuit Lower circuit • Communication error between the micro- • Press Stop/Reset button. • Control board (D.P.circuit) computer and the memory IC. •...
- Page 19 5.2. How to erase self-diagnosis memory • Memory of self-diagnosis cannot be erased by turning OFF the power. • By "How to erase self-diagnosis memory (1)" , self-diagnosis memory of "F 97", "F 98", "FE 7" and "FE 8" cannot be erased. In this case, erase the memory of self-diagnosis by "How to erase self-diagnosis memory (2)"...
- Page 20 5.5. How to cancel ”CHEC” sign in the display • When the number of times of using magnetron reaches 120,000 times, the display indicates CHEC after heating. • Once CHEC is displayed, it is displayed every time when cooking is finished. Follow the procedure as mentioned below to cancel the "CHEC"...
-
Page 21: Troubleshooting Guide
6 Troubleshooting Guide 6.1. Precautions when repairing To prevent accidents during repair and ensure your safety after the repair, be sure to read or refer to “Safety Precautions” describing precautions that you must observe when repairing. 6.2. Before repair 6.3. Discharging high-voltage capacitor When the confirmation of power-on is performed, always discharge the capacitor as shown below. - Page 22 6.4. Power cannot be turned on Power cannot be turned on (Opening the door does not indicate 0. Keys do not work.)
- Page 23 6.5. 10A FUSE blow-out 1 Power cannot be turned on (Opening the door does not indicate 0. Keys do not work.)
- Page 24 6.6. 10A FUSE blow-out 2 In several seconds after starting cooking, operation stops by displaying "FE 7"...
- Page 25 6.7. Oven does not warm up In several seconds or several 10s seconds after starting cooking, operation stops by displaying "FE 5", " F 95", "FE 7", "FE 8", "F 98" 6.7.1. "F 95", "F 97", "F 98" are displayed (Check the circuit for upper magnetron. ) (In the case of FUSE 1 [10A FUSE upper side] blow-out defect, power cannot be supplied)
- Page 27 6.7.2. Displays "FE 5", "FE 7", "FE 8" (Check the circuit for lower magnetron)
- Page 29 6.7.3. How to check the magnetron when indicating "F 92" or "FE 2" When "F 92", "FE 2" is indicated, inspect by using the following procedure.
- Page 30 6.7.4. Component test procedure for magnetron and H.V.inverter Caution: First, remove wiring of the component to be checked to make it a stand-alone condition. 6.7.4.1. How to check an H.V.inverter Mainly use failure diagnosis of F97/FE7/F98/FE8 Caution: Polarity of a tester is shown below. Use the tester as shown for measurement.
-
Page 31: Disassembly And Assembly Instructions
7 Disassembly and Assembly Instructions To prevent accidents during repair and ensure your safety after the repair, be sure to read or refer to “Safety Precautions” describing precautions that you must observe when repairing. 7.1. Cabinet, back panel 7.2.2. Magnetron (upper) 1. - Page 32 7.3. Exhaust thermistor 7.2.3. Magnetron (lower) 1. Remove the high-voltage lead-wire of the magnetron 1. Remove the cabinet. (Refer to 7.1.Cabinet, back panel) (lower) 2. In the lead-wire harness, cut the lead-wire of exhaust (High-voltage lead-wire: 2 places before and behind the thermistor at the thermistor side bundle.
- Page 33 7.5. H.V.inverter 6. Remove connectors (CN701, CN702, CN703). 7. Remove the H.V.inverter. (Black arrow: 2 screws, white 1. Remove the cabinet and back panel. arrow: 3 hooks) ( Refer to "7.1.Cabinet, back panel”) 7.5.1. H.V.inverter (upper) 1. Remove the inverter lead-wire and high-voltage lead-wire from each hook and holder.
- Page 34 7.6. Operation unit (Escutcheon 4. Remove the inverter lead-wire and high-voltage lead-wire from each hook. base U) 5. Remove cover B. (White arrow: 1 hook) 1. Remove the cabinet. 2. Remove the flat cable (CN14) and keyboard (CN15) on PC board. 3.
- Page 35 7.7. Fan motor U 7.9. Shelf 1. Remove the cabinet and back panel. 1. Remove the cabinet. (Refer to "7.1.Cabinet, back panel") (Refer to "7.1.Cabinet, back panel") 2. Remove the connector of the fan motor U. 2. Remove the shelf. 3.
-
Page 36: Door Disassembly
7.11. Door disassembly 1. Remove the door C. • While inserting a screw-driver between door AU and door C, and remove door C by disengaging the hook of door C. (Note) Door C is held on door EU by using hooks. When the hook is broken, replace the door C. -
Page 37: Measurements And Adjustments
8 Measurements and Adjustments 8.1. Adjustment of hinge and hook When the components related to Door and door hook U are dis- assembled/assembled or replaced, check the operation of each switch. Please confirm that the gap between the switch housing and switch actuator levers is no more than 1.0 mm when the door is closed. -
Page 38: Dimensions
9 Dimensions... -
Page 39: Block Diagram
10 Block Diagram upper and lower magnetron • (Upper) (Lower) correspond to the... -
Page 40: Wiring Connection Diagram
11 Wiring Connection Diagram 11.1. Wiring Connection Diagram... - Page 41 11.2. Switch Operation Door condition Door Switch 1 Short switch 1 Door Signal Switch Door Switch 2 Short switch 2 Open Close 11.3. Relay operation Relay Operation Relay 2 Fan motor, stirer motor ON-OFF Relay 3 Inverter (upper) input (230-240V) ON-OFF (ON when cooking is set). Relay 4 Inverter (upper) input (230-240V) ON-OFF (ON when cooking is set).
-
Page 42: Exploded View And Replacement Parts List
12 Exploded View and Replacement Parts List 12.1. Exploded view and parts list... - Page 43 Safety Ref. Part No. Part Name & Description Pcs/set Remarks 2M261-M32U3Y6 MAGNETRON A490W3J90BP FAN MOTOR, DC, 40.8W 40.8W A603L3J90BP D.P.CIRCUIT (U) A603Y3J90BP RELAY PCB A605A-3E10S EXHAUST THERMISTOR 124°C A605S-3J00 PCB, OVEN LAMP A605Y-3J00 THERMISTOR BU FOR MAGNETRON A606Y3G70BPC H.V.INVERTER A61424T00AP MICRO SWITCH (V-16G-3C25-M) A6144-3E10...
- Page 44 Safety Ref. Part No. Part Name & Description Pcs/set Remarks ANE0922000AD CUSHION RUBBER C ANE0922000AL CUSHION RUBBER C ANE0922000AP CUSHION RUBBER C ANE0922000AQ CUSHION RUBBER C ANE0922000CH CUSHION RUBBER C ANE0924000AQ CUSHION RUBBER C ANE092B000BK CUSHION RUBBER C ANE0962000AT CUSHION RUBBER D A611K3J90BP DETECTION SWITCH A22133J90BP...
- Page 45 Safety Ref. Part No. Part Name & Description Pcs/set Remarks ANE30038U0AP DOOR FRAME (U) A3007-3J00 HINGE A3018-3B10 DOOR KEY A UPPER A01065202AP DOOR KEY B LOWER A301A3J90BP DOOR AU A301H-3850 DOOR KEY LEVER BU A301Q3J90BP DOOR EU A2011-3E10S DOOR KEY SPRING ANE30562Q0AP HANDLE PIN A A30703170GP...
- Page 46 Safety Ref. Part No. Part Name & Description Pcs/set Remarks A603M-3J00 PC BOARD B (U) A630Y3J90BP MEMBRANE SWITCH ANE80018U0AP ESCUTCHEON A A80023E20P6 ESCUTCHEON B A80063E20P6 ESCUTCHEON D A8016-3B10 SPACER A800L3J90BP ESCUTCHEON BASE U...
- Page 47 Safety Ref. Part No. Part Name & Description Pcs/set Remarks A01023J90BP PACKING CASE,PAPER A0104-3J00 UPPER FILLER A0105-3J00 LOWER FILLER A01065202AP VINYL COVER ANE01072Q0AP DOOR SHEET A01083J90BP TRAY PACKING A01453E20P6 DOOR SHEET B A2011-3E10S CEILING PLATE A04203J90BP OPERATING GUIDE A00033J90BP INSTRUCTION BOOK...
- Page 48 Safety Ref. Part No. Part Name & Description Pcs/set Remarks A030A3J90BP LEAD WIRE HARNESS A030E-3J00 LEAD WIRE FOR H.V.INVERTER AND MAGNETRON (LOWER) A030E-3J10 LEAD WIRE FOR H.V.INVERTER AND MAGNETRON (UPPER) A030F-3J00 LEAD WIRE HARNESS B FOR H.V.INVERTER A0352-3E10 LEAD WIRE FOR ANTENNA MOTOR (LOWER) A6590-3E20 FLAT CABLE...