
Related Manuals for ABB FSM4000-SE41F


Summary of Contents for ABB FSM4000-SE41F
- Page 1 Operating Instruction Electromagnetic Flowmeter D184B140U02 FSM4000 Valid for software versions C.10 and higher Model FSM4000-SE41F FSM4000-SE21 FSM4000-SE21F FSM4000-S4...
-
Page 2: Dransfelder Straße
+49 551 905-777 Phone: +49 180 5 222 580 automation.service@de.abb.com © Copyright 2018 by ABB Automation Products GmbH Subject to changes without notice This document is protected by copyright. It assists the user in safe and efficient operation of the device. -
Page 3: Table Of Contents
Contents Safety ................................6 General information and notes for the reader ....................6 Intended use ..............................7 Improper use ..............................7 Target groups and qualifications ........................7 Warranty provisions ............................7 ... - Page 4 Contents Ground ................................30 4.8.1 General information on ground connections ..................30 4.8.2 Metal pipe with fixed flanges ......................... 30 4.8.3 Metal pipe with loose flanges ........................ 31 4.8.4 Non-metallic pipes or pipes with insulating liner ................... 31 ...
- Page 5 Contents Replacing the transmitter ........................... 106 Spare parts list ............................108 10.1 Fuses for transmitter electronics ........................ 108 10.2 Spare parts for transmitter S4 ........................109 10.2.1 Field housing unit ..........................109 ...
-
Page 6: Safety
Safety Safety General information and notes for the reader You must read these instructions carefully prior to installing and commissioning the device. These instructions are an important part of the product and must be kept for future reference. These instructions are intended as an overview and do not contain detailed information on all designs for this product or every possible aspect of installation, operation and maintenance. -
Page 7: Intended Use
Prior to using corrosive and abrasive materials for measurement purposes, the operator must check the level of resistance of all parts coming into contact with the materials to be measured. ABB Automation Products GmbH will gladly support you in selecting the materials, but cannot accept any liability in doing so. -
Page 8: Safety-/ Warning Symbols, Note Symbols
Safety 1.5.1 Safety-/ warning symbols, note symbols DANGER – <Serious damage to health / risk to life> This symbol in conjunction with the signal word "Danger" indicates an imminent danger. Failure to observe this safety information will result in death or severe injury. DANGER –... -
Page 9: Name Plate / Factory Tag
Safety 1.5.2 Name Plate / Factory Tag The factory tag or name plate can be found at the following locations on the unit housing: G00522 Fig. 1 1 Name plate, flowmeter sensor 2 Factory tag plate, flowmeter sensor 3 Name plate, transmitter 1.5.2.1 Identifying the device design 1.... -
Page 10: Germany
Pmax: < 30 VA Phase: 90° URef: 0.280 V -31.3500 % Cz: -0.5052 % ABB Automation Products GmbH 37070 Göttingen – Germany G00523 Fig. 2 1 Model no. 8 Max. flowrate at v = 10 m/s 2 CE mark (EC conformity) 9... -
Page 11: Germany
0045 DN 50 / PN 40 Material: 1.4571 / PTFE / Hast.C-4 Manufactured: 2002 PED: Fluid 1, Gas ABB Automation Products GmbH 37070 Göttingen - Germany G00002 Fig. 4 1 CE mark (with number of labeled 4 Flange material, liner material and location) to confirm the device meets the electrode material (wetted parts). -
Page 12: Transport Safety Information
The power supply and the electrical circuit for the coils of the sensor are dangerous and pose a contact risk. The coils and signal circuit can be connected with ABB sensors only. Use the supplied cable. Only electrical circuits that do not pose a contact risk can be connected to the remaining signal inputs and outputs. -
Page 13: Safety Instructions For Operation
Safety Safety instructions for operation During operation with hot fluids, contact with the surface may result in burns. Aggressive fluids may result in corrosion or abrasion of the parts that come into contact with the medium. As a result, pressurized fluids may escape prematurely. Wear to the flange gasket or process connection gaskets (e.g., aseptic threaded pipe connections, Tri-Clamp, etc.) may enable a pressurized medium to escape. -
Page 14: Maintenance And Inspection Safety Information
According to EC guidelines for hazardous materials, the owner of hazardous waste is responsible for its disposal or must observe the following regulations for shipping purposes: All devices delivered to ABB Automation Products GmbH must be free from any hazardous materials (acids, alkalis, solvents, etc.). -
Page 15: Integrated Management System
Proper disposal prevents negative effects on people and the environment, and supports the reuse of valuable raw materials. If it is not possible to dispose of old equipment properly, ABB Service can accept and dispose of returns for a fee. D184B140U02... -
Page 16: Design And Function
Design and function Design and function Measuring principle Measurements performed by the electromagnetic flowmeter are based on Faraday’s law of induction. A voltage is generated in a conductor when it moves through a magnetic field. This principle is applied to a conductive fluid in the measuring tube through which a magnetic field is generated perpendicular to the flow direction (see schematic). -
Page 17: Design
• Field housing unit model S4 The flowmeter sensor comes with aluminum or stainless steel housing: • Aluminum housing: Model FSM4000-SE41F • Stainless steel housing: Model FSM4000 SE21W / SE21F / SE21 Important Also older model flowmeters sensor can be connected to S4 transmitters. For additional information, see chapter "6.1 Preliminary checks prior to start-up"... -
Page 18: Transport
Transport Transport Inspection Check the devices for possible damage that may have occurred during transport. Damages in transit must be recorded on the transport documents. All claims for damages must be claimed without delay against the shipper and before the installation. General information on transport Observe the following when transporting the device to the measurement site: •... -
Page 19: Transport Of Flanged Units Larger Than Nominal Diameter Dn 350
Transport Transport of flanged units larger than nominal diameter DN 350 Notice - Potential damage to parts! Use of a forklift to transport the device can dent the housing and damage the internal magnet coils. Flanged units must not be lifted by the center of the housing when using a forklift for transport. Flanged units must not be lifted by the terminal box or by the center of the housing. -
Page 20: Mounting
Mounting Mounting General information on installation The following points must be observed for the installation: • The flow direction must correspond to the identification if present. • The maximum torque for all flange connections must be complied with. • The devices must be installed without mechanical tension (torsion, bending). •... -
Page 21: Mounting The Meter Tube
Mounting Mounting the meter tube The meter can be installed at any location in a pipeline under consideration of the installation conditions. Warning - Potential damage to device! Use of graphite with the flange or process connection gaskets is prohibited. In some instances, an electrically conductive coating may form on the inside of the measuring tube. -
Page 22: Torque Information
Mounting Torque information 4.4.1 Flanged units and units with adapter flange, model SE41F / SE21F / SE21W Meter size DN Nominal Max. tightening torque [Nm] pressure Inch Hard/soft rubber lining PTFE, PFA, ETFE lining Steel flange Stainless steel Steel flange Stainless steel flange flange... - Page 23 Mounting Meter size DN Nominal Max. tightening torque [Nm] pressure Inch Hard/soft rubber lining PTFE, PFA, ETFE lining Steel flange Stainless steel Steel flange Stainless steel flange flange PN40 41.26 27.24 71.45 71.45 PN63 71.62 60.09 109.9 112.6 CL150 22.33 22.33 66.22 66.22...
- Page 24 Mounting Meter size DN Nominal Max. tightening torque [Nm] pressure Inch Hard/soft rubber lining PTFE, PFA, ETFE lining Steel flange Stainless steel Steel flange Stainless steel flange flange PN10 23.54 27.31 86.06 89.17 PN16 88.48 61.71 99.42 103.1 PN25 137.4 117.6 166.5 133.9...
-
Page 25: Variable Process Connections Model Se21
Mounting Meter size DN Nominal Max. tightening torque [Nm] pressure Inch Hard/soft rubber lining ETFE lining Steel flange Stainless steel Steel flange Stainless steel flange flange PN10 391.7 304.2 On request On request PN16 646.4 511.8 On request On request 32“... -
Page 26: Information On 3A Conformity
Mounting Information on 3A conformity Important Only process connections which comply with "3A Sanitary Standard 63" may be used. The device must only be installed vertically with the terminal box or transmitter housing pointing upward. The "bracket mounting (1)" option no longer applies. G00528-01 Fig. -
Page 27: Installation Requirements
Mounting Change from one to two columns Installation Requirements 4.6.3 Vertical connections The device measures the flowrate in both directions. Forward flow is • Vertical installation for measuring abrasive fluids, preferably with flow in upward direction. the factory setting, as shown in Fig. 15. G00990 Fig. -
Page 28: Installation In The Vicinity Of Pumps
Mounting Nomograph for pressure drop determinations 4.6.7 Installation in the vicinity of pumps For adaptor with /2 = 8° • For flowmeter sensors that are installed near pumps or other vibration-causing fixtures, the use of mechanical vibration control components is mandatory. G00988 Fig. -
Page 29: Flowmeter Sizes, Pressure Ratings, Flow Range
Mounting Flowmeter Sizes, Pressure Ratings, Flow Range Meter size DN Standard Min. flow velocity measuring range Max. flow velocity measuring range pressure 0 … 0.5 m/s 0 … 10 m/s rating PN 1/25 … 0.03 l/min 0.00792 US gal/min … l/min 0.158 US gal/min... -
Page 30: Ground
Mounting Ground 4.8.1 General information on ground connections Observe the following items when grounding the device: • Use the supplied green-yellow cable as a ground wire. • Connect the ground screw for the flowmeter sensor (on flange and transmitter housing) to the station ground. -
Page 31: Metal Pipe With Loose Flanges
Mounting 4.8.3 Metal pipe with loose flanges 1. Solder the threaded nuts (2) M6 to the pipeline. 2. Insert M6x12 threads (3) in the flanges for the flowmeter sensor. 3. Secure the ground straps (1) with nut, spring washer, and shim as shown in the figure, and connect to the flowmeter sensor with ground connection (3). -
Page 32: Flowmeter Sensor In Stainless Steel Design Model Se21
Mounting 4.8.5 Flowmeter sensor in stainless steel design model SE21 Ground the stainless steel model as shown in the figure. The measuring fluid is grounded via the adapter (1) and an additional ground is not required. G00533 Fig. 29 4.8.6 Ground for devices with protective plates The protective plates are used to protect the edges of the liner in the measuring tube, e.g., for abrasive fluids. -
Page 33: Electrical Connections
Electrical connections Electrical connections Preparing and routing the signal and magnet coil cable Cut to length and terminate both cables as shown. Important Use wire end sleeves. Signal cable D173D025U01 Magnet coil cable D173D147U01 Preparing the transmitter side 80 (3.15) 60 (2.36) (0.59) (0.20) - Page 34 Electrical connections Observe the following items when routing cables: • The signal and magnet coil cable carries a voltage signal of only a few millivolts and therefore must be routed the shortest distance possible. The maximum permissible signal cable length is 50 m or 200 m, if the flowmeter sensor is equipped with a preamplifier. •...
-
Page 35: Connecting The Flowmeter Sensor
Electrical connections Connecting the flowmeter sensor 5.2.1 Connecting the signal and magnet coil cables The flowmeter sensor is connected to the transmitter via the signal / magnet coil cables (part no. D173D025U01 / D173D147U01). The coils of the flowmeter sensor are supplied with a field voltage by the transmitter over terminals M1/M3. -
Page 36: Protection Class Ip 68
Electrical connections 5.2.2 Protection class IP 68 For flowmeter sensors with IP 68 degree of protection, the maximum flooding height is 5 m (16.4 ft). The supplied cable (signal cable part no. D173D025U01 / magnet coil cable part no.: D173D147U01) fulfill the submersion requirements. G00171 Fig. - Page 37 Electrical connections 5.2.2.2 Sealing the connection box If the terminal box is to be sealed subsequently on-site, a special 2-part sealing compound can be ordered separately (order no. D141B038U01). Sealing is only possible if the flowmeter sensor is installed horizontally. Observe the following instructions during work activity: Warning - General risks! The sealing compound is toxic.
-
Page 38: Connecting The Transmitter
Electrical connections Connecting the transmitter 5.3.1 Supply power connection The line voltage and power consumption are indicated on the name plate for the transmitter. The wire cross-section for the supply power must meet the requirements for the main fuse (VDE 0100). -
Page 39: Connecting The Signal And Magnet Coil Cables
Electrical connections 5.3.2 Connecting the signal and magnet coil cables The outer shielding of the magnet coil cable is attached to the busbar via the 6 mm clip (from the accessory bag in the connection area). The outer shielding of the signal is routed in a similar manner. -
Page 40: Terminal Connection Diagrams
6 Magnet coil cable: 14 White shielded 2 x 1 mm CE Typ 227 TEC 74 15 Shielded signal cable: ABB order no. D173D025U01, 10 m ABB order no. D173D147U01, 10 m included in shipment, included in shipment standard 7 Supply power Low voltage: 100 ... - Page 41 2 x 1 mm CE Typ 227 TEC 74 15 Shielded signal cable: ABB order no. D173D025U01, ABB order no. D173D147U01, 10 m included in shipment, 10 m, included in shipment standard 16 With preamplifier (always with DN 1 ... DN 8 [1/25 ... 5/16"]) 7...
- Page 42 Fig. 38: Flowmeter sensor standard DN 3 ... DN 1000 (1/10 ... 40"), transmitter field-mount housing 1 Functional ground (busbar) 7 Shielded signal cable: Use ABB order no. D173D025U01 2 Pulse output or incorporate in existing wiring 3 Contact input 8...
- Page 43 16 With preamplifier (always with DN 1 ... DN 8 [1/25 ... 5/16"]) shielded 2 x 1 mm CE Typ 227 TEC 74 ABB order no. D173D147U01, 10 m included in shipment, standard Comment: We recommend that shielded output cables be used with the shields connected to the functional ground at one end.
-
Page 44: Connection Examples For Peripherals (Incl. Hart)
Electrical connections Connection examples for peripherals (incl. HART) Current output I = internal E = external 0/4 ... 20 mA 0/2 ... 10 mA G00243 Current output: selectable in software Active Function: 0/4 ... 20 mA (0 Ω ≤ RB ≤ 560 Ω) 0/2 ... - Page 45 Electrical connections Pulse output Pulse output active Pulse output, passive, optocoupler + 16 ... 30 V DC G00247 Function: active/passive, selectable via jumper (see "Commissioning" in operating instructions) fmax: 5 kHz, fmin: 0.00016 Hz Setting range: Pulses/unit, pulse width (observe dynamic limits) 150 Ω...
- Page 46 Electrical connections Bus termination for S4 transmitter To terminate the bus if the instrument is at the end of the bus cable, the termination components in the S4 transmitter can be used. To do so, close both hook switches in the connection area of the transmitter. Important If the transmitter plug-in module is removed, bus termination is also canceled.
-
Page 47: Commissioning
Commissioning Commissioning Preliminary checks prior to start-up The following points must be checked before commissioning: • The supply power must be switched off. • The supply power must match information on the name plate. • The pin assignment must correspond to the connection diagram. •... - Page 48 Commissioning • The sensor must be installed at a largely vibration-free location. • The sensor and the converter must be assigned properly for the model FSM4000: The sensors have an end number of X1, X2, etc., on the name plate. The transmitters have the end numbers Y1, Y2, etc.
-
Page 49: Commissioning The Unit
Commissioning Commissioning the unit 6.2.1 Switching on supply power After switching on the supply power, the flowmeter sensor data in the external FRAM is compared with the data saved internally. If the data is not identical, the transmitter data is replaced automatically. - Page 50 Commissioning 6. System zero point (menu item “System Adjust”) When commissioning an older model flowmeter sensor or checking the system, you can set the system zero point on the transmitter after a warmup period. The fluid in the flowmeter sensor must be at absolute standstill. The measuring tube must be completely full. The adjustment can now be made manually or automatically via the "System zero point"...
-
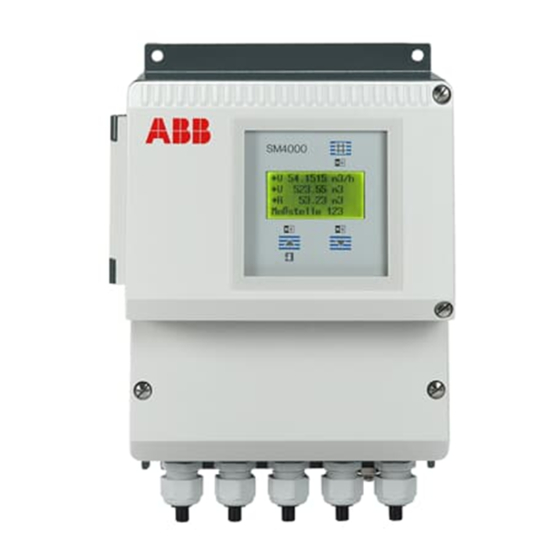
Page 51: Easy Set-Up: For Uncomplicated Configuration
Commissioning Easy Set-up: For uncomplicated configuration The Easy Set-up function enables users to configure the transmitter for quick and convenient startup. additional information about configuration options, chapter "Parameterization". Press any key in the process display, then use Note! FSM4000 STEP or DATA to scroll Parameters can be changed to the “Easy Set-up“... -
Page 52: Commissioning Profibus Pa Units
Commissioning Commissioning PROFIBUS PA units For units with PROFIBUS PA, the bus address must be checked or configured prior to start-up. If no bus address information was supplied by the customer, the unit was shipped with its BUS address set to “126”. The address must be reset during start-up to a number within the valid range (0 …... - Page 53 Commissioning Example of local address setting (DIP switch 8 = On) G00564 Fig. 50 Position of DIP switches 1 Transmitter plug-in module 2 DIP switch Switches 1, 5, 7 = ON means: 1+16+64 = 81 Bus address 81 Switch Address Status Unit address...
-
Page 54: Information On Voltage/Current Consumption
Commissioning Device behaviour during turning on the power supply After switching on the auxiliary power, DIP switch 8 is polled: Status The address defined by DIP switches 1 ... 7 applies. The address can no longer be changed once the unit is in operation, since DIP switch 8 is polled only once when auxiliary power is turned on. -
Page 55: System Integration
In addition, third-party devices can be interchanged without having to reconfigure the process control system. To support interchangeability, ABB provides three different GSD files (equipment master data) that can be integrated in the system. Users decide at system integration whether to install the full range of functions or only part. -
Page 56: Commissioning Foundation Fieldbus Units
(common file format) are required. The DD file contains the device description. The CFF file is required for segment engineering. Engineering can be performed online or offline. The DD and CFF files are available to download from the ABB homepage http://www.abb.com/flow. The DIP switches on the unit must be set correctly as follows: DIP switch 1 must be OFF. - Page 57 Commissioning Seating of DIP switches G00564 Fig. 51: Position of DIP switches 1 Transmitter plug-in module 2 DIP switch Assigning of DIP switches DIP switch 1: Releases the simulation of the AI function blocks. DIP switch 2: Hardware write protection for write access via bus (locks all blocks). DIP switch 3 ...
-
Page 58: Parameterization
Parameterization Parameterization Display options After switching on the auxiliary power, the current process information for the measuring point is displayed. In the first line of the display, the current flow direction ( F for forward, R for reverse) is displayed along with the flowrate as a percentage or a physical unit. -
Page 59: Data Entry
Parameterization Data entry Use the keys (4) to enter data when housing is open. If closed, use the magnet stick (5) and the magnet sensors. The stick is held over the appropriate NS symbol. FSM4000 DATA STEP C/CE ENTER G00566 Fig. - Page 60 Parameterization ENTER function for magnet stick operation The ENTER function is initiated when the DATA/ENTER sensor is activated for more than 3 seconds. The display flashes to indicate that the function is active. There are two different methods of entering data: •...
-
Page 61: Entering Data In "Short Form
Parameterization Entering data in “short form” Task Action Display information Starting point for “Process information” → V98.14 % → V12.000 m 1. Open menu. Any parameter C/CE is displayed 2. Search "Prog. Level". "Prog. level" ENTER Disabled 3. Switch off “Programming protection” STEP or DATA "Prog. - Page 62 Standard "Specialist": Contains all menu items accessible by the customer. Prog. Level "Service": Additional menus can be displayed by entering Specialist the correct service code number (for ABB Service only). Prog. Level Service Servicecode? Prog. Level Pg.prot.code 1 ... 9999 The Prog.
- Page 63 Parameterization Submenu/parameter Value range Comment Language German The languages available are displayed in the present English language selection. Menus in the Service Code section English are displayed in English. French Finnish Language Spanish English Italian Dutch Danish Swedish Turkish Submenu Operating mode Standard "Standard": Selection used for continuous flow metering.
- Page 64 Parameterization Submenu/parameter Value range Comment Unit Qmax Select the unit for volume and mass flow. This unit refers l/s; l/min; l/h; m to Qmax DN, Qmax and the instantaneous status, if these /min; m /h; m are displayed in engineering units. usgps;...
- Page 65 Parameterization Submenu/parameter Value range Comment Submenu This menu does not appear with an excitation frequency of 50 Hz or 70 Hz. Data 60 Hz View only Adjustment value for Channel can be monitored for the Channel excitation frequency setting (displayed when an older -123 µs sensor 60 Hz has been selected).
- Page 66 Parameterization Submenu/parameter Value range Comment Submenu Primary Type of primary Display the connected flowmeter model: The selection is imported with the FRAM automatically by the transmitter. DS2_, DS4 If an older flowmeter sensor model (see list) is selected, the FRAM with Cs = 100%, Cz = 100% must be used. The models 10D1422 (10DI1425, 10DS3111A-C ≥...
- Page 67 70 mV View only Displayed only if flowmeter sensor 10D1462/72 is Meter factor selected View only Display the ABB order number for the flowmeter sensor. Order-Number „-----------------------“ Display required for "Older Model". Use ENTER and Option available only Submenu STEP to access the parameters: Mains Frequency, Type with "Older Model"...
- Page 68 Parameterization Submenu/parameter Value range Comment Cal-fact 10m/s View only Display the max. possible flow range. Automatically selected based on size. 50 m 3 /h Numeric entry Flow range end value for forward and reverse flow. Flow Qmax range end value configurable from 0.5 ... 10 m/s. 50 m 3 /h Damping [1\xE0] Numeric entry...
- Page 69 Parameterization Submenu/parameter Value range Comment Adj. empty pipe Manual Adjustment value for empty meter pipe. The pipeline must be empty. After the adjustment is completed, the 1000 Autom. Adjust transmitter displays the adjustment value and calculates a new threshold value. Not displayed, if DEP is switched off or DEP mode is standard.
- Page 70 Parameterization Submenu/parameter Value range Comment 1st line Q [percent]; Q [unit]; Display 1st line Iout [mA]; Q [m/s]; Q Notes regarding the values Fprt1 ... Fprt4 (assignment of Q [Prozent] BargraphTotalizer; values in the submenu Diagnostic / Fingerprint) as well as Totalizer →...
- Page 71 Parameterization Submenu/parameter Value range Comment Anzeige 1. Zeile FB TOT1 Total. Displays the total value for the totalizer block. The displayed unit is UNIT_TOTAL. TBT → Value FB TOT1 Status. Displays the current mode of the particular block and the status of the output variables (Total.
- Page 72 Parameterization Submenu/parameter Value range Comment 1st line Displays the value or status of the parameter Trk_Val for the function block PID. PID Trk_Value Example: The status is displayed in plain text format, the 1st line substatus in numeric form after the status. TB VolF GOOD0 1st line Displays the current mode for the function blocks.
- Page 73 Parameterization Submenu/parameter Value range Comment Totalizer → F Numerical entry Display or input the forward totalizer value. 0.0 kg/h 0 ... 9999999 Overflow ← R Display only Overflow counter max. 65535. 1 overflow = pulse totalizer of 9,999,999 units. Resets the display status and increments the overflow counter by one.
- Page 74 Parameterization Submenu/parameter Value range Comment Submenu This menu does not appear for the PROFIBUS PA or FOUNDATION fieldbus. Pulse output Qmax Pulses Numerical entry Expanded flow totalization to the maximum flow range Qmax DN. This parameter is displayed only if the 2.5 m measuring range specified is less than Qmax DN.
- Page 75 Parameterization Submenu/parameter Value range Comment Submenu Label Curr. Variant Display only Displays the pulse output and communication configuration for the shipped model. Active pulse without Active pulse without HART HART Active pulse with HART Passive pulse without HART Passive pulse with HART PROFIBUS PA FOUNDATION...
- Page 76 Parameterization Submenu/parameter Value range Comment HART Date Enter and output a date in this submenu. Month No entry for standard devices (without HART hardware). 03.11.2003 Year PA Address Numeric entry 2. PROFIBUS PA communication 0 - 125 Only available if PROFIBUS PA version was ordered. Displays the slave address.
- Page 77 Communication: 0 FF Address 0x15 3. FOUNDATION Fieldbus communication. Displays the address and device ID: Dev. ID 000320 = manuf. code ABB, hex 0003200017_FSM40 0017 = Device Type Code FSM4000, hex 00_12345 _FSM4000_ = Device name 12345 = serial number of device, 5-digit Dip Switch Hardware switch.
- Page 78 Parameterization Submenu/parameter Value range Comment Warning Mask This menu shows the screen for the warning register (TB Index 96). Bitstring 0 OFF Operation is identical to Error screen. See Warning Register 9.8.3 and interface description D184B093U31, 020000100 page 47. Warning: 10 Reverse Q Software Rev.
- Page 79 Parameterization Submenu/parameter Value range Comment Simulation Mode On/Off function for Simulation mode. Before operation with flow, a flowrate can be simulated. The output values correspond to the simulated flowrate entered. The information ** Q Simulation** is displayed in the lower line of the display.
- Page 80 Parameterization Submenu/parameter Value range Comment Submenu Set the time-out limits and alarm behavior for values over or under the coil AC. Alarm Coil Current Min. value 0 ... 500 Lower range limit for alarm. 20.0 mA Max. value 0 ... 500 Upper range limit for alarm.
- Page 81 Parameterization Submenu/parameter Value range Comment Submenu Set the time-out limits and alarm behavior for values over or under the coil temperature. Alarm Ins Resist Min. value 0 ... 100000 Lower range limit for alarm. 1 megaohm Max. value 0 ... 100000 Upper range limit for alarm.
- Page 82 Parameterization Submenu/parameter Value range Comment Submenu Set the time-out limits and alarm behavior for values over or under the electrode balance. Alarm Elec Bal The electrode balance is calculated as the ratio between the electrode AC voltages E1/E2. This value is displayed in [%].
- Page 83 Parameterization Submenu/parameter Value range Comment Submenu Set the time-out limits and alarm behavior for values over or under the DAC value. The DAC value is a criterion for Alarm DAC Value the amount of coil current. Min. value 0 ... 1024 Lower range limit for alarm.
- Page 84 Parameterization Submenu/parameter Value range Comment Submenu Preselect the diagnostic measurement values that you want to display and manage in the Fingerprint data. Fingerprint Submenu Assign the rate for Fprt1. The display line for the process indicator is assigned in the submenu. Fprt1 Diagnostic AC volt.
- Page 85 Parameterization Submenu/parameter Value range Comment As Startup Copies the current data record in the Fingerprint "as Startup" (commissioning fingerprint). Accept Yes, exit via C/CE Yes → Enter Submenu Calibration Submenu Enter the current coil temperature to readjust the coil resistance at 20 °C. Perform adjustment only on a "cold" Coil Temp device.
- Page 86 Parameterization Submenu/parameter Value range Comment Submenu status Error register After calling up the error register, the error register text is displayed with the number of pending errors. Press Number: 1 ENTER again to display the pending errors with error number and text. If you press ENTER again, you will be C (Current) asked whether you want to reset the error or view the Ext.
- Page 87 Parameterization Submenu/parameter Value range Comment Submenu Syst. Adjust Start System Zero Manual Check zero, if necessary (when adapting an older flowmeter sensor). Manual entry, e.g., when replacing the Autom. Calibration 0.0 % transmitter. System zero point Numerical entry Automatic adjustment: Valve must be closed, fluid in flowmeter sensor must be at absolute standstill.
-
Page 88: Additional Information Regarding Use Of Enhanced Diagnostic Functions
Parameterization Additional information regarding use of enhanced diagnostic functions Additional diagnostic functions are available for flowmeters sensor SE41F, SE21 and SE21F are available for meter sizes DN 8 and larger. The following section describes how to determine individual values. 7.4.1 Determining measurement values for diagnostics 7.4.1.1 Determining the coil alternating current or coil alternating voltage... - Page 89 The coil temperature is a factor of the ambient and fluid temperatures. The measurement can, e.g., be used to monitor overtemperature due to the fluid. The coil temperature is measured indirectly via the coil DC resistance (ABB patent GB 2 348 011).
- Page 90 Parameterization 7.4.1.5 Determining the electrode AC voltage for E1 and E2 Primary signal for determining the electrode balance. The electrode AC voltages are measured at the electrodes E1 and E2 to ground. The voltage measured is proportional to the flowrate. The electrode AC voltage can be measured without affecting the flow measurement in any way.
- Page 91 Parameterization 7.4.1.7 Determining the signal-to-noise ratio Detect changes in fluid, e.g., gas bubbles, increased/reduced amount of solids. To determine the signal-to-noise ratio (SNR), the electrode AC voltage - raw signal for the flowmeter sensor is set in relation to the digitally filtered signal. G00578e Filtered signal...
-
Page 92: Recommended Settings For Diagnostic Limit Values
Parameterization 7.4.2 Recommended settings for diagnostic limit values The values indicated are only intended as a rough guide and may need to be adapted in line with on-site conditions. Parameter Minimum value Maximum value Electrode voltage 1 These values depend on the flowrate, so no recommendations can be made here. Electrode voltage 2 Electrode balance -150 %... - Page 93 Parameterization Parameter Minimum value Maximum value Accidental coil ground 10 MΩ 99.9 MΩ DAC max Design level of the flowmeter sensor Nominal diameter DN 1 ... 2 (1/25 ... 1/12") DN 3 ... 10 (1/10 ... 3/8") DN 15 (1/2") DN 20 ...
-
Page 94: Displaying The Diagnostic Values
Parameterization 7.4.3 Displaying the diagnostic values 7.4.3.1 Measurement values A maximum of four diagnostic values can be displayed (Fprt1, Fprt2, Fprt3, Fprt4). Values can be selected in the submenu Diagnostics / Fingerprint / Fprt1 - 4. In addition to the type of measurement value, the desired data record has to be configured. - Page 95 Parameterization When displaying the operating hours / log time, the ID code combines data record and type without underscore. Data record Type Numerical Unit value CVC: Current transmitter operating hours counter H:Min:Sec P1C: Product1-Fingerprint transmitter log time H:Min:Sec P2C: Product2-Fingerprint transmitter log time H:Min:Sec DFC: Startup-Fingerprint transmitter log time H:Min:Sec...
- Page 96 Parameterization The error registers for diagnostic values are structured as follows: ID code Description _______________________________ − Signal quality − Magnetic linearity − Electrode balance − Electrode voltage E1 − Electrode voltage E2 − DAC value − Insulation resistance − Coil temperature −...
-
Page 97: Readjusting The Coil Temperature
Parameterization 7.4.4 Readjusting the coil temperature If a readjustment is required, make sure that the flowmeter sensor and coil are relatively close to ambient temperature. You might need to allow the flowmeter to cool off overnight. Work steps: • Switch on the transmitter. •... -
Page 98: Software History
Parameterization Software history 7.5.1 For transmitters without communication or HART protocol Software D200S021U01 Software Type of changes Documentation / version Supplements − B0.10 Original Software − B0.11 Improve min. contrast limit. After changing from 50 → 60 Hz the system data now displays the correct frequency. -
Page 99: For Transmitter With Profibus Pa Communication
Parameterization 7.5.2 For transmitter with PROFIBUS PA communication Software D200S021U02 Software Type of changes Documentation / version Supplements − B0.11 Original Software − B0.14 Shortened Finnish texts. Aut. Simulator detection for counter management improved; FRAM management improved. C0.10 Extended diagnostic functions, etc. Added documentation for the additional points −... -
Page 100: Messages And Tests
Messages and tests Messages and tests Overview of error states and alarms Contact output Notification Flowrate with Current Pulse Message with Ext. State / Error indicator General Min. Max. Max-Min Empty simulation at output output HART Diag. display Alarm alarm alarm alarm pipe... -
Page 101: Error Messages During Operation And With Data Entry
Messages and tests Error messages during operation and with data entry The error messages listed below include explanations of the error codes shown in the display. When entering information, the error codes 0 ... 6, A, B, C, D, E, G do not appear. Error code and Priori Description... - Page 102 If the FRAM is defective and startup cannot be performed, a new FRAM can be requested from the Göttingen plant. To properly process requests, you must include the ABB order number and unit number of the flowmeter sensor. After installing the FRAM and switching on the power, you can start up the system.
-
Page 103: Warning Messages During Operation
Messages and tests Warning messages during operation Warning code and Prior- Description Possible cause Corrective action ID letter Warning: 1 Before operation with flow, a Simulation mode on. After completing the flowrate can be simulated. The simulation program, Q Simulation output values correspond to the switch off the simulated flowrate entered. - Page 104 Auto. Adjust contact input for internal For ABB Service For ABB Service adjustment (for ABB Service personnel only. personnel only. only). Warning. 14 Warning results only when the Measuring signal Set noise reduction to "Noise reduction"...
-
Page 105: Maintenance / Repair
ABB. Important When sending the flowmeter sensor to the local office of ABB, complete the return form in the appendix and include with device. When cleaning the exterior of meters, make sure that the cleaning agent used does not corrode the housing surface and the gaskets. -
Page 106: Replacing The Transmitter
Maintenance / Repair Replacing the transmitter The transmitter plug-in module can be replaced without loss of function for sizes DN 1 ... DN 1000. When replacing the FRAM-calibrated flowmeter sensor (identifiable by the Cs and Cz values on the model plate), please take into consideration the following points: •... - Page 107 Maintenance / Repair 2. Switch on the supply power; the model number of the transmitter and the current software version are displayed. The flowmeter sensor and system data from the external FRAM are imported: a) The following information is displayed: Warning 7 - Primary data loaded.
-
Page 108: Spare Parts List
Spare parts list 10 Spare parts list Important Please contact Customer Center Service acc. to page 2 for nearest service location. 10.1 Fuses for transmitter electronics Warning – Electrical voltage risk! When the housing is open, EMC protection is impaired and protection against contact is suspended. -
Page 109: Spare Parts For Transmitter S4
Spare parts list 10.2 Spare parts for transmitter S4 10.2.1 Field housing unit 11,12 11,12 11,12 G00582 Fig. 55 No. Parameter Order number Transmitter (100 ... 230 V AC) without HART D674A859U04 Transmitter (100 ... 230 V AC) with HART D674A859U05 Transmitter (100 ... -
Page 110: Spare Parts Flowmeter Sensor
Spare parts list 10.3 Spare parts flowmeter sensor 10.3.1 Terminal box, stainless steel, DN 1 ... DN 100 4 / 5 7 / 8 / 9 G00583 Terminal box for SE21, standard Terminal box for SE21, with preamplifier Fig. 56 No. -
Page 111: Terminal Box, Aluminum, Dn 3
Spare parts list 10.3.2 Terminal box, aluminum, DN 3 ... DN 1000 6.1-6.3 2.1-2.3 G00583 Fig. 57 No. Name of part Order number Connection board, standard > DN 8 D685A1025U01 Connection board, preamplifier D685A1028U01 Lower section with cable gland M 20 x 1.5 ≤ DN 100 D612A153U01 Lower section with cable gland M 20 x 1.5 >... -
Page 112: Operating S4 With An Older Sensor
(0 m/s). Important If no values are listed for the reference voltage on the name plate, you can request this information from ABB Service. Please provide order number with your request. e-mail: parts-repair-goettingen@de.abb.com Phone: +49 180 5222 580... - Page 113 Operating S4 with an older sensor Type of Meter size DN Connection FRAM design Coil supply Reference flowmeter board with current from: voltage sensor, version voltage splitter level (switch S903 must be closed) With flowmeter sensor calibration values SE2_, SE4 1 ...
- Page 114 Operating S4 with an older sensor Warning – Electrical voltage risk! When the housing is open, EMC protection is impaired and there is no longer any protection against accidental contact. • Power to all connecting cables must be switched off. Adapting the transmitter to the flowmeter sensor 10D1422 (DN 3 ...
-
Page 115: Specifications
Specifications 12 Specifications Change from one to two columns 12.1 Measuring accuracy 12.1.1 Reference conditionsper EN 29104 Fluid temperature 20 °C (68 °F) ± 2 K Ambient temperature 20 °C (68 °F) ± 2 K Power supply Line voltage as per name plate ±... -
Page 116: Flowmeter Sensor
Specifications Flowmeter sensor material 12.2 Flowmeter sensor Parts Standard Others Lining PTFE, PFA, hard rubber, Ceramic 12.2.1 Flowmeter sensor SE41F soft rubber, ETFE carbide Signal and ground Stainless steel Hastelloy B-3 Temperature graph electrode for 1.4571 (316 Ti) (2.4600), Hastelloy C-4 Hard rubber (2.4610), Soft rubber... - Page 117 Specifications Storage temperature [bar] [PSI] -20 ... 70 °C (-4 ... 158 °F) 1595.4 1450.4 Degree of protection acc. to EN 60529 PN 100 IP 65 / IP 67 1305.3 IP 68 (option) 1160.3 1015.3 Pipeline vibration according to EN 60068-2-6 PN 63 870.2 Transmitter...
- Page 118 Specifications [bar] [psi] 797.5 725.0 CL 300 652.5 580.0 507.5 435.0 362.5 290.0 CL 150 217.5 145.0 72.5 190 [°C] 374 [°F] G00218 Fig. 64: Steel ASME flange up to DN 400 (16") (CL150/300); up to DN 1000 (40") (CL150) JIS 10K-B2210 Flange Nominal Material...
-
Page 119: Flowmeter Sensor Se21 / Se21F
Specifications Flowmeter material 12.2.2 Flowmeter sensor SE21 / SE21F Lining Electrode material Electrode design Minimum Allowable Absolute Pressure Standard Others Standard Others Nominal Lining Operation PFA, Hast.-C4 Hast.-B3 Flat head Pointed Operating diameter mbar abs head Peek, (2.4610) (2.4600), °C ( ... - Page 120 Specifications JIS B2210-10K wafer type Storage temperature -25 … 70 °C (-13 ... 158 °F) Meter size Material [bar] Degree of protection acc. to EN 60529 1.4404 (316 L), 32 … 100 -40 … 130 °C • IP 67 1.4435 (316 L), (1¼...
-
Page 121: Transmitter S4
Specifications 12.3 Transmitter S4 Any flow range whose 100% value Flow range corresponds to a flow velocity between 0.5 m/s and 10 m/s can be selected. ≥ 20 µS/cm standard Minimum DN 10 ... 1000 conductivity (3/8 ... 40“) ≥ 20 µS/cm with preamplifier DN 1 ... -
Page 122: Appendix
The maximum permissible pressure (PS) is less than 0.5 bar Due to low pressure risks (meter size ≤ DN 25 / 1") no approval procedures are required. Important All documentation, declarations of conformity, and certificates are available in ABB's download area. www.abb.com/flow FSM4000... -
Page 123: Overview Of Setting Parameters And Technical Design
Appendix 13.3 Overview of setting parameters and technical design Measuring point: TAG no.: Flowmeter model: Transmitter type: Order no.: Device no.: Order no.: Measured medium temp.: Power supply: Lining: Electrodes: Exciter frequency: System zero point: zero Span Parameters Setting range Prog. -
Page 124: Return Form
13.4 Return form Statement on the contamination of devices and components Repair and / or maintenance work will only be performed on devices and components if a statement form has been completed and submitted. Otherwise, the device / component returned may be rejected. This statement form may only be completed and signed by authorized specialist personnel employed by the operator. -
Page 128: Germany
ABB has Sales & Customer Support expertise in over The Company’s policy is one of continuous product 100 countries worldwide. improvement and the right is reserved to modify the information contained herein without notice. www.abb.com/flow Printed in the Fed. Rep. of Germany (02.2018) ©...