Sign In
Upload
Manuals
Brands
Yamaha Manuals
Receiver
AVENTAGE RX-A660
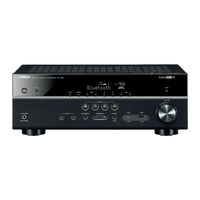
User Manuals: Yamaha AVENTAGE RX-A660 AV Receiver
Manuals and User Guides for Yamaha AVENTAGE RX-A660 AV Receiver. We have
1
Yamaha AVENTAGE RX-A660 AV Receiver manual available for free PDF download: Owner's Manual
Yamaha AVENTAGE RX-A660 Owner's Manual (133 pages)
Brand:
Yamaha
| Category:
Receiver
| Size: 12.04 MB
Table of Contents
Table of Contents
2
Before Using the Unit
5
Accessories
5
How to Use this Manual
5
Remote Control
5
Insert the Batteries
5
Operating Range of the Remote Control
5
Features
6
What You Can Do with the Unit
6
Part Names and Functions
9
Front Panel
9
Front Display (Indicators)
10
Rear Panel
11
Remote Control
12
Preparations
13
1 Placing Speakers
14
Typical Speaker Layouts
15
Other Speaker Layouts
16
Setting the Speaker Impedance
17
2 Connecting Speakers
18
Connecting Speaker Cables
19
Connecting the Subwoofer (with Built-In Amplifier)
19
Connecting Front Speakers that Support Bi-Amp Connections
19
Connecting Zone B Speakers
19
3 Connecting a Tv/Playback Devices
20
Input/Output Jacks and Cables
20
Connecting a TV
21
HDMI Connection
21
Composite Video Connection
21
Connecting Video Devices (such as BD/DVD Players)
22
Connecting Audio Devices (such as CD Players)
24
Connecting to the Jack on the Front Panel
24
4 Connecting the Radio Antennas
25
FM/AM Antennas (RX-V481)
25
DAB/FM Antenna (RX-V481D)
25
5 Preparing for Connecting to a Network
26
Connecting a Network Cable
26
Preparing a Wireless Antenna
26
6 Connecting the Power Cable
27
7 Selecting an On-Screen Menu Language
28
8 Optimizing the Speaker Settings Automatically (YPAO)
29
Error Messages
31
Warning Messages
32
9 Connecting to a Network Wirelessly
33
Selecting the Connection Method
33
Connecting the Unit to a Wireless Network
34
Connecting a Mobile Device to the Unit Directly (Wireless Direct)
39
10 Setting the Musiccast
41
Musiccast CONTROLLER
41
Adding the Unit to the Musiccast Network
41
Playback
42
Basic Playback Procedure
42
Enjoying Playback
42
Switching Information on the Front Display
43
Selecting the Input Source and Favorite Settings with One Touch (SCENE)
44
Selecting a Registered Scene
44
Registering a Scene
44
Selecting the Sound Mode
45
Enjoying Stereoscopic Sound Fields (CINEMA DSP 3D)
46
Virtual Cinema Dsp
47
Enjoying Unprocessed Playback
48
Enjoying Pure High Fidelity Sound (Direct Playback)
49
Enhancing the Bass (Extra Bass)
49
Playing Back Digitally Compressed Formats (such as MP3, Etc.) with Enriched Sound (Compressed Music Enhancer)
49
Listening to FM/AM Radio (RX-V481)
50
Setting the Frequency Steps
50
Selecting a Frequency for Reception
50
Registering Favorite Radio Stations (Presets)
51
Selecting a Preset Station
53
Clearing Preset Stations
53
Radio Data System Tuning
54
Listening to DAB Radio (RX-V481D)
55
Preparing the DAB Tuning
55
Selecting a DAB Radio Station for Reception
56
Registering Favorite DAB Radio Stations (Presets)
57
Displaying the DAB Information
58
Checking Reception Strength of each DAB Channel Label
59
Listening to FM Radio (RX-V481D)
60
Selecting a Frequency for Reception
60
Registering Favorite FM Radio Stations (Presets)
60
Radio Data System Tuning
63
Playing Back Music Stored on a Bluetooth® Device
64
Playback Bluetooth® Device Music on the Unit
64
Enjoying Audio Using Bluetooth® Speakers/Headphones
65
Playing Back Music with Airplay
66
Playback of Itunes/Ipod Music Contents
66
Playing Back Music Stored on a USB Storage Device
68
Connecting a USB Storage Device
68
Playback of USB Storage Device Contents
68
Playing Back Music Stored on Media Servers (Pcs/Nas)
71
Media Sharing Setup
71
Playback of PC Music Contents
72
Listening to Internet Radio
74
Playback of Internet Radio
74
Registering Favorite Internet Radio Stations (Bookmarks)
76
Playing Back more High-Quality Sounds with Bi-Amp Connections
77
Connecting Front Speakers that Support Bi-Amp Connections
77
Playing Back Music in Multiple Rooms
78
Connecting Zone B Speakers
78
Operating the Zone B
79
Useful Functions
81
Registering Favorite Items (Shortcut)
81
Configuring Playback Settings for Different Playback Sources (Option Menu)
83
Option Menu Items
83
Configurations
87
Configuring Various Functions (Setup Menu)
87
Setup Menu Items
88
Speaker
90
Test Tone
92
Hdmi
93
Sound
95
Initial Volume
97
Eco
98
Auto Power Standby
98
Eco Mode
98
Function
99
Memory Guard
100
Network
102
Mac Address Filter
103
Network Standby
103
Bluetooth
104
Language
105
Configuring the System Settings (ADVANCED SETUP Menu)
106
ADVANCED SETUP Menu Items
106
Changing the Speaker Impedance Setting (SP IMP.)
106
Selecting the Remote Control ID (REMOTE ID)
107
Changing the FM/AM Tuning Frequency Setting (TU)
107
Switching the Video Signal Type (TV FORMAT)
107
Selecting the HDMI 4K Signal Format (4K MODE)
107
Restoring the Default Settings (INIT)
108
Updating the Firmware (UPDATE)
108
Checking the Firmware Version (VERSION)
108
Updating the Unit's Firmware Via the Network
109
Appendix
110
Frequently Asked Questions
110
Troubleshooting
112
First, Check the Following
112
Power, System and Remote Control
112
Audio
113
Video
115
FM/AM Radio (am Radio Feature Is Available Only on RX-V481)
116
DAB Radio (RX-V481D)
116
USB and Network
117
Bluetooth
118
Error Indications on the Front Display
119
Glossary
120
Audio Information
120
HDMI and Video Information
121
Network Information
121
Yamaha Technologies
121
Supported Devices and File Formats
122
Supported Devices
122
File Formats
123
Video Signal Flow
123
Information on HDMI
124
HDMI Control
124
Audio Return Channel (ARC)
126
HDMI Signal Compatibility
126
Trademarks
127
Specifications
128
Audio Section
130
Video Section
131
Advertisement
Advertisement
Related Products
Yamaha AVENTAGE RX-A670
Yamaha RX-A1000
Yamaha RX-A700
Yamaha RX-A2030
Yamaha RX-A1030
Yamaha RX-A730
Yamaha AVENTAGE RX-A740
Yamaha Aventage RX-A1050
Yamaha MusicCast AVENTAGE RX-A4A
Yamaha AVENTAGE RX-A1060
Yamaha Categories
Motorcycle
Musical Instrument
Electronic Keyboard
Receiver
Amplifier
More Yamaha Manuals
Login
Sign In
OR
Sign in with Facebook
Sign in with Google
Upload manual
Upload from disk
Upload from URL