Sign In
Upload
Manuals
Brands
Valtra Manuals
Tractor
T series Versu
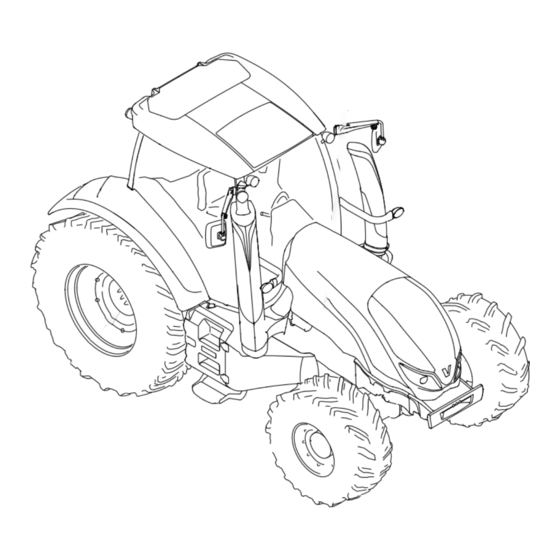
Valtra T series Versu Manuals
Manuals and User Guides for Valtra T series Versu. We have
1
Valtra T series Versu manual available for free PDF download: Operator's Manual
Valtra T series Versu Operator's Manual (450 pages)
Brand:
Valtra
| Category:
Tractor
| Size: 33.93 MB
Table of Contents
About this Manual
2
Tractor Serial Numbers
3
Table of Contents
4
1 Safety Precautions
15
Hazard Statements
15
Safety Rules
15
Replacing Safety and Information Signs
15
Maintaining Hardware Safety
16
Using Safety Features
17
Safe Operation
19
Following Safe Operating Practices
19
Driving on Public Roads
22
Getting into and out of the Cab
22
Controlling the Driving Speed
23
Driving Downhill
23
Operating with Implements
24
Running with Power Take-Off Driven Implements or Machines
25
Using Ballast Weights
25
Ensuring Personal Safety of Other People
26
Towing
26
Fire Hazards
27
Handling Viton Seals Subjected to High Temperatures
27
After-Treatment System
28
2 Instruments and Controls
29
One-Key Locking System
29
Pedals
29
Dashboard
30
Control Panel for A-Pillar Display and Proline
31
Proline Instrument Panel
31
Symbols on the Proline Instrument Panel Display
32
Indicator Lights on the Left Side of the Display
33
Indicator Lights on the Right Side of the Display
34
Controls on the Right-Hand Side
36
Tractor Terminal
36
Driving Controls
37
Linkage
38
Rear Linkage
38
Front Linkage
39
Power Take-Off
40
Rear Power Take-Off
40
Front Power Take-Off
41
Auxiliary Hydraulics
41
Other Controls
42
Main Power Emergency Button
43
Controls on the Rear Side
43
Rear Window Opening Latch
43
Additional Wipers
44
Reverse Drive System Controls
44
Controls on the Left-Hand Side
45
Controls on the Right-Hand Side Roof Console
46
Air Conditioning Controls
47
Automatic Air Conditioning and Additional Heater Controls
47
Manual Air Conditioning and Additional Heater Controls
47
Manual Air Conditioning
48
Heater Controls
48
Operator's Seat
49
Air Suspended Operator's Seat
49
Valtra Evolution Operator's Seat
50
Controls on the Rear Mudguard
51
Front End Controls and Connections
52
Rear Controls and Connections Outside the Cab
53
3 Operation
55
Running the Tractor in
55
Preparing for Use
55
Adjusting the Air-Suspended Driver's Seat
55
Adjusting the Valtra Evolution Driver's Seat
58
Adjusting the Right-Side Armrest
62
Adjusting the Steering Wheel
62
Adjusting Standard Mirrors
63
Adjusting Optional Mirrors
64
Heating Mirrors
65
Using the Windscreen Wiper and Washer
65
Using the Side Window Wiper and Washer
66
Using the Rear Window Wiper and Washer
67
Using the Rear Window Heater
67
Power Shuttle Lever
68
Control Stop
69
Using the Control Stop
69
Using the Ignition Switch
70
Main Power
71
Using the Main Power Emergency Button
71
Using the Roof Hatch
72
Starting the Tractor
73
Starting under Normal Conditions
73
Starting under Cold Conditions
75
Starting with an Auxiliary Battery
76
Using Lights
77
Using the Light Switch
77
Using the Follow-Me-Home Functionality
78
Using the Light Panel
78
Using the Cab Light
80
Using Notification Devices
81
Using Turn Signals
81
Using the Horn
82
Using the Rotary Beacon Light
82
Using Hazard Lights
83
Heating and Ventilation
83
Using the Heater
83
Using the Manual Air Conditioning
84
Using the Manual Air Conditioning and Additional Heater
84
Automatic Air Conditioning
85
Automatic Air Conditioning Control Panel and Display
85
Eco Mode
86
Using the Automatic Air Conditioning
86
Using ECO Mode
87
Using the Additional Heater
88
Using Defrost
89
Power Outlets
90
Lighters
90
Using the Two-Pin Current Socket and Power Switch
90
Three-Pin Current Socket
91
Trailer Socket
91
Driving the Tractor
93
Notifications about Steering
93
Power Shuttle
93
Parking Brake
94
Using the Power Shuttle Lever
94
Adjusting the Power Shuttle Engagement Speed
96
Clutch Pedal
97
Adjusting the Clutch Pedal Engagement Position
97
Using the Clutch Pedal While Driving
97
Braking
99
Using the Emergency Brake Button
99
Using the Emergency Brake Lever
100
Starting to Drive
101
Transmission System
102
Selecting the Speed Range
103
Speed Matching
103
Selecting the Creeper Speed Range
105
Using Powershift
105
Preprogramming Gear for Driving Direction Changing
106
Using the Shifting Automatics
108
Programming Shifting Automatics
110
Using the Powershift Limiter
112
Programming Automatic Shifting between Speed Ranges C and D
113
Using the ECO Function
114
Parking the Tractor
115
Refuelling the Tractor
115
Filling the Fuel Tank
115
Filling the Adblue/Def Tank
116
Cruise Control
118
Cruise Control Buttons
119
Activating and Deactivating the Driving Speed Cruise Control
120
Programming the Driving Speed Cruise Control
120
Activating and Deactivating the Engine Speed Cruise Control
122
Programming the Engine Speed Cruise Control
122
Automatic Traction Control
123
Front Axle Air Suspension
124
Autocomfort Cab Suspension
125
Differential Lock
125
Engaging and Disengaging the Differential Lock
126
Four-Wheel Drive
127
Engaging and Disengaging the Four-Wheel Drive
128
Driving Start Automatics
128
Setting the Driving Start Automatics
129
Quicksteer
130
Using Quicksteer
130
Resetting Quicksteer
131
Twintrac Reverse Drive System
131
Activating and Deactivating Twintrac
132
Using Twintrac with Quicksteer
132
Hillhold
133
Using Hillhold
133
Permitted Driving Inclinations
135
Displays
135
Adjusting Display Brightness
135
Proline Instrument Panel Display
136
Fixed Views
137
Single-Row and Two-Row Views
137
Working Time View
138
Battery Voltage View
138
Cruise Control View
139
Driving Speed View
139
Wheel Slip View
140
Rear Power Take-Off Speed View
140
Front Power Take-Off Speed View
141
Engine Speed View
141
Fuel Consumption Views
141
3.10.2.10 Rear Lower Links' Position View
143
3.10.2.11 Gearbox Temperature View
143
3.10.2.12 Travel Distance and Surface Area View
144
Periodical Maintenance View
144
Clearing the Periodical Maintenance View
145
Resetting Views
146
Changing Parameters
147
Activating and Exiting the Setting Mode
147
Changing the Parameter Value
148
Setting the Implement Width
149
Changing the Hour Display
149
Changing the Minute Display
150
Changing the Clock Mode
150
Activating the Direction Indicator Buzzer
150
Changing the Temperature Unit
151
Changing the Length Unit
151
3.10.5.10 Changing the Volume Unit
152
3.10.5.11 Activating and Deactivating the Front Power Take-Off Speed View
152
3.10.5.12 Adjusting the Display Contrast
153
A-Pillar Display
153
A-Pillar Display Control Panel
154
Drive Display
154
Power Shuttle Section
154
Transmission Section
155
General Information Section
156
Changing General Information Section Views
158
Tractor Terminal
158
Tractor Terminal Control Button Functions
159
Entering Menus
159
Power Shuttle-Related Drive View Symbols
161
Transmission-Related Drive View Symbols
162
General Information Drive View Symbols
162
Pop-Up Views
164
Entering the Large Drive View
165
Split Drive View
165
Entering the Split Drive View
166
Changing the Lower Field Views
166
Lower Field Views
167
3.12.11.1 Power Take-Off Speed Views
168
3.12.11.2 Engine Speed View
169
3.12.11.3 Rear Hydraulic Valve Settings View
169
3.12.11.4 Front Hydraulic Valve Settings View
169
3.12.11.5 Gearbox Temperature View
170
3.12.11.6 Working Hydraulics Oil Temperature View
170
3.12.11.7 Rear Lower Link Position View
170
3.12.11.8 Wheel Slip View
171
3.12.11.9 Working Time View
171
3.12.11.10 Travel Distance View
172
3.12.11.11 Surface Area View
172
3.12.11.12 Fuel Consumption Views
173
3.12.11.13 Battery Voltage View
174
3.12.11.14 Urea Level View
175
3.12.11.15 Cruise Control View
175
Entering the Hydraulics Settings View
175
Hydraulics View Symbols
176
Changing Units
177
Selecting the Display Theme
177
3.12.16.1 Setting the Implement Width
179
Changing Parameters
179
3.12.16.2 Editing Counters
180
3.12.16.3 Resetting Counters
180
Transmission Settings View
181
3.12.17.1 Selecting the Transmission Settings Memory Slot
182
3.12.17.2 Resetting the Transmission Settings Memory Slot Values to Default
182
I/O Query View
183
Tractor Information View
183
Rear Linkage
184
Diagnostic Light
185
Activating the Linkage
186
Lift/Lower Indicator Lights
186
Using the Lift/Stop/Lower Switch
187
Using the Position Control Knob
188
Overriding the Position Set by Position Control Knob
189
Using the Linkage Floating Position
190
Using the Lift/Lower Push Buttons
191
Using the Lift/Lower Switch
191
Setting the Lowering Speed
192
Draft Control
193
Limiting the Lifting Height
193
3.13.12.1 Activating and Deactivating the Draft Control
194
Drive Balance Control
194
3.13.13.1 Using the Drive Balance Control
195
Slip Control
195
3.13.14.1 Using the Slip Control
196
Three-Point Linkage
197
Attaching Implements
198
Using Quick Couplings for Lower Links
200
Adjusting Lift Links
202
Adjusting Hydraulic Lift Link
203
Adjusting Lower Links
204
Adjusting Side Limiters
205
Automatic Side Limiters
205
Setting Automatic Side Limiters to Fixed Position
206
Adjusting the Side Limiters' Support
207
Setting Automatic Side Limiters to Floating Position
207
Auxiliary Hydraulics
209
Auxiliary Hydraulic Controls and Functions
210
Activating and Deactivating the Auxiliary Hydraulics
211
Selecting Joystick Functions for Auxiliary Hydraulics
212
Selecting Predefined Settings for Auxiliary Hydraulics Valves
212
Controlling the Auxiliary Hydraulics Rear Valves 1 and 2 and Front Valves 1F and 2F
214
Controlling the Auxiliary Hydraulics Rear Valves 3, 4 and 5 and the Front Valve 3F
215
Using the Auxiliary Hydraulics On/Off Valves
215
Controlling the Rear Valve 1 from Rear Mudguard Push Buttons
216
Using the Front Linkage Shut-Off Valve
217
Changing the Auxiliary Hydraulics Settings
218
Auxiliary Hydraulic Control's Safety Time out
219
Adjusting the Auxiliary Hydraulic Control's Safety Time out Speed Limit
220
Activating and Deactivating the Hydraulics Assistant
221
Activating and Deactivating the Position Locking
222
Activating and Deactivating the Floating Position
223
Connecting to the Valves
223
Using Quick Couplings
223
Using Power Beyond Couplings
224
Connecting an External Hydraulic Motor to the Auxiliary Hydraulics
226
Using a Hydraulic Valve as a Single-Action Valve
226
Front Linkage
227
Using the Front Linkage
227
Setting Front Linkage Lifting Link Positions
228
Using the Valtra Front Loader
229
Using the Valtra Quick Front Loader Coupling Device
231
Using Softdrive
231
Locking the Equipment
232
Controlling the Extra Cylinder with the Change Valve
233
Power Take-Off
233
Attaching Implements to the Power Take-Off
233
Rear Power Take-Off
235
Recommended Rear Power Take-Off Shafts
237
Activating Rear Power Take-Off
238
Starting Rear Power Take-Off
239
Stopping Rear Power Take-Off Temporarily
240
Deactivating Rear Power Take-Off
242
Stopping the Rear Power Take-Off in Emergency
243
Using the Rear Power Take-Off Automatic Start/Stop
244
Proportional Ground Speed Power Take-Off
245
Adjusting the Rear Power Take-Off Engagement
247
Front Power Take-Off
249
Activating and Deactivating Front Power Take-Off
250
U-Pilot Headland Automatics
250
U-Pilot Operating Requirements
251
U-Pilot Controls
251
U-Pilot View
252
U-Pilot View Symbols
252
U-Pilot Programme Examples
254
Using U-Pilot Programmes
255
Selecting a U-Pilot Programme
255
Recording a U-Pilot Programme
256
Previewing a U-Pilot Programme
257
Running a U-Pilot Programme
258
Managing U-Pilot Programmes
260
Adding a New U-Pilot Programme
260
Renaming a U-Pilot Programme
260
Removing a U-Pilot Programme
261
Recovering a Deleted U-Pilot Programme
262
Editing U-Pilot Programmes
262
Changing a Programme Function
262
Entering the Programme Editing View
262
Removing a Programme Function
263
Adding a New Programme Function
264
Moving a Programme Function
264
Editing the Programme Function Distance
265
U-Pilot Error Codes
266
Implement Signal Connection
268
Implement Signal Connector
268
Resetting the Implement Signal Connection
269
Isobus Implement Control System
270
Bus Extension Connectors
271
ISOBUS Implement Connector
271
ISOBUS Terminal
271
ISOBUS Terminal Connector
271
Auto-Guide Readiness
271
Using Auto-Guide
272
Using Auto-Guide with Quicksteer
273
Auto-Guide with Twintrac and Quicksteer
274
Resetting the Auto-Guide Steering Valve
274
Towing Devices
274
Nordic Pick-Up Hitch
274
Euro Pick-Up Hitch
275
Hydraulic Pick-Up Hitch
276
Latching the Nordic and Euro Pick-Up Hitch
278
Unlatching the Pick-Up Hitch
278
Using the Pickup Hitch
278
Extending the Hydraulic Pick-Up Hitch
280
Latching the Hydraulic Pick-Up Hitch
280
Changing the Euro Pick-Up Hitch Implement
282
Changing the Pick-Up Hitch Implement
282
Changing the Hydraulic Pick-Up Hitch Implement
283
Agricultural Drawbar
284
Adjusting the Agricultural Drawbar
285
Towing Device Frames
285
Adjusting the Jaw Height
286
Attaching to the Mechanical Jaw
288
Attaching to the Mechanical Jaw K80
289
Attaching to Fixed Piton Fix/Fixed Ø80Mm Ball Hitch
290
Attaching to the Automatic Jaw
290
Air Pressure System
292
Trailer
293
Trailer Turn Signals
294
Trailer Air Pressure Brakes
295
Hydraulic Trailer Brake Valve
296
4 Maintenance
297
Maintenance Schedule
297
Service Inspection
297
Performing Maintenance Tasks
298
Cleaning the Tractor
299
Cleaning the Engine Compartment
300
Cleaning Front Axle Suspension Bellows
301
Cleaning Polycarbonate Windows
301
Greasing Lubricating Points Fitted with Grease Nipples
301
Supporting the Tractor
302
Recommended Fuel and Lubricants
304
Fuel
304
Quality Requirements for Engine Fuel
304
Storing Adblue/Def
304
Storing Fuel
304
Adblue/Def
305
Biodiesel Fuel
305
Grease
306
Calsium LF - NLGI2 Calsium Grease LF
306
Universal Grease - NLGI2 Universal Grease
306
Grease Moly - NLGI2 Moly Grease
307
Storing the Tractor
307
Storing the Tractor for a Period Shorter than Two Months
307
Storing the Tractor for a Period Longer than Two Months
307
Running the Tractor in after Storage
308
Running the Tractor in after a Storing Period Shorter than Two Months
308
Running the Tractor in after a Storing Period Longer than Two Months
308
Periodical Maintenance
309
Periodical Maintenance Chart
310
Daily Maintenance
312
Checking the Engine Oil Level
312
Checking the Coolant Level
313
Cleaning Radiators
315
Checking the Oil Level in the Hydraulic System
316
Checking the Oil Level in the Transmission System
316
Weekly Maintenance
320
Greasing the Rear Linkage
320
Checking the Pick-Up Hitch
322
Greasing the Nordic and Euro Pick-Up Hitch
323
Greasing the Hydraulic Pick-Up Hitch
324
Checking and Greasing the Front Linkage
325
Checking the Front Power Take-Off
326
Greasing Front Axle Mounting Bearings
327
Greasing the Brake Mechanism
327
Greasing Air-Suspended Front Axle Mounting Bearings
328
Checking Belts' Tension
329
Changing the Fan and Alternator Belt
330
Checking the Tyre Pressure
331
Checking the Emergency Brake
332
Checking the Windscreen Washer Fluid Amount
332
Checking the Air Pressure System Antifreeze Fluid Amount
333
Maintenance Every 600 Hours
334
Checking, Cleaning and Greasing the Battery Terminals
334
Changing the Engine Oil and the Oil Filter
335
Changing the Cab Ventilation Air Filter
337
Changing the Recirculation Filter
338
Checking the Front Loader Frame Bolt Tightness
338
Adjusting the Brake Pedal Free Travel
344
Checking the Brake Pedal Free Travel
344
Checking the Wheel Nut Tightness
344
Checking the Parking Brake
345
Adjusting the Parking Brake
346
Changing Transmission Oil Filters
347
Changing the Hydraulic System Oil Filter
348
Checking the Engine Breathing System
349
Checking the Oil Level in the Front Axle Differential
349
Changing Oil in the Hubs of the Front Axles with Brakes
350
Checking the Oil Level in Front Axle Hubs
350
Changing the Front PTO Housing Oil and Washing the Oil Filter
351
Checking Front PTO Couplings
352
Checking and Greasing the Trailer Air-Pressure Brake System
353
Checking the Air Pressure System's Automatic Water Draining
353
Adjusting Engine Valves
355
Filling the Air Pressure System Antifreeze Container
355
Running the Transmission Automatic Calibration
355
Maintenance Every 1200 Hours or Yearly
355
Changing Oil in the Hydraulic System
355
Changing Oil in the Front Axle Differential
357
Changing Oil in the Front Axle Hubs
358
Changing the Fuel Filter
358
Changing the Fuel Prefilter
359
Changing Engine Air Filters
361
Changing the Selective Catalytic Reduction System Supply Module Main Filter
363
Checking the Front Wheel Toe-In
364
Adjusting the Front Wheel Toe-In
365
Changing the Hydraulic Breather
365
Changing Oil in the Transmission System
366
Checking the Power Shuttle Operation
366
Maintenance Every 2400 Hours or Every Other Year
366
Changing the Transmission Breather
368
Cleaning the Suction Strainer
368
Bleeding the Brake System
369
Bleeding the Front Axle Brake System
371
Cleaning the Cooling System
372
Checking the Engine Vibration Damper
374
Maintaining the Air Conditioning
375
Checks and Adjustments
375
Changing Tyres
375
Setting the Tyre Parameter
376
Tyre Parameters
377
Calibrating Speed Sensors
378
Track Widths
380
Front Axle Track Widths
381
Rear Axle Track Widths
381
Using Chains
382
Using Twin-Mounted Wheels
382
Bleeding the Fuel System
383
Engine
383
Checking the Battery
384
Electrical System
384
Safety Precautions for the Electrical System
384
Alternator
385
Protecting the Electrical System before Welding
385
Fuses and Relays
386
Fuses and Relays in the Cab Electric Centre
386
Fuses and Relays in the Roof Electric Centre
394
Fuses and Relays in the Main Electric Centre
397
Fuses and Relays in the Engine Electric Centre
399
Adjusting Headlights
401
Changing the Rear Power Take-Off Shaft
402
Power Transmission System
402
Adjusting the Steering Angle
403
Checking the Transmission Ratio of a Power Take-Off Driven Trailer
403
Steering System
403
Calibrating the Steering Angle
404
Cab and Shields
406
Cleaning the Cab Ventilation Air Filter
406
Adjusting Steps for Driving Off-Road
407
Checking and Adjusting Front Mudguards
408
Adjusting Flexible Front Mudguards
409
Adjusting Lifting Links of the Pick-Up Hitch
410
Towing Devices
410
Maintaining the Automatic Jaw of the Wagon Towing Device
411
5 Troubleshooting
412
Handling Error Situations
412
Warnings on the Proline Instrument Panel Display
412
Identifying a Blocked Transmission or Hydraulic System Filter
413
Viewing Service Codes
415
Viewing the IO-List
415
Automatic Air Conditioning Error Codes
417
Steering System Malfunctions
417
Towing the Tractor
418
Towing the Tractor When the Engine Is Running
418
Towing the Tractor When the Engine Is Not Running
419
6 Technical Specifications
420
Dimensions
420
Weights
420
Maximum Permissible Axle Loading
420
Tyres
420
Wheel Nut Tightening Torques
421
Wheel Stud Dimensions
421
Tyre Loadings and Pressures
422
Flange Distance for Axles
422
Track Widths
423
Rear Axle Track Widths
423
Front Axle Track Widths
425
Engine
425
Engine Lubrication System
426
Fuel System
426
Selective Catalytic Reduction System
426
Air Cleaner
427
Cooling System
427
Electrical System
427
Power Transmission
428
Power Shuttle
428
Clutch
428
Gearbox
428
Rear Axle Differential Lock
428
Rear Power Take-Off
429
Lower Link End Distance from Rear Power Take-Off Shaft
429
Rear Power Take-Off Alternatives
429
Rear Power Take-Off Ratios
429
Rear Power Take-Off Shafts
429
Proportional Ground Speed Power Take-Off
430
Front Power Take-Off
430
Front Power Take-Off Ratios
430
Front Power Take-Off Shafts
430
Brake System
430
Steering System
431
Front Axle
431
Turning Circle Radius
432
Front Axle Air Suspension
432
Cab and Shields
433
Cab Filter Capacity
433
Windscreen Washer
433
Air Conditioning System
433
Noise Level
433
Exposure to Vibration
433
Hydraulic System
434
Low-Pressure Circuit
434
Steering Hydraulic Circuit
434
Working Hydraulic Circuit
434
Valves for Auxiliary Hydraulics
435
Counter Pressure When Using the Return Connection for Auxiliary Hydraulics
436
Rear Linkage
436
Lifting Forces and Lifting Ranges
436
Front Linkage
437
Towing Devices
437
Euro Pick-Up Hitch
437
Pick-Up Hitch
437
Hydraulic Pick-Up Hitch
438
Agricultural Towing Device
439
Towing Device Frames
440
Alphabetical Index
442
Advertisement
Advertisement
Related Products
Valtra T Series
Valtra T214
Valtra T174
Valtra T2 Versu Series
Valtra T132 V
Valtra T162e V
Valtra T152 V
Valtra T182 V
Valtra T202 V
Valtra HiTech T3 Series
Valtra Categories
Tractor
Farm Equipment
More Valtra Manuals
Login
Sign In
OR
Sign in with Facebook
Sign in with Google
Upload manual
Upload from disk
Upload from URL