Sign In
Upload
Manuals
Brands
Thermo Scientific Manuals
Laboratory Equipment
Orbitrap ID-X
Thermo Scientific Orbitrap ID-X Manuals
Manuals and User Guides for Thermo Scientific Orbitrap ID-X. We have
2
Thermo Scientific Orbitrap ID-X manuals available for free PDF download: Getting Started Manual
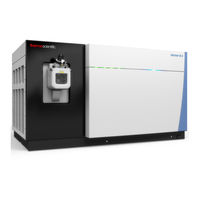
Thermo Scientific Orbitrap ID-X Getting Started Manual (116 pages)
Orbitrap Tribrid Series
Brand:
Thermo Scientific
| Category:
Laboratory Equipment
| Size: 4.32 MB
Table of Contents
Table of Contents
7
Preface
13
Accessing Documentation
13
Viewing the Product Manuals
14
Accessing the Help Menu Options
14
Viewing Online User Documentation
14
Providing Documentation Feedback
15
License for the 1M Option
15
Special Notices, Symbols, and Cautions
15
Model Differences
17
Contacting Us
18
Chapter 1 Introduction
19
Introduction
19
Ionization Techniques
19
H-ESI Mode
20
APCI Mode
21
APPI Mode
22
LC Flow Rate Ranges
22
NSI Mode
22
Types of Buffers
24
Templates in Thermo Xcalibur Instrument Setup (Method Editor)
25
Chapter 2 Setting up the Ion Source
27
Preparing the Mass Spectrometer
27
Installing the Ion Source
29
Figure 1. MS Ion Source Mount Assembly and Ion Sweep Cone
29
Preparing the Spray Insert for the Ion Source
30
Installing the Spray Insert
30
Spray Insert Positions
31
Adjusting the Spray Direction
32
Removing the Ion Source
33
Installing the NSI Source
33
Chapter 3 Connecting the Inlet Plumbing
35
Guidelines for PEEK Fittings and Tubing
35
Setting up the Syringe and Syringe Pump
36
Figure 2. Proper Connection for the PEEK Tubing and Fitting
36
Plumbing Schematics for the Sample Introduction Techniques
38
Figure 3. Schematics of the Sample Introduction Techniques (Examples)
38
Setting up the Inlet Plumbing for the Sample Introduction Techniques
39
Setting up the Inlet for Direct Infusion
39
Setting up the Inlet for HPLC with an Autosampler
40
Setting up the Inlet for High-Flow Infusion Without an Autosampler
41
Setting up the Inlet for Loop Injections (Flow-Injection Analysis)
42
Connecting the Grounding Union to the H-ESI Spray Insert
44
Figure 4. Plumbing Connections for the Grounding Union (H-ESI Mode)
44
Chapter 4 Preparing the System for Calibration
45
Setting up the Syringe Pump for Direct Infusion
45
Setting up the Mass Spectrometer for Calibration
46
Figure 5. Syringe Pump Settings Box
47
Chapter 5 Establishing a Stable Ionization Spray
49
Evaluating the Spray Stability
49
Figure 6. Plot Chromatogram Dialog Box with the TIC Option Selected
50
Optimizing the Ion Source Parameters
51
Figure 7. Optimization Page of the Ion Source Pane
52
Figure 8. Report Generation Options Dialog Box
52
Chapter 6 Calibrating the Mass Spectrometer in H-ESI Mode
55
Calibration Solution Peak Values
56
Peak Values for the Traditional Calibration Solutions
56
Figure 9. Traditional N-Butylamine Calibration Solution's Normal Mass-Range Spectrum
57
Figure 10. Traditional Ultramark 1621 Calibration Solution's Normal Mass-Range Spectrum in Negative Ion Polarity Mode
57
Peak Values for the Pierce Flexmix Calibration Solution
58
Figure 11. Flexmix Calibration Solution's Low-Mass Range Spectrum in Positive Ion
59
Figure 12. Flexmix Calibration Solution's Low-Mass Range Spectrum in Negative Ion
59
Figure 13. Flexmix Solution's Normal-Mass Range Spectrum in Positive Ion Polarity
60
Figure 14. Flexmix Solution's Normal-Mass Range Spectrum in Negative Ion Polarity
60
Figure 15. Flexmix Solution's High-Mass Range Spectrum in Positive Ion Polarity
61
Figure 16. Flexmix Solution's High-Mass Range Spectrum in Negative Ion Polarity
61
Running the Calibration Procedures
62
Figure 17. Calibration Pane
62
Chapter 7 Using Tune to Acquire Sample Data
65
Setting up the LC/MS System for Analyte Optimization
65
Setting up the Inlet
66
Configuring the Syringe Pump
66
Figure 18. Syringe Pump Settings Box
66
Configuring the LC Pump
67
Configuring the Ion Source for Reserpine (Example)
67
Setting the Instrument's Optimal Pressure
68
Defining the Scan Parameters for Precursor Optimization
68
Defining the MS/MS Scan Parameters for Precursor Optimization
68
Optimizing the Isolation Window
69
Figure 19. CID-MS/MS Scan Spectrum with Fragmentation (Reserpine Example)
70
Optimizing the Ion Source Parameters on an Analyte
71
Optimizing the Fragmentation Parameters
71
Defining the Scan Parameters for an MS 3 Scan
72
Acquiring a Data File by Using the Tune Application
73
Figure 20. CID-MS 3 Scan Spectrum with Fragmentation (Reserpine Example)
73
Figure 21. Data Acquisition Pane in the Tune Window
74
Chapter 8 Using the Xcalibur Data System to Acquire Data
75
Selecting the External Start Instrument
76
Figure 22. Run Sequence Dialog Box (Partial) Showing the Selected Start Instrument
76
Acquiring a Data File by Using the Xcalibur Data System
77
Figure 23. Change Instruments in Use Dialog Box Showing the MS as the Start
77
Appendix A Using Basic Tune Functions
79
Opening the Tune Window
80
Figure 24. Orbitrap Fusion Lumos Tune Window Showing the Define Scan Pane
80
Setting the Instrument System Controls
81
Setting the Instrument Power Mode
82
Checking the Instrument Readback Status
83
Setting the Tune Preferences
84
Using the MS N Setting Table in the Define Scan Pane
85
Importing a Mass List from a File
85
Exporting a Mass List to a File
85
Modifying Rows in the MS N Setting Table
86
Adding or Removing Scan Parameters from the MS Setting Table
87
Using the History Pane
88
Using the Favorites Pane to Save System Settings
88
Saving a Favorite State
88
Loading a Favorite State
89
Applying a Favorite State
89
Deleting a Favorite State
89
Renaming a Favorite State
89
Appendix B Flushing the Inlet Components
91
Supplies
92
Flushing the Inlet Components after Calibration
93
Appendix C Preparing the Reserpine Sample Solution
95
Appendix D Preparing the High Mass Range Calibration Solution
97
Supplies
97
Guidelines
99
Preparing the Enfuvirtide Calibration Solution
99
Preparing the 0.15% Ammonium Hydroxide Solution
99
Preparing the 0.15% Ammonium Hydroxide/Acn-50:50 Solution
100
Preparing the Enfuvirtide Stock Solution
100
Preparing the 0.1% Acetic Acid/Acn-50:50 Solution
101
Preparing the Enfuvirtide Final Solution
101
Appendix E Installation Kits
103
Orbitrap Tribrid Series Chemicals Kit
103
Calibration Kit
104
Performance Specification Kit
105
Glossary
107
Index
113
Advertisement
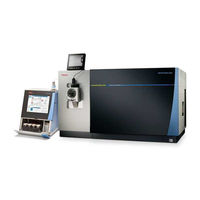
Thermo Scientific Orbitrap ID-X Getting Started Manual (42 pages)
Orbitrap Tribrid Series
Brand:
Thermo Scientific
| Category:
Measuring Instruments
| Size: 3.35 MB
Table of Contents
Table of Contents
7
Preface
9
Accessing Documentation
10
Providing Documentation Feedback
10
Viewing Online User Documentation
10
Viewing the Product Manuals
10
Special Notices, Symbols, and Cautions
11
Model Differences
12
Contacting Us
13
Chapter 1 Connecting the Forepump for the Vacuum System
16
Connecting the Forepumps to the Mass Spectrometer
16
Connecting the Forepumps to the Lab Exhaust System
17
Locking the Workbench Wheels
18
Chapter 2 Connecting the Nitrogen and Helium Gases
20
Connecting the Instrument Gas Lines
20
Chapter 3 Connecting the API Source and Waste Container
24
Setting up the Fume Exhaust Connections
24
Connecting the Solvent Waste Container
25
Chapter 4 Installing the Syringe Pump and Modular Valve
27
Chapter 5 Connecting the Cables and Power Cords
29
Chapter 6 External Devices
33
Communication Connectors
34
Syringe Pump and Modular Valve Assembly
35
Single Mechanical Pump Kit
36
Dual Mechanical Pumps Kit
37
Advertisement
Related Products
Thermo Scientific Orbitrap Fusion Lumos MS
Thermo Scientific Orbitrap Fusion MS
Thermo Scientific Orbitrap Fusion Lumos
Thermo Scientific Orbitrap Fusion
Thermo Scientific Orion 960
Thermo Scientific Orion ROSS Ultra
Thermo Scientific Orion ROSS Ultra Triode
Thermo Scientific Orion ROSS
Thermo Scientific Heratherm OGS 100
Thermo Scientific Heratherm OGS 180
Thermo Scientific Categories
Laboratory Equipment
Measuring Instruments
Accessories
Freezer
Refrigerator
More Thermo Scientific Manuals
Login
Sign In
OR
Sign in with Facebook
Sign in with Google
Upload manual
Upload from disk
Upload from URL