Sign In
Upload
Manuals
Brands
Sony Manuals
Camcorder
DCR-TRV33 PIXELA ImageMixer v1.5
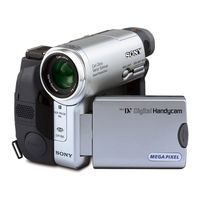
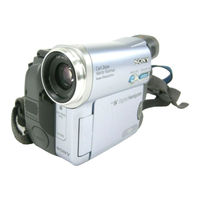
Sony DCR-TRV33 PIXELA ImageMixer v1.5 Manuals
Manuals and User Guides for Sony DCR-TRV33 PIXELA ImageMixer v1.5. We have
7
Sony DCR-TRV33 PIXELA ImageMixer v1.5 manuals available for free PDF download: Operating Instructions Manual, Service Manual, Instruction Manual
Sony DCR-TRV33 PIXELA ImageMixer v1.5 Operating Instructions Manual (260 pages)
Digital Video Camera Recorder
Brand:
Sony
| Category:
DVR
| Size: 43.05 MB
Table of Contents
Main Features
4
Table of Contents
6
Quick Start Guide - Recording on Tape
8
Connecting the Power Cord
8
Inserting the Cassette
8
To Eject the Cassette
8
Recording a Picture on the Tape
9
Monitoring the Playback Picture on the LCD Screen
9
Inserting the Memory Stick
10
While the Access Lamp Is Lit or Flashing
10
Recording Still Images on the Memory Stick
11
Monitoring the Playback Still Image on the LCD Screen
11
Precautions on Camcorder Care
14
Checking Supplied Accessories
15
Preparing the Power Source
16
Installing the Battery Pack
16
To Remove the Battery Pack
16
Charging the Battery Pack
17
Charging Time
18
Recording Time
19
Playing Time
20
Checking Status of Battery Pack - Battery Info
20
Connecting to a Wall Outlet
21
Setting the Date and Time
22
To Return to FN
22
Using the Touch Panel
23
Operation Buttons on each Display
24
Recording a Picture
25
To Enable Smooth Transition
26
Indicators Displayed During Recording
27
Remaining Battery Time Indicator During Recording
27
Time Code
27
Recording Data
27
After Recording
28
Adjusting the LCD Screen
28
When Monitoring on the LCD Screen
28
Shooting with the Mirror Mode
29
Adjusting the Brightness of the LCD Screen
30
Adjusting the Viewfinder
31
Using the Zoom Features
32
Shooting Backlight Subjects - Back Light Function
33
To Cancel the Back Light Function
33
Shooting in the Dark
34
Using Nightshot
34
Using Super Nightshot
34
Using Nightshot Light
34
Using Color Slow Shutter
35
Checking Recordings
37
End Search
37
Edit Search
38
Rec Review
38
Playing Back Tape
39
To Display the Screen Indicators - Display Function
40
About Date/Time and Various Settings
40
Using the Remote Commander
41
Various Playback Modes
42
Video Control Buttons
43
When You Play Back the Tape in Reverse
43
Slow Playback
43
Viewing a Recording on TV
44
If Your TV Is Already Connected to the VCR
44
If Your TV or VCR Is a Monaural Type
44
During Tape Recording Standby
46
During Tape Recording
46
Recording a Still Image on a Tape
48
Tape Photo Recording
48
Self-Timer Recording
50
Recording on the Tape
50
Recording Images
51
Adjusting the White Balance Manually
52
Using the Wide Mode
53
Using the Fader Function
55
Using Special Effects - Picture Effect
58
Shutter Speed
61
Using Program AE
62
Adjusting the Exposure Manually
64
Using Spot Light-Metering Function
65
Focusing Manually
66
Spot Focus
67
Interval Recording
68
Frame Recording
69
Using the Viewfinder
70
Playing Back Tape with Picture Effect
72
Playing Back Tape with Digital Effect
73
Enlarging Images Recorded on Tape
74
Quickly Locating a Scene
75
Searching the Boundaries of Recorded Tape by Title
76
Title Search
76
Date Search
77
Searching for the Date Without Using Cassette Memory
78
Searching for a Photo by Using Cassette Memory
79
Searching for a Photo Without Using Cassette Memory
79
Scanning Photo
80
Dubbing Tape
81
Connecting
81
Dubbing
82
When You Have Finished Dubbing the Tape
82
Dubbing Only Desired Scenes - Digital Program Editing
84
Connecting to the VCR
84
Setting the VCR to Operate
85
Adjusting the Synchronization of the VCR
88
Making a Program
90
To Finish Marking Programs
90
Erasing the Program Your Have Set
91
Erasing All Programs
91
Performing Digital Program Editing
92
When the Program Has Not Been Set
92
Recording Video or TV Programs
93
Connecting a VCR or TV
93
Inserting a Scene from a VCR
95
Audio Dubbing
97
Preparing for Audio Dubbing
97
Dubbing with the Built-In Microphone
97
Connecting the Microphone to the MIX Jack
97
Connecting the Microphone to the Intelligent Accessory Table
98
Adding an Audio Sound on the Recorded Tape
99
Monitoring the New Recorded Sound
100
Superimposing a Title on a Cassette with Cassette Memory
101
Eraasing a Title
102
Making Your Own Titles
103
Labeling a Cassette on a Cassette with Cassette Memory
104
Erasing All the Data in Cassette Memory
105
Using Memory Stick
106
File Format
106
To Prevent from Erasing Images Accidentally
106
Ejecting the Memory Stick
109
Selecting Image Quality and Size
110
Selecting Still Image Quality
110
Selecting the Still Image Size
111
Selecting the Moving Picture Size
112
Recording Images Continuously
116
Recording an Image from Tape as a Still Image
118
Recording a Still Image from Other Equipment
119
Recording a Superimposed Image to the Tape
121
Recording a Still Image
127
Recording a Moving Picture
127
Recording a Moving Picture from Other Equipment
129
Making the Program
130
Performing the Program
132
To Stop Dubbing
132
Changing the Recording Folder
133
Creating a New Folder
133
Selecting the Recording Folder
134
Viewing a Still Image - Memory Photo Playback
135
Screen Indicators During Still Image Playback
135
Playing Back 6 Recorded Images at a Time
136
Viewing a Moving Picture
137
Playing Back a Picture from a Particular Segment
137
Deleting Selected Images
143
Deleting Selected Images on the Index Screen
144
Deleting All the Images
145
Changing Images Size - Resize
146
Writing a Print Mark
147
Viewing Images with a Computer
148
Viewing Pictures Recorded on the Tape
148
When Connecting to a Computer with the DV Port
149
When Connecting to a Computer with the USB Port
149
Notes on Using Your Computer
150
Installing Imagemixer
155
Making the Computer Recognize Your Camcorder
156
If You Cannot Install the USB Driver
158
Capturing Images with Imagemixer
161
Viewing Images Without Image Transfer
168
Image File Storage Destinations and Image Files
169
Recommended Macintosh Environment
170
Installing the USB Driver
171
Viewing Images
172
When Finished, Disconnect the USB Cable and Remove the Memory Stick
172
Capturing Images from an Analog Video Unit on a Computer
173
Signal Convert Function
173
After Capturing Images and Sound
174
Changing the Menu Settings
175
Selecting the Mode Setting of each Item
176
When You Select Image Quality
179
Notes on Formatting
180
Types of Trouble and How to Correct Trouble
186
During Playback
188
During Recording and Playback
189
When Operating Using the Memory Stick
190
Others
192
Self-Diagnosis Display
194
Warning Indicators
195
Warning Indicator as to File
195
The Battery Pack Is Dead or Nearly Dead
195
Moisture Condensation Has Occured
195
Warning Messages
196
Usable Cassettes
197
Selecting Cassette Types
197
Copyright Signal
197
When You Play Back
197
Audio Mode
198
When You Play Back a Dual Sound Track Tape
198
Notes on the Cassette
198
To Prevent Accidental Erasure
198
When the Cassette Memory Function Does Not Work
199
Cleaning Gold-Plated Connector
199
About the Infolithium Battery Pack
200
Effective Use of the Battery Pack
200
Remaining Battery Time Indicator
201
How to Store the Battery Pack
201
Battery Life
201
About I.link
202
What Is I.link?
202
I.link Baud Rate
202
I.link Functions on this Unit
203
Required I.link Cable
203
Using Your Camcorder Abroad
204
Simple Setting of Clock by Time Difference
204
Maintenance Information and Precautions
205
Moisture Condensation
205
If Moisture Condensation Has Occured
205
Maintenance Information
206
Cleaning the Video Head
206
Cleaning the LCD Screen
206
Removing Dust from Inside the Viewfinder
206
Charging the Built-In Rechargeable Battery
207
Adjusting the LCD Screen (Calibration)
207
Precautions
208
Camcorder Operation
208
On Handling the Tape
208
Camcorder Care
208
AC Adaptor
209
About Care and Storage of the Lens
209
Rechargeable Battery Pack
209
Note on Dry Batteries
210
If Batteries Are Leaking
210
Specifications
211
Identifying Parts and Controls
213
Attaching the Supplied Lens Cap
213
Remote Commander
217
To Prepare the Remote Commander
217
Operation Indicators
218
LCD Screen and Viewfinder
218
Index
219
Contents
223
Recharging
226
Batteries/Chargers
227
Lenses/Filters
231
Lights/Microphone
235
Convergence
237
Memory Stick Media & Interface Adaptors
241
Advertisement
Sony DCR-TRV33 PIXELA ImageMixer v1.5 Operating Instructions Manual (220 pages)
Digital Video Camera Recorder
Brand:
Sony
| Category:
Camcorder
| Size: 5.36 MB
Table of Contents
Digital Video Camera
1
Operating Instructions
1
Declaration of Conformity
3
Main Features
4
Table of Contents
6
Recording on Tape
8
Recording a Picture on the Tape
9
Quick Start Guide
10
(DCR-TRV22/TRV33 Only)
10
Recording Still Images on the "Memory Stick
11
Getting Started
12
Using this Manual
12
Precautions on Camcorder Care
14
Checking Supplied Accessories
15
Step 1 Preparing the Power Source
16
Installing the Battery Pack
16
Charging the Battery Pack
17
Charging Time
18
Recording Time
19
Checking Status of Battery Pack - Battery Info
20
Connecting to a Wall Outlet
21
Step 2 Setting the Date and Time
22
Step 3 Using the Touch Panel
23
Recording - Basics
25
Recording a Picture
25
Indicators Displayed During Recording
27
Adjusting the Lcd Screen
28
Shooting with the Mirror Mode
29
Adjusting the Brightness of the Lcd Screen
30
Adjusting the Viewfinder
31
Digital Zoom (P
32
Shooting Backlit Subjects - Back Light Function
33
Shooting in the Dark - Nightshot/Super Nightshot/Color Slow Shutter
34
Checking Recordings - End Search/Edit Search/Rec Review
37
Edit Search
38
Rec Review
38
Playback - Basics
39
Playing Back Tape
39
To Display the Screen Indicators - Display Function
40
Various Playback Modes
42
Viewing a Recording on TV
44
Advanced Recording Operations
46
Recording Still Images on "Memory Stick" During Tape Recording Standby or Tape Recording (DCR-TRV22/TRV33 Only)
46
Recording a Still Image on a Tape - Tape Photo Recording (DCR-TRV19 Only)
48
Self-Timer Recording
50
Adjusting the White Balance Manually
52
Using the Wide Mode
53
Using the Fader Function
55
Using Special Effects - Picture Effect
58
Using Special Effects - Digital Effect (DCR-TRV22/TRV33 Only)
59
Using PROGRAM AE
62
Adjusting the Exposure Manually
64
Using Spot Light-Metering Function - Flexible Spot Meter
65
Focusing Manually
66
Using Spot Focus Function - Spot Focus
67
Interval Recording
68
Frame by Frame Recording - Frame Recording
69
Using the Viewfinder
70
Advanced Playback Operations
72
Playing Back Tape with Picture Effect
72
Playing Back Tape with Digital Effect (DCR-TRV22/TRV33 Only)
73
Enlarging Images Recorded on Tape - Tape PB ZOOM (DCR-TRV22/TRV33 Only)
74
Quickly Locating a Scene - Zero Set Memory
75
Searching the Boundaries of Recorded Tape by Title - Title Search
76
Searching a Recording by Date - Date Search
77
Searching for the Date Without Using Cassette Memory
78
Searching for a Photo - Photo Search/Photo Scan (DCR-TRV19 Only)
79
Scanning Photo
80
Editing
81
Dubbing Tape
81
Dubbing Only Desired Scenes - Digital Program Editing (on Tape)
84
Recording Video or TV Programs
93
Inserting a Scene from a VCR - Insert Editing
95
Inserting a Scene from a Vcr – Insert Editing
96
Audio Dubbing
97
Monitoring the New Recorded Sound
100
Superimposing a Title on a Cassette with Cassette Memory
101
Erasing a Title
102
Making Your Own Titles
103
Labeling a Cassette on a Cassette with Cassette Memory
104
Erasing All the Data in Cassette Memory
105
?Memory Stick” Operations
106
Memory Stick" Operations (DCR-TRV22/TRV33 Only)
106
Using "Memory Stick
106
Inserting/Ejecting the "Memory Stick
109
Selecting Image Quality and Size
110
Selecting the Moving Picture Size
112
Still Images
113
Recording Still Images on "Memory Stick" - Memory Photo Recording
114
Recording an Image from Tape as a Still Image
118
Recording a Still Image from Other Equipment
119
Superimposing a Still Image in "Memory Stick" on an Image - MEMORY MIX
120
Interval Photo Recording
124
Recording Moving Pictures on "Memory Stick" - MPEG MOVIE Recording
125
Self-Timer Recording
127
Recording a Picture from Tape as a Moving Picture
128
Recording a Moving Picture from Other Equipment
129
Recording Edited Pictures from Tape as a Moving Picture - Digital Program Editing (on "Memory Stick")
130
Making the Program
130
Changing the Recording Folder
133
Viewing a Still Image - Memory Photo Playback
135
Viewing a Moving Picture - MPEG MOVIE Playback
137
Choosing a Playback Folder
139
Enlarging Still Images Recorded on "Memory Stick" - Memory PB ZOOM
140
Playing Back Images Continuously - Slide Show
141
Preventing Accidental Erasure - Image Protection
142
Deleting Images - DELETE
143
Deleting Selected Images on the Index Screen
144
Deleting All the Images
145
Changing Image Size - Resize (DCR-TRV33 Only)
146
Writing a Print Mark - Print Mark
147
Viewing Images with Your Computer
148
Viewing Images with a Computer - Introduction
148
Connecting Your Camcorder to a Computer Using the USB Cable (for Windows Users)
151
Installing the Usb Driver
153
Installing Imagemixer
155
If You Cannot Install the Usb Driver
158
Viewing Pictures Recorded on Tape on a Computer - USB Streaming (for Windows Users)
161
Viewing Images Recorded on "Memory Stick" on a Computer (for Windows Users) (DCR-TRV22/TRV33 Only)
167
Connecting Your Camcorder to a Computer Using the USB Cable (for Macintosh Users) (DCR-TRV22/TRV33 Only)
170
Viewing Images Recorded on "Memory Stick" on a Computer (for Macintosh Users) (DCR-TRV22/TRV33 Only)
172
Capturing Images from an Analog Video Unit on a Computer - Signal Convert Function (DCR-TRV22/TRV33 Only)
173
Customizing Your Camcorder
175
Changing the Menu Settings
175
Selecting the Mode Setting of each Item
176
Troubleshooting
186
Types of Trouble and How to Correct Trouble
186
During Playback
188
Self-Diagnosis Display
194
Warning Indicators
195
Warning Messages
196
Additional Information
197
Usable Cassettes
197
Audio Mode
198
About the "Infolithium" Battery Pack
200
Battery Life
201
About I.link
202
Using Your Camcorder Abroad
204
Maintenance Information and Precautions
205
Adjusting the Lcd Screen (Calibration)
207
About Care and Storage of the Lens
209
Specifications
211
Quick Reference
213
Identifying Parts and Controls
213
Remote Commander
217
Back Light (P
218
PROGRAM AE (P
218
Picture Effect (P
218
MEMORY MIX* (P
218
Index
219
Sony DCR-TRV33 PIXELA ImageMixer v1.5 Operating Instructions Manual (220 pages)
Digital Video Camera Recorder
Brand:
Sony
| Category:
Camcorder
| Size: 4.84 MB
Table of Contents
Main Features
4
Table of Contents
6
Recording on Tape
8
Quick Start Guide
10
(DCR-TRV22/TRV33 Only)
10
Getting Started
12
Using this Manual
12
Checking Supplied Accessories
15
Step 1 Preparing the Power Source
16
Installing the Battery Pack
16
Charging the Battery Pack
17
Checking Status of Battery Pack - Battery Info
20
Connecting to a Wall Outlet
21
Step 2 Setting the Date and Time
22
Step 3 Using the Touch Panel
23
Recording - Basics
25
Recording a Picture
25
Shooting Backlit Subjects - Back Light Function
33
Shooting in the Dark - Nightshot/Super Nightshot/Color Slow Shutter
34
Checking Recordings - End Search/Edit Search/Rec Review
37
Playback - Basics
39
Playing Back Tape
39
To Display the Screen Indicators - Display Function
40
Viewing a Recording on TV
44
Advanced Recording Operations
46
Recording Still Images on "Memory Stick" During Tape Recording Standby or Tape Recording (DCR-TRV22/TRV33 Only)
46
Recording a Still Image on a Tape - Tape Photo Recording (DCR-TRV19 Only)
48
Self-Timer Recording
50
Adjusting the White Balance Manually
52
Using the Wide Mode
53
Using the Fader Function
55
Using Special Effects - Picture Effect
58
Using Special Effects - Digital Effect (DCR-TRV22/TRV33 Only)
59
Using PROGRAM AE
62
Adjusting the Exposure Manually
64
Using Spot Light-Metering Function - Flexible Spot Meter
65
Focusing Manually
66
Using Spot Focus Function - Spot Focus
67
Interval Recording
68
Frame by Frame Recording - Frame Recording
69
Using the Viewfinder
70
Advanced Playback Operations
72
Playing Back Tape with Picture Effect
72
Playing Back Tape with Digital Effect (DCR-TRV22/TRV33 Only)
73
Enlarging Images Recorded on Tape - Tape PB ZOOM (DCR-TRV22/TRV33 Only)
74
Quickly Locating a Scene - Zero Set Memory
75
Searching the Boundaries of Recorded Tape by Title - Title Search
76
Searching a Recording by Date - Date Search
77
Searching for a Photo - Photo Search/Photo Scan (DCR-TRV19 Only)
79
Editing
81
Dubbing Tape
81
Dubbing Only Desired Scenes - Digital Program Editing (on Tape)
84
Recording Video or TV Programs
93
Inserting a Scene from a VCR - Insert Editing
95
Audio Dubbing
97
Superimposing a Title on a Cassette with Cassette Memory
101
Making Your Own Titles
103
Labeling a Cassette on a Cassette with Cassette Memory
104
Erasing All the Data in Cassette Memory
105
Memory Stick" Operations (DCR-TRV22/TRV33 Only)
106
Using "Memory Stick
106
Inserting/Ejecting the "Memory Stick
109
Selecting Image Quality and Size
110
Recording Still Images on "Memory Stick" - Memory Photo Recording
114
Recording an Image from Tape as a Still Image
118
Superimposing a Still Image in "Memory Stick" on an Image - MEMORY MIX
120
Interval Photo Recording
124
Recording Moving Pictures on "Memory Stick" - MPEG MOVIE Recording
125
Self-Timer Recording
127
Recording a Picture from Tape as a Moving Picture
128
Recording Edited Pictures from Tape as a Moving Picture - Digital Program Editing (on "Memory Stick")
130
Changing the Recording Folder
133
Viewing a Still Image - Memory Photo Playback
135
Viewing a Moving Picture - MPEG MOVIE Playback
137
Choosing a Playback Folder
139
Enlarging Still Images Recorded on "Memory Stick" - Memory PB ZOOM
140
Playing Back Images Continuously - Slide Show
141
Preventing Accidental Erasure - Image Protection
142
Deleting Images - DELETE
143
Changing Image Size - Resize (DCR-TRV33 Only)
146
Writing a Print Mark - Print Mark
147
Viewing Images with Your Computer
148
Viewing Images with a Computer - Introduction
148
Connecting Your Camcorder to a Computer Using the USB Cable (for Windows Users)
151
Viewing Pictures Recorded on Tape on a Computer - USB Streaming (for Windows Users)
161
Viewing Images Recorded on "Memory Stick" on a Computer (for Windows Users) (DCR-TRV22/TRV33 Only)
167
Connecting Your Camcorder to a Computer Using the USB Cable (for Macintosh Users) (DCR-TRV22/TRV33 Only)
170
Viewing Images Recorded on "Memory Stick" on a Computer (for Macintosh Users) (DCR-TRV22/TRV33 Only)
172
Capturing Images from an Analog Video Unit on a Computer - Signal Convert Function (DCR-TRV22/TRV33 Only)
173
Customizing Your Camcorder
175
Changing the Menu Settings
175
Troubleshooting
186
Types of Trouble and How to Correct Trouble
186
Self-Diagnosis Display
194
Warning Indicators
195
Warning Messages
196
Additional Information
197
Usable Cassettes
197
About the "Infolithium" Battery Pack
200
About I.link
202
Using Your Camcorder Abroad
204
Maintenance Information and Precautions
205
Specifications
211
Quick Reference
213
Identifying Parts and Controls
213
Index
219
Advertisement
Sony DCR-TRV33 PIXELA ImageMixer v1.5 Service Manual (229 pages)
DIGITAL VIDEO CAMERA RECORDER
Brand:
Sony
| Category:
Camcorder
| Size: 6.22 MB
Sony DCR-TRV33 PIXELA ImageMixer v1.5 Service Manual (96 pages)
Digital Video Camera Recorder
Brand:
Sony
| Category:
Camcorder
| Size: 9.03 MB
Table of Contents
Memory Stick
2
Specifications
2
Table of Contents
4
Service Note
6
Power Supply During Repairs
6
To Take out a Cassette When Not Eject
6
Self-Diagnosis Function
7
Self-Diagnosis Display
7
Self-Diagnosis Code Table
8
Disassembly
9
P Cabinet (C) Assembly
11
Cabinet (R) Cover (40E) Assembly
12
F Panel Section
13
Board
13
Cabinet (R) Section
15
Lcd Section
16
Board,Control Switch Block
16
(Cf-Cx4000)
16
Board, Lcd Unit
17
Hinge (40) Assembly
18
Bt Panel/Evf Section
19
Va-118 Board, Lens Section
23
Board
23
Mechanism Deck, VC-313 Board (1)
24
CD-431 Board
24
Mechanism Deck, VC-313 Board (2)
25
Cabinet (G) Assembly (40E)
25
Control Switch Block (Fk-Cx4000)
26
Board
26
Circuit Boards Location
28
Flexible Boards Location
29
Cabinet R Section
31
Block Diagrams
33
Overall Block Diagram (1/4)
33
Overall Block Diagram (2/4)
33
Overall Block Diagram (3/4)
33
Overall Block Diagram (4/4)
33
Power Block Diagram (1/2)
33
Power Block Diagram (2/2)
33
Printed Wiring Boards and Schematic Diagrams
40
Frame Schematic Diagram (1/3)
41
Frame Schematic Diagram (2/3)
41
Frame Schematic Diagram (3/3)
42
Schematic Diagrams
43
Control Switch Block (Fk-Cx4000)
43
Schematic Diagram
44
Schematic Diagram
45
Printed Wiring Boards
55
Printed Wiring Board
59
Printed Wiring Board
60
Flexible Board
63
Rgb Drive, Tg, Hi Control, Y/Psensor Amp, Connector, DC/DC Coverter, Power In, Charge) Printed Wiring Board
64
Printed Wiring Board
69
Pages from 4-85 to 4-88 Are Not Shown
69
Waveforms of the VC-313 Board Are Not Shown
70
Pages 4-91 and 4-92 Are Not Shown
70
Mounted Parts Location
71
Is Not Shown
72
Repair Parts List
73
Exploded Views
73
Overall Section
73
F Panel Section
73
Main Chassis Section
73
Lens Section
73
Cabinet L Section
73
Bt Panel/Evf Section
73
Cabinet R Section
73
Lcd Section
73
Mechanical Chassis Block Assembly
85
Electrical Parts List
86
Pages from 5-21 to 5-26 Are Not Shown
92
Revision History
96
Sony DCR-TRV33 PIXELA ImageMixer v1.5 Service Manual (34 pages)
DIGITAL VIDEO CAMERA RECORDER, LEVEL 3
Brand:
Sony
| Category:
Camcorder
| Size: 6.43 MB
Table of Contents
Table of Contents
3
Schematic Diagrams
4
Schematic Diagram
15
Schematic Diagram
18
Schematic Diagram
19
VC-313
20
Schematic Diagram
22
Schematic Diagram
23
VC-313
25
Printed Wiring Boards
25
Mounted Parts Location
25
Repair Parts List
27
Electrical Parts List
27
Sony DCR-TRV33 PIXELA ImageMixer v1.5 Instruction Manual (2 pages)
Digital Camcorders: Digital Handycam Camcorder
Brand:
Sony
| Category:
Camcorder
| Size: 0.16 MB
Advertisement
Related Products
Sony Handycam DCR-TRV330E
Sony DCR-TRV33E
SONY HANDYCAM DCR-TRV330
Sony Handycam DCR-TRV325E
Sony D8 Digital Handycam DCR-TRV310E
Sony Handycam DCR-TRV355
Sony DCR-TRV340 - Digital8 Camcorder w/ 2.5" LCD USB Streaming
Sony Digital Handycam DCR-TRV310
Sony DCR-TRV360 - Digital Video Camera Recorder
Sony DCR-TRV310P
Sony Categories
Laptop
TV
CD Player
Camcorder
Digital Camera
More Sony Manuals
Login
Sign In
OR
Sign in with Facebook
Sign in with Google
Upload manual
Upload from disk
Upload from URL