Sign In
Upload
Manuals
Brands
Singer Manuals
Sewing Machine
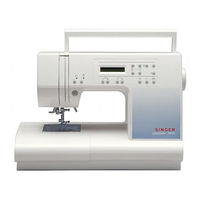
QUANTUM 9910
User Manuals: Singer QUANTUM 9910 Sewing Machine
Manuals and User Guides for Singer QUANTUM 9910 Sewing Machine. We have
6
Singer QUANTUM 9910 Sewing Machine manuals available for free PDF download: Instruction Manual, Workbook, Service Manual, Spare Parts List
Singer QUANTUM 9910 Instruction Manual (80 pages)
Brand:
Singer
| Category:
Sewing Machine
| Size: 1.99 MB
Table of Contents
Important Safety Instructions
2
Table of Contents
3
Consignes de Sécurité Importantes
4
Normas de Seguridad Importantes
6
Model 9910
8
For European and Similar Territories
8
Modèle 9910
9
Pour Les Territoires Européens Et Assimilés
9
Modelo 9910
9
Para Europa y Territorios Equiparables
9
Main Parts
10
Pièces Principales
11
Partes Principales
11
Accessories
12
Dust Cover
12
Accessoires
13
Housse de Protection Souple
13
Accesorios
13
Cubierta
13
Extension Table
14
Removing the Extension Table
14
Opening the Accessory Case
14
Changing the Presser Foot
14
Removing the Presser Foot Holder
14
Plateau D'extension
15
Dégager Le Plateau D'extension
15
Ouvrir Le Compartiment Àaccessoires
15
Changement de Pied Presseur
15
Changer de Pied Presseur
15
Ôter Le Support du Pied Presseur
15
Extensión
15
Retirada de la Extensión
15
Apertura del Compartimento de Accesorios
15
Cómo Cambiar el Prensatelas
15
Inserting the Needle
16
Fabric, Thread and Needle Table
16
Mise en Place de L'aiguille
17
Tableau des Tissus, Fils Et Aiguilles
17
Inserción de la Aguja
17
Tabla de Tejidos, Hilos y Agujas
17
Connecting the Machine
18
Branchement de la Machine
19
Conexión de la Máquina
19
Function of each Part
20
Reverse Stitch Button
20
Needle Up/Down Button
20
Twin Needle Button
20
Presser Foot Lifter
20
Drop Feed Lever
20
Pressure Regulator
20
Hand Wheel
20
Top Cover
20
Fonction des Pièces Et Touches
21
Touche de Marche Arrière
21
Touche de Positionnement de L'aiguille (Haut/Bas)
21
Touche de L'aiguille Jumelée
21
Releveur de Pied Presseur
21
Levier des Griffes
21
Régulateur de Pression
21
Volant
21
Carter Supérieur
21
Función de cada una de las Partes
21
Control Panel
22
Display
22
Contrast Control
22
Pattern Chart
22
Utility Stitch Button
22
Letter Stitch Button
22
Mirror Stitch Button
22
Pattern Selection Buttons
22
Stitch Memory, Clear and Check Buttons
22
Stitch Width, Length Button
22
Écran D'affichage
23
Écran Lcd
23
Molette de Réglage du Contraste
23
Tableau des Points
23
Touche des Points Utilitaires
23
Touche de Lettres
23
Touche Miroir
23
Touches de Sélection des Motifs
23
Touche de Mémorisation, D'annulation Et de Vérification
23
Touches de Largeur du Point Et de Longueur du Point
23
Bobbin Setting
24
Removing the Bobbin
24
Setting Spool of Thread on Spool Pin
24
Winding the Bobbin
24
Canette
25
Retirer la Canette
25
Mise en Place de la Bobine Sur la Tige À Bobine
25
Bobinage de la Canette
25
Ajuste de la Canilla
25
Cómo Sacar la Canilla
25
Colocación del Carrete de Hilo en el Portacarretes
25
Devanado de la Canilla
25
Inserting the Bobbin
26
Mise en Place de la Canette
27
Colocación de la Canilla
27
Threading the Machine
28
Preparing to Thread Machine
28
Setting Spool of Thread on Spool Pin
28
Threading the Upper Thread
28
Enfilage de la Machine
29
Préparation en Vue de L'enfilage
29
Mise en Place de la Bobine Sur la Tige À Bobine
29
Enfilage du Fil D'aiguille
29
Enhebrado de la Máquina
29
Preparación para Enhebrar la Máquina
29
Colocación del Carrete de Hilo en el Portacarretes
29
Enhebrado del Hilo Superior
29
Threading the Needle Eye
30
Drawing up the Bobbin Thread
30
Enfilage du Fil Dans Le Chas de L'aiguille
31
Remonter Le Fil de Canette
31
Enhebrado del Ojo de la Aguja
31
Extraccíon del Hilo de la Canilla
31
Starting to Sew
32
Start and End of Seam
32
Reverse Stitching
32
Début de la Couture
33
Début Et Fin de la Couture
33
Marche Arrière
33
Comenzar a Coser
33
Principio y Final de una Costura
33
Puntada en Retroceso
33
Turning Corners
34
Sewing Heavy Fabric
34
Sewing over Overlapped Areas
34
Width of Seam Allowance
34
Couture des Angles
35
Couture de Tissus Épais
35
Couture des Surépaisseurs
35
Largeur des Rabats
35
Cómo Girar en las Esquinas
35
Cómo Coser Tejidos Fuertes
35
Cómo Coser sobre Áreas Solapadas
35
Ancho del Margen de Costura
35
Adjusting the Thread Tensions
36
Réglage de la Tension du Fil
37
Ajuste de la Tensión de Los Hilos
37
Selecting Utility Stitch Patterns
38
Selecting the Pattern
38
Mirror Stitch
38
Setting Stitch Width and Length
38
Sélection des Points Utilitaires
39
Sélection du Point
39
Point Miroir
39
Réglage de la Largeur Et de la Longueur du Point
39
Selección de Puntadas Utilitarias
39
Selección de la Puntada
39
Puntada Invertida
39
Ajuste del Ancho y Largo de la Puntada
39
Where to Use each Stitch
40
Description des Points
41
Straight Stitch Sewing
42
Couture Au Point Droit
43
Dónde Utilizar cada Tipo de Puntada 41 Puntada Recta
43
Zigzag Stitch Sewing
44
Multi-Stitch Zigzag
44
Free Arm Sewing
44
Couture Au Point Zigzag
45
Point Zigzag Multiple
45
Couture Avec Bras Libre
45
Puntada de Zig-Zag
45
Puntada Múltiple de Zig-Zag
45
Costura con Brazo Libre
45
Quilting
46
Joining the Pieces of Fabric
46
Hand Look Quilting Stitch (No. 5)
46
Quilting
47
Assemblage des Morceaux de Tissu
47
Point de Quilting, Apparence Fait Main (N°5)
47
Acolchado
47
Cómo Unir las Piezas de Tejido
47
Cómo Coser Acolchados
47
Puntada de Acolchado con Aspecto Artesanal (Nº5)
47
Elastic Stitch Sewing
48
Continuous Decorative Pattern
48
Sewing Thin Fabrics
48
Couture de Points Élastiques
49
Séquence de Motifs Décoratifs
49
Sur Les Tissus Légers
49
Puntada Elástica
49
Puntadas Decorativas Continuas
49
Costura de Tejidos Finos
49
Overcasting-Overlocking
50
Using the Overcasting Foot
50
Using the General Purpose Foot
50
Note
50
Surjet - Surfilage
51
Avec Le Pied de Surjet
51
Avec Le Pied Universel
51
Remarque
51
Sobrehilado-Remallado
51
Con el Prensatelas para Sobrehilado
51
Con el Prensatelas Universal
51
Nota
51
Blind Hem Stitching
52
Couture D'ourlets Invisibles
53
Dobladillo de Puntada Invisible
53
Patch Work
54
Applique
54
Patchwork
55
Applique
55
Labores de Parcheado
55
Aplicaciones
55
Inserting Zippers Centered Insertion
56
Fermeture À Glissière - Pose Bord Àbord
57
Inserción de Cremalleras Inserción Centrada
57
Lapped Insertion
58
To Open the Zipper While Stitching
58
Fermeture À Glissière - Pose Sous Patte
59
Ouvrir la Fermeture À Glissière Pendant la Couture
59
Inserción Solapada
59
Para Abrir la Cremallera Mientras Se Cose
59
Buttonhole Sewing
60
Couture de Boutonnières
61
Cómo Coser Ojales
61
Automatic Bar-Tack and Darning
64
Arrêt Et Reprisage Automatiques
65
Presillas y Zurcidos Automaticos
65
Sewing on Buttons
66
Thread Shank
66
Couture de Boutons
67
Bouton Avec Tige
67
Cómo Coser Botones
67
Botones con Talle
67
Twin Needle Sewing
68
Couture Avec Aiguille Jumelée
69
Cómo Coser con Aguja Doble
69
Letter Stitch Sewing
70
Selecting Letter Stitch
70
To Delete Memorized Letter
70
Couture de Lettres
71
Sélection des Lettres
71
Annulation des Lettres Mémorisées
71
Puntadas para Letras
71
Selección de Puntadas para Letras
71
Para Borrar una Letra Memorizada
71
To Check Memorized Letters
72
Sewing the Memorized Letters
72
Tips
72
Pour Vérifier Les Lettres Mémorisées
73
Couture des Lettres Mémorisées
73
Astuces
73
Para Comprobar las Letras Memorizadas
73
Costura de las Letras Memorizadas
73
Consejos
73
Maintenance
74
Cleaning
74
Entretien
75
Nettoyage
75
Mantenimiento
75
Limpieza
75
Helpful Hints
76
Solution Aux Problèmes Courants
77
Recomendaciones Útiles
78
Advertisement
Singer QUANTUM 9910 Instruction Manual (80 pages)
Brand:
Singer
| Category:
Sewing Machine
| Size: 1.95 MB
Table of Contents
Important Safety Instructions
1
Table of Contents
2
Vigtige Sikkerhedsregler
3
Viktiga Säkerhetsinstruktioner
4
Model 9910
7
For European and Similar Territories
7
Modell 9910
8
För Europa
8
Model 9910
8
For Europa Og Lignende Områder
8
Main Parts
9
Maskinens Delar
10
Vigtigste Dele
10
Accessories
11
Dust Cover
11
Tillbehör
12
Huv
12
Tilbehør
12
Støvhætte
12
Extension Table
13
Removing the Extension Table
13
Opening the Accessory Case
13
Changing the Presser Foot
13
Removing the Presser Foot Holder
13
Sybord
14
Tag Bort Sybordet
14
Öppna Tillbehörsasken
14
Byt Pressarfot
14
Tag Bort Pressarfotshållaren
14
Forlængerbord
14
Aftagning Af Forlængerbord
14
Åbning Af Tilbehørsrummet
14
Skift Af Trykfod
14
Aftagning Af Trykfodsholder
14
Inserting the Needle
15
Fabric, Thread and Needle Table
15
Byta Nål
16
Material, TråD Och Nåltabell
16
Skift Af Nål
16
Materiale, TråD Og Nåletabel
16
Connecting the Machine
17
Anslut Maskinen
18
Tilslutning Af Maskinen
18
Function of each Part
19
Reverse Stitch Button
19
Needle Up/Down Button
19
Twin Needle Button
19
Presser Foot Lifter
19
Drop Feed Lever
19
Pressure Regulator
19
Hand Wheel
19
Top Cover
19
Reglagefunktioner
20
Backknapp
20
Nålstopp Upp / Ner
20
Knapp Tvillingnål
20
Pressarfotsspak
20
Matarreglage
20
Pressarfotstryck
20
Handhjul
20
Maskinlock
20
Delenes Funktion
20
Control Panel
21
Display
21
Contrast Control
21
Pattern Chart
21
Utility Stitch Button
21
Letter Stitch Button
21
Mirror Stitch Button
21
Pattern Selection Buttons
21
Stitch Memory, Clear and Check Buttons
21
Stitch Width, Length Button
21
Inställningspanel
22
Lcd - Display
22
Kontrastreglage För Lcd
22
SöMöversikt
22
D.nyttosömsväljare
22
Bokstavsväljare
22
Knapp Spegelvänd
22
Sömvalsknappar
22
Stygnbredds- Stygnlängdsknappar
22
Kontrol Panel
22
Bobbin Setting
23
Removing the Bobbin
23
Setting Spool of Thread on Spool Pin
23
Winding the Bobbin
23
Förbered För Spolning
24
Tag Ur Undertrådsspolen
24
Sätt Tråden På Trådhållaren
24
Spolning
24
Spoling
24
Udtagning Af Spolen
24
Påsætning Af Trådrullen
24
Spoling Af UndertråD
24
Inserting the Bobbin
25
Sätt I Undertrådsspolen
26
Ilægning Af Spolen
26
Threading the Machine
27
Preparing to Thread Machine
27
Setting Spool of Thread on Spool Pin
27
Threading the Upper Thread
27
Trädning Av Maskinen
28
Förbered Maskinen
28
Placera Tråden På Trådhållaren
28
Trädning Av Övertråden
28
Trådning Af Maskinen
28
Forberedelse Af Trådning
28
Påsætning Af Trådrullen
28
Trådning Af Overtråden
28
Threading the Needle Eye
29
Drawing up the Bobbin Thread
29
TräD I Nålen
30
Tag Upp Undertråden
30
Trådning Af Nålen
30
Ophentning Af Undertråden
30
Starting to Sew
31
Start and End of Seam
31
Reverse Stitching
31
Starta Sömnaden
32
Början Och Slutet Av Sömmen
32
Sy Bakåt / Fästa
32
Begynd at Sy
32
Start Og Slut På en SøM
32
Baglænssyning
32
Turning Corners
33
Sewing Heavy Fabric
33
Sewing over Overlapped Areas
33
Width of Seam Allowance
33
Vända I Hörn
34
Sy I Kraftiga Material
34
Sy Över Sömsmåner
34
Sy Med Jämnbred Sömsmån
34
Drejning Om Hjørner
34
Syning I Kraftigt Stof
34
Syning Hen over Overlapninger
34
SøM Bredde
34
Adjusting the Thread Tensions
35
Justera Trådspänningen
36
Justering Af Trådspændingen
36
Selecting Utility Stitch Patterns
37
Selecting the Pattern
37
Mirror Stitch
37
Setting Stitch Width and Length
37
Välja Nyttosömmar
38
Välj SöM
38
Spegelvänd
38
Ställ in Stygnbredd / Längd
38
Valg Af NyttesøM
38
Valg Af SøM
38
Spejlet SøM
38
Indstilling Af Stingbredde Og Længde
38
Where to Use each Stitch
39
Sömmarnas Användning
40
Brug Af Sømmene
40
Straight Stitch Sewing
41
RaksöM
42
LigestingssøM
42
Zigzag Stitch Sewing
43
Multi-Stitch Zigzag
43
Free Arm Sewing
43
SicksacksöM
44
Trestegssicksack
44
Friarmssömnad
44
Sigsag
44
Flerstings Sigsag
44
Friarmssyning
44
Quilting
45
Joining the Pieces of Fabric
45
Hand Look Quilting Stitch (No. 5)
45
Quiltning
46
Sy Ihop Lapparna
46
Quilta Ihop Delarna
46
QuiltsöM (Nr.5)
46
Elastic Stitch Sewing
47
Continuous Decorative Pattern
47
Sewing Thin Fabrics
47
Elastiska Sömmar
48
Dekorsömmar
48
Sy På Tunna Material
48
Elastiske Sømme
48
Kontinuerlige Pyntesømme
48
Syning I Tynde Stoffer
48
Overcasting-Overlocking
49
Using the Overcasting Foot
49
Using the General Purpose Foot
49
Note
49
Överkastning - Overlocksömnad
50
Användning Av Overlocksfoten
50
Användning Av Standardpressarfoten
50
Tips
50
Kantning / Overlock
50
Brug Af Overlockfoden
50
Brug Af Standardtrykfoden
50
Bemærk
50
Blind Hem Stitching
51
Dold Fållsömnad
52
Blindsting
52
Patch Work
53
Applique
53
Lappteknik
54
Applikation
54
Patch Work
54
Applikering
54
Inserting Zippers Centered Insertion
55
Sy I Blixtlås
56
Isyning Af Lynlåse Centrerede Lynlåse
56
Lapped Insertion
57
To Open the Zipper While Stitching
57
Liksidigt
58
Oliksidigt
58
Öppna Blixtlåset VID Isömnad
58
Isyning Af Lynlåse Overlappende Isyning
58
Åbning Af Lynlåsen under Syning
58
Buttonhole Sewing
59
Sy Knapphål
60
Knaphulssyning
60
Automatic Bar-Tack and Darning
63
Automatisk Tränssömnad Och Stoppning
64
Automatisk Trense Og Stopning
64
Sewing on Buttons
65
Thread Shank
65
Sy I Knappar
66
Knapp Med Hals
66
Påsyning Af Knapper
66
TråD Hals
66
Twin Needle Sewing
67
Sy Med Tvillingnål
68
Syning Med Tvillingenål
68
Letter Stitch Sewing
69
Selecting Letter Stitch
69
To Delete Memorized Letter
69
Sy Bokstäver
70
Välj Bokstav
70
Ta Bort Vald Bokstav
70
Syning Af Bogstaver
70
Vælg Bogstaver
70
Slet Programmerede Bogstaver
70
To Check Memorized Letters
71
Sewing the Memorized Letters
71
Tips
71
Kontrollera Valda Bokstäver
72
Sy Valda Bokstäver
72
Tips
72
Kontroller Programmerede Bogstaver
72
Syning Af Programmerede Bogstaver
72
Maintenance
73
Cleaning
73
Maskinens Skötsel
74
Rengöring
74
Vedligeholdelse
74
Rengøring
74
Helpful Hints
75
Felsökning
76
Nyttige Tips
76
SINGER QUANTUM 9910 Instruction Manual (79 pages)
Brand:
SINGER
| Category:
Sewing Machine
| Size: 8.81 MB
Table of Contents
Français
3
Important Safety Instructions
2
Table of Contents
3
Normas de Seguridad Importantes
6
Español
7
For European and Similar Territories
8
Model 9910
8
Modelo 9910
9
Para Europa y Territorios Equiparables
9
Main Parts
10
PARTES Princlpales
11
Accessories
12
Dust Cover
12
Accesqriqs
13
Cubierta
13
Extension Table
14
Removing the Extension Table
14
Opening the Accessory Case
14
Changing the Presser Foot
14
Removing _Le Presser Foot Holder
14
Apertura del Compartimento de Accesorios
15
Como Cambiar el Prensatelas
15
Como Retjrar el Portaprensalelas
15
Inserting the Needle
16
Fabric, Thread and Needle Table
16
Comq Cambiar el Prensatelas
15
Extension
15
Retirada de la Extension
15
Inserclon de la AGUJA
17
Tabla de Tejidqs, Hilos y Agujas
17
Connecting the Machine
18
Conexion de la M,_,Quina
19
Function of each Part
20
Reverse Stitch Button
20
Needle Up/Down Button
20
Twin Needle Button
20
Presser Foot Lifter
20
Drop Feed Lever
20
Pressure Regulator
20
Hand Wheel
20
Top Cover
20
Boton de Aguja Doble
21
Boton de Puntada en Retroceso
21
Boton de Subida/Bajada de la Aguja
21
Cubierta Superior
21
Control Panel
22
Display
22
Contrast Control
22
Pattern Chart
22
Utility Stitch Button
22
Letter Stitch Button
22
Mirror Stitch Button
22
Pattern Selection Buttons
22
Stitch Memory, Clear and Check Buttons
22
Stitch Width, Length Button
22
Funcion de cada una de las Partes
21
Palanca Alzaprensatelas
21
Palanca de Arrastre
21
Regulador de Presion
21
Volante Manual
21
Boton de Puntada Invertida
23
Boton de Puntada para Letras
23
Boton de Puntada Utilitaria
23
Botones de Anchoy Largo de Puntada
23
Bobbin Setting
24
Removing the Bobbin
24
Setting Spool of Thread on Spool Pin
24
Winding the Bobbin
24
BOTONES de MEMORIA de PUNTADA, BORRADO Ycomprobaclon
23
Botones de Seleccion de Puntada
23
Control de Contraste de la Pantalla Lcd
23
Panelde Control
23
Pantalla Lcd
23
Tabla de Puntadas
23
Ajuste de la Canilla
25
Como Sacar la Canilla
25
Portacarretes
25
Devanado de la Canilla
25
Inserting the Bobbin
26
Colocacion de la Canilla
27
Threading the Machine
28
Preparing to Thread Machine
28
Setting Spool of Thread on Spool Pin
28
Threading the Upper Thread
28
Enhebrado de la M,_,Quina
29
Enhebrado del Hilo Superior
29
Threading the Needle Eye
30
Drawing up the Bobbin Thread
30
Preparaclon para ENHEBRAR la M_,QUINA
29
Portacarretes
29
Enhebrado del Ojo de la Aguja
31
Extraccion del Hilo de la Canilla
31
Starting to Sew
32
Start and End of Seam
32
Reverse Stitching
32
Comenzar a Cqser
33
Principioy Final de una Costura
33
Puntada en Retroceso
33
Turning Corners
34
Sewing Heavy Fabric
34
Sewing over Overlapped Areas
34
Width of Seam Allowance
34
Machine
34
Ancho del Margen de Costura
35
Machine
35
Adjusting the Thread Tensions
36
Ajuste de la Tension de Los Hilos
37
Selecting Utility Stitch Patterns
38
Selecting the Pattern
38
Mirror Stitch
38
Setting Stitch Width and Length
38
Selecclon de PUNTADAS UTILITARIAS
39
Seleccion de la Puntada
39
Como Coser sobre _,Reas Solapadas
35
Como Coser Tejidos Fuertes
35
Como Girar en las Esquinas
35
Ajuste del Ancho y Largo de la Puntada
39
Where to Use each Stitch
40
Puntada Invertida
39
Donde Utilizar cada Tipq de Puntada
41
Straight Stitch Sewing
42
Puntada Recta
43
Zigzag Stitch Sewing
44
Multi-Stitch Zigzag
44
Free Arm Sewing
44
Cqstura con Brazo Libre
45
Quilting
46
Joining the Pieces of Fabric
46
Hand Look Quilting Stitch (No. 5)
46
PUNTADA de Zlg-ZAG
45
PUNTADA MOLTIPLE de Zlg-ZAG
45
Acolchadq
47
Como Coser Acolchados
47
Como Unir las Piezas de Tejido
47
Puntada de Acolchado con Aspecto Artesanal (N°5)
47
Elastic Stitch Sewing
48
Continuous Decorative Pattern
48
Sewing Thin Fabrics
48
Costura de Tejidos Finos
49
Overcasting-Overlocking
50
Using the Overcasting Foot
50
Using the General Purpose Foot
50
Note
50
Puntada Elastica
49
Puntadas Decqrativas Cqntinuas
49
C Not
51
Blind Hem Stitching
52
Con el Prensatelas para Sobrehilado
51
Con el Prensatelas Universal
51
Sqbrehiladq-Remallado
51
Dqbladillo de Puntada Invisible
53
Patch Work
54
Applique
54
Aplicaciones
55
Inserting Zippers
56
Centered Insertion
56
Lapped Insertion
58
To Open the Zipper While Stitching
58
Labores de Parcheado
55
Insercion de Cremalleras
59
Inserclon SQLAPADA
59
Para Abrir la Cremallera Mientras Se Cose
59
Buttonhole Sewing
60
Como Cqser Qjales
61
Automatic Bar-Tack and Darning
64
Preslllas y ZURCIDQS AUTOMATICOS
65
Sewing on Buttons
66
Thread Shank
66
Botones con Talle
67
Twin Needle Sewing
68
Como Cqser Bqtones
67
Comq Cqser con Aguja Doble
69
Letter Stitch Sewing
70
Selecting Letter Stitch
70
To Delete Memorized Letter
70
Para Borrar una Letra Memorizada
71
To Check Memorized Letters
72
Sewing the Memorized Letters
72
Tips
72
Puntadas para Letras
71
Seleccion de Puntadas para Letras
71
Consejos
73
Maintenance
74
Cleaning
74
Costura de las Letras Memorizadas
73
Para Comprobar las Letras Memorizadas
73
Limpieza
75
Helpful Hints
76
Mantenimiento
75
Recomendaciones 0Tiles
78
Advertisement
Singer QUANTUM 9910 Service Manual (34 pages)
Brand:
Singer
| Category:
Sewing Machine
| Size: 3.1 MB
Table of Contents
Table of Contents
2
Removing the Exterior Parts
3
Light Cover
3
Base
3
Top Cover (Flap)
4
Hinge Cover
4
Thread Tension Cover
4
Side Enclosure
5
Handle and Unit Cover
5
Needle Plate
6
Front Enclosure
7
Rear Enclosure
8
Front Panel (from Front Enclosure)
8
Replacing the Exterior Parts
9
Front Panel (to Front Enclosure)
9
Rear Enclosure
9
Front Enclosure
10
Needle Plate
10
Handle and Unit Cover
11
Side Enclosure
12
Thread Tension Cover
12
Hinge Cover
12
Top Cover (Flap)
13
Base
13
Light Cover
14
Check and Adjustment
15
Height of Needle Bar
15
Gap between Needle and Hook
16
Timing of the Hook
17
Height of the Feed Dog
18
Needle Plate and Needle Position
19
Timing of the Upper and Lower Shaft
20
Adjusting the Forward Reverse Stitch
21
Bobbin Winder
22
Height and Direction of Presser Foot
23
Height of Needle Threader
24
Adjustments for Buttonhole Lever Position
25
Motor Belt Tension
26
Timing Belt Tension
26
Backlash of Hook Gear
27
Upper Thread Tension Unit
28
Adjusting the Lower Thread Tension
28
Flatness of the Base
28
Locating the Deffected Electrical Part
29
To Turn off the Audible Beep
29
The Self-Diagnostic Program
29
Messages on LCD (9940/9920)
33
Electrical Parts Connection
34
SINGER QUANTUM 9910 Workbook (67 pages)
Brand:
SINGER
| Category:
Sewing Machine
| Size: 9.4 MB
Singer QUANTUM 9910 Spare Parts List (29 pages)
Singer Sewing Machine Parts List
Brand:
Singer
| Category:
Sewing Machine
| Size: 0.77 MB
Advertisement
Related Products
Singer 99-13
Singer 991B3
Singer 991B43
Singer 991C
Singer 991B
Singer 99-24
Singer 990B11
Singer 99W130
SINGER 99W113
Singer 9985
Singer Categories
Sewing Machine
Iron
Vacuum Cleaner
Kitchen Appliances
Dehumidifier
More Singer Manuals
Login
Sign In
OR
Sign in with Facebook
Sign in with Google
Upload manual
Upload from disk
Upload from URL