Sign In
Upload
Manuals
Brands
Singer Manuals
Sewing Machine
201-2
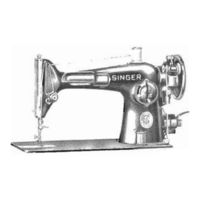
User Manuals: Singer 201-2 Vintage Sewing Machine
Manuals and User Guides for Singer 201-2 Vintage Sewing Machine. We have
4
Singer 201-2 Vintage Sewing Machine manuals available for free PDF download: Adjusters Manual, Instruction Book, Instructions For Use Manual, Instructions For Using Manual
Singer 201-2 Adjusters Manual (73 pages)
Brand:
Singer
| Category:
Sewing Machine
| Size: 3.24 MB
Table of Contents
Index
4
Descriptions
6
Motors for Machines 201-2 and 201-3
6
Singer P.H. Motors for Machine 201-2
7
Singer B.R. Motors for Machine 201-3
7
To Insure Correct Demonstration of Machine
8
Electrical Connections for Machine 201-2 and 201-3
8
Machine 201-2, Singer P.H. Motor, Singerlight and Controller
9
Motor Leads
9
Singerlight Leads
9
Controller Leads
9
Machine 201-3, Singer B.R. Motor, Singerlight and Controller
10
Instructions for Using the Bakelite Controller for Floor or Knee Operation with Cabinet 48
11
When Used for Foot Control
11
Bakelite Controller Arranged for Foot Control with Cabinet 48 - Illustration
11
When Used for Knee Control
12
Placing Bakelite Controller in Cabinet 48 for Knee Control - Illustration
12
Bakelite Controller Arranged for Knee Control in Cabinet 48 - Illustration
12
Causes of Trouble with Machines of Class 201
13
Motor Causes of Trouble with Machines 201-2 and 201-3
13
Causes of Binding: Machines 201-2 and 201-3
14
To Inspect Electrical Connections
15
Three-Pin Terminal
15
Motor - Machine 201-2
16
Singerlight - Machine 201-2
16
Remove Singerlight Shade - Machine 201-2
16
Inspect Singerlight Connections - Machine 201-2
17
Reassemble the Singerlight - Machine 201-2
17
Replace Singerlight - Machine 201-2
17
To Remove Singerlight Leads from the Machine Arm Machine 201-2
18
View of the Stitch Indicator Plate Removed to Show the Position of Singerlight Leads in the Arm of Machine 201-2
19
To Replace the Singerlight Leads Machine 201-2
20
Replacing the Three-Pin Terminal - Machine 201-2
21
Three-Pin Terminal Plug (Machines 201-2 and 201-3)
22
Electric Outle Plug (Machines 201-2 and 201-3)
22
Singerlight Fails to Light (Machines 201-2 and 201-3)
22
To Remove and Replace the Bulb (Machines 201-2 and 201-3)
23
To Remove the Motor from Machine 201-2
23
To Disassemble the Motor of the Machine 201-2
24
To Reassemble the Motor of the Machine 201-2
25
Replacing the Field Core with Coils
25
Replacing Armature - Machine 201-2
26
Attaching Motor and Three-Pin Terminal Machine 201-2
27
Replacing Brushes - Machine 201-2
27
To Lubricate the Motor - Machine 201-2
28
To Remove and Replace Balance Wheel - Machine 201-2
28
To Remove and Replace Balance Wheel Textolite Gear and Shock-Absorbing Spring (Machine 201-2)
29
Balance Wheel Disassembled View (Machine 201-2)
29
To Inspect Electrical Connections (Machine 201-3)
30
Motor Three-Pin Terminal and Singerlight (Machine 201-3) View
30
Three-Pin Terminal - Machine 201-3
31
Motor - Machine 201-3
31
Singerlight - Machine 201-3
31
Screw Connections of Singerlight (Machine 201-3) View
31
To Remove the Motor from Machine 201-3
33
Do Disassemble the Motor (Machine 201-3)
33
Removing Pulley
33
Remove Pulley End Cover - Machine 201-3
34
Remove Brushes - Machine 201-3
34
Remove Armature - Machine 201-3
34
Inspecting and Cleaning the Armature - Machine 201-3
34
Remove Field Core Shield - Machine 201-3
35
Inspecting Wire Connections to Brush Tubes - Machine 201-3
35
Motor Pulley End Cover, Ommutator End Cover and Armature Removed View (Machine 201-3)
35
To Reassemble the Motor (Machine 201-3)
36
Replacing Commutator End Cover
36
Replace Field Core Shields - Machine 201-3
36
Replace Armature - Machine 201-3
36
Replacing Pulley End Cover - Machine 201-3
37
Replace Brushes - Machine 201-3
37
Replace Pulley - Machine 201-3
37
Attach Motor, Singerlight and Three-Pin Terminal to Machine 201-3
38
Adjust Belt Tension - Machine 201-3
38
To Lubricate the Motor - Machine 201-3
38
Singer Bakelite Carbon Controller (Machines 201-2 and 201-3)
39
To Inspect the Carbon Resistance Unit of the Controllers
39
Teadle Controller
39
Convertible Foot and Knee Controller
39
Motor Fails to Operate at All Speeds
40
Emergency Adjustment of Carbon Resistance Unit
40
Motor Fails to Stop
41
Bakelite Treadle Controller - Cover Removed View
41
Bakelite Convertible Foot and Knee Controller Cover Removed View
41
Replace the Cover - Treadle Controller
42
Inside View of Bakelite Treadle Controller Cover
42
Replace the Cover - Convertible Foot and Knee Controller
43
Inside View of Cover of Bakelite Convertible: Foot and Knee Controller Snowing Pedal Disengaged from Cover
43
To Remove and Replace the Rotating Hook Bobbin Case
44
To Remove and Replace the Feed Dog
44
To Remove and Replace the Rotating Hook Bobbin Case Position Plate
45
To Remove and Replace the Rotating Hook
45
To Time the Rotating Hook
46
Correct Adjustment of Timing Gauge View
46
Needle Bar and Rotating Hook Correctly Timed View
46
Removing Rotating Hook Shaft Bevel Gear Cover
47
Setting Rotating Hook Driving Shaft Front Bevel Gear to Time Rotating Hook
47
To Set the Needle Bar at the Correct Height
48
To Remove and Replace the Rotating Hook Shaft and Rotating Hook Shaft Bevel Gear
48
To Remove and Replace Rotating Hook Driving Shaft and Rotating Hook Driving Shaft Bevel Gears
49
Rotating Hook Shaft and Gear (Removed and Disassembled) View
49
Removing Rotating Hook Driving Shaft Bevel Gear Back Cover
50
To Remove Rotating Hook Driving Shaft and Rotating Hook Driving Shaft Back Bevel Gear
50
To Raise or Lower the Feed Dog
52
To Adjust the Position of the Feed Dog Lengthwise in the Feed Dog Slots in the Throat Plate
52
Lengthwise Adjustment of Feed Dog
52
To Adjust the Position of Feed Dog Centrally with Relation to the Sides of Throat Plate Slots
53
Sidewise Adjustment of Feed Dog
53
To Remove and Disassemble the Graduated Tension
54
To Reassemble and Replace the Graduated Tension
54
To Adjust the Bobbin Winder
56
To Adjust the Presser Bar
57
To Remove and Replace the Presser Bar
57
To Remove and Replace the Needle Bar
58
To Remove Needle Bar and Presser Bar
58
Needle Bar Removed and Disassembled View
58
To Remove and Replace the Feed Connecting Rod
59
To Remove Feed Connecting Rod
60
Feed Connecting Rod Removed - Upper End View
60
To Detach Lower End of Feed Connecting Rod
60
To Remove and Replace the Feed Forked Connection and the Feed Regulator
61
To Remove Feed Regulator
61
Feed Forked Connection (Upper End) and Feed Regulator Removed from Machine - Illustration
62
To Remove and Replace the Upright Arm Shaft and the Upright Arm Shaft Gears
63
To Remove Upright Arm Shaft and Gears - Lower End View
63
To Remove and Replace the Horizontal Arm Shaft Horizontal Arm Shaft Bushing Horizontal Arm Shaft Bevel Gear and Counterbalanced Feed Cam and Feed-Lift
64
To Remove Horizontal Arm Shaft (New through Arm Side Cover Opening)
65
Face Plate, Needle Bar and Presser Bar Removed from Machine - Illustration
66
Thread Take-Up Lever Assemble and Needle Bar Link Removed from Machine - Illustration
66
Horizontal Arm Shaft Removed Showing the Position of Needle Bar Grank, Bushing, Gear and Eccentrics on the Shaft
67
To Oil the Machine
69
View of Sewing Hook Showing Oiling Points
69
End View Showing Oiling Points
69
Oiling Points at the Back of the Machine (Arm Broken Away to Show Oil Hole) - Illustration
70
Using Singer Lubricants for Your Sewing Machine
71
Advertisement
Singer 201-2 Instruction Book (61 pages)
Brand:
Singer
| Category:
Sewing Machine
| Size: 18.07 MB
Table of Contents
Contents
5
Getting to Know Your Machine
6
Principal Parts
6
Accessories
8
Getting Ready to Sew
9
Choosing and Changing Accessories
9
Changing Presser Feet
9
Removing Presser Foot with Shank
9
Changing the Needle
10
Attaching Snap-In Feed Cover
10
Attaching the Seam Guide
10
Remove and Replacing Needle Plate
11
Fabric Weight Table
12
Fabric, Thread and Needle Table
18
Operating the Machine
24
Connecting the Machine
24
The Bobbin
25
Winding the Bobbin
25
Winding Steps
25
Removing the Bobbin Case
26
Threading the Bobbin Case
26
Replacing the Bobbin Case
27
Adjusting Bobbin-Thread Tension
27
Threading the Machine
28
Raising the Bobbin Thread
29
Straight Stitching
30
Adjusting Machine Stitch to Suit Your Fabric
30
Setting Selectors
30
Stitch Pattern Selector
30
Reverse Lever
31
Needle-Thread Tension
31
Bobbin-Thread Tension
31
Sewing a Seam
32
Keeping the Seam Straight
32
Applications
33
Zipper Insertion
33
Adjusting the Zipper Foot
33
Darning
34
Quilting
34
Preparing the Fabric
34
Basic Procedure
34
Basic Zig-Zag Stitching
35
Stitch Width Selector
35
Adjusting Needle-Thread Tension
36
Adjusting Stitch Length
36
Lingerie Seams
37
Satin Stitching
37
Adjusting Upper Thread Tension
37
Applique
38
Machine Stitch Patterns
39
Selecting a Pattern
40
Adjusting Width of the Design
40
Adjusting Stitches for Stretch Fabrics
41
Guiding and Supporting Fabric
41
Stitch Pattern Chart
42
Overedge Stretch Stitch
43
Overedged Seams
43
Multi-Stitch Zig-Zag
44
Mending a Tear
44
Finishes for Hems and Facings
44
Blindstitch
45
Blindstitch Hems
45
Buttonholes
46
Garment Preparation
46
Buttonhole Position
46
Buttonhole Length
47
Horizontal Buttonholes
47
Vertical Buttonholes
47
Four-Step Buttonholing
48
Four-Step Buttonholing Procedure
49
Bar Tack
49
Side Stitching
49
Twin-Needle Stitching
50
Free-Arm Sewing
51
Sleeves
51
Performance Checklist
52
Caring for Your Machine
53
Cleaning and Oiling Your Machine
53
Bobbin Case Holder
54
Bobbin and Feed Areas
54
Exterior Areas
54
Interior Feed Area
55
Changing the Light Bulb
56
Index
57
Singer 201-2 Instructions For Use Manual (35 pages)
P.H. Built-on Motor Reversible Feed Lock Stitch for Family Use
Brand:
Singer
| Category:
Sewing Machine
| Size: 6.39 MB
Table of Contents
Points to Determine before Connecting Motor to Electric Service Line
4
To Connect the Machine to Electric Service Line
4
To Insure Perfect Action of the Machine
4
To Remove and Replace the Bulb
5
To Operate the Machine
5
To Remove the Bobbin
6
To Wind the Bobbin
6
Adjusting of Bobbin Winder
7
To Replace the Bobbin and Thread the Bobbin Case
7
To Set the Needle
8
Upper Threading
9
To Prepare for Sewing
10
To Remove the Work
10
To Turn a Corner
10
To Regulate the Pressure on the Material
10
To Regulate the Direction of Feed
11
To Regulate the Length of Stitch
11
Basting
11
To Sew Flannel or Bias Seams
11
Tensions
12
To Regulate the Needle Thread Tension
12
To Regulate the Bobbin Thread Tension
12
To Disassemble the Needle Thread Tension
13
To Reassemble the Needle Thread Tension
13
To Adjust the Needle Thread Tension
14
To Adjust the Tension on the Thread Take-Up Spring
14
To Adjust the Bobbin Thread Tension
14
Machine Working Heavily
15
To Avoid Breaking Needles/Braking of Needle Thread/Breaking of Bobbin Thread
15
Skipping of Stitches
15
To Oil the Machine
15
Oiling Points at the Back of the Machine
16
Oiling Points in Base of Machine
16
End View Showing Oiling Points
16
To Lubricate the Motor
17
To Clean the Stitch Forming Mechanism
18
To Remove the Bobbin Case
18
To Replace the Bobbin Case
18
Darning or Embroidering
19
Advantages of Machine 201-2 for Darning or Embroidering
20
Instructions for Using the Attachments
20
The Foot Hemmer
20
How to Start the Hem at the very Edge
20
Making a Hem with the Foot Hemmer
21
Making a Hemmed Seam with the Foot Hemmer
21
Hemming and Sewing on Lace in One Operation
22
Adjustable Hemmer - Hemming
22
Adjustable Hemmer - Wide Hemming
23
Multiple Slotted Binder
23
To Attach the Binder
24
To Insert the Binding in the Binder
24
To Insert the Garment in the Binder
24
To Adjust the Binder
24
Piped Edge
25
Piping and Binding in One Operation
25
To Bind Outside Curves
26
To Bind Inside Curves
26
To Apply French Folds to Curves
26
The Edge-Stitcher
26
Adjusting the Edge-Stitcher
27
Sewing Lace Together with the Edge-Stitcher
27
Piping with the Edge-Stitcher
27
Applying Bias Folds with the Edge-Stitcher
27
Stitching a Wide Hem with the Edge-Stitcher
28
Making a French Seam
28
Tucking with the Edge-Stitcher
29
Shirring with the Gatherer
29
Ruffler
30
To Attach the Ruffler to the Machine
31
To Adjust the Ruffler for Gathering
31
To Make a Ruffle and Sew in to a Garment in One Operation
32
Piping a Ruffle
32
To Ruffle and Sew on a Facing in One Operation
32
To Adjust the Ruffler for Plaiting
33
To Adjust the Ruffler for Group Plaiting and Gathering
33
To Oil the Ruffler
34
Needle and Threads
34
Types of Fabrics, Thread and Needle Sizes and Machine Stitches to the Inch Chart
34
Advertisement
Singer 201-2 Instructions For Using Manual (34 pages)
Electric Sewing Machine
Brand:
Singer
| Category:
Sewing Machine
| Size: 2.22 MB
Advertisement
Related Products
SINGER 201K
Singer 201-4
Singer 201-1
Singer 201-3
Singer 20-1
Singer 2010
Singer 201P
Singer 20U33
Singer 20G 125CEA
Singer 20G 105CEB
Singer Categories
Sewing Machine
Iron
Vacuum Cleaner
Kitchen Appliances
Dehumidifier
More Singer Manuals
Login
Sign In
OR
Sign in with Facebook
Sign in with Google
Upload manual
Upload from disk
Upload from URL