Sign In
Upload
Manuals
Brands
Roland Manuals
Printer
VS-300
Roland VS-300 Manuals
Manuals and User Guides for Roland VS-300. We have
6
Roland VS-300 manuals available for free PDF download: Service Notes, User Manual, Manual, Setup Manual
Roland VS-300 Service Notes (295 pages)
Brand:
Roland
| Category:
Plotter
| Size: 69.88 MB
Table of Contents
Table of Contents
2
Structure & Spare Parts
7
Label,Mark Eco#La1014 Label,Set Ink
14
Label,Use Eco-Sol Max#La924 Sheet,Frame Support Rail
14
21425110 Washer,Cover Fj-50 (Vs-420)
14
Parts no
14
Parts Name
14
S7 31289112As Cupscrew Set,M3*10 ni 100 Pcs. (Vs-420)
14
Frame
15
S10 31289111As Cupscrew Set, M4*6 ni 100 Pcs
16
Drive Unit (Vs-640)
17
Drive Unit (Vs-540)
17
Drive Unit (Vs-420)
18
Drive Unit (Vs-300)
18
Qt. Indicates the Number of Parts that Is Described in the Figure
18
Head Carriage
25
Base Frame(Vs-640/540)
27
Base Frame(Vs-420/300)
27
Chassis
31
Pinch Roller
32
Stand
33
Tool Carriage
34
WIPER and CAP Systems
35
Ink System
36
Ink System
37
INK TUBE WIRING (VS-640 S/N ZZ92065 and Below)
40
INK TUBE WIRING (VS-640 S/N ZZ92066 and Above, VS-540/420/300)
40
Accessory
42
Accessory
43
Electrical Section
46
Wiring Map
46
Main Board
48
Servo Board
59
Sub Board
68
Maintenance Parts List
73
Replacement of Main Parts
74
Head Replacement
77
Damper Replacement
84
Wiper Replacement
91
Felt Wiper Replacement
94
Cap Top Replacement
97
Tool Carriage Replacement
102
Carriage Motor Replacement
107
Feed Motor Replacement
113
Pump Replacement
124
(Main Board Sw Power Supply)
129
Battery Replacement
139
Carriage Belt Replacement
142
Encoder Scale Replacement
147
Grit Encoder Replacement
149
Pinch Roller Replacement
153
Cutter Protection Replacement
154
Cut Ribbon Cable Replacement
155
Linear Encoder Board Replacement
161
How to Fold Ribbon Cable to the Head
166
Ink Tube Replacement
169
Ribbon Cable (Main Board to Carriage Board) Replacement
184
Adjustment
199
Service Mode
200
Firmware
216
Head Alignment
221
Limit Position & Cut down Position Initialize
225
Linear Encoder Setup
227
Flushing Position Adjustment
229
Crop Mark Sensor Adjustment
231
Crop-Cut Adjustment
234
Print/Cut Position Adjustment
237
Calibration(Feeding Direction)
241
Tool Height Adjustment
242
Tool Pressure Adjustment
244
Belt Tension Adjustment
248
Belt Position Adjustment
251
Take-Up Unit Operation Check
258
Supplemental Information
261
Special Tools
261
Sensor Map
262
Troubleshooting
265
White Fine Line / Banding / Missing Dot / Scratchy Printing / Blurred Printing
265
Poor Printing Quality When Using the Metallic Silver Ink
266
Mixed Color Is Printed at the Metallic Silver Specified Area
266
Particular Color Is Not Printed at All
267
Shifting in Printing/Color Shifting
267
Ink Drops on the Media
267
Vertical Banding
268
Missing Dot or Deflected Dot Appears When Printing after a Long
268
Unwanted Lines Are Printed
268
Print & Cut Misalignment
269
Poor Cutting Quality (Stitch Cut, Distorted Cut, Mismatched Start and End Points)
272
Media Skew
272
Motor Error
273
Heater / Dryer Temperature Does Not Rise
274
The Take-Up Unit* Does Not Operate (*Option)
274
Problem in Network (Rip Does Not Recognize the Printer)
275
Error Message
275
Service Call
276
Service Activities
278
Installation Check List
278
Maintenance Check List
293
Specification
294
Advertisement
Roland VS-300 User Manual (176 pages)
VersaCamm
Brand:
Roland
| Category:
Printer
| Size: 14.15 MB
Table of Contents
For California
2
Operating Instructions
2
Table of Contents
3
Contents
3
Chapter 1 Machine Highlights
7
Part Names and Functions
8
Printer Unit
8
Operation Panel
10
Menu List
11
Main Menu
11
Language and Unit Menu
14
Function Menu
15
To Ensure Safe Use
16
Warning Labels
22
Pour Utiliser en Toute Sécurité
23
Important Notes on Handling and Use
31
Chapter 2 Basic Operation
33
Prepare the Media
34
Type of Media
34
Usable Media
35
Switch on
36
The Power-Saving Feature (Sleep Mode)
36
Loading Media
37
Loading Roll Media
37
Loading the Sheet Media
44
Performing the Initial Adjustment (Correcting for Misalignment in Bidirectional Printing more Precisely)
46
Setup of Media
48
About [Media Setting] Menu
48
Setup of Media ([Media Setting] Menu)
48
Adjusting the Head Height
49
Outputting
59
Setting the Output-Start Location
59
Printing Tests and Cleaning
60
Important Note on Cutting
61
Setting the Cutting Test and the Blade Force
62
Getting Ready to Receive Data from a Computer
64
Starting Output
65
Pausing and Canceling Output
66
Cutting off the Media
66
Switch off
68
Chapter 3 Maintenance: for Always Using the Printer in the Best Condition
69
Checking for Remaining Ink and Replacing Cartridges
70
Checking for Remaining Ink
70
How to Replace Ink Cartridges
71
Maintenance that Should be Performed Daily
72
Maintenance of Ink Cartridges
72
Disposing of Discharged Ink
72
Cleaning
74
About Care and Maintenance of Print Head
75
When Normal Cleaning Is Not Effective
76
Medium/ Powerful Cleaning
76
Maintenance that Should be Performed more than Once a Month
77
When Manual-Cleaning Becomes Necessary
77
Manual Cleaning of Print Head
78
When Problems such as Dot Drop-Out Are Not Cleared up
83
Replacing Consumable Parts
86
Replacing the Wiper
86
Replacing the Felt Wiper
89
Enter Felt Wiper Replacement Menu
89
Replacing the Blade
92
Replacing the Separating Knife
94
When Not in Use for a Prolonged Period
96
Keep Performing Maintenance
96
Alarm Feature
96
Chapter 4 Part of Practice
97
Fully Utilizing Preset Function
98
Saving Various Settings as a Name Assigned Preset
98
Loading a Saved Preset
100
Fully Utilize the Media Heating System
101
What Is the Media Heating System
101
Making the Temperature Setting for the Media Heating System
102
Control of Media Heating System During Preheating
104
Drying the Trailing Edge of the Printing Area on the Dryer
104
Setting the Drying Time after Printing
105
Fully Utilizing the Correction Function
106
Correcting for Misalignment in Bidirectional Printing
106
Correcting for Misalignment in Bidirectional Printing more Precisely
107
Alleviating Horizontal Bands and the Like (Feed Correction Function)
107
Default Setting
108
Accommodating to the Types and Condition of Media
109
Adjusting Head Height to Match Media Thickness
109
Using Transparent Media
110
Printing Hard-To-Dry Media
110
Using the Media Easy to be Winkled/Hard to be Fed
111
Speeding up Output for Narrow Media
112
Preventing Soiling of the Media and Dot Drop-Out
113
Using Sticky Media
114
Clamping the Nozzle Array to be Used (Cmyklclm Mode Only)
115
Fully Utilizing Cutting Function
116
Hints and Tips for Cutting Setting
116
Preventing Pulling of the Media with Undue Force When Performing Cutting Only
116
Fine-Tuning the Cutting Conditions
117
Accurately Adjusting the Cutting-In Amount
119
Performing Distance Correction During Cutting
120
Correcting Misalignment of the Printing and Cutting Positions
121
Prioritize the Settings of this Machine to the Settings of a Computer Side
123
Viewing the Automatic Environment Correction Function Settings
124
Performing Printing and Cutting Separately
125
To Perform Printing and Cutting Separately
125
Printing with Crop Marks
125
Aligning Automatically and Cutting
127
Aligning Manually and Cutting
129
Correcting Misalignment for Printing and Cutting When Using Crop Marks
130
Using Media Take-Up System
133
Use the Media Take-Up System When the Output Accompanied with the Pull-Back Operation Is Performed
133
Use Conditions of Take-Up System When "TU2" Is Selected
133
Chapter 5 To Administrators
135
Output Operation Management
136
Printing a System Report
136
Determining What Happens When Ink Runs out
136
Displaying the Amount of Media Remaining
137
Making Sure to Verify the Setting for the Amount Remaining Every Time the Media Is Changed
138
Printing the Amount of Remaining Media
139
System Management of Printer
140
Setting for the Menu Language and the Units of Measurement
140
Setting the Interval until Activation of the Sleep Mode (Power Saving Function)
140
Deactivating the Sleep Mode (Power Saving Function)
141
Viewing Information about the System of this Machine
142
Returning All Settings to Their Initial Values
143
Chapter 6 Read this Chapter Whenever You Face a Problem. (FAQ)
145
Printer Does Not Start up
146
The Printer Unit Doesn't Run
146
The Media Heating System Doesn't Warm up
147
Cannot Cut off the Media
147
Attractive Printing or Cutting Is Impossible
148
Printed Results Are Coarse or Contain Horizontal Stripes
148
Colors Are Unstable or Uneven
149
The Media Becomes Soiled When Printed
150
Cutting Is Misaligned or Skewed
150
Media Jam Occurs
152
The Media Jams
152
Media Feed Is Not Smooth
153
Media Wrinkles or Shrinks
153
Media Feed Is Not Straight
154
Media Feed Is Not Smooth
154
Print Head Stops Moving. Why
155
What to Do First
155
If the Heads Still Do Not Move
155
A Message Appears
157
An Error Message Appears
159
Chapter 7 Main Specifications
163
Printing/Cutting Area
164
Maximum Area
164
Maximum Area When Using Crop Marks
164
The Media-Cutoff Location During Continuous Printing
165
About the Blade
166
Locations of the Power Rating and Serial Number Labels
167
Specifications
168
Roland VS-300 Manual (60 pages)
Brand:
Roland
| Category:
Printer
| Size: 8.81 MB
Table of Contents
Contents
3
Table of Contents
3
Chapter 1 Getting Started
5
What this Document Assumes and Related Manuals
6
What this Document Assumes
6
Related Manuals
6
Versaworks Online
6
Before Starting Operations
7
Important: Characteristics of Inks and Important Notes
7
Before Starting the Day's Work
7
Important Notes on Printing
8
Using the Middle Pinch Rollers in Printing and Cutting
8
Important Notes in Using Transparent Media
8
Important Notes on Using Media Take-Up System
8
Precautions When Using an Optional Dryer
9
Chapter 2 Getting Ready
11
Preparing Versaworks
12
Starting Versaworks
12
Creating a Folder for Saving PS Files
12
Printer Preparations
13
Making the Printer Settings and Loading Media
13
Creating Printing Data
14
Basic Approach for Creating Printing Data
14
Creating Data for Printing
14
Blend Print and Layered Print (Metallic Silver and Cmyklclm)
20
Blend Print and Layered Print
20
Metallic Silver and Cmyklclm
20
Chapter 3 Printing
23
Print Job Setting
24
Printing Only with Metallic Silver Ink
24
Blend Print (Metallic Silver + Cmyklclm)
26
Layered Print (Metallic Silver Cmyklclm)
28
Layered Print (Cmyklclm Metallic Silver)
30
Printing Only with White Ink (WMT Mode)
32
Printing Only with White Ink (W Mode)
34
Printing with While, Metallic Silver, and CMYK Ink
36
Printing with White Ink and Cmyklclm Ink (WMT Mode)
39
Printing with White Ink and Cmyklclm Ink (W Mode)
41
Starting the Print Operation
43
Printing a Metallic Color Chart
44
Chapter 4 Advanced
48
Performing Texture Printing
48
What Is Texture Printing
48
Create the Texture Printing Data
48
Performing Texture Printing
53
Printing a Texture Chart
54
Chapter 5 Maintenance
57
Maintenance
58
Message for Ink Circulation
58
When Dot Drop-Out Etc. Cannot be Corrected
58
Advertisement
Roland VS-300 Setup Manual (56 pages)
Brand:
Roland
| Category:
Printer
| Size: 7.77 MB
Table of Contents
Read this First
1
Setup Guide
1
Table of Contents
3
Contents
3
To Ensure Safe Use
4
Warning Labels
10
Pour Utiliser en Toute Sécurité
11
Setup Guide
19
1 Installation Environment
20
Deciding on an Installation Site
20
Temperature and Humidity
21
Installation Space
21
2 Included Items
22
3 Assembling and Installing
24
Step 1: Assembling the Stand - Mounting the Machine
24
Step 2: Installing the Media Holder
27
Step 3: Installing the Drain Bottle
29
Step 4: Removing the Packing Materials
30
4 Connect the Cables
31
Connecting the Cables
31
5 Installing the Ink Cartridges
32
Filling with Ink for the First Time
32
Affixing the Cartridge-Slot Labels
32
Installing the Ink Cartridges
33
Performing Heads Cleaning
39
6 Installing the Blade
41
7 Network Settings
43
Introduction
43
Step 1: Make the Network Settings for the Computer
43
Step 2: Make the Network Settings on the Printer
45
Step 3: Make the Port Settings for the Software RIP
47
8 When Not in Use for a Prolonged Period
48
Keep Performing Maintenance
48
Alarm Feature
48
9 When Transferring the Unit
49
Procedures from Preparing for Transfer through Reinstalling the Machine
49
Roland VS-300 Manual (24 pages)
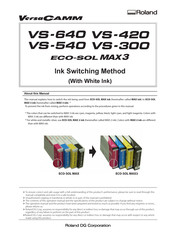
Ink Switching Method, With White Ink
Brand:
Roland
| Category:
Printer Accessories
| Size: 11.27 MB
Table of Contents
Contents
2
Table of Contents
2
Introduction
3
Overall Flow
3
Preparation before Operations
4
STEP 1: Checking the Package Contents
4
STEP 2: Checking the Replacement Ink Cartridges
4
STEP 3: Checking the Necessary Files
5
STEP 4: Writing a Memo with the Versaworks Settings
5
Switching the Ink
6
STEP 1: Updating the Printer Unit Firmware
6
STEP 2: Switching the Ink
6
STEP 3: Cleaning of the Periphery of the Print Heads (Manual Cleaning)
9
STEP 4: Replacing the Wiper and Felt Wiper
13
STEP 5: Bidirectional Printing Correction
15
STEP 6: Correcting Misalignment of the Printing and Cutting Positions
15
STEP 7: Updating Versaworks
16
Important: Changes and Precautions after Switching the Ink
20
Change: Manual Cleaning Required after Daily Operations Finish
20
Change: Cleaning Locations During Manual Cleaning
21
Daily Precautions
21
When Not in Use for a Prolonged Period, Precaution 1
22
When Not in Use for a Prolonged Period, Precaution 2
22
When Operations Are Interrupted
23
Actions When the Cleaning/Wiper Replacement Operation Is Interrupted
23
Roland VS-300 User Manual (10 pages)
Brand:
Roland
| Category:
Printer
| Size: 1.48 MB
Table of Contents
Usable Media
5
Loading Roll Media
6
Loading Media
6
Replacing Consumable Parts
7
Replacing the Wiper
7
Printing/Cutting Area
8
Maximum Area When Using Crop Marks
8
Specifications
9
Advertisement
Related Products
Roland VS-420
Roland VS-540
Roland VS-640
Roland VS-640i
Roland VS-300i
Roland VS-540i
Roland TrueVIS VG-540
Roland TrueVIS VG3-640
Roland TrueVIS VG2-540
Roland VersaWorks VS-640i
Roland Categories
Musical Instrument
Synthesizer
Recording Equipment
Drums
Electronic Keyboard
More Roland Manuals
Login
Sign In
OR
Sign in with Facebook
Sign in with Google
Upload manual
Upload from disk
Upload from URL