Sign In
Upload
Manuals
Brands
Roland Manuals
Music Equipment
FP-E50
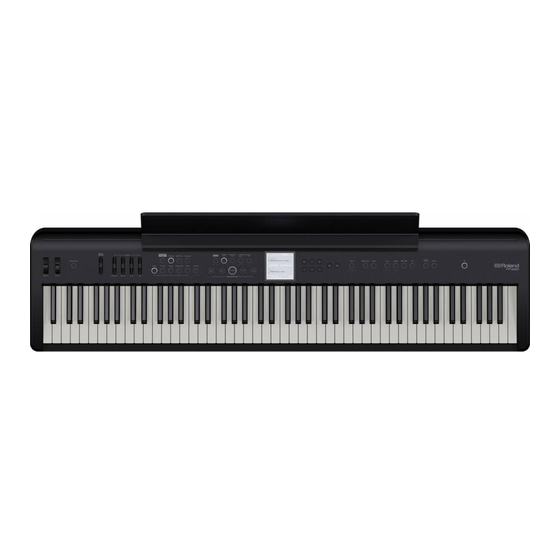
User Manuals: Roland FP-E50 Digital Piano
Manuals and User Guides for Roland FP-E50 Digital Piano. We have
3
Roland FP-E50 Digital Piano manuals available for free PDF download: Reference Manual, Quick Start Manual, User Manual
Roland FP-E50 Reference Manual (85 pages)
Brand:
Roland
| Category:
Musical Instrument
| Size: 5.68 MB
Table of Contents
Table of Contents
2
Introduction
4
Getting Ready to Play
5
Placing the FP-E50 on a Stand
5
Attaching the Music Rest
6
Connecting the Pedals
6
Connecting the Included Pedal Switch
6
Connecting the Dedicated Pedal Unit (KPD-70)
6
Connecting the Expression Pedal
6
Using the Headphones
7
Basic Operations of the Fp-E50
8
Panel Descriptions
9
Top Panel
9
Rear Panel
10
Adjusting the Overall Volume
11
Adjusting the Volume Balance
11
Basic Operations and the Screen
11
Turning off the Power
11
Turning on the Power
11
Turning On/Off the Power
11
Basic Operation
12
Making the Power Automatically Turn off after a Time (Auto off )
12
Turning off the Auto-Off Function
12
Dual Mode
13
Single Mode
13
Split Mode
13
Top Screen
13
Switching between Tone Category and Tone Bank View in the Tone List
14
Tone Bank
14
Tone Category
14
Accessing the Various Functions (Menu Screen)
15
Accessing the Various Functions (Menu Screen) Editing a Name (Rename Screen)
15
Editing a Name (Rename Screen)
15
Selecting a Tone
16
Playing with Different Tones in the Left and Right Hands (Split)
17
Playing with One Part (Single)
17
Playing with Two Parts (Dual/Split)
17
Selecting the Keyboard Mode
17
Switching between Keyboard Modes
17
Playing with Two Tones Layered (Dual)
18
Selecting a Tone (Tone Select)
19
Selecting with the Tone Buttons
19
Selecting with the [Dec] [Inc] Buttons
19
Selecting from the Tone List Screen
20
Tone List Screen (Bank View)
20
Tone List Screen (Category View)
20
Recalling the Favorite Tones
21
Registering a Favorite (Register Favorite)
21
Using Favorites
21
Selecting a Standard Piano Tone (One Touch Piano)
22
Basic Functions
23
Changing the Metronome Settings (Metronome)
24
Starting the Metronome
24
Using the Metronome (Metronome)
24
(Tempo Lock)
25
Changing the Tempo
25
Making the Tempo Stay the same When Switching Scenes or Styles (Tempo Lock)
25
Setting the Tempo (Tempo)
25
Setting the Tempo in Time with the Button Presses (Tap Tempo)
25
Editing a Scene (Scene Edit)
26
Scene
26
Selecting a Scene (Scene Select)
26
Saving a Scene (Scene Write)
27
Adding Ambience to the Sound (Ambience)
28
Setting the Ambience (Ambience Setting)
28
Turning the Ambience On/Off
28
Changing the Key (Transpose)
29
Setting the Transposition
29
Turning Transpose On/Off
29
Connecting a Mobile Device Via Bluetooth
30
Adjusting the Volume of Bluetooth Audio
31
Connecting an Already-Paired Mobile Device
31
Making Initial Settings (Pairing)
31
Pairing with more than One FP-E50 (Bluetooth ID)
31
Playing Back Audio
31
Playing Music through the Piano's Speakers (Bluetooth Function)
31
Auto-Accompaniment and Chord Sequencer
33
(Accompaniment)
34
Selecting from the Bank List
34
Selecting from the Category List
34
Selecting the Styles
34
Selecting with the [Dec] [Inc] Buttons
34
Starting/Stopping the Style ([Start/Stop] Button)
34
Using the Auto-Accompaniment
34
Using the Auto-Accompaniment (Accompaniment)
34
Playing Styles in Sync ([Sync Start] Button)
35
Selecting a Chord Pattern (Chord Sequencer [Select] Button)
35
Starting with an Intro ([Intro/Ending] Button)
35
Stopping with an Ending ([Intro/Ending] Button)
35
Switching between Variations ([Variation 1] and [Variation 2] Buttons)
35
Turning Auto-Accompaniment On/Off ([Accomp On] Button)
35
Turning the Chord Sequencer On/Off (Chord Sequencer [On] Button)
35
Turning the Interactive Function On/Off ([Interactive On] Button)
35
(Arranger Setting)
36
Configuring the Auto-Accompaniment
36
Configuring the Auto-Accompaniment (Arranger Setting)
36
(Auto Mute)
37
(Interactive Settings)
37
Automatically Muting the Left-Hand Performance During Playback When in Split Mode (AUTO MUTE)
37
Configuring the Interactive Function
37
Configuring the Interactive Function (Interactive Settings)
37
Playing Back a Chord Pattern
38
Selecting a Chord Pattern
38
Synchronizing the Chord Pattern Playback
38
Turning the Chord Sequencer On/Off
38
Using the Chord Sequencer
38
(Chord Pattern View Screen)
39
Checking the Chord Pattern
39
Editing a Chord Pattern (Edit Menu)
39
Playing Back and Recording a Song
47
Deleting a Song
48
Playing a Recorded Song
48
Playing Back Songs (Song Player)
48
Playing Back the Internal Songs
48
Switching to the Scene that Corresponds to an Internal Song
48
Changing the Loop Settings for a Song
49
Changing the Song Playback Position
49
Getting Ready to Record
50
Listening to the Recording of What You Played
50
Recording
50
Recording Your Performance (Audio Rec)
50
Erasing the Recording of What You Played
51
Recording a Center-Canceled Sound Source
51
Convenient Functions (Song Utility)
52
Editing a Song Name (Song Rename)
52
Copying a Recorded Song to a USB Flash Drive (Song Copy)
53
Selecting and Deleting Multiple Songs (Song Delete)
53
Deleting All Recorded Songs (Song Delete All)
54
Demo Mode
55
Various Menus (Menu)
58
Adjusting the Input Audio Volume (Input Volume)
59
Creating a Piano Tone
60
Personalizing Your Piano Sound (Piano Designer)
60
What Is Piano Designer
60
Editing a Scene (Scene Edit)
61
Overall Settings (Scene (Common))
61
Changing the Tuning Method (Scale Tuning)
62
Assigning Functions to the Wheels (Wheel Setting)
63
Assigning Functions to the Pedals (Pedal Setting)
64
Configuring the MIDI Transmit Channel Settings (MIDI Setting)
65
Settings for this Unit (General)
66
System Settings (System)
66
Adjusting the Sound Quality (Equalizer)
67
Sound-Related Settings (Sound)
67
Saving the System Settings (System Write)
68
Convenient Functions (Utility)
69
Returning to the Factory Settings (Factory Reset)
69
Backing up Settings to a USB Flash Drive (Backup)
70
Loading a Backup File into this Instrument (Restore)
70
Importing and Exporting Data (Import/Export)
71
Initializing a USB Flash Drive (Format USB Memory)
75
Viewing the Program Version (Information)
76
Advertisement
Roland FP-E50 Quick Start Manual (10 pages)
Brand:
Roland
| Category:
Musical Instrument
| Size: 2.26 MB
Table of Contents
Table of Contents
1
Panel Descriptions
2
Top Panel
2
Rear Panel
3
Getting Ready to Play
4
Placing the FP-E50 on a Stand
4
Attaching the Music Rest
5
Turning On/Off the Power
5
Adjusting the Overall Volume
5
Making the Power Automatically Turn off after a Time (Auto off )
5
Turning off the Auto-Off Function
5
Having Fun with the FP-E50
6
Selecting an Auto-Accompaniment Style (Style)
6
Playing Along with the Auto-Accompaniment
6
Changing the Accompaniment to Match Your Playing (Interactive Function)
6
Switching between Collections of Settings (Scene)
7
Playing Music through the Piano's Speakers (Bluetooth Audio)
7
Making Initial Settings (Pairing)
7
Playing Back Audio
7
Using the Unit Safely
8
Important Notes
8
Main Specifications
9
List of Shortcut Keys
10
Roland FP-E50 User Manual (5 pages)
Brand:
Roland
| Category:
Music Equipment
| Size: 0.35 MB
Advertisement
Advertisement
Related Products
Roland FG-1000
Roland FP-7F
Roland FP-5
Roland FP-4
Roland FP-1
Roland FP-9
ROLAND FP-4F
Roland FP-8
Roland FP-90
Roland FP-90X
Roland Categories
Musical Instrument
Synthesizer
Recording Equipment
Drums
Electronic Keyboard
More Roland Manuals
Login
Sign In
OR
Sign in with Facebook
Sign in with Google
Upload manual
Upload from disk
Upload from URL