Sign In
Upload
Manuals
Brands
Ricoh Manuals
All in One Printer
SP C260SFNw
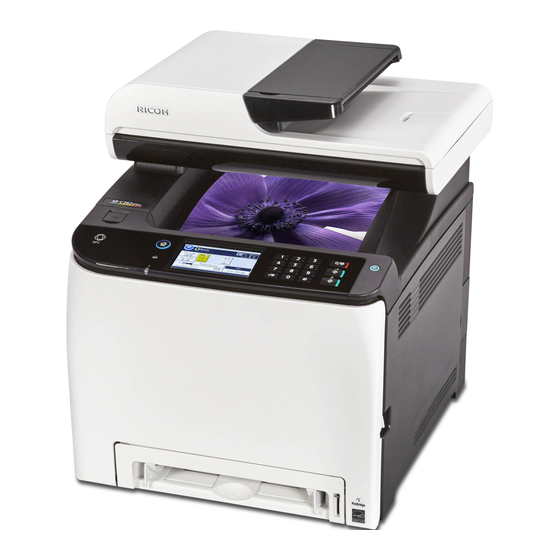
Ricoh SP C260SFNw Multifunction Printer Manuals
Manuals and User Guides for Ricoh SP C260SFNw Multifunction Printer. We have
4
Ricoh SP C260SFNw Multifunction Printer manuals available for free PDF download: User Manual, Setup Manual
Ricoh SP C260SFNw User Manual (444 pages)
Brand:
Ricoh
| Category:
All in One Printer
| Size: 8.16 MB
Table of Contents
Table of Contents
3
How to Find Information about Operations and Troubleshooting
13
Operating Manual (Printed)
13
Operating Manual (Digital Format)
13
How to Read this Manual
15
Introduction
15
Symbols Used in this Manual
15
Model-Specific Information
15
Disclaimer
16
Notes
16
Note to Administrator
17
List of Option
17
About IP Address
18
1 Guide to the Machine
19
Guide to Components
19
Exterior: Front View
19
Exterior: Rear View
21
Interior
23
Control Panel
24
Installing Option
27
Attaching Paper Feed Unit
27
How to Use the [Home] Screen
30
Displaying the [Home] Screen
30
Customizing the [Home] Screen
33
How to Customize the [Home] Screen
33
Adding to the [Home] Screen Shortcuts to Favorite Items
33
Changing the Order of Icons on the [Home] Screen
33
Deleting an Icon on the [Home] Screen
34
Registering Frequently Used Functions
35
Registering Functions in a Favorite Item
35
Recalling a Favorite Item
36
Deleting a Favorite Item
37
Displaying Frequently Used Modes Preferentially
38
Multi-Access
39
About Operation Tools
44
Entering Characters
45
Character Entry Display
45
Available Characters
45
Entering Text
46
Using RICOH Smart Device Connector
48
Connecting a Smart Device to the Machine Using NFC
49
Writing the Machine's Information to the NFC Tag with a Smart Device
49
Using the Application on a Smart Device by Using NFC
49
2 Paper Specifications and Adding Paper
51
Workflow for Loading Paper and Configuring Paper Sizes and Types
51
Loading Paper
52
Loading Paper into Tray1 and 2
52
Loading Paper into Bypass Tray
57
Loading Envelopes
58
Specifying Paper Type and Paper Size Using the Control Panel
61
Specifying the Paper Type
61
Specifying the Standard Paper Size
62
Specifying a Custom Paper Size
62
Specifying Paper Type and Paper Size Using Web Image Monitor
64
Specifying a Custom Paper Size
64
Specifying Paper Type and Paper Size Using the Printer Driver
65
When Using Windows
65
When Using os X
66
Supported Paper
67
Specifications of Paper Types
70
Plain Paper
70
Label Paper
74
Non-Recommended Paper Types
76
Paper Storage
77
Print Area
77
Placing Originals
81
Placing Originals on the Exposure Glass
81
Placing Originals in the Auto Document Feeder
81
About Originals
82
Recommended Size of Originals
82
Unscannable Image Area
83
3 Printing Documents
85
What You Can Do with the Printer Function
85
Configuring Option Settings for the Printer
86
Conditions for Bidirectional Communication
86
If Bidirectional Communication Is Disabled
86
Displaying the Printing Preferences Dialog Box
88
Displaying the Printing Preferences Dialog Box from the [Start] Menu
88
Displaying the Printing Preferences Dialog Box in an Application
88
Basic Operation of Printing
90
If a Paper Mismatch Occurs
91
Canceling a Print Job
91
Printing Confidential Documents
93
Storing a Locked Print File
93
Printing a Locked Print File
94
Deleting a Locked Print File
95
Direct Printing from a Digital Camera (Pictbridge)
97
What Is Pictbridge
97
Pictbridge Printing
97
What Can be Done on this Machine
98
Exiting Pictbridge
98
When Pictbridge Printing Does Not Work
99
Printing with Mopria
101
Using Various Print Functions
102
Print Quality Functions
102
Print Output Functions
103
4 Copying Originals
105
What You Can Do with the Copier Function
105
Copier Mode Screen
106
Basic Operation of Copying
108
Canceling a Copy
109
Making Enlarged or Reduced Copies
111
Specifying Reduce/Enlarge
112
Copying Single-Sided Originals with 2-Sided and Combined Printing
113
Specifying Combined and 2-Sided Copies
116
Copying 2-Sided Originals with 2-Sided and Combined Printing
118
Duplex Copying Using the ADF
119
Duplex Copying Manually Using the Exposure Glass
121
Copying an ID Card
123
Specifying Scan Settings for Copying
126
Adjusting Image Density
126
Selecting the Document Type According to Original
126
5 Scanning Originals
129
What You Can Do with the Scanner Function
129
Scanner Mode Screen
130
Registering Scan Destinations
132
Modifying Scan Destinations
138
Deleting Scan Destinations
138
Testing Transmission
139
Basic Operation of Scan to Folder
141
Printing the Check Sheet
141
Confirming the User Name and Computer Name
142
Creating a Shared Folder on a Computer
144
Specifying Access Privileges for the Created Shared Folder
146
Registering a Shared Folder in the Machine's Address Book
146
Send Scanned Files to a Shared Folder
147
Basic Operation of Scan to E-Mail
150
Configuring SMTP and DNS Settings
150
Registering Destination E-Mail Addresses to the Address Book
151
Sending Scanned Files by E-Mail
151
Basic Operation of Scan to FTP
154
Configuring FTP Server Settings
154
Sending Scanned Files to an FTP Server
154
Specifying the Scan Destination Using [Redial]
157
Basic Procedures for Saving Scan Files on a USB Flash Memory Device
158
Basic Operation for RICOH Scan Utility
161
Preparations for Using RICOH Scan Utility
161
Using Ricoh Scan Utility to Scan to a Computer
161
Using RICOH SP C260 Series Scan to Scan from a Smart Device
164
Basic Operation for TWAIN Scanning
166
Using TWAIN Scanner
166
TWAIN Scanning
166
Settings You Can Configure in the TWAIN Dialog Box
167
Basic Operation for WIA Scanning
169
Basic Operation for ICA Scanning
170
Installing the ICA Driver
170
Using ICA Scanner
170
ICA Scanning
170
Settings You Can Configure in the ICA Dialog Box
171
Using SANE Scanning
173
Specifying Scan Settings for Scanning
174
Specifying the Scanning Size According to the Size of the Original
174
Adjusting Image Density
175
Specifying Resolution
176
6 Sending and Receiving a Fax
179
What You Can Do with the Fax Function
179
Fax Setting Workflows
180
Fax Mode Screen
181
Setting the Date and Time
183
Registering Fax Destinations
184
Registering Fax Destinations Using the Control Panel
184
Modifying or Deleting Fax Destinations
185
Registering Fax Destinations Using Web Image Monitor
186
Modifying Fax Destinations
187
Preventing Transmission to the Wrong Destination
188
Sending a Fax
190
Selecting Transmission Mode
190
Internet Fax Transmission
191
Basic Operation for Sending a Fax
192
Canceling a Transmission
194
Specifying the Fax Destination
196
Specifying the Destination Using the Broadcast Function
198
Useful Sending Functions
199
Specifying Scan Settings for Faxing
201
Specifying the Resolution
202
Using the Fax Function from a Computer (LAN-Fax)
204
Basic Operation for Sending Faxes from a Computer
204
Canceling a Fax
205
Configuring Transmission Settings
206
Configuring the LAN-Fax Address Book
206
Modifying Destinations
207
Modifying Groups
208
Editing a Fax Cover Sheet
209
Receiving a Fax
210
Selecting Reception Mode
210
Receiving an Internet Fax
214
Forwarding or Storing Faxes in Memory
216
Receiving or Rejecting Faxes from Special Senders
220
Lists/Reports Related to Fax
222
7 Configuring the Machine Using the Control Panel
223
Basic Operation
223
Menu Chart
224
Copier Features Settings
225
Scanner Features Settings
230
Fax Features Settings
232
Address Book Settings
241
System Settings
242
Printer Features Settings
250
Paper Settings
254
Administrator Tools Settings
259
Printing Lists/Reports
266
Printing the Configuration Page
266
Types of Lists/Reports
266
Network Settings
268
8 Configuring the Machine Using Utilities
273
Available Setting Functions Using Web Image Monitor
273
Using Web Image Monitor
274
Displaying Top Page
275
Changing the Interface Language
276
Checking the System Information
277
Status Tab
277
Counter Tab
278
Machine Information Tab
281
Configuring the System Settings
282
Sound Volume Adjustment Tab
282
Tray Paper Settings Tab
282
Copier Tab
286
Fax Tab
286
Priority Tray Tab
288
Toner Saving Tab
289
I/O Timeout Tab
289
Black-And-White Print Priority Tab
290
Registering Destinations
291
Registering Fax Special Senders
292
Restricting Machine Functions According to User
293
Enabling the User Restriction Settings
293
When Machine Functions Are Restricted
297
Configuring the Network Settings
299
Network Status Tab
299
Ipv6 Configuration Tab
300
Network Application Tab
300
DNS Tab
301
Auto E-Mail Notification Tab
302
SNMP Tab
303
SMTP Tab
304
POP3 Tab
305
Internet Fax Tab
305
Wireless Tab
306
Configuring the Ipsec Settings
309
Ipsec Global Settings Tab
309
Ipsec Policy List Tab
309
Printing Lists/Reports
313
Configuring the Administrator Settings
314
Administrator Tab
314
Reset Settings Tab
314
Backup Setting Tab
315
Restore Setting Tab
316
Set Date/Time Tab
316
Energy Saver Mode Tab
317
PCL6 Mode
318
9 Maintaining the Machine
319
Replacing the Print Cartridge
319
Replacing the Waste Toner Bottle
324
Replacing a Component
330
Replacing the Intermediate Transfer Unit
330
Replacing the Fusing Unit and Transfer Roller
330
Cautions When Cleaning
331
Cleaning the Toner Density Sensor
332
Cleaning the Friction Pad and Paper Feed Roller
334
Cleaning the Registration Roller and Paper Tray
337
Cleaning the Exposure Glass
340
Cleaning the Auto Document Feeder
341
Moving and Transporting the Machine
343
Disposal
344
Where to Inquire
344
10 Troubleshooting
345
Error and Status Messages on the Screen
345
Removing Paper Jams
355
Removing Printing Jams
355
Removing Scanning Jams
363
When You Cannot Print Test Page
366
Paper Feed Problems
367
Print Quality Problems
370
Checking the Condition of the Machine
370
Checking the Printer Driver Settings
371
Printer Problems
373
When You Cannot Print Properly
373
When You Cannot Print Clearly
377
When Paper Is Not Fed or Ejected Properly
380
Other Printing Problems
381
Copier Problems
382
When You Cannot Make Clear Copies
382
When You Cannot Make Copies as Wanted
383
Scanner Problems
384
When You Cannot Browse the Network to Send a Scan File
384
When Scanning Is Not Done as Expected
384
Fax Problems
385
When You Cannot Send or Receive Fax Messages as Wanted
385
When an Error Is Notified Via a Report or E-Mail
388
Error Code
390
Common Problems
395
11 Configuring Network Settings Using os
397
Connecting the Machine to a Wired Network
397
Using a USB Cable
397
Using an Ethernet Cable
398
Connecting the Machine to a Wireless Network
400
Installing the Printer Driver
400
Using the Wi-Fi Setup Wizard
400
Using the WPS Button
402
Using a PIN Code
403
12 Appendix
405
Transmission Using Ipsec
405
Encryption and Authentication by Ipsec
405
Security Association
406
Encryption Key Exchange Settings Configuration Flow
407
Specifying Encryption Key Exchange Settings
407
Specifying Ipsec Settings on the Computer
408
Enabling and Disabling Ipsec Using the Control Panel
410
Notes about the Toner
411
Specifications of the Machine
412
General Function Specifications
412
Printer Function Specifications
414
Copier Function Specifications
415
Scanner Function Specifications
417
Fax Function Specifications
418
Paper Feed Unit TK1220
420
Consumables
422
Print Cartridge
422
Waste Toner Bottle
424
Information for this Machine
425
User Information on Electrical & Electronic Equipment (Mainly Europe and Asia)
425
Note for the Battery And/Or Accumulator Symbol (for EU Countries Only)
426
Environmental Advice for Users (Mainly Europe)
426
Notice to Wireless LAN Interface Users (Mainly Europe)
427
Notes to Users Regarding Facsimile Unit (New Zealand)
428
Notes to Users in the State of California (Notes to Users in USA)
428
Notes to Users in the United States of America
428
Notes to Canadian Users of Wireless Devices
431
Notes to Canadian Users Regarding Facsimile Unit
431
Remarques À L'attention des Utilisateurs Canadiens
432
ENERGY STAR Program
432
Saving Energy
432
Trademarks
434
Index
437
Advertisement
Ricoh SP C260SFNw User Manual (444 pages)
Brand:
Ricoh
| Category:
Printer
| Size: 7.56 MB
Table of Contents
Table of Contents
3
How to Find Information about Operations and Troubleshooting
13
Operating Manual (Printed)
13
Operating Manual (Digital Format)
13
How to Read this Manual
15
Introduction
15
Symbols Used in this Manual
15
Model-Specific Information
15
Disclaimer
16
Notes
16
Note to Administrator
17
List of Option
17
About IP Address
18
Guide to the Machine
19
Guide to Components
19
Exterior: Front View
19
Exterior: Rear View
21
Interior
23
Control Panel
24
Installing Option
27
Attaching Paper Feed Unit
27
How to Use the [Home] Screen
30
Displaying the [Home] Screen
30
Customizing the [Home] Screen
33
How to Customize the [Home] Screen
33
Adding to the [Home] Screen Shortcuts to Favorite Items
33
Changing the Order of Icons on the [Home] Screen
33
Deleting an Icon on the [Home] Screen
34
Registering Frequently Used Functions
35
Registering Functions in a Favorite Item
35
Recalling a Favorite Item
36
Deleting a Favorite Item
37
Displaying Frequently Used Modes Preferentially
38
Multi-Access
39
About Operation Tools
43
Entering Characters
44
Character Entry Display
44
Available Characters
45
Entering Text
45
Using RICOH Smart Device Connector
47
Connecting a Smart Device to the Machine Using NFC
48
Writing the Machine's Information to the NFC Tag with a Smart Device
48
Using the Application on a Smart Device by Using NFC
48
Paper Specifications and Adding Paper
49
Workflow for Loading Paper and Configuring Paper Sizes and Types
49
Loading Paper
50
Loading Paper into Tray1 and 2
50
Loading Paper into Bypass Tray
55
Loading Envelopes
56
Specifying Paper Type and Paper Size Using the Control Panel
59
Specifying the Paper Type
59
Specifying the Standard Paper Size
60
Specifying a Custom Paper Size
60
Specifying Paper Type and Paper Size Using Web Image Monitor
62
Specifying a Custom Paper Size
62
Specifying Paper Type and Paper Size Using the Printer Driver
63
When Using Windows
63
When Using os X
64
Supported Paper
65
Specifications of Paper Types
68
Non-Recommended Paper Types
74
Paper Storage
75
Print Area
75
Placing Originals
79
Placing Originals on the Exposure Glass
79
Placing Originals in the Auto Document Feeder
79
About Originals
80
Printing Documents
83
What You Can Do with the Printer Function
83
Configuring Option Settings for the Printer
84
Conditions for Bidirectional Communication
84
If Bidirectional Communication Is Disabled
84
Displaying the Printing Preferences Dialog Box
86
Displaying the Printing Preferences Dialog Box from the [Start] Menu
86
Displaying the Printing Preferences Dialog Box in an Application
86
Basic Operation of Printing
88
If a Paper Mismatch Occurs
89
Canceling a Print Job
89
Printing Confidential Documents
91
Storing a Locked Print File
91
Printing a Locked Print File
92
Deleting a Locked Print File
93
Direct Printing from a Digital Camera (Pictbridge)
95
What Is Pictbridge
95
Pictbridge Printing
95
What Can be Done on this Machine
96
Exiting Pictbridge
96
When Pictbridge Printing Does Not Work
97
Printing with Mopria
99
Using Various Print Functions
100
Print Quality Functions
100
Print Output Functions
101
Copying Originals
103
What You Can Do with the Copier Function
103
Copier Mode Screen
104
Basic Operation of Copying
106
Canceling a Copy
107
Making Enlarged or Reduced Copies
109
Specifying Reduce/Enlarge
110
Copying Single-Sided Originals with 2-Sided and Combined Printing
111
Specifying Combined and 2-Sided Copies
114
Copying 2-Sided Originals with 2-Sided and Combined Printing
116
Duplex Copying Using the ADF
117
Duplex Copying Manually Using the Exposure Glass
119
Copying an ID Card
121
Specifying Scan Settings for Copying
124
Adjusting Image Density
124
Selecting the Document Type According to Original
124
Scanning Originals
127
What You Can Do with the Scanner Function
127
Scanner Mode Screen
128
Registering Scan Destinations
130
Modifying Scan Destinations
136
Deleting Scan Destinations
136
Testing Transmission
137
Basic Operation of Scan to Folder
139
Printing the Check Sheet
139
Confirming the User Name and Computer Name
140
Creating a Shared Folder on a Computer
142
Specifying Access Privileges for the Created Shared Folder
144
Registering a Shared Folder in the Machine's Address Book
144
Send Scanned Files to a Shared Folder
145
Basic Operation of Scan to E-Mail
148
Configuring SMTP and DNS Settings
148
Registering Destination E-Mail Addresses to the Address Book
149
Sending Scanned Files by E-Mail
149
Basic Operation of Scan to FTP
152
Configuring FTP Server Settings
152
Sending Scanned Files to an FTP Server
152
Specifying the Scan Destination Using [Resend]
155
Basic Procedures for Saving Scan Files on a USB Flash Memory Device
156
Basic Operation for RICOH Scan Utility
159
Preparations for Using RICOH Scan Utility
159
Using Ricoh Scan Utility to Scan to a Computer
159
Using RICOH SP C260 Series Scan to Scan from a Smart Device
162
Basic Operation for TWAIN Scanning
164
Using TWAIN Scanner
164
TWAIN Scanning
164
Settings You Can Configure in the TWAIN Dialog Box
165
Basic Operation for WIA Scanning
167
Basic Operation for ICA Scanning
168
Installing the ICA Driver
168
Using ICA Scanner
168
ICA Scanning
168
Settings You Can Configure in the ICA Dialog Box
169
Using SANE Scanning
171
Specifying Scan Settings for Scanning
172
Specifying the Scanning Size According to the Size of the Original
172
Adjusting Image Density
173
Specifying Resolution
174
Sending and Receiving a Fax
177
What You Can Do with the Fax Function
177
Fax Setting Workflows
178
Fax Mode Screen
179
Setting the Date and Time
181
Registering Fax Destinations
182
Registering Fax Destinations Using the Control Panel
182
Registering Fax Destinations Using Web Image Monitor
184
Preventing Transmission to the Wrong Destination
186
Sending a Fax
188
Selecting Transmission Mode
188
Internet Fax Transmission
189
Basic Operation for Sending a Fax
190
Canceling a Transmission
192
Specifying the Fax Destination
194
Useful Sending Functions
197
Specifying Scan Settings for Faxing
199
Using the Fax Function from a Computer (LAN-Fax)
202
Basic Operation for Sending Faxes from a Computer
202
Configuring Transmission Settings
204
Configuring the LAN-Fax Address Book
204
Editing a Fax Cover Sheet
207
Receiving a Fax
208
Selecting Reception Mode
208
Receiving an Internet Fax
212
Forwarding or Storing Faxes in Memory
214
Receiving or Rejecting Faxes from Special Senders
218
Lists/Reports Related to Fax
220
Configuring the Machine Using the Control Panel
221
Basic Operation
221
Menu Chart
222
Copier Features Settings
223
Scanner Features Settings
228
Fax Features Settings
230
Address Book Settings
239
System Settings
240
Printer Features Settings
248
Paper Settings
252
Administrator Tools Settings
257
Printing Lists/Reports
265
Printing the Configuration Page
265
Types of Lists/Reports
265
Network Settings
267
Configuring the Machine Using Utilities
271
Available Setting Functions Using Web Image Monitor
271
Using Web Image Monitor
272
Displaying Top Page
273
Changing the Interface Language
274
Checking the System Information
275
Status Tab
275
Counter Tab
276
Machine Information Tab
279
Configuring the System Settings
280
Sound Volume Adjustment Tab
280
Tray Paper Settings Tab
280
Copier Tab
284
Fax Tab
284
Priority Tray Tab
286
Toner Saving Tab
287
I/O Timeout Tab
287
Black-And-White Print Priority Tab
288
Registering Destinations
289
Registering Fax Special Senders
290
Restricting Machine Functions According to User
291
Enabling the User Restriction Settings
291
When Machine Functions Are Restricted
295
Configuring the Network Settings
297
Network Status Tab
297
Ipv6 Configuration Tab
298
Network Application Tab
298
DNS Tab
299
Auto E-Mail Notification Tab
300
SNMP Tab
301
SMTP Tab
302
POP3 Tab
303
Internet Fax Tab
303
Wireless Tab
304
Configuring the Ipsec Settings
307
Ipsec Global Settings Tab
307
Ipsec Policy List Tab
307
Printing Lists/Reports
311
Configuring the Administrator Settings
312
Administrator Tab
312
Reset Settings Tab
312
Backup Setting Tab
313
Restore Setting Tab
314
Set Date/Time Tab
314
Energy Saver Mode Tab
315
PCL6 Mode
316
Maintaining the Machine
317
Replacing the Print Cartridge
317
Replacing the Waste Toner Bottle
322
Replacing a Component
328
Replacing the Intermediate Transfer Unit
328
Replacing the Fusing Unit and Transfer Roller
328
Cautions When Cleaning
329
Cleaning the Toner Density Sensor
330
Cleaning the Friction Pad and Paper Feed Roller
332
Cleaning the Registration Roller and Paper Tray
335
Cleaning the Exposure Glass
338
Cleaning the Auto Document Feeder
339
Moving and Transporting the Machine
341
Disposal
342
Where to Inquire
342
10. Troubleshooting
343
Error and Status Messages on the Screen
343
Removing Paper Jams
353
Removing Printing Jams
353
Removing Scanning Jams
361
When You Cannot Print Test Page
364
Paper Feed Problems
365
Print Quality Problems
368
Checking the Condition of the Machine
368
Checking the Printer Driver Settings
369
Printer Problems
371
When You Cannot Print Properly
371
When You Cannot Print Clearly
375
When Paper Is Not Fed or Ejected Properly
378
Other Printing Problems
379
Copier Problems
380
When You Cannot Make Clear Copies
380
When You Cannot Make Copies as Wanted
381
Scanner Problems
382
When You Cannot Browse the Network to Send a Scan File
382
When Scanning Is Not Done as Expected
382
Fax Problems
383
When You Cannot Send or Receive Fax Messages as Wanted
383
When an Error Is Notified Via a Report or E-Mail
386
Error Code
388
Common Problems
393
Configuring Network Settings Using os
395
Connecting the Machine to a Wired Network
395
Using a USB Cable
395
Using an Ethernet Cable
396
Connecting the Machine to a Wireless Network
398
Installing the Printer Driver
398
Using the Wi-Fi Setup Wizard
398
Using the WPS Button
400
Using a PIN Code
401
12. Appendix
403
Transmission Using Ipsec
403
Encryption and Authentication by Ipsec
403
Security Association
404
Encryption Key Exchange Settings Configuration Flow
405
Specifying Encryption Key Exchange Settings
405
Specifying Ipsec Settings on the Computer
406
Enabling and Disabling Ipsec Using the Control Panel
408
Notes about the Toner
409
Specifications of the Machine
410
General Function Specifications
410
Printer Function Specifications
412
Copier Function Specifications
413
Scanner Function Specifications
415
Fax Function Specifications
416
Paper Feed Unit TK1220
418
Consumables
420
Print Cartridge
420
Waste Toner Bottle
423
Information for this Machine
424
User Information on Electrical & Electronic Equipment (Mainly Europe and Asia)
424
Note for the Battery And/Or Accumulator Symbol (for EU Countries Only)
425
Environmental Advice for Users (Mainly Europe)
425
Notice to Wireless LAN Interface Users (Mainly Europe)
426
Notes to Users Regarding Facsimile Unit (New Zealand)
426
Notes to Users in the State of California (Notes to Users in USA)
427
Notes to Users in the United States of America
427
Notes to Canadian Users of Wireless Devices
429
Notes to Canadian Users Regarding Facsimile Unit
430
Remarques À L'attention des Utilisateurs Canadiens
430
ENERGY STAR Program
431
Saving Energy
431
Trademarks
433
Index
437
Ricoh SP C260SFNw User Manual (444 pages)
Brand:
Ricoh
| Category:
All in One Printer
| Size: 4.66 MB
Advertisement
Ricoh SP C260SFNw Setup Manual (17 pages)
Brand:
Ricoh
| Category:
All in One Printer
| Size: 6.52 MB
Table of Contents
Setup Guide
1
Setting up the Machine
3
Installing the Software
6
Check How the Computer Is Connected
6
Connecting the Machine (Usb/Network)
7
Connecting the Machine Via Wi-Fi
8
Fax Settings
12
Selecting the Telephone Line Type and Telephone Network Connection Type
13
Setting the Outside Line Access Number
13
Basic Operation for Sending a Fax
13
Scan Settings
14
Control Panel Sheet
14
Advertisement
Related Products
Ricoh C264
Ricoh C261
Ricoh SP C262SFNw
Ricoh C221N - Aficio SP Color Laser Printer
Ricoh C275
Ricoh C220S - Aficio SP Color Laser
Ricoh Savin C240
Ricoh M C250FWB
Ricoh C280
Ricoh C216
Ricoh Categories
All in One Printer
Printer
Digital Camera
Copier
Printer Accessories
More Ricoh Manuals
Login
Sign In
OR
Sign in with Facebook
Sign in with Google
Upload manual
Upload from disk
Upload from URL