Sign In
Upload
Manuals
Brands
Ricoh Manuals
All in One Printer
PRO C7200
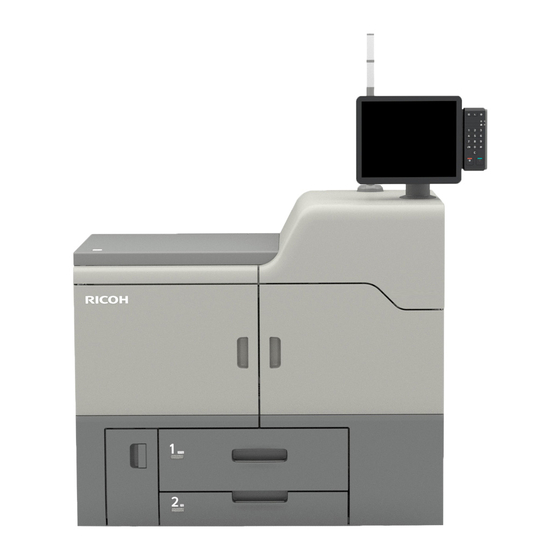
Ricoh PRO C7200 Manuals
Manuals and User Guides for Ricoh PRO C7200. We have
11
Ricoh PRO C7200 manuals available for free PDF download: Troubleshooting Manual, Operating Instructions Manual, Adjustment Settings For Operators, Manual, Cip Training
Ricoh PRO C7200 Troubleshooting Manual (685 pages)
Brand:
Ricoh
| Category:
Printer
| Size: 15.28 MB
Table of Contents
Table of Contents
5
1 SC Codes
11
Self-Diagnostic Mode
11
Service Call Conditions
11
SC Logging
12
SC Automatic Reboot
12
SC Manual Reboot
14
Service Call 101-195(Scanning)
16
SC100 (Engine)
16
Service Call 202-286 (Image Writing)
27
SC200 (Engine)
27
Service Call 300-398
35
SC300 (Engine: Charge, Development)
35
Service Call 400-498
55
SC400 (Engine: Around the Drum)
55
Service Call 501-595
68
SC500 (Engine: Paper Transport 1: Paper Feed, Duplex, and Transport)
68
Service Call 600-672 (Controller)
123
SC632 to SC653, SC670 to SC672
123
Service Call 603-689 (Engine)
126
SC600 (Engine: Communication and Others)
126
Service Call 700-740
152
SC700 (Engine: Peripherals)
152
Service Call 750-790
197
SC700 (Engine: Peripherals)
197
Service Call 816-899
377
SC816 to SC899
377
Service Call 900-998 (Controller)
381
SC900 to SC998
381
Service Call 995 (Engine)
390
SC995 (Engine: Others)
390
2 JAM Codes
391
Jam Detection
391
Jam Displays
391
Jam Removal
391
Printer Engine Jam History
392
Jam Code Descriptions
392
3 Troubleshooting: Paper Delivery Problems
407
Advertisement
Ricoh PRO C7200 Operating Instructions Manual (348 pages)
Brand:
Ricoh
| Category:
All in One Printer
| Size: 10.23 MB
Table of Contents
Table of Contents
3
Introduction
10
How to Read this Manual
11
Symbols
11
Disclaimer
11
Notes
11
Notes for TCRU/ORU Users
12
1 Before You Begin
13
About this Manual
13
Names of Components
14
About the Display for Options
15
Before You Change a Setting
16
About Printing Surfaces
17
Note about Vertical and Horizontal Directions
19
2 Troubleshooting Service Call Problems (SC Codes)
21
What Are SC Codes
21
If an SC Code Appears
21
3 Specifying and Checking Paper Settings
23
Adjusting Paper Settings
23
Paper Setting Flowchart
23
Improving Fusibility
23
Improving Transferability
27
Improving Paper Deliverability
27
4 Troubleshooting Image Quality Problems
29
Image Index
29
Large Classification: Lines/Streaks
29
Large Classification: Spots
33
Large Classification: Full Page
35
5 Image Quality Problem: Lines
47
Streaks
47
Horizontal Black Streaks (Image Edge)
47
Horizontal White Streaks
48
Whiter at the Trailing Edge
49
Vertical Black Streaks
50
Toner Scattering: Trailing Edge
182
Toner Scattering: Around a Solid Fill Image
185
Multiple Toner Stains: Horizontal Streaks
185
Stains on the Trailing Edge (20 MM Intervals)
186
Stained Paper Edges
187
Stained Paper Edges (1)
187
Stained Paper Edges (2)
188
Stained Paper Edges (3)
188
Stained Paper Edges (4)
189
Stained Paper Edges (5)
190
Stained Paper Edges (6)
190
Disturbed Image
195
Image Degradation: Affected Graininess of Half-Tone Images
195
Stretched Image
196
Shrunken Image
196
Image Skew
198
Others
199
Insufficient Gloss: Clear Image
199
Milky Transparency
200
Waves: Trailing Edge (A4 and Larger)
205
Narrow Margin: Trailing Edge of Paper (Stretched Image)
206
Creases or Worm Track (Wavy Streaks)
206
Troubleshooting Paper Delivery Problems
213
Frequent Paper Misfeeds
213
Messages Reporting Paper Misfeeds
216
If (J032) Appears
216
If (J033/J082) Appears
218
If (J033/J034/J083) Appears
220
If (J080) Appears
224
If (J097) Appears
225
If (J098) Appears
225
If (J099) Appears
227
If (J129) Appears
227
Ricoh PRO C7200 Operating Instructions Manual (132 pages)
Adjustment Item Menu Guide: TCRU/ORU
Brand:
Ricoh
| Category:
All in One Printer
| Size: 3.65 MB
Table of Contents
Operating Instructions
1
Table of Contents
3
Introduction
9
How to Read this Manual
10
Symbols
10
Disclaimer
10
Notes
10
Manuals for this Machine
11
Paper Feed Direction of Printed Copies (Side 1/Side 2)
12
Adjustment Settings for Operators
15
Accessing Adjustment Settings for Operators
15
Layout of Adjustment Settings for Operators
16
Features of the Displayed Items and Setting Operations
17
Notes on How Adjustment Settings Are Applied to Printed Copies
20
Details of Menu Items in Adjustment Settings for Operators
23
[Machine: Image Position]
23
0101 [Image Position: Across Feed: Side 1]/0102 [Image Position: Across Feed: Side 2]
23
0103 [Image Position: with Feed: Side 1]/0104 [Image Position: with Feed: Side 2]
24
0105 [Perpendicularity Adjustment]
26
0106 [Switch Paper Edge Detection Sensor]
26
0107 [Auto Adjust Image Position: No. of Printed Sheets]
27
[Machine: Image Quality]
28
0201 [Execute Image Quality Adjustment]
28
0202 [Maximum Image Density]
28
0203 [Line Width]
28
0204 [Density Difference: Across Feed]
29
[Machine: Paper Feed/ Output]
30
0301 [3-Tray LCIT: Fan Setting]
30
0302 [3-Tray LCIT: Fan Volume Setting]
30
0303 [Pickup Assist Setting]
30
0304 [Correct Output Paper Curl]
31
0305 [Detect JAM099]
32
0306 [Detect JAM080]
33
0307 [Detect/Control JAM097/098]
34
0308 [Detect JAM048]
35
0309 [Registration Gate: Paper Buckle Amount]
35
0310 [ADF Adjustment]
36
0311 [Buffer Pass Unit Fan Activation Setting]
37
0312 [Nip Width of Pressure Position 3 & 4]
37
[Machine: Productivity]
39
0401 [No. of Sheets for Auto Color Selection]
39
0402 [Print Mode When Switching Paper Type]
39
0403 [Fusing Temperature on Standby]
39
0404 [Pressure Roller Cooling Fan Level]
40
[Machine: Maintenance]
41
0501 [Execute Process Adjustment]
41
0502 [Screw-On Cap to Replace]
41
0503 [Execute Charger Unit Cleaning]
41
0504 [Execute Cleaning Initial Setting for PCU]
41
0505 [Photoconductor more Lubricant Mode]
42
0506 [Execute Developer Refreshing]
42
0507 [Execute ITB Manual Lubrication]
43
0508 [Manually Smooth Fusing Belt]
43
0509 [Fusing Belt Manual Smoothing Adjustment]
43
0510 [Fusing Belt Auto Smoothing Setting]
44
0511 [Fusing Belt Smoothing Adjustment]
44
0512 [Fuser Unit Speed Adjustment]
44
0513 [Wind Fuser Cleaning Unit at Replacement]
44
0514 [Temperature / Humidity Inside]
45
0515 [Temperature / Humidity Outside]
45
0516 [Change Special Toner]
45
0517 [Switch Print Screen]
46
0518 [Reset Parts Counter]
46
0519 [Display Parts Life Counter]
48
0520 [Special Toner Position]
50
[Finishing: Finisher]
52
0601 [Staple Position: Across Feed 1]
52
0602 [Staple Position: Across Feed 2]
53
0603 [Staple Position: with Feed]
53
0604 [Paper Alignment for Stapling: Across Feed]
54
0605 [Paper Alignment for Stapling: with Feed]
55
0606 [Number of Sheets Align for Stapling]
56
0607 [Punch Position: Across Feed]
57
0608 [Punch Position: with Feed]
58
0609 [Punch Skew Correction]
58
0610 [Amount of Punch Skew Correction]
59
0611 [Paper Alignment in Shift Tray Setting]
59
0612 [Paper Alignment in Shift Tray: Across Feed]
60
0613 [Output Tray Descending Position]
60
0614 [Exit Guide Close Timing]
61
0615 [Output Trail Edge Press Setting]
61
0616 [Output Fan Setting]
61
0617 [Output Fan Level]
62
0618 [Staple Position for Booklet]
62
0619 [Folding Position for Booklet]
63
0620 [Paper Alignment for Booklet: Across Feed]
64
0621 [Set Number of Folds for Booklet]
65
0622 [Paper Alignment for Booklet: with Feed]
66
0623 [Z-Fold Skew Correction]
67
0624 [Amount of Z-Fold Skew Correction]
67
0625 [Amount of Z-Fold Skew Correction: Reverse]
67
0626 [Maximum No. Stacked Sheets in Output Tray]
68
[Finishing: Fold]
69
0701 [Z-Fold Position 1]
69
0702 [Z-Fold Position 2]
69
0703 [Half Fold Position: 1 Sheet Fold]
70
0704 [Half Fold Position: Multi-Sheet Fold]
71
0705 [Letter Fold-Out Position 1: 1 Sheet Fold]
73
0706 [Letter Fold-Out Position 1: Multi-Sheet Fold]
73
0707 [Letter Fold-Out Position 2: 1 Sheet Fold]
74
0708 [Letter Fold-Out Position 2: Multi-Sheet Fold]
75
0709 [Letter Fold-In Position 1: 1 Sheet Fold]
75
0710 [Letter Fold-In Position 1: Multi-Sheet Fold]
76
0711 [Letter Fold-In Position 2: 1 Sheet Fold]
77
0712 [Letter Fold-In Position 2: Multi-Sheet Fold]
78
0713 [Double Parallel Fold Position 1]/0714 [Double Parallel Fold Position 2]
79
0715 [Gate Fold Position 1]/0716 [Gate Fold Position 2]/0717 [Gate Fold Position 3]
80
0718 [Folding Unit Tray Full Detection]
81
0719 [Number of Sheets Folded after Full Detection]
81
[Finishing: Perfect Binder]
83
0801 [Perf Bind Cvr Sht Posit: Across Feed]
83
0802 [Perf Bind Cvr Sht Posit: with Feed]
83
0803 [Perfect Binding Finishing Angle]
83
0804 [Applying Binding Glue]
84
[Finishing: Stacker]
85
0901 [Ppr Align in Stack Tray: Acr Feed 1]
85
0902 [Ppr Align in Stack Tray: Acr Feed 2]
86
0903 [Paper Alignment in Stacker Tray: with Feed]
86
0904 [Ppr Align in 2Nd Stack Tray: Acr Feed 1]
87
0905 [Ppr Align in 2Nd Stack Tray: Acr Feed 2]
88
0906 [Ppr Align in 2Nd Stack Tray: with Feed]
89
0907 [Maximum Stack Quantity in Stacker Tray]
90
[Density Difference Printing: Across Feed]
92
Custom Paper Settings for Administrators
93
Accessing Advanced Settings
93
Description of Paper Icons
94
Deleting Saved Custom Paper Profiles
95
Backing up and Restoring Custom Paper Profiles
96
Backing up Custom Paper Profiles Registered under the [Custompaper Management] Setting
96
Backing up and Restoring Custom Paper Profiles Using the External Controller's Control Panel
97
Paper Presets in "Advanced Settings
98
Displaying the Paper Profile Version
98
Details of Menu Items in Advanced Settings
99
[Machine: Image Position]
99
1101 [Image Position]
99
1102 [Auto Adjust Image Position]
102
1103 [Image Position Feedback Correction]
103
1104 [Image Position Feedback Correction: Gap]
103
[Machine: Image Quality]
105
1201 [Max Image Density]
105
1212 [Image Transfer Output]
105
1214 [Paper Transfer Output]
106
1216 [Paper Transfer Output Correction: Paper Edge]
107
1218 [Paper Transfer Output: Textured Paper Mode]
108
1221 [Paper Transfer Separate Voltage]
109
1222 [Paper Transfer Nip Operation Mode]
109
1223 [Paper Transfer Nip]
110
1231 [Print Speed]
110
1232 [Fusing Temperature]
112
1233 [Fusing Pressure Temperature]
115
1234 [Print Mode When Switching Paper Type]
116
1235 [Fusing Temperature Range]
116
1236 [Fusing Pressure Roller Cooling]
118
1237 [Print Speed (Sheet Interval Adj)]
119
1238 [Fusing Cleaning]
119
1239 [Erase Margin]
120
1240 [Fusing Nip Width: Paper Type]
120
1241 [Fusing Nip Width Adjustment]
121
1242 [Initial Fusing Temperature for Envelope]
121
1243 [Fusing Belt Smoothing]
121
1244 [Fusing Pressure Roller on before Fusing]
122
[Machine: Paper Feed/ Output]
123
1301 [2-Tray LCIT: Paper Feed Mode]
123
1302 [2-Tray LCIT: Fan/Shutter]
123
1303 [2-Tray LCIT: Other Settings]
126
1311 [3-Tray LCIT]
126
1312 [Main/3-Tray Lcit/Bypass]
127
Advertisement
Ricoh PRO C7200 Operating Instructions Manual (52 pages)
Advanced Settings for Custom Paper Adjustment
Brand:
Ricoh
| Category:
Printer
| Size: 3.36 MB
Table of Contents
Table of Contents
3
Introduction
5
Basic Procedure
5
Advanced Settings
6
Mechanism
7
Xerographic Process - Overview
7
Xerographic Process-Laser Exposure
9
Laser Unit (Exposure)
9
Xerographic Process - Development
10
Development
10
Xerographic Process - Drum-To-Belt Transfer
12
Drum-To-Belt Transfer
12
Xerographic Process - Belt-To-Paper Transfer
13
Belt-To-Paper Transfer
13
PTR Rotation Speed
16
Paper Separation
16
Xerographic Process - Fusing
18
Fusing Unit
18
Fusing Nip Width Adjustment
19
Fusing Cleaning Unit
19
Fusing Belt Smoothing Roller
20
Paper Delivery
22
Mainframe
22
Decurl Unit
25
3-Tray LCIT
26
Details of Advanced Settings
29
Overview
29
Print Mode
29
Registration
30
Image Position/Magnification
30
Image Quality
31
Maximum Image Density
31
Image Transfer Current
31
Paper Transfer
32
Fusing
34
Paper Feed/Delivery from Mainframe Trays
41
2-Tray LCIT
41
3-Tray LCIT
45
Decurler Unit
46
Mainframe Trays
46
Ricoh PRO C7200 Operating Instructions Manual (44 pages)
Printer Driver Installation Guide
Brand:
Ricoh
| Category:
Printer
| Size: 0.27 MB
Table of Contents
Table of Contents
3
1 Introduction
5
Start Installer
5
Software and Utilities Included on the CD-ROM
7
Printer Drivers
7
For os X, Macos Users
10
2 Installing the Printer Driver
11
Confirming the Connection Method
11
Using the Windows Printing Port
11
Using as a Network Printer
11
Install from Disk
13
Installing the Printer Driver for a Network Connection
15
Installing the Printer Driver for the Selected Port
15
Using as a Network Printer
21
Configuring Option Settings for the Printer
23
Conditions for Bidirectional Communication
23
If Bidirectional Communication Is Disabled
23
3 Troubleshooting
25
Messages Displayed When Installing the Printer Driver
25
4 Installing the Printer Driver under os X, Macos
27
Installing the PPD Files
27
Registering the Printer
28
Configuring Option Settings for the Printer under os X, Macos
29
5 Installing the Latest Driver Via an Internet
31
Installing the Device Software Manager
31
Uninstalling Device Software Manager
31
6 Appendix
33
Updating or Deleting the Printer Driver
33
Updating the Printer Driver
33
Deleting the Printer Driver
34
Trademarks
36
Index
39
Ricoh PRO C7200 Adjustment Settings For Operators (76 pages)
CIP training
Brand:
Ricoh
| Category:
Printer
| Size: 3.43 MB
Ricoh PRO C7200 Manual (56 pages)
CIP Training
Brand:
Ricoh
| Category:
Printer
| Size: 47.9 MB
Ricoh PRO C7200 Cip Training (28 pages)
Brand:
Ricoh
| Category:
Printer
| Size: 19 MB
Table of Contents
Control Panel Information
3
Control Panel
5
Changing Modes by Pressing the Function Keys
5
[Printer Status] Screen
5
[Tray Paper Settings] Screen
6
How to Use the [Custom Paper Management] Screen
8
How to Use the [Import from Master Library] Screen
9
Registering a New Custom Paper with the Media Identification Unit
15
Specifying a Custom Paper for Paper Trays with the Media Identification Unit
17
Ricoh PRO C7200 Cip Training (18 pages)
Brand:
Ricoh
| Category:
Printer
| Size: 68.86 MB
Ricoh PRO C7200 Cip Training (12 pages)
Brand:
Ricoh
| Category:
Printer
| Size: 9.15 MB
Table of Contents
Startup and Shutdown
3
Turning On/Off the Power
4
Turning off the Main Power
5
Saving Energy
5
Supply Yields
8
Removing Jammed Paper
9
Ricoh PRO C7200 Cip Training (16 pages)
Brand:
Ricoh
| Category:
Printer
| Size: 48.11 MB
Advertisement
Related Products
Ricoh PRO C7200X
Ricoh PRO C7210
Ricoh PRO C7210X
Ricoh PRO C7210S
Ricoh PRO C7200S
Ricoh Pro C7100
Ricoh Pro C7100s
Ricoh Pro C7110s
Ricoh Pro C7500H
Ricoh Pro C720s
Ricoh Categories
All in One Printer
Printer
Digital Camera
Copier
Printer Accessories
More Ricoh Manuals
Login
Sign In
OR
Sign in with Facebook
Sign in with Google
Upload manual
Upload from disk
Upload from URL