Sign In
Upload
Manuals
Brands
Ricoh Manuals
Printer
aficio SG 2100N
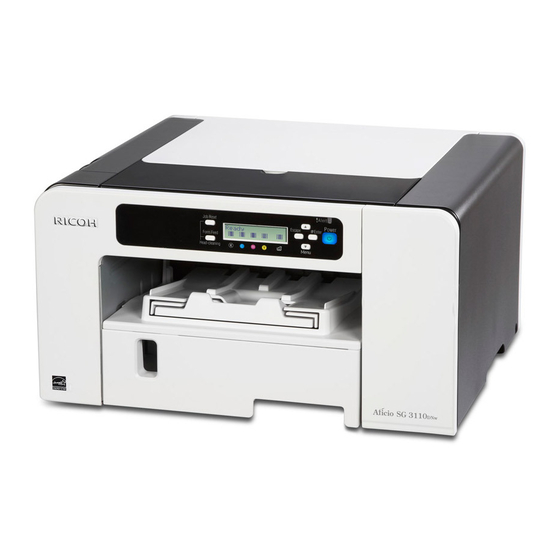
Ricoh aficio SG 2100N Inkjet Printer Manuals
Manuals and User Guides for Ricoh aficio SG 2100N Inkjet Printer. We have
2
Ricoh aficio SG 2100N Inkjet Printer manuals available for free PDF download: User Manual, Field Service Manual
Ricoh aficio SG 2100N Field Service Manual (360 pages)
Brand:
Ricoh
| Category:
Printer
| Size: 4.25 MB
Table of Contents
Table of Contents
12
Safety Instructions, Conventions
3
Responsibilities of the Customer Engineer
3
Before Installation, Maintenance
4
Installation, Disassembly, and Adjustments
5
Special Tools
5
Power
4
Shipping and Moving the Machine
4
During Maintenance
5
General
5
Safety Devices
5
Organic Cleaners
6
Power Plug and Power Cord
6
After Installation Servicing
7
Disposal of Used Items
7
Points to Confirm with Operators
7
Safety Instructions for Batteries
8
Safety Instructions for Ink Cartridges
8
Accidental Exposure to Ink
8
Handling and Storing Ink Cartridges
8
Ink Cartridge Disposal
8
Conventions Used in this Manual
9
Symbols and Abbreviations
9
Machine Names
10
Warnings, Cautions, Notes
10
Trademarks
11
Table of Contents
12
Product Information
19
Specifications
19
Overview
20
Before You Begin
20
What this Manual Contains
20
Print Cartridges
22
Printer Models and Options
22
Ink Collector Unit
23
Main Machine
24
Front View
24
Left View
25
Rear View
25
Options
26
Installation
27
Preparation
27
Environment
27
Choosing a Location
27
Minimum Space Requirements
28
Power Source
29
Using the Operation Panel
30
Key Summary Table
31
Printer Display Summary
32
Operation Panel: Cartridge Replacement Indicator
32
Operation Panel: Waste Ink Full Indicator
33
Display Menu Summary
34
User Menu Mode
34
Access to Menus During an Error
40
Installation
41
Important Information
42
Checklist before Moving the Printer
42
Taping Positions During the Machine Transport
42
If the Printer Is Not Used Frequently
43
Preventive Maintenance
45
PM Table
45
Service Call Procedures
45
Replacement and Adjustment
47
Before Replacing Parts
47
Removal Table
47
Required Tools
49
Common Procedures
50
Simple Removals
50
Duplex Unit (J028/J029/J035)
50
Ink Collector Unit
50
Covers
52
Cover Names
52
Order of Cover Removal
53
Rear Cover, Top Cover
53
Right Cover
55
Right Front Cover
55
Left Cover
57
Port Cover
57
Canopy Cover
58
Front Cover, Operation Panel Board
58
Re-Assembly
60
Unlocking, Moving the Carriage
64
Maintenance Unit, Right Ink Sump
66
Maintenance Unit
66
Right Ink Sump
69
Encoders
71
Vertical Encoder Wheel
71
Horizontal Encoder Strip
73
Reinstallation
75
Vertical Encoder Wheel Protection Cover (J035 Only)
76
Reinstallation of the Vertical Encoder Wheel Protection Cover
79
Boards
80
Psu
80
Hvps
81
Printer Engine CTL Board
83
Before Replacement
83
CTL Board Replacement
84
After Replacement
85
Wireless LAN Board (J029 Only)
88
Motors
91
Horizontal Motor
91
Vertical Motor
93
Fan, Fan Bracket
95
Clutches
97
Feed Clutch
97
Re-Installation
98
Transport Belt
99
Transport Belt, Charge Roller, Pressure Plate, Pressure Rollers
99
Sensors, Switches
103
Vertical Encoder Sensor
103
Ink Level Sensor
104
1St Registration Sensor
106
2Nd Registration Sensor
108
Air Purge Detection Switch
109
Top Cover Switch
111
Right Front Cover Switch
112
Temperature/Humidity Sensor
114
Trailing Edge Sensor
114
Paper End Sensor
115
Duplex Unit Set/Cover Open Switch
115
Bypass Drawer Connector
117
Drive Switching Module and Ink Tube Guide
120
Drive Switching Module
120
Ink Tube Guide
122
Rollers
123
Paper Feed Roller (J027/J028/J029)
123
Re-Installation
126
Paper Feed Roller (J035)
126
Re-Installation
129
Connecting Rollers
129
Carriage Unit
130
Replacing the Carriage Unit
132
Accessories
132
Preparation
132
Re-Installation
135
After Replacing the Carriage
137
Print Head Cleaning and Adjustment
139
Preparing for Test Printing
139
Nozzle Check
139
Nozzle Check Pattern
139
Color Demo Print
140
Print Head Cleaning
141
Print Head Flushing
142
Adjust Paper Feed
143
Head Position
145
Registration
146
Cleaning
149
Maintenance Unit Cleaning
149
Connecting Rollers Cleaning
150
Transport Belt Cleaning
151
Friction Pad Cleaning
152
Horizontal Encoder Strip Cleaning
154
Cleaning Procedure
154
Horizontal Encoder Sensor Cleaning
156
Vertical Encoder Wheel Cleaning
157
Refurbishing
159
Swap and Repair Flow
159
Before Shipping from Customer Site to Repair Center
159
What You Need
160
Refurbishing Flow
160
Purging
161
Clean the Machine
162
System Maintenance Reference
163
Service Program Mode
163
SP Mode Service Tables
164
SP Table Key
164
Sp3-XXX
165
Reset and Restoration Settings
165
Maintenance, Replacement
166
Sp5-XXX
166
Input Check: Sensors
166
Input Check: Temperature and Humidity
167
Input Check: Air
168
Input Check: Ink Cartridge Set Sensors
168
Input Check: Ink Cartridge Levels
169
Print an Engine Maintenance Summary
169
Sp7-XXX
169
Display Count: Machine Total
169
Date Display SC Log
170
Display Count: User Cleaning
170
Display Count: User Flushing
170
Display Jam Log
171
Display Total Count: Jam Log
171
Display Total Count: SC Log
171
Status Reports
173
Page Counter
174
Config. List
176
Service Summary
178
Engine Summary Chart
179
Firmware Updates
183
Operating Environment and Other Requirements
183
Update Cautions
183
Firmware Update Operating Instructions
184
Bidirectional-Enabled
185
Bidirectional-Disabled
187
Troubleshooting
191
Troubleshooting Guide
191
Image Problems
191
Basic Check Points and Specifications
191
Problems and Solutions
193
Operation Panel Display
202
Operation Panel Messages
204
Error Codes
211
Service Call Conditions
211
SC Code Display Patterns and How to Clear Them
211
Service Call Code Tables
212
Jam Codes
228
Jammed Paper Location
241
Status Monitor Messages
243
Energy Saving
247
Energy Save
247
Energy Saver Modes
247
Return to Standby Mode
247
Timer Settings
247
Recommendation
248
Paper Save
249
Effectiveness of Duplex/Combine Function
249
Combine Mode
249
Duplex
249
Duplex + Combine
250
Duplex Mode Tables
250
Recommendation
250
Table of Contents
257
1 Appendix: Specifications
263
Specifications
263
Printer Engine
263
Quick Comparison
263
Base Specifications
264
Ink Cartridge Yield (Target)
267
Options Available
267
Print Volume, Service Life
268
Operating Environment
269
Transportation and Storage
271
Multi Bypass Tray BY1040 (J313) Option
272
Paper Feed Unit TK1160 (J312) Option
273
Supported Paper Sizes
273
Operation Specifications
275
Printing Operation
275
Print Speed and Resolution
276
Continuous Print Speed: Monochrome/Full Color
278
Control Boards
279
J027(ZICO) Controller
279
J028/J029/J035 (FIGO) Controller
281
Interface Specifications
283
Supported Utilities
284
2 Appendix: SP Mode Tables
285
Service Mode, Engine Maintenance
285
Entering/Exiting Service Mode
285
Service Mode
285
Engine Maintenance (SP) Mode
287
Entering/Exiting SP Mode
287
Using SP Mode Menus
288
Bit Switch Settings
289
SP Mode Service Tables
294
SP Table Key
294
Paper Feed
295
Sp1-XXX
295
Sub Scan Registration
295
Carriage
297
Main Scan Registration
297
Charge Width Setting Mj1,2 : Simplex (DFU)
299
Charge Width Setting Mj3,4,5 : Simplex (DFU)
299
Charge Width Setting Mj1,2 : Duplex (DFU)
300
Charge Width Setting Mj3,4 : Duplex (DFU)
300
Calibrate Humidity/Temperature for Duplex (DFU)
301
Set Charge Area
301
Set Charge for Target Market
302
Adjust Printhead Gap
303
Sp3-XXX
303
Set Print Head Rank (Wave)
304
DAC Adjustment Value
305
Ink Consumption in the Print Cartridge
305
Set Print Head Rank (Voltage)
305
Margin for Detecting if the Print Cartridge Has Run out of Ink
306
Set Threshold for Near-Full Alert
306
Maintenance, Replacement
307
Reset and Restoration Settings
307
Sp4-XXX
307
Administration Password Setting
308
Authentication Function
308
Sp5-XXX
308
User Code Setting
308
Color Mode Setting
309
SC Alarm Setting
310
Supply Alarm Setting
310
Plotter Settings
311
Input Check: Sensors
312
Input Check: Temperature and Humidity
313
Input Check: Air
314
Input Check: Ink Cartridge Set Sensors
314
Board Temperature Sensors
315
Encoder Readings
315
Input Check: Ink Cartridge Levels
315
Area Setting
316
Display: ID2 Code
316
Remote Service Setting
316
Service Tel Number Setting
316
Initial Value Setting
318
Usb Power Mode
318
Installation Date / Printing Installation Date
319
Print an Engine Maintenance Summary
319
Sp6-XXX
319
Display Count: Air Purges/Re-Fillings after SC990
320
Display Count: Machine Total
320
Display Count: User Cleaning
320
Sp7-XXX
320
Display Count: Additional Air Purges/Re-Fillings after Detecting Air
321
Display Count: Additional Air Purges/Re-Fillings after Humidity Change
321
Display Count: Air Purges/Re-Fillings after Detecting Air
321
Display Count: Air Purges/Re-Fillings after Excessive Ink Consumption
321
Display Count: Air Purges/Re-Fillings after Ink End
321
Display Count: Air Purges/Re-Fillings after Feed Pump Idle Time
322
Display Count: Air Purges/Re-Fillings after Humidity Change
322
Display Count: Ink Circulation Sequence
322
Display Count: Ink Circulation Sequence after Humidity Change
322
Display Count: Air Detected at Power on
323
Display Count: Air Detection Frequency
323
Display Count: Automatic Cleanings between Page Prints
323
Display Count: Automatic Cleanings before Print Head Capping
324
Display Count: Automatic Print Head Cleanings (after De-Cap Time Elapsed)
324
Display Count: Time Length after the Last Automatic Maintenance
324
Display Count: Ink Discharge for Maintenance after Idle Time (Small/Large)
324
Display Count: Cleaning after Idle Time
325
Display Count: Air Purges/Re-Fillings after Idle Time
325
Display Count: Ink Circulation Sequence after Idle Time
325
Display Count: Air Purge Time
325
Display Count: Tank Full: Ink Collector Unit
325
Display Full Count for Right Ink Sump
326
Display Count: Mist Counter for Automatic Cleaning
326
Display Count: Paper Dust Counter for Automatic Cleaning
326
Display Count: Cap off Time for Automatic Print Head Cleaning
326
Display Humidity Reading before Automatic Print Head Cleaning
327
Display Count: Ink Circulation Starting Time
327
Display Count: Pump Suspension Starting Time
327
Display Count: Time Length of Feed Pump Suspension with the Power on
327
Display Count: Uncapped Time Length
328
Display Count: Need for Ink Circulation Sequence
328
Display: Print Head Temperature During the Last Air-Purge/Ink Re-Filling
328
Display: Print Head Humidity During the Last Air-Purge/Ink Re-Filling
328
Display: Temperature During the Last Maintenance
328
Display Count: Ink Discharge to the Cap for Maintenance
329
Display Count: Ink Discharge for Maintenance after Idle Time (Small)
329
Display Count: Ink Cartridge Replacements
329
Display Count: Total Ink Cartridge out
330
Display Standby Time
330
Display Operation Start Date
330
Date Display SC Log
330
Display Total Count: SC Log
331
Display Jam Log
331
Display Total Count: Jam Log
332
Display Total Count: Ink Fill Log
332
Display Maintenance Log
332
Display Maintenance Log: by Type of Maintenance
333
Display Maintenance Log: Total Count
333
Display Jam Location Log
334
Display SC Sub Code Log
334
Display: Time/Type of the Last Print Head Maintenance
334
Display Last Execution Date of Air Purge
335
Display Normal Position for Detection of Full Print Head Tank
335
Display Position of Tank Full Feeler for each Print Head Tank after Air Purge
335
Display: Encoder Count Difference between Air-Purge/Ink Re-Fillings and Usual Re-Fillings
335
Display Count: Ink Discharge for Maintenance at the Right
336
Display Count: Ink Supply Time up
336
Display Count: Number of Drive Cleanings
336
Display: Emergency Start Time
336
Display Count: Emergency Mode Count
337
Display Count: Emergency Mode Execution
337
Display Count: Number of Prints in Emergency Mode
337
Display Count: Stop Flag
337
Display: Emergency Stop Flag
337
Emergency Mode Period Stop Threshold
338
Sp8-XXX
338
Sp9-XXX
338
3 Appendix: Troubleshooting Guide
339
Troubleshooting Guide
339
Basic Check Points and Specifications
339
Image Problems
339
Problems and Solutions
341
Operation Panel Display
350
Operation Panel Messages
352
Advertisement
Ricoh aficio SG 2100N User Manual (374 pages)
Brand:
Ricoh
| Category:
Printer
| Size: 7.01 MB
Table of Contents
Table of Contents
3
Operating Instructions
1
User Guide
1
Manuals for this Machine
11
Manuals List
12
Notice
13
Important
13
User's Notes
13
How to Read this Manual
16
Notes
16
Symbols
16
Model-Specific Information
17
Available Units and Options for each Model
17
1 About this Product
19
Guide to Components
19
Front View
19
Rear View
20
Left Side View
21
Paper Feed Unit (SG 3110DN/SG 3110Dnw)
21
Duplex Unit
23
Paper Feed Unit (SG 7100DN)
23
Multi Bypass Tray (SG 3110DN/SG 3110Dnw)
24
Multi Bypass Tray (SG 7100DN)
25
Control Panel
26
Attaching and Detaching Units and Options
28
Attaching and Detaching the Paper Feed Unit
28
Attaching and Detaching the Duplex Unit
30
Attaching and Detaching the Multi Bypass Tray
32
Turning On/Off the Power
35
2 Preparing for Printing
37
Setup Procedure
37
Checking the Computer and Installation Area
38
The Area Where the Machine Is to be Placed
38
Checking the Power Source
41
Checking the Computer to be Connected
42
Checking the Supplied Items and Unpacking the Machine
44
Installing the Print Cartridges
46
Plugging in the Power Cord and Turning the Power on
49
Confirming the Connection Method
52
Connecting the Computer and Installing the Software (USB Connection)
53
Before Installing the Software
53
Quick Install for USB
55
Connecting the Computer and Installing the Software (Network Connection)
57
Before Installing the Software
57
Host Interface
61
Network Setup
61
Connecting the Machine Via a Wireless LAN Interface
62
Easy Setup
63
Quick Install for Network
66
Installing and Opening the User Guide
68
Opening the User Guide When an Error Message Appears on the Status Monitor
69
Opening the User Guide from the CD-ROM
70
Installing the Printer Drivers for a USB Connection
71
Sharing the Printer
74
Installing the Printer Drivers for a Network Connection
76
Using the Standard TCP/IP Port
77
Using the LPR Port
78
Using the WSD Port
80
Using the IPP Port
82
Using the Smartdevicemonitor for Client Port
83
Using as the Windows Network Printer
85
Downloading Utility Software
87
Smartdevicemonitor for Client
87
Paper
88
Loadable Paper Sizes and Quantities
88
Paper Handling Precautions
96
Paper Storage Precautions
98
Paper Type Precautions
98
Printable Area
100
Loading Paper
102
Loading Paper into Tray 1-3
102
Extending the Paper Tray to Load Paper
104
Loading Paper into Bypass Tray
107
3 Specifying the Printer Driver Settings
109
Opening the Printer Driver Dialog Box
109
Opening from an Application
109
Opening the [Printer Properties] Dialog Box
109
Opening the [Printing Preferences] Dialog Box
109
Specifying Settings on [Accessories] Tab
111
Conditions for Bidirectional Communication
111
If Bidirectional Communication Is Unavailable
111
Printing
113
Canceling Printing
115
Canceling Printing from the Status Monitor
115
Canceling Printing Using the [Job Reset] Key
115
Reset All
117
Canceling Printing from the Taskbar
118
4 Machine Setup Menus
119
Making Machine Settings Using the Control Panel
119
Using the [Counter] Menu
124
Displaying the Counter
126
Printing the Counter
126
Differences between the Counter and the Total Counter
127
Using the [Paper Input] Menu
128
Changing the [Paper Input] Menu
128
Paper Input
129
Using the [List/Test Print] Menu
130
Printing a Configuration Page
130
Interpreting the Configuration Page
131
Using the [Maintenance] Menu
132
Nozzle Check
133
Head-Cleaning
134
Head-Flushing
136
Head Position
137
High Speed
138
Adj.paper Feed
140
Registration
142
Setting the Date and Time
144
Time Setting
145
Time Zone
145
De-Condensation
146
Using the [System] Menu
147
Changing the [System] Menu
150
Using the [Host Interface] Menu
151
Changing the [Host Interface] Menu
154
Precautions to Take When Using in a Network
154
Using the [PCL Menu]
156
Changing the [PCL Menu]
157
Symbol Set
158
Using the [User Code] Menu
159
Using the [Language] Menu
161
5 Monitoring and Configuring the Machine
163
Using the Status Monitor
163
Using Web Image Monitor
164
Displaying Top Page
164
Logging in Using Web Image Monitor
166
Menu
166
Changing the Machine Settings
167
Notifying the Machine Status by E-Mail
171
About the Web Image Monitor Help
178
Snmp
179
6 Using the Machine with a Macintosh
181
System Requirements for Macintosh
181
Instructions Applicable to both Macintosh and Windows Computers
182
Installing the Printer Driver on a Macintosh
184
Adding the Printer through a USB Connection Via the Print & Fax Preferences Pane
184
Adding the Printer in the Print & Fax Panel Using Bonjour
185
Adding the Printer through a Network Connection Via the Print & Fax Preferences Pane
185
Printer Properties Pane on a Macintosh
187
Displaying the Page Setup Pane on a Macintosh
187
Displaying the Print Pane on a Macintosh
187
Displaying the Machine Status on a Macintosh
188
Displaying the Status Monitor on a Macintosh
188
Displaying the [Maintenance Utility] on a Macintosh
188
Specifying Option Settings on a Macintosh
188
Printing with a Macintosh
189
Canceling Printing on a Macintosh
191
Canceling a Print Job from the Print Job Queue Window
191
Opening Help on a Macintosh
192
Displaying the Printer Driver Help from the Mac Help
192
Displaying the Printer Driver Help from the Print Pane
192
Software on the CD-ROM for Macintosh
193
Files for Macintosh
193
Manuals for Macintosh
193
RPCS Raster Printer Drivers for Macintosh
193
7 Maintenance
195
Restricting Machine Functions
195
Locking the Keys
195
Unlocking the Keys
195
Replacing a Print Cartridge
196
Checking the Remaining Ink
196
Replacing a Print Cartridge
197
Handling Print Cartridges
199
Replacing an Ink Collector Unit
202
Checking the Waste Ink Level
202
Replacing an Ink Collector Unit
203
Cleaning
207
Cleaning the Power Cable Plug
207
Moving
209
Moving a Short Distance
209
Moving a Long Distance
210
Disposing
211
When Not Using for a Long Period of Time
212
8 Troubleshooting
213
Software Cannot be Installed
213
Checking Your Computer Environment
213
Confirming Installation
213
Printer Driver Cannot be Installed
215
USB Connection Is Not Automatically Detected
216
If Test Print Fails
217
Uninstalling
218
Uninstalling the Printer Driver
218
Deleting Devices
219
Removing the User Guide
220
Printing Does Not Start
222
Paper Is Not Fed or Delivered Normally
224
Paper Jam
226
Using the [Form Feed] Key to Remove Jammed Paper
227
Removing Paper Jammed in Tray 1
228
Paper Jam in Tray 2/3
229
Removing Paper Jammed in the Multi Bypass Tray
230
Removing Paper Jammed under the Top Cover
231
Paper Jam in the Duplex Unit
233
Paper Jam in the Duplex Unit and Tray 2/3
233
Opening the Rear Cover to Remove Jammed Paper
234
Removing Paper Jammed in Tray 2/3
235
Opening the Rear Unit Cover to Remove Jammed Paper (SG 3110DN/SG 3110Dnw)
237
Opening the Duplex Unit Cover to Remove Jammed Paper
238
Removing Paper Jammed in the Duplex Unit
239
Print Results Are Not Satisfactory
241
Prints Are Unsatisfactory
241
Colors Do Not Match the Displayed Image
243
Other Problems
244
Positions Do Not Match the Displayed Image
244
Checking the Consumables
246
If a Message Appears During Installation
247
Error & Status Messages on the Display
248
Error Messages
248
Status Monitor Errors
255
No Response from Machine
255
Status Monitor Does Not Open
255
No Paper/Tray Not Detected (Bypass Tray)
256
No Paper/Tray Not Detected (Tray 1)
256
No Paper/Tray Not Detected (Tray 2/3)
256
Paper Size Mismatch/Paper Type Mismatch (Bypass Tray)
257
Paper Size Mismatch/Paper Type Mismatch (Tray 1)
257
Paper Size Mismatch/Paper Type Mismatch (Tray 2/3)
257
Cover Open
258
Paper Size Mismatch/Paper Type Mismatch (Auto Tray Select)
258
Cover Open / Print Cartridge(S) Not Detected
260
Cartridge Almost Empty
262
Cartridge Empty
262
Duplex Unit Not Detected
262
Ink Collector Unit Not Detected
263
Used Cartridge
263
Ink Collector Unit Almost Full
264
Ink Collector Unit Full
264
Out of Printable Temperature Range
264
Used Ink Collector Unit
264
Maintenance Failed
265
Network Interface Error
265
Printer Error
265
Cannot Recover Error Page
266
9 Appendix
267
Software on the CD-ROM
267
Files
267
RPCS Raster Printer Drivers
267
PCL Printer Drivers
268
Manuals
269
Electromagnetic Interference
270
Specifications
271
Machine Body
271
Bypass Tray
277
Paper Feed Unit
277
Where to Inquire
279
Recommended Consumables
280
Options and Consumables
281
When Using Windows Terminal Service/Citrix Presentation Server/Citrix Xenapp
282
Limitations
282
Operating Environment
282
Supported Printer Drivers
282
Copyrights
284
Expat
284
Jpeg Library
284
IPS TM Print Language Emulations
285
Netbsd
285
Newlib
287
Openssl
302
Zilb
304
Trademarks
305
Index
307
Manual Setting
320
Checking the Status
330
Safety Information
333
Environmental Advice for Users
335
About Sg Series Firmware Updates (Web Image Monitor)
336
About Firmware Updates
337
Caution
337
Disclaimer
337
Operating Environment
337
Firmware Update Operating Instructions
338
Wireless LAN Update Operating Instructions
345
Trademarks
356
About Sg Series Firmware Updates (Windows)
357
1 About Firmware Updates
358
2 Operating Environment and Other Requirements
358
Operating Environment
358
Supported Operating Systems
358
About Printer Drivers
358
3 Update Cautions
359
Caution 1
359
Caution 2
359
Caution 3
359
Caution 4
359
Caution 5
359
Caution 6
360
Caution 7
360
4 Disclaimer
361
5 Firmware Update Operating Instructions
362
Bidirectional-Enabled
363
Bidirectional-Disabled
367
6 Trademarks
371
Advertisement
Related Products
Ricoh Aficio SG 3110DN
Ricoh SG 7100DN
Ricoh SG Series
Ricoh Aficio SG 3100DN
Ricoh Aficio SPC220N
Ricoh Aficio SP C431DN
Ricoh SP 100 e
Ricoh SP 325DNw
Ricoh PRIPORT SILVER-V2
Ricoh SP 213SUw
Ricoh Categories
All in One Printer
Printer
Digital Camera
Copier
Printer Accessories
More Ricoh Manuals
Login
Sign In
OR
Sign in with Facebook
Sign in with Google
Upload manual
Upload from disk
Upload from URL