Sign In
Upload
Manuals
Brands
Ricoh Manuals
Copier
Aficio MP C3002
Ricoh Aficio MP C3002 Manuals
Manuals and User Guides for Ricoh Aficio MP C3002. We have
6
Ricoh Aficio MP C3002 manuals available for free PDF download: User Manual, Quick Start Manual, Brochure & Specs
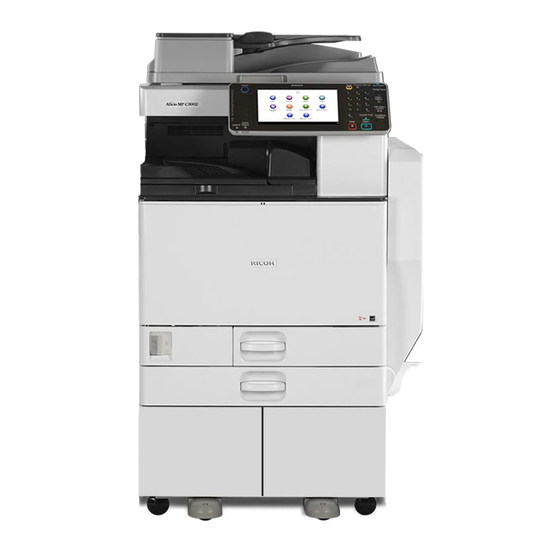
Ricoh Aficio MP C3002 User Manual (830 pages)
User Guide
Brand:
Ricoh
| Category:
All in One Printer
| Size: 12.75 MB
Table of Contents
Table of Contents
2
Introduction
4
How to Read the Manuals
5
Disclaimer
5
Notes
5
Symbols Used in the Manuals
5
Machine Types
6
1 Manuals Provided with this Machine
8
Manuals for this Machine
8
Manuals List
11
On-Screen Operating Instructions
12
Formats of the Operating Instructions
12
Reading the HTML Manuals on the CD-ROM
12
Installing and Opening the HTML Manuals
13
Reading the PDF Manuals on the CD-ROM
13
2 Safety Information
16
Safety During Operation
16
Safety Precautions to be Followed
17
Environments Where the Machine Can be Used
17
Handling Power Cords and Power Cord Plugs
18
Handling the Main Machine
20
Handling the Machine's Interior
22
Handling the Machine's Supplies
23
Safety Labels of this Machine
25
Positions of WARNING and CAUTION Labels for Users of Types 1 and 2
25
Positions of WARNING and CAUTION Labels for Users of Types 3 and 4
32
Power Switch Symbols
38
3 Information for this Machine
40
Duplication and Printing Prohibited
40
Laser Safety
41
Laser Safety for Types 1 and 2
41
Laser Safety for Types 3 and 4
41
Notes to USA Users of FCC Requirements
42
Part 15 of the FCC Rules
42
Part 68 of the FCC Rules Regarding Facsimile Unit
43
Important Safety Instructions for Facsimile Unit
45
IMPORTANTES MESURES de SÉCURITÉ de L'unité Fax
45
Notes to Canadian Users of Facsimile Unit
46
Remarques à L'attention des Utilisateurs Canadiens de L'unité Fax
46
ENERGY STAR Program
47
Energy Saving Functions
48
Notes to Users in the State of California (Notes to Users in USA)
50
4 Appendix
52
Trademarks
52
Table of Contents
61
How to Read the Manuals
66
Symbols Used in the Manuals
66
Model-Specific Information
67
Names of Major Features
68
1 What You Can Do with this Machine
69
I Want to Save Paper
69
I Want to Convert Documents to Electronic Formats Easily
70
I Want to Register Destinations
71
I Want to Operate the Machine more Effectively
72
You Can Customize the [Home] Screen as You Like
73
You Can Make Copies Using Various Functions
74
You Can Print Data Using Various Functions
75
You Can Utilize Stored Documents
76
You Can Send and Receive Faxes Without Paper
77
You Can Send and Receive Faxes Using the Internet
79
You Can Send and Receive Faxes by Using the Machine Without Fax Unit Installed
81
You Can Use the Facsimile and the Scanner in a Network Environment
82
You Can Prevent Information Leakage (Security Functions)
83
You Can Monitor and Set the Machine Using a Computer
84
You Can Prevent an Unauthorized Copy
85
2 Getting Started
87
Guide to Names and Functions of Components
87
Guide to Components of Types 1 and 2
87
Guide to Components of Types 3 and 4
90
Guide to Functions of the Machine's Options
93
Guide to Functions of the Machine's External Options
93
Guide to the Names and Functions of the Machine's Control Panel
105
How to Use the [Home] Screen
108
Adding Icons to the [Home] Screen
109
Registering Functions in a Program
113
Example of Programs
115
Turning On/Off the Power
119
Turning off the Main Power
119
Turning on the Main Power
119
When the Authentication Screen Is Displayed
121
Logging in Using the Control Panel
121
User Code Authentication Using the Control Panel
121
Logging out Using the Control Panel
122
Placing Originals
123
Placing Originals in the Auto Document Feeder
123
Placing Originals on the Exposure Glass
123
3 Copy
127
Basic Procedure
127
Auto Reduce / Enlarge
129
Duplex Copying
131
Combined Copying
133
One-Sided Combine
134
Two-Sided Combine
135
Copying Onto Custom Size Paper from the Bypass Tray
138
Copying Onto Envelopes
139
Copying Onto Envelopes from the Bypass Tray
139
Copying Onto Envelopes from the Paper Tray
140
Finishing
141
Staple
141
Punch
143
Storing Data in the Document Server
146
4 Fax
147
Basic Procedure for Transmissions (Memory Transmission)
147
Registering a Fax Destination
149
Deleting a Fax Destination
150
Transmitting While Checking Connection to Destination (Immediate Transmission)
152
Canceling a Transmission
154
Canceling a Transmission before the Original Is Scanned
154
Canceling a Transmission While the Original Is Being Scanned
154
Canceling a Transmission after the Original Is Scanned
155
Sending at a Specific Time (Send Later)
156
Storing a Document
157
Sending Stored Documents
158
Printing the Journal Manually
160
5 Print
161
Quick Install
161
Displaying the Printer Driver Properties
162
Standard Printing
163
When Using the PCL 6 Printer Driver
163
Locked Print
164
Printing a Locked Print File Using the Control Panel
164
Sending a Locked Print File
164
Hold Print
166
Printing a Hold Print File Using the Control Panel
166
Sending a Hold Print File
166
Stored Print
168
Sending a Stored Print File
168
Printing a Stored Print File Using the Control Panel
169
Direct Printing from a Removable Memory Device
170
Printing from a Removable Memory Device
172
Screen for Direct Printing
174
Pictbridge Printing
176
Using Pictbridge
176
Exiting Pictbridge
177
6 Scan
178
Basic Procedure When Using Scan to Folder
178
Creating a Shared Folder on a Computer Running Windows/Confirming a Computer's Information
179
Registering an SMB Folder
181
Deleting an SMB Registered Folder
184
Entering the Path to the Destination Manually
185
Basic Procedure for Sending Scan Files by E-Mail
186
Registering an E-Mail Destination
187
Deleting an E-Mail Destination
188
Entering an E-Mail Address Manually
189
Basic Procedure for Storing Scan Files
190
Checking a Stored File Selected from the List
191
Specifying the File Type
192
Specifying Scan Settings
193
Basic Procedure for Saving Scan Files on a Removable Memory Device
194
7 Document Server
198
Storing Data
198
Printing Stored Documents
200
8 Web Image Monitor
202
Displaying Top Page
202
Viewing Received Fax Documents Using Web Image Monitor
204
9 Adding Paper and Toner
206
Loading Paper into Paper Trays
206
Loading Paper into the Bypass Tray
208
Settings to Use the Bypass Tray under the Printer Function
209
Loading Paper into the Small Size Paper Tray
213
Loading Paper into Tray 3 (LCT)
215
Loading Paper into the Large Capacity Tray (LCT)
217
Recommended Paper Sizes and Types
219
Thick Paper
227
Envelopes
228
Adding Toner
232
Sending Faxes or Scanned Documents When Toner Has Run out
233
Disposing of Used Toner
234
10 Troubleshooting
236
Indicators
236
When an Indicator for the [Check Status] Key Is Lit
237
Panel Tone
239
When You Have Problems Operating the Machine
240
When Messages Are Displayed on the Control Panel
247
Messages Displayed When Using the Copy/Document Server Function
247
Messages Displayed When Using the Facsimile Function
251
Messages Displayed When Using the Printer Function
268
Other Messages
273
Messages Displayed When Using the Scanner Function
282
When Messages Are Displayed on Your Computer Screen
297
Messages Displayed When Using the Scanner Function
297
11 Appendix
304
Trademarks
304
Setting up Options
316
Operating Instructions
319
Table of Contents
321
1 Introduction
323
Start Installer
323
Software and Utilities Included on the CD-ROM
325
Printer Drivers
325
TWAIN Driver
327
LAN-Fax Driver
328
Font Manager
329
For Mac os X Users
330
2 Installing the Printer Driver
331
Confirming the Connection Method
331
Network Connection
331
Local Connection
332
Quick Install
333
Installing the Printer Driver for a Network Connection
334
Using as a Network Printer
342
Installing the Printer Driver for a Local Connection
347
USB Connection
347
Bluetooth Connection
351
Parallel Connection
351
Configuring Option Settings for the Printer
355
Conditions for Bidirectional Communication
355
If Bidirectional Communication Is Disabled
356
Installing Font Manager
357
Using Adobe Pagemaker Version 6.0, 6.5, or 7.0
358
3 Installing the Scanner Driver
359
Installing the TWAIN Driver
359
Installing a TWAIN-Compliant Application on the same Client Computer
359
4 Installing the Facsimile Driver
361
Installing the LAN-Fax Driver
361
Specifying the same Port as the Printer Driver
361
Specifying the Port When Installing the LAN-FAX Driver
362
Enabling the Function to Prevent Transmission to the Wrong Destination
364
Editing the Configuration File
364
Installing the LAN-FAX Driver in "Add Printer
365
Setting LAN-Fax Driver Properties
367
Setting Print Properties
367
Configuring Option Settings for the Facsimile
368
5 Troubleshooting
369
Messages Displayed When Installing the Printer Driver
369
If USB Connection Fails
371
6 Installing the Printer Driver under Mac os
373
Installing the PPD Files
373
Registering the Printer
374
USB Connection
374
Network Connection
375
Configuring Option Settings for the Printer under Mac os X
377
7 Appendix
379
Updating or Deleting the Driver
379
Updating the Driver
379
Deleting the Driver
380
Trademarks
383
Index
385
Table of Contents
393
Notice
395
Important
395
How to Read this Manual
396
Notes
396
Laws and Regulations
397
Legal Prohibition
397
UNIX Configuration
399
Before Setup
399
Using the Lp/Lpr Commands
399
Using the Rsh/Rcp/Ftp Commands
399
Using the Installation Shell Script
400
Executing the Installation Shell Script
401
After Executing the Installation Shell Script
404
Printing Method
409
Printing with Lpr, Lp
409
Printing with Rsh, Rcp, Ftp
409
Printer Status
412
Viewing the Print Job Status with Lpq and Lpstat
412
Viewing the Printer Status with Rsh and Ftp
412
Copying Information to a File
413
Specifying the Device Option
414
Configuring the Device Option
414
Printer Language
418
Text Printing
419
Input Tray
419
Paper Size
420
Paper Type
422
Output Tray
423
Copies
424
Collating
425
Duplex Printing
425
Binding
426
Orientation
426
Image Direction
427
Resolution
427
Gradation Quality
428
Billing Code
429
Fold
429
Staple
430
Punch, Punchhole
431
Usercode
433
Symbol Set
433
Trademarks
437
Index
439
Table of Contents
445
Functions that Require Options
452
Main Software Products
453
1 Getting Started
455
Before Using this Machine
456
Administrators
458
Configuring Administrator Authentication
459
Specifying Administrator Privileges
460
Registering and Changing Administrators
462
Using Web Image Monitor to Configure Administrator Authentication
465
Administrator Login Method
466
Logging in Using the Control Panel
466
Logging in Using Web Image Monitor
467
Administrator Logout Method
468
Logging out Using the Control Panel
468
Logging out Using Web Image Monitor
468
Supervisor
469
Resetting the Administrator's Password
469
Changing the Supervisor
470
2 Configuring User Authentication
473
Users
473
About User Authentication
474
Configuring User Authentication
475
User Code Authentication
477
Specifying User Code Authentication
477
Basic Authentication
481
Specifying Basic Authentication
481
Authentication Information Stored in the Address Book
483
Specifying Login User Names and Passwords
483
Specifying Login Details
485
Windows Authentication
487
Specifying Windows Authentication
489
Installing Internet Information Services (IIS) and Certificate Services
493
Creating the Server Certificate
494
If the Fax Number Cannot be Obtained
495
LDAP Authentication
496
Specifying LDAP Authentication
497
Integration Server Authentication
502
Specifying Integration Server Authentication
502
Printer Job Authentication
508
Printer Job Authentication Levels
508
Printer Job Types
508
Authfree" Command
511
Auto Registration to the Address Book
512
Data Carry-Over Setting for Address Book Auto-Program
512
User Lockout Function
514
Canceling Password Lockout
515
Specifying the User Lockout Function
515
Auto Logout
516
Authentication Using an External Device
518
3 Restricting Machine Usage
519
Restricting Usage of the Destination List
519
Restrict Use of Destinations / Restrict Adding of User Destinations
519
Preventing Changes to Administrator Settings
521
Prohibiting Users from Making Changes to Settings
521
Menu Protect
522
Specifying Menu Protect
522
Limiting Available Functions
524
Specifying Which Functions Are Available
524
Restricting Media Slot Access
526
Managing Print Volume Per User
528
Specifying Limitations for Print Volume
529
Specifying the Default Maximum Use Count
531
Specifying the Maximum Use Count Per User
532
Checking Print Volume Per User
534
Printing a List of Print Volume Use Counters
535
Clearing Print Volume Use Counters
536
Configuring the Auto-Reset Function
538
4 Preventing Leakage of Information from Machines
541
Specifying Address Book Access Permissions
541
Protecting the Address Book
541
Encrypting Data in the Address Book
543
Encrypting Data on the Hard Disk
545
Enabling the Encryption Settings
547
Backing up the Encryption Key
549
Updating the Encryption Key
550
Canceling Data Encryption
551
Deleting Data on the Hard Disk
552
Conditions for Use
552
Instructions for Use
552
Auto Erase Memory
553
Erase All Memory
557
5 Enhanced Network Security
561
Access Control
561
Enabling and Disabling Protocols
562
Enabling and Disabling Protocols Using the Control Panel
568
Enabling and Disabling Protocols Using Web Image Monitor
569
Specifying Network Security Level
570
Specifying Network Security Level Using the Control Panel
570
Specifying Network Security Level Using Web Image Monitor
571
Status of Functions under each Network Security Level
572
Protecting the Communication Path Via a Device Certificate
575
Creating and Installing a Device Certificate from the Control Panel (Self-Signed Certificate)
575
Creating the Device Certificate (Issued by a Certificate Authority)
577
Installing the Device Certificate (Issued by a Certificate Authority)
578
Installing an Intermediate Certificate (Issued by a Certificate Authority)
579
Configuring SSL/TLS
580
Enabling SSL/TLS
581
User Setting for SSL/TLS
582
Setting the SSL/TLS Encryption Mode
583
Enabling SSL for SMTP Connections
584
Configuring S/MIME
586
E-Mail Encryption
586
Attaching an Electronic Signature
588
Specifying Checking of the Certificate Valid Period
590
Configuring Pdfs with Electronic Signatures
592
Configuring Ipsec
593
Encryption and Authentication by Ipsec
593
Encryption Key Auto Exchange Settings and Encryption Key Manual Settings
594
Ipsec Settings
595
Encryption Key Auto Exchange Settings Configuration Flow
605
Encryption Key Manual Settings Configuration Flow
609
Telnet Setting Commands
610
Installing a Site Certificate
618
Configuring IEEE 802.1X Authentication
618
Selecting the Device Certificate
619
Setting Items of IEEE 802.1X for Ethernet
619
Setting Items of IEEE 802.1X for Wireless LAN
621
Snmpv3 Encryption
623
Encrypting Transmitted Passwords
625
Specifying a Driver Encryption Key
625
Specifying an IPP Authentication Password
626
Kerberos Authentication Encryption Setting
628
6 Preventing the Leaking of Documents
629
Configuring Access Permissions for Stored Files
629
Configuring Access Permission for each Stored File
630
Changing the Owner of a Document
633
Configuring Access Permission for each User for Stored Files
634
Specifying Passwords for Stored Files
636
Unlocking Stored Files
637
Unauthorized Copy Prevention / Data Security for Copying
639
Enabling Pattern Printing
639
Enabling Data Security for Copying
641
Printing User Information on Paper
642
Managing Locked Print Files
645
Deleting Locked Print Files
645
Changing the Password of a Locked Print File
647
Unlocking a Locked Print File
648
Enforced Storage of Documents to be Printed on a Printer
650
7 Managing the Machine
651
Managing Log Files
651
Managing Logs from the Machine
651
Managing Logs from the Log Collection Server
652
Using Web Image Monitor to Manage Log Files
653
Downloading Logs
655
Logs that Can be Managed Using Web Image Monitor
660
Attributes of Logs You Can Download
665
Customizing the Control Panel
690
Configuring the Home Screen for Individual Users
690
Configuring the Browser Functions
692
Changing the Browser Settings
692
Precautions for Using the Browser Function
692
Restricting User Browser Functions
694
Checking the Usage Status of the Browser Functions
695
Troubleshooting
695
Managing Device Information
697
Exporting Device Information
698
Importing Device Information
699
Periodically Importing Device Information
700
Manually Importing the Device Setting Information File of a Server
701
Printing Log Files
702
Managing Eco-Friendly Counter
703
Configuring the Display of Eco-Friendly Counters
703
Clearing a Machine's Eco-Friendly Counter
704
Clearing the Eco-Friendly Counter by User
704
Specifying the Extended Security Functions
706
Extended Security Function Settings
706
Other Security Functions
714
Fax Function
714
Confirming Firmware Validity
715
Scanner Function
715
System Status
715
Limiting Machine Operations to Customers Only
716
Additional Information for Enhanced Security
718
Settings You Can Configure Using the Control Panel
718
Settings You Can Configure Using Web Image Monitor
720
Settings You Can Configure When Ipsec Is Available/Unavailable
722
8 Troubleshooting
725
If Authentication Fails
725
If a Message Is Displayed
725
If an Error Code Is Displayed
727
If the Machine Cannot be Operated
743
9 Checking Operation Privileges
749
List of Operation Privileges for Settings
749
System Settings
751
Edit Home
761
Maintenance
762
Copier / Document Server Features
763
Facsimile Features
769
Printer Functions
772
Printer Features
773
Scanner Features
777
Browser Features
779
Extended Feature Settings
780
Web Image Monitor: Job
781
Web Image Monitor: Device Settings
783
Web Image Monitor: Printer
792
Web Image Monitor: Fax
796
Web Image Monitor: Scanner
798
Web Image Monitor: Interface
801
Web Image Monitor: Network
803
Web Image Monitor: Security
807
Web Image Monitor: @Remote
808
Web Image Monitor: Webpage
809
Web Image Monitor: Extended Feature Settings
810
Web Image Monitor: Address Book
811
Web Image Monitor: Reset Printer Job
812
Web Image Monitor: Reset the Machine
813
Web Image Monitor: Device Home Management
814
Web Image Monitor: Customize Screen Per User
815
Web Image Monitor: Document Server
816
Web Image Monitor: Fax Received File
817
Web Image Monitor: Printer: Print Jobs
818
List of Operation Privileges for Stored Files
819
List of Operation Privileges for Address Books
821
Trademarks
825
Index
827
Advertisement
Ricoh Aficio MP C3002 User Manual (244 pages)
Manuals
Brand:
Ricoh
| Category:
Copier
| Size: 5.78 MB
Table of Contents
Table of Contents
3
How to Read the Manuals
8
Symbols Used in the Manuals
8
Model-Specific Information
9
Names of Major Features
10
1 What You Can Do with this Machine
11
I Want to Save Paper
11
I Want to Convert Documents to Electronic Formats Easily
12
I Want to Register Destinations
13
I Want to Operate the Machine more Effectively
14
You Can Customize the [Home] Screen as You Like
15
You Can Make Copies Using Various Functions
16
You Can Print Data Using Various Functions
17
You Can Utilize Stored Documents
18
You Can Send and Receive Faxes Without Paper
19
You Can Send and Receive Faxes Using the Internet
21
You Can Send and Receive Faxes by Using the Machine Without Fax Unit Installed
23
You Can Use the Facsimile and the Scanner in a Network Environment
24
You Can Prevent Information Leakage (Security Functions)
25
You Can Monitor and Set the Machine Using a Computer
26
You Can Prevent an Unauthorized Copy
27
2 Getting Started
29
Guide to Names and Functions of Components
29
Guide to Components of Types 1 and 2
29
Guide to Components of Types 3 and 4
32
Guide to Functions of the Machine's Options
35
Guide to Functions of the Machine's External Options
35
Guide to the Names and Functions of the Machine's Control Panel
47
How to Use the [Home] Screen
50
Adding Icons to the [Home] Screen
51
Registering Functions in a Program
55
Example of Programs
57
Turning On/Off the Power
61
Turning on the Main Power
61
Turning off the Main Power
61
When the Authentication Screen Is Displayed
63
User Code Authentication Using the Control Panel
63
Logging in Using the Control Panel
63
Logging out Using the Control Panel
64
Placing Originals
65
Placing Originals on the Exposure Glass
65
Placing Originals in the Auto Document Feeder
65
3 Copy
69
Basic Procedure
69
Auto Reduce / Enlarge
71
Duplex Copying
73
Combined Copying
75
One-Sided Combine
76
Two-Sided Combine
77
Copying Onto Custom Size Paper from the Bypass Tray
80
Copying Onto Envelopes
81
Copying Onto Envelopes from the Bypass Tray
81
Copying Onto Envelopes from the Paper Tray
82
Finishing
83
Staple
83
Punch
85
Storing Data in the Document Server
88
4 Fax
89
Basic Procedure for Transmissions (Memory Transmission)
89
Registering a Fax Destination
91
Deleting a Fax Destination
92
Transmitting While Checking Connection to Destination (Immediate Transmission)
94
Canceling a Transmission
96
Canceling a Transmission before the Original Is Scanned
96
Canceling a Transmission While the Original Is Being Scanned
96
Canceling a Transmission after the Original Is Scanned
97
Sending at a Specific Time (Send Later)
98
Storing a Document
99
Sending Stored Documents
100
Printing the Journal Manually
102
5 Print
103
Quick Install
103
Displaying the Printer Driver Properties
104
Standard Printing
105
When Using the PCL 6 Printer Driver
105
Locked Print
106
Sending a Locked Print File
106
Printing a Locked Print File Using the Control Panel
106
Hold Print
108
Sending a Hold Print File
108
Printing a Hold Print File Using the Control Panel
108
Stored Print
110
Sending a Stored Print File
110
Printing a Stored Print File Using the Control Panel
111
6 Scan
113
Basic Procedure When Using Scan to Folder
113
Creating a Shared Folder on a Computer Running Windows/Confirming a Computer's Information
114
Registering an SMB Folder
116
Deleting an SMB Registered Folder
119
Entering the Path to the Destination Manually
120
Basic Procedure for Sending Scan Files by E-Mail
121
Registering an E-Mail Destination
122
Deleting an E-Mail Destination
123
Entering an E-Mail Address Manually
124
Basic Procedure for Storing Scan Files
125
Checking a Stored File Selected from the List
126
Specifying the File Type
127
Specifying Scan Settings
128
7 Document Server
129
Storing Data
129
Printing Stored Documents
131
8 Web Image Monitor
133
Displaying Top Page
133
Viewing Received Fax Documents Using Web Image Monitor
135
9 Adding Paper and Toner
137
Loading Paper into Paper Trays
137
Loading Paper into the Bypass Tray
139
Settings to Use the Bypass Tray under the Printer Function
140
Loading Paper into the Small Size Paper Tray
144
Loading Paper into Tray 3 (LCT)
146
Loading Paper into the Large Capacity Tray (LCT)
148
Recommended Paper Sizes and Types
150
Paper Thickness
156
Thick Paper
158
Envelopes
159
Adding Toner
163
Sending Faxes or Scanned Documents When Toner Has Run out
164
Disposing of Used Toner
165
10 Troubleshooting
167
Indicators
167
When an Indicator for the [Check Status] Key Is Lit
168
Panel Tone
170
When You Have Problems Operating the Machine
171
When Messages Are Displayed on the Control Panel
178
Messages Displayed When Using the Copy/Document Server Function
178
Messages Displayed When Using the Facsimile Function
182
Messages Displayed When Using the Printer Function
199
Other Messages
204
Messages Displayed When Using the Scanner Function
213
When Messages Are Displayed on Your Computer Screen
228
Messages Displayed When Using the Scanner Function
228
11 Appendix
235
Trademarks
235
Ricoh Aficio MP C3002 User Manual (240 pages)
Brand:
Ricoh
| Category:
All in One Printer
| Size: 7.21 MB
Table of Contents
Table of Contents
3
How to Read the Manuals
8
Symbols Used in the Manuals
8
Model-Specific Information
9
Names of Major Features
10
1 What You Can Do with this Machine
11
I Want to Save Paper
11
I Want to Convert Documents to Electronic Formats Easily
12
I Want to Register Destinations
13
I Want to Operate the Machine more Effectively
14
You Can Customize the [Home] Screen as You Like
15
You Can Make Copies Using Various Functions
16
You Can Print Data Using Various Functions
17
You Can Utilize Stored Documents
18
You Can Send and Receive Faxes Without Paper
19
You Can Send and Receive Faxes Using the Internet
21
You Can Send and Receive Faxes by Using the Machine Without Fax Unit Installed
23
You Can Use the Facsimile and the Scanner in a Network Environment
24
You Can Prevent Information Leakage (Security Functions)
25
You Can Monitor and Set the Machine Using a Computer
26
You Can Prevent an Unauthorized Copy
27
2 Getting Started
29
Guide to Names and Functions of Components
29
Guide to Components of Types 1 and 2
29
Guide to Components of Types 3 and 4
32
Guide to Functions of the Machine's Options
35
Guide to Functions of the Machine's External Options
35
Guide to the Names and Functions of the Machine's Control Panel
47
How to Use the [Home] Screen
50
Adding Icons to the [Home] Screen
51
Registering Functions in a Program
55
Example of Programs
57
Turning On/Off the Power
60
Turning on the Main Power
60
Turning off the Main Power
60
When the Authentication Screen Is Displayed
62
User Code Authentication Using the Control Panel
62
Logging in Using the Control Panel
62
Logging out Using the Control Panel
63
Placing Originals
64
Placing Originals on the Exposure Glass
64
Placing Originals in the Auto Document Feeder
64
3 Copy
67
Basic Procedure
67
Auto Reduce / Enlarge
68
Duplex Copying
70
Combined Copying
73
One-Sided Combine
74
Two-Sided Combine
75
Copying Onto Custom Size Paper from the Bypass Tray
78
Copying Onto Envelopes
79
Copying Onto Envelopes from the Bypass Tray
79
Copying Onto Envelopes from the Paper Tray
80
Finishing
81
Staple
81
Punch
83
Storing Data in the Document Server
86
4 Fax
87
Basic Procedure for Transmissions (Memory Transmission)
87
Registering a Fax Destination
89
Deleting a Fax Destination
90
Transmitting While Checking Connection to Destination (Immediate Transmission)
92
Canceling a Transmission
94
Canceling a Transmission before the Original Is Scanned
94
Canceling a Transmission While the Original Is Being Scanned
94
Canceling a Transmission after the Original Is Scanned
95
Sending at a Specific Time (Send Later)
96
Storing a Document
97
Sending Stored Documents
98
Printing the Journal Manually
100
5 Print
101
Quick Install
101
Displaying the Printer Driver Properties
102
Standard Printing
103
When Using the PCL 6 Printer Driver
103
Locked Print
104
Sending a Locked Print File
104
Printing a Locked Print File Using the Control Panel
104
Hold Print
106
Sending a Hold Print File
106
Printing a Hold Print File Using the Control Panel
106
Stored Print
108
Sending a Stored Print File
108
Printing a Stored Print File Using the Control Panel
109
6 Scan
111
Basic Procedure When Using Scan to Folder
111
Creating a Shared Folder on a Computer Running Windows/Confirming a Computer's Information
112
Registering an SMB Folder
114
Deleting an SMB Registered Folder
117
Entering the Path to the Destination Manually
118
Basic Procedure for Sending Scan Files by E-Mail
119
Registering an E-Mail Destination
120
Deleting an E-Mail Destination
121
Entering an E-Mail Address Manually
122
Basic Procedure for Storing Scan Files
123
Checking a Stored File Selected from the List
124
Specifying the File Type
125
Specifying Scan Settings
126
7 Document Server
127
Storing Data
127
Printing Stored Documents
129
8 Web Image Monitor
131
Displaying Top Page
131
Viewing Received Fax Documents Using Web Image Monitor
133
9 Adding Paper and Toner
135
Loading Paper into Paper Trays
135
Loading Paper into the Bypass Tray
137
Settings to Use the Bypass Tray under the Printer Function
138
Loading Paper into the Small Size Paper Tray
142
Loading Paper into Tray 3 (LCT)
144
Loading Paper into the Large Capacity Tray (LCT)
146
Recommended Paper Sizes and Types
148
Thick Paper
156
Envelopes
157
Adding Toner
161
Sending Faxes or Scanned Documents When Toner Has Run out
162
Disposing of Used Toner
163
10 Troubleshooting
165
Indicators
165
When an Indicator for the [Check Status] Key Is Lit
166
Panel Tone
168
When You Have Problems Operating the Machine
169
When Messages Are Displayed on the Control Panel
176
Messages Displayed When Using the Copy/Document Server Function
176
Messages Displayed When Using the Facsimile Function
180
Messages Displayed When Using the Printer Function
196
Other Messages
202
Messages Displayed When Using the Scanner Function
211
When Messages Are Displayed on Your Computer Screen
225
Messages Displayed When Using the Scanner Function
225
11 Appendix
231
Trademarks
231
Advertisement
Ricoh Aficio MP C3002 User Manual (41 pages)
PaperCut Ricoh Embedded Manual
Brand:
Ricoh
| Category:
All in One Printer
| Size: 1.75 MB
Table of Contents
Table of Contents
1
1 Overview
3
Consistency
3
Integration
3
Rate of Development
3
Vendor Neutral
3
Security
3
2 Installation
4
Requirements
4
Devices Supporting GW+ ESA SDK Version 10.X (or Later)
5
Devices Supporting ESA SDK Version 4.X, 5.X, 7.X
5
Devices Supporting ESA SDK Version 2.X
6
How to Determine the ESA SDK Version
6
Setup Procedure
7
Verify Access to the Ricoh Administrative Web Interface
7
Networking/Firewall Configuration
7
Papercut Settings
7
Choosing Application Version
7
Choosing App Version
7
Configuring the Enhanced External Charge Unit (SDK 4.X+ Devices Only)
8
Disable the Document Server
8
Increase Extended Feature Settings Heap / Stack Size
10
Revision: 19 2012
10
Fax Configuration (Recommended When Tracking Faxes)
10
Choose an Installation Method
11
Installing Application Using Ricoh Web Admin (Recommended)
12
Installing Application Using the Ricoh Java SD Card
14
Set Default Application and System Timeout
16
Starting the Embedded Application
16
3 Post-Install Testing
18
Test Preparation
18
Scenario 1: Standard Copying
19
Scenario 2: Copying with Account Selection
20
Scenario 3: Print Release
21
4 Configuration
23
Device Function
23
Authentication Methods
23
Shared Account Selection
24
Customizing Text and Messages
25
5 Advanced Configuration
26
Config Editor
26
Customizing the Header Logos and Colors
27
Customized Logos
27
Custom Header Color
27
Configuring Application Switch Buttons (SDK 4.X+ Devices Only)
28
Setting Papercut as Priority Application
28
Enable Application Switch Button(S)
28
Configuring Swipe Card Readers
29
6 Known Limitations and Security
31
Limitations on SDK V4 (or Higher) Devices
31
Fax Tracking Limitations
31
Limitations on SDK V2 Devices
31
Bypassing the System
31
7 FAQ & Troubleshooting
32
Appendix: Supported Authentication Card Readers
35
Configuring Swipe Card Readers
35
Configuration of Rfideas Pcswipe Magstripe Reader
38
Appendix: Screenshots for User Information Sheets
40
Ricoh Aficio MP C3002 Quick Start Manual (24 pages)
Brand:
Ricoh
| Category:
Printer
| Size: 2.56 MB
Table of Contents
Copying Documents
2
Using Batch Mode
3
Stapling Documents
5
Reduction / Enlargement
11
Directional/Size Magnification
12
Create Margin
13
Erase Center / Border
14
Page Numbering
15
Double Copies
16
Image Centering
17
Adding Covers
18
Sample Copy
20
Using the Bypass Tray
21
Job Preset
22
Simple Screen
23
Ricoh Aficio MP C3002 Brochure & Specs (8 pages)
Brand:
Ricoh
| Category:
All in One Printer
| Size: 0.83 MB
Advertisement
Related Products
Ricoh Aficio MP C3502
Ricoh MP C3004 series
Ricoh MP C3504 series
Ricoh Aficio MP C4502
Ricoh Aficio MP C4502A
Ricoh Aficio MP C5502A
Ricoh MPC 1500sp
Ricoh MP C2504 series
Ricoh MPC 2050
Ricoh MP C401SP
Ricoh Categories
All in One Printer
Printer
Digital Camera
Copier
Printer Accessories
More Ricoh Manuals
Login
Sign In
OR
Sign in with Facebook
Sign in with Google
Upload manual
Upload from disk
Upload from URL