Sign In
Upload
Manuals
Brands
Ricoh Manuals
Printer
Aficio MP 171SPF
Ricoh Aficio MP 171SPF Manuals
Manuals and User Guides for Ricoh Aficio MP 171SPF. We have
6
Ricoh Aficio MP 171SPF manuals available for free PDF download: Operating Instructions Manual, Scanner Reference, Troubleshooting Manual
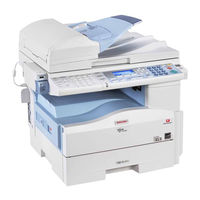
Ricoh Aficio MP 171SPF Operating Instructions Manual (1780 pages)
All in one printer
Brand:
Ricoh
| Category:
Printer
| Size: 54.76 MB
Table of Contents
Table of Contents
4
About this Machine
1
Documentation for this Machine
3
Table of Contents
4
Manuals for this Machine
8
Other Manuals
9
Manuals List
10
What You Can Do with this Machine
11
Using this Machine as a Copier
11
Using this Machine as a Printer
11
Paperless Fax Transmission
12
Fax Transmission and Reception over the Internet
13
Administrating the Machine (Security Functions)
14
Using the Scanner in a Network Environment
14
Monitoring the Machine Via Computer
15
Notice
16
Important
16
How to Read this Manual
17
Name of Major Item
17
Symbols
17
Note
18
Safety Information
19
Safety During Operation
19
Safety Precautions to be Followed
19
Handling Power Cords and Power Plugs
20
Safety Labels of this Machine
24
Positions of WARNING and CAUTION Labels
24
Power Switch Symbols
24
Energy Saving Functions
25
Laws and Regulations
27
Laser Safety
27
Legal Prohibition
27
Notes to Users in the United States of America
27
1 Simple Search
30
Searching by What You Want to Do
30
I Want to Save My Paper Document
30
I Want to Convert Documents to Electronic Formats Easily
31
I Want to Register Destinations
31
I Want to Operate the Machine more Effectively
32
Searching by Keyword
34
Paper
34
Register/Change/Delete
34
Forwarding
35
Install
35
Settings
35
2 Getting Started
38
Guide to Components
38
Other Items
41
External Items
41
Internal Items
41
Control Panel
43
• P.46 "Display Panel
46
Display Panel
47
Reading the Display and Using Keys
47
Changing the Display Language
48
When the Authentication Screen Is Displayed
49
User Code Authentication (Using the Control Panel)
49
Login (Using the Control Panel)
50
Logout (Using the Control Panel)
50
User Code Authentication (Using a Printer Driver)
50
Login (Using a Printer Driver)
51
Login (Using Web Image Monitor)
51
Logout (Using Web Image Monitor)
51
Changing Modes
53
System Reset
53
Turning On/Off the Power
55
Turning on the Main Power
55
Turning off the Power
56
Turning on the Power
56
Saving Energy
57
Turning off the Main Power
57
3 Adding Paper
60
Loading Paper
60
Loading Paper into the Paper Trays
60
Orientation-Fixed Paper or Two-Sided Paper
62
Changing the Paper Size
65
Changing the Paper Size in the Paper Tray (Tray 1)
65
Changing the Paper Size in the Optional Paper Tray Unit (Tray 2 and Tray 3)
68
Selecting the Paper Size with User Tools
70
Recommended Paper Sizes and Types
72
Envelopes
75
Unusable Paper
77
Paper Storage
78
4 Adding Toner
80
Replacing Toner
81
Sending Faxes or Scanned Documents When Toner Has Run out
82
Used Toner
83
5 Entering Text
84
Available Characters
84
Keys
84
How to Enter Text
85
Entering Symbols
89
Entering Numbers
92
6 Operating Instructions
94
Installing Operating Instructions
94
PDF Manuals
94
How to Use the Operating Instructions
96
Opening from the Icon
96
Opening from the [Start] Menu
96
Opening from the CD-ROM
97
7 Remarks
98
Dos and Don'ts
98
Where to Put Your Machine
100
Machine Environment
100
Environments to Avoid
101
Optimum Environmental Conditions
101
Power Connection
102
Maintaining Your Machine
104
Cleaning the ADF
104
Cleaning the Exposure Glass
104
Cleaning the Power Cable Plug
105
Counter
106
Displaying the Total Counter
106
8 Appendix
108
Software and Utilities Included on the CD-ROM
108
Printer Drivers for this Machine
108
Viewing the Contents of the CD-ROM
108
LAN-Fax Driver
110
TWAIN Driver
110
Desktopbinder Lite
111
Smartdevicemonitor for Admin
111
Desktopbinder-Smartdevicemonitor for Client
113
Specifications for the Main Unit
114
Specifications for Auto Document Feeder
118
Specifications for Paper Tray Unit (Tray 2 and Tray 3)
119
Specifications for Wireless LAN Board
120
Trademarks
121
Index
124
Copy Reference
132
Table of Contents
134
Notice
137
Important
137
How to Read this Manual
138
Name of Major Item
138
Note
138
Symbols
138
Laws and Regulations
139
Legal Prohibition
139
Display
140
Reading the Display and Using Keys
140
1 Placing Originals
143
Originals
143
Sizes and Weights of Recommended Originals
143
Sizes Selectable as Regular Size Originals
144
Missing Image Area
145
Placing Originals
147
Original Orientation
147
Placing Originals on the Exposure Glass
147
Placing Originals in the ADF
148
Regular Sizes
149
Specifying Original Size When a Paper Tray Is Selected
149
Specifying Original Size When the Bypass Tray Is Selected
152
2 Copying
157
Basic Procedure
157
Copying from the Bypass Tray
159
Copying Onto Regular Size Paper
161
Copying Onto Custom Size Paper
162
Copying Onto OHP Transparencies
163
Copying Onto Thick Paper
164
Copying Onto Envelopes
165
Reducing or Enlarging Originals
170
Preset Reduce/Enlarge
170
Zoom
172
Duplex Copying
175
Combined Copying
179
One-Sided Combine
179
Two-Sided Combine
183
Series Copies
186
Finishing
188
Sort
188
Adjusting Copy Image Density
190
Selecting the Original Type
191
Selecting Copy Paper
192
3 Copier Features
193
Accessing User Tools
193
Changing Default Settings
193
Quitting User Tools
194
User Tools Menu
195
4 Appendix
199
Function Compatibility
199
Trademarks
201
Index
203
Printer Reference
209
Table of Contents
211
Notice
216
Important
216
How to Read this Manual
217
Note
217
Symbols
217
Laws and Regulations
218
Legal Prohibition
218
Model-Specific Information
219
1 Preparing the Machine
220
Confirming the Connection Method
220
Network Connection
220
Local Connection
222
Installing the Printer Driver
223
Quick Install
223
Using the Smartdevicemonitor for Client Port
224
Using the Standard TCP/IP Port
229
Using the LPR Port
230
Using the WSD Port
232
Using as a Windows Network Printer
234
Using as a Netware Print Server/Remote Printer
236
Form Feed
237
Banner Page
238
Printing after Resetting the Printer
238
Installing the Printer Driver Using USB
239
Windows 2000/XP, Windows Server 2003/2003 R2 - USB
239
Windows Vista, Windows Server 2008 - USB
240
Printing with Parallel Connection
242
Making Option Settings for the Printer
244
Conditions for Bidirectional Communication
244
If Bidirectional Communication Is Disabled
245
Installing Font Manager
246
Using Adobe Pagemaker Version 6.0, 6.5, or 7.0
247
2 Printing Documents
248
Displaying the Printer Driver Settings Screen
248
Making Printer Default Settings - Printing Preferences
248
Making Printer Default Settings - the Printer Properties
248
Making Printer Settings from an Application
249
Setting Paper on the Bypass Tray
250
Setting the Paper Size Using the Control Panel
252
Setting Custom Size Paper Using the Control Panel
254
Setting Thick Paper or OHP Transparencies Using the Control Panel
256
Setting Envelopes Using the Control Panel
258
Printing on Orientation-Fixed or Two-Sided Paper
264
Frequently Used Print Methods
266
Standard Printing
266
Printing on both Sides of Sheets
267
Combining Multiple Pages into Single Page
269
Types of Duplex Printing
269
Pages Per Sheet
271
Using One Click Presets
272
Advanced Printing
274
Collate
274
Menu Names and Brief Overview of each Function
274
If Error Occurs with the Specified Paper Size and Type
276
Printing from a Selected Tray
276
Canceling a Print Job
277
Spool Printing
279
Registering Classification Codes
280
Configuring Classification Codes
281
Specifying the Classification Code for a Print Job
281
3 Printing Stored Documents
284
Display
284
Reading the Display and Using Keys
284
Using the Print Job Function
286
Print Job Screen
286
Printing from the Print Job Screen
289
Sample Print
289
Locked Print
292
Hold Print
296
Stored Print
299
Deleting Stored Print Files
302
Printing from the User ID Screen
303
Printing the Selected Print Job
303
Printing All Print Jobs
304
Canceling a Print Job
306
Canceling a Print Job Using the Control Panel
306
Windows - Canceling a Print Job from the Computer
306
Mac os - Canceling a Print Job from the Computer
307
Checking the Error Log
308
4 Printing from Desktopbinder Lite
310
Printing a PDF File Directly
310
Printing Method
310
Using Desktopbinder Lite
310
PDF Direct Print Properties
312
Using Commands
313
5 Printer Features
314
Accessing User Tools
314
Changing Default Settings
314
Quitting User Tools
314
Menu Protect
315
List/Test Print
316
Printing the Configuration Page
316
Maintenance
319
System
320
Host Interface
324
PCL Menu
325
PS Menu
327
PDF Menu
329
6 Appendix
330
Using the Virtual Printer
330
Adding a Virtual Printer
330
Changing a Virtual Printer Configuration
331
Confirming a Virtual Printer Configuration
331
Deleting a Virtual Printer
332
Printing Using a Virtual Printer
332
Specifications
334
Trademarks
336
Index
338
Facsimile Reference
345
Table of Contents
347
Notice
354
Important
354
How to Read this Manual
355
Names of Major Functions
355
Notes
355
Symbols
355
Laws and Regulations
356
Important Safety Instructions
356
Legal Prohibition
356
Notes to Users in the United States of America
357
Notes to Users in Canada
358
Reading the Display
359
Reading the Display Panel and Using Keys
359
1 Transmission
362
Transmission Modes
362
Selecting Type of Transmission
363
Memory Transmission
364
Parallel Memory Transmission
367
Automatic Redial
368
Broadcasting Sequence
368
Dual Access
368
Ecm (Error Correction Mode)
369
If Memory Runs out While Storing an Original
369
Immediate Transmission
369
IP-Fax Functions
372
Gatekeeper (Voip Gatekeeper)
374
Gateway (Voip Gateway)
374
Notes on Using IP-Fax
374
Terminology
374
Functions Not Available for IP-Fax Transmission
375
Internet Fax Functions
376
Notes on Using Internet Fax
377
Functions Not Available for Internet Fax Transmission
378
E-Mail Subject
379
Functions Not Available for Internet Fax Reception
379
T.37 Full Mode
379
Placing Originals
381
Acceptable Original Sizes
382
Paper Size and Scanned Area
383
Detecting Blank Sheet
384
Scan Settings
386
Original Type
386
Jbig Transmission
387
Resolution
387
Image Density (Contrast)
388
Mixing Scan Settings for a Multiple Page Original
389
Specifying a Destination
391
Sending over a Fax Line
391
Entering a Pause
392
Entering a Tone
392
Sending by IP-Fax
394
Sending to an E-Mail Address
398
Setting a Port Number
398
Bypassing the Smtp Server
401
Using the Quick Dial Keys
403
Checking the Specified Destination
405
Redial
407
Preventing Transmission to the Wrong Destination
408
Re-Entering a Fax Number to Confirm Destination
408
Programming Destinations in the Address Book
411
Registering a Fax Destination
411
Changing a Fax Destination
413
Deleting a Fax Destination
416
Programming Destinations from Check Destination Screen
417
Programming Destinations from Redial Screen
418
Searching for a Destination in the Address Book
420
Search by Name
420
Search by Destination List
422
Search by Registration Number
424
Search by Fax Number
425
Search by E-Mail Address
427
Search by IP-Fax Destination
429
Search by LDAP Server
431
On Hook Dial
435
Manual Dial
437
Canceling a Transmission
438
Before the Original Is Scanned
438
While the Original Is Being Scanned
438
While the Original Is Being Transmitted
439
Before the Transmission Is Started
440
Checking the Storage Result (Memory Storage Report)
442
Setting Transmission Function Defaults (Home Position)
443
2 Other Transmission Features
444
Sending at a Specific Time (Send Later)
444
Sender Settings
446
Entering the Subject
449
E-Mail Options
449
Requesting a Reception Notice
450
Fax Header Print
453
Label Insertion
455
Setting SUB Codes for Transmission
457
Setting a Password
459
Setting SEP Codes for Reception
461
Entering a Password
463
SEP Code RX Reserve Report
463
SEP Code RX Result Report
463
Two-Sided Transmission (Double-Sided Transmission)
465
3 Reception
468
Types of Reception
468
Immediate Reception
468
Memory Reception
469
Substitute Reception
469
Receiving Documents Unconditionally
470
Reception Modes
473
Auto Switch
473
Manual Reception
473
Auto Reception
474
Switching the Reception Mode
474
Receiving E-Mail
476
Auto E-Mail Reception
477
Receiving Internet Fax Documents
477
Manual E-Mail Reception
478
Received Images
479
Mail to Print
480
Reception Functions
482
Forwarding Received Documents
482
SMTP Reception Using Internet Fax
483
Routing E-Mail Received Via Smtp
484
Auto Fax Reception Power-Up
486
JBIG Reception
486
Printing Options
488
Center Mark
488
Checkered Mark
488
Print Completion Beep
488
Reception Time
489
Two-Sided Printing
489
Combine Two Originals
491
Page Separation and Length Reduction
491
TSI Print (Transmitting Subscriber Identification Print)
492
If There Is no Paper of the Correct Size
493
Setting Priority Trays
493
4 Confirming Communication Information
496
Printing a List of Files in Memory (Print TX Standby File List)
496
Printing a File from Memory
498
Checking the Transmission Result (TX File Status)
500
Confirming on Display
500
Confirming by Report
501
Confirming by E-Mail
502
Communication Result Report (Memory Transmission)
503
Confirming by Report and E-Mail
503
Communication Failure Report
504
Immediate TX Result Report (Immediate Transmission)
504
Checking the Reception Result (RX File Status)
506
Confirming on Display
506
Confirming by Report
507
Printing the Journal
508
Journal
509
Transmitting Journal by E-Mail
511
Journal by E-Mail
512
Printing a File Received with Memory Lock
513
5 Fax Via Computer
516
Sending Fax Documents from Computers
516
Before Use
517
Using the Software
517
Address Book
518
Auto Run Program
518
Installing Individual Applications
519
Making Settings for Option Configuration
520
Setting LAN-Fax Driver Properties
520
Setting Print Properties
520
Basic Transmission
521
Entering a Destination Directly
524
Specifying Options
525
Saving as Files
527
Checking Transmission Using LAN-Fax Driver
528
Confirming Transmission Results by E-Mail
528
LAN-Fax Result Report
529
Editing Address Book
530
Printing and Saving
530
Programming New Destinations
530
Editing Programmed Destinations
531
Deleting Programmed Destinations
532
Editing Fax Cover Sheets
532
Managing Facsimile Functions Using Smartdevicemonitor for Admin
534
Using the Machine's Address Book as the LAN-Fax Destination List
534
LAN-Fax Operation Messages
536
Viewing Fax Information Using a Web Browser
537
Viewing, Printing, and Deleting Received Fax Documents Using Web Image Monitor
537
Printing Fax Information Using a Web Browser
538
Deleting Fax Information Using a Web Browser
539
Programming Destination Information from Web Browser
539
To Edit Machine Properties Already Programmed
540
6 Fax Features
542
Accessing User Tools
542
Changing Default Settings
542
Quitting User Tools
543
General Settings/Adjust
544
Reception Settings
546
E-Mail Settings
548
IP-Fax Settings
550
Administrator Tools
553
Memory File Transfer
557
Reception File Setting
559
Specifying Automatic Deletion of Incoming Faxes When an Error Occurs
560
Reception Report E-Mail
561
Registering Fax Information
562
Deleting Fax Information
565
Forwarding
567
Programming an End Receiver
568
Quitting the Forwarding Function
569
Forwarding Mark
570
Parameter Settings
571
User Parameter List
571
Changing the User Parameters
579
Printing the Parameter Settings List
580
Home Position
582
Home Position Parameter List
582
Changing the Home Position
583
Program Special Sender
586
Authorized Reception
587
Forwarding
588
Memory Lock
588
Programming/Changing Special Senders
589
Sided Print
589
Programming Initial Set up of a Special Sender
594
Deleting a Special Sender
595
Printing Special Sender List
596
7 Appendix
598
Optional Equipment
598
Handset
598
Specifications
599
Specifications Required for the Internet Fax Destination Machines
601
Maximum Values
603
Trademarks
605
Index
608
Scanner Reference
617
Table of Contents
619
Manuals for this Machine
623
Troubleshooting
623
Notice
625
Important
625
How to Read this Manual
626
Note
626
Symbols
626
Laws and Regulations
627
Legal Prohibition
627
About the Scanner Functions
628
Display Panel
630
Reading the Display and Using Keys
630
Confirmation Displays
631
1 Sending Scan Files by E-Mail
633
Before Sending Scan Files by E-Mail
633
Overview of Sending Scan Files by E-Mail
633
Preparation for Sending by E-Mail
634
Registering E-Mail Addresses in the Address Book
636
E-Mail Screen
637
Basic Procedure for Sending Scan Files by E-Mail
639
Specifying E-Mail Destinations
642
Selecting a Destination Registered to a Quick Dial Key
642
Selecting the Destination from the Machine's Address Book
642
Entering an E-Mail Address Manually
648
Selecting Destinations by Searching an LDAP Server
649
Registering a Directly-Entered Destination in the Address Book
652
Specifying the E-Mail Sender
654
Selecting a Sender Registered to a Quick Dial Key
654
Selecting a Sender from the List
655
Using a Registration Number to Specify a Sender Name
657
Searching for a Sender by Name
658
Searching for a Sender by E-Mail Address
660
Setting the Return Receipt Function
663
Entering the E-Mail Subject
664
Security Settings to E-Mails
665
Sending Encrypted E-Mail
665
Sending E-Mail with a Signature
666
2 Sending Scan Files to Folders
669
Before Sending Files by Scan to Folder
669
Overview of Sending Scan Files by Scan to Folder
669
Preparation for Sending by Scan to Folder
671
Registering Destination Folders in the Address Book
673
Scan to Folder Screen
674
Basic Procedure When Using Scan to Folder
676
Specifying Scan to Folder Destinations
678
Selecting a Destination Registered to a Quick Dial Key
678
Selecting the Destination from the Machine's Address Book
678
Sending Files to a Shared Folder
684
Sending Files to an FTP Server
689
Sending Files to Netware Server
691
Registering the Path to the Selected Destination in the Address Book
696
3 Sending Scan Files Using WSD
699
Before Sending Scan Files Using WSD
699
Overview of Sending Scan Files Using WSD
699
Preparation for Sending Files Using WSD
701
Using the WSD Scanner (Push Type)
705
Basic Procedure for Sending Scan Files Using WSD (Push Type)
705
WSD Scanner (Push Type) Screen
705
Specifying the Destination Client Computer
707
Using the WSD Scanner (Pull Type)
711
Basic Procedure for Sending Scan Files Using WSD (Pull Type)
711
Configuring the Scan Settings on a Client Computer
713
Changing a Scan Profile
713
Creating a New Scan Profile
714
Scan Profile Items and Settings
714
4 Saving Scan Files on a Removable Memory Device
717
Before Saving Files on a Removable Memory Device
717
Overview of Saving Files on a Removable Memory Device
717
Basic Procedure for Saving Scan Files on a Removable Memory Device
719
5 Delivering Scan Files
721
Before Delivering Files
721
Overview of Scan File Delivery
721
Preparing to Deliver Files
722
Installing Desktopbinder Lite from the Supplied CD-ROM
724
Network Delivery Scanner Screen
725
Basic Procedure for Delivering Files
727
Specifying Delivery Destinations
730
Selecting a Destination Registered in the Destination List of the Delivery Server
730
Selecting a Destination Using a Quick Dial Key
730
Specifying the Sender
736
Selecting a Sender Registered to a Quick Dial Key
736
Selecting a Sender by Searching the Delivery Server's Destination List
737
Entering the Subject of the E-Mail to be Transmitted Via the Delivery Server
743
6 Scanning Originals with the Network TWAIN Scanner
745
Before Using the Network TWAIN Scanner
745
Preparing to Use the Network TWAIN Scanner
746
Installing the TWAIN Driver from the Supplied CD-ROM
748
Basic Network TWAIN Scanner Procedure
750
Scan Settings When Using TWAIN Scanner
752
Setting Original Orientation on the TWAIN Scanner
752
7 Various Scan Settings
755
Specifying Send Options
755
Resolution
755
Original Orientation
756
Original Setting
758
Scan Size
759
File Type
761
Notes about and Limitations of File Types
763
PDF Security Encryption
763
PDF Security Permissions
766
Selecting Original Type
769
Adjusting Image Density
771
8 Scanner Features
773
Accessing User Tools
773
Changing User Tools
773
Closing User Tools
774
Scan Settings
775
Destination List Settings
777
Send Settings
778
Output Settings
781
Administrator Tools
782
9 Appendix
783
Relationship between Resolution and Scan Size
783
When Using as a TWAIN Scanner
784
Software Supplied on CD-ROM
786
Auto-Run Program
786
TWAIN Driver
786
Desktopbinder Lite
787
Values of Various Set Items for Transmission/Delivery Function
789
Transmission Function
789
Network Delivery Function
791
About WIA Scanning
793
Specifications
796
Trademarks
799
Index
801
Network and System Settings Guide
809
Advertisement
Ricoh Aficio MP 171SPF Scanner Reference (158 pages)
Operating Instructions
Brand:
Ricoh
| Category:
All in One Printer
| Size: 3.24 MB
Table of Contents
Operating Instructions
1
Manuals for this Machine
3
Table of Contents
5
How to Read this Manual
9
Symbols
9
About the Scanner Functions
10
Display Panel
11
Confirmation Displays
11
Scanner Features
14
Administrator Tools
16
Send Settings
16
1 Sending Scan Files by E-Mail
17
Before Sending Scan Files by E-Mail
17
Outline of Sending Scan Files by E-Mail
17
Preparation for Sending by E-Mail
18
Registering E-Mail Addresses in the Address Book
18
E-Mail Screen
19
Basic Operation for Sending Scan Files by E-Mail
20
Switching to the E-Mail Screen
23
Specifying E-Mail Destinations
24
Selecting the Destination from the Machine's Address Book
24
Entering an E-Mail Address Manually
27
Selecting Destinations by Searching an LDAP Server
28
Registering a Directly-Entered Destination in the Address Book
31
Specifying the E-Mail Sender
32
Selecting a Sender from the List
32
Using a Registration Number to Specify a Sender Name
33
Selecting the Sender by Searching the Machine's Address Book
34
Specifying the E-Mail Subject
35
Specifying the E-Mail Message
36
Selecting a Message from the List
36
Manual Entry of a Message
37
Simultaneous Storage and Sending by E-Mail
38
Sending the URL by E-Mail
39
2 Sending Scan Files by Scan to Folder
41
Before Sending Files by Scan to Folder
41
Outline of Sending Scan Files by Scan to Folder
41
Preparation for Sending by Scan to Folder
43
Registering Destination Folders in the Address Book
44
Scan to Folder Screen
45
Basic Operations When Using Scan to Folder
46
Switching to the Scan to Folder Screen
48
Specifying Scan to Folder Destinations
49
Selecting the Destination from the Machine's Address Book
49
Sending Files to a Shared Network Folder
52
Sending Files to an FTP Server
56
Sending Files to Netware Server
58
Registering the Path to the Selected Destination in the Address Book
62
Simultaneous Storage and Sending by Scan to Folder
63
3 Storing Files Using the Scanner Function
65
Before Storing Files
65
Outline of File Storage under the Scanner Function
65
Basic Operation for Storing Scan Files
67
Specifying File Information for a Stored File
69
Specifying a User Name
69
Specifying a File Name
70
Specifying a Password
71
Displaying the List of Stored Files
72
List of Stored Files
72
Searching the List of Stored Files
74
Checking Stored Files from a Client Computer
76
Using Desk Top Binder Lite to Display Stored Files
76
Using Web Image Monitor to Display Stored Files
76
Sending a Stored File
77
Sending Stored Files
77
Managing Stored Files
79
Deleting a Stored File
79
Changing Information for a Stored File
80
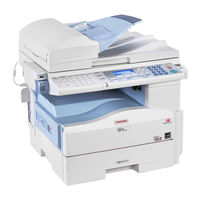
RICOH Aficio MP 171SPF Operating Instructions Manual (128 pages)
Brand:
RICOH
| Category:
All in One Printer
| Size: 6.57 MB
Table of Contents
Documentation for this Machine
3
Table of Contents
4
Manuals for this Machine
8
Manuals List
10
What You Can Do with this Machine
11
Using this Machine as a Copier
11
Using this Machine as a Printer
11
Paperless Fax Transmission
12
Fax Transmission and Reception over the Internet
13
Using the Scanner in a Network Environment
14
Administrating the Machine (Security Functions)
14
Monitoring the Machine Via Computer
15
Notice
16
Important
16
How to Read this Manual
17
Symbols
17
Name of Major Item
17
Note
18
Safety Information
19
Safety During Operation
19
Safety Precautions to be Followed
19
Safety Labels of this Machine
24
Positions of WARNING and CAUTION Labels
24
Power Switch Symbols
24
ENERGY STAR Program
25
Energy Saving Functions
26
Laws and Regulations
27
Legal Prohibition
27
Laser Safety
27
1 Simple Search
29
Searching by What You Want to Do
29
I Want to Save My Paper Document
29
I Want to Convert Documents to Electronic Formats Easily
30
I Want to Register Destinations
30
I Want to Operate the Machine more Effectively
31
Searching by Keyword
33
Paper
33
Register/Change/Delete
33
Settings
34
Forwarding
34
Install
34
2 Getting Started
37
Guide to Components
37
Other Items
40
External Items
40
Internal Items
40
Control Panel
42
Display Panel
46
Reading the Display and Using Keys
46
Changing the Display Language
47
When the Authentication Screen Is Displayed
48
User Code Authentication (Using the Control Panel)
48
User Code Authentication (Using a Printer Driver)
49
Login (Using the Control Panel)
49
Logout (Using the Control Panel)
49
Login (Using a Printer Driver)
50
Login (Using Web Image Monitor)
50
Logout (Using Web Image Monitor)
50
Changing Modes
52
System Reset
52
Turning On/Off the Power
54
Turning on the Main Power
54
Turning on the Power
55
Turning off the Power
55
Turning off the Main Power
56
Saving Energy
56
Advertisement
Ricoh Aficio MP 171SPF Operating Instructions Manual (136 pages)
Printer Reference
Brand:
Ricoh
| Category:
Printer
| Size: 5.37 MB
Table of Contents
Operating Instructions
1
Table of Contents
3
Manuals for this Machine
7
Notice
9
Important
9
How to Read this Manual
10
Symbols
10
Note
10
Laws and Regulations
11
Legal Prohibition
11
Model-Specific Information
12
1 Preparing the Machine
13
Confirming the Connection Method
13
Network Connection
13
Local Connection
15
Installing the Printer Driver
16
Quick Install
16
Using the Smartdevicemonitor for Client Port
17
Using the Standard TCP/IP Port
22
Using the LPR Port
23
Using the WSD Port
25
Using as a Windows Network Printer
27
Using as a Netware Print Server/Remote Printer
29
Form Feed
30
Banner Page
31
Printing after Resetting the Printer
31
Installing the Printer Driver Using USB
32
Windows 2000/XP, Windows Server 2003/2003 R2 - USB
32
Windows Vista, Windows Server 2008 - USB
33
Printing with Parallel Connection
35
Making Option Settings for the Printer
37
Conditions for Bidirectional Communication
37
If Bidirectional Communication Is Disabled
38
Installing Font Manager
39
Using Adobe Pagemaker Version 6.0, 6.5, or 7.0
40
2 Printing Documents
41
Displaying the Printer Driver Settings Screen
41
Making Printer Default Settings - the Printer Properties
41
Making Printer Default Settings - Printing Preferences
41
Making Printer Settings from an Application
42
Setting Paper on the Bypass Tray
43
Setting the Paper Size Using the Control Panel
45
Setting Custom Size Paper Using the Control Panel
47
Setting Thick Paper or OHP Transparencies Using the Control Panel
49
Setting Envelopes Using the Control Panel
51
Printing on Orientation-Fixed or Two-Sided Paper
57
Frequently Used Print Methods
59
Standard Printing
59
Printing on both Sides of Sheets
60
Combining Multiple Pages into Single Page
62
Pages Per Sheet
64
Using One Click Presets
65
Advanced Printing
67
Menu Names and Brief Overview of each Function
67
Collate
67
If Error Occurs with the Specified Paper Size and Type
69
Printing from a Selected Tray
69
Canceling a Print Job
70
Spool Printing
72
Registering Classification Codes
73
Configuring Classification Codes
74
Specifying the Classification Code for a Print Job
74
Ricoh Aficio MP 171SPF Troubleshooting Manual (100 pages)
Operating Instructions
Brand:
Ricoh
| Category:
Printer
| Size: 2.47 MB
Table of Contents
Operating Instructions
1
Troubleshooting
1
Manuals for this Machine
3
Table of Contents
5
How to Read this Manual
7
Symbols
7
Name of Major Item
7
1 When the Machine Does Not Operate as Wanted
9
Indicators
9
Panel Tone
10
When the Function Status Indicator Lights up in Red
11
When You Have Problems Operating the Machine
12
This Machine
14
When a Job Is Not Performed
15
2 Troubleshooting When Using the Copy Function
17
When a Message Is Displayed
17
When You Cannot Make Clear Copies
19
When You Cannot Make Copies as Wanted
21
When Memory Is Full
23
3 Troubleshooting When Using the Facsimile Function
25
Adjusting the Volume
25
When a Message Is Displayed
28
When You Cannot Send or Receive Fax Messages as Wanted
35
When Memory Is Full
39
When an Error Report Is Printed
40
Turning off the Main Power / in the Event of Power Failure
41
When an Error Occurs Using Internet Fax
42
Error Mail Notification
42
Error Report (E-Mail)
42
Server-Generated Error E-Mail
42
4 Troubleshooting When Using the Printer Function
43
When a Message Is Displayed During Installation of the Printer Driver
43
Windows 95/98/Me, Windows 2000 or Windows NT 4.0
43
Windows XP Professional or Windows Server 2003
43
Windows XP Home Edition
44
When a Message Is Displayed
45
Status Messages
45
Alert Messages
46
Printing the Error Log
48
When You Cannot Print
49
Other Printing Problems
52
5 Troubleshooting When Using the Scanner Function
59
When Scanning Is Not Done as Expected
59
When You Cannot Send Scanned Files
60
When You Cannot Browse the Network to Send a Scanned File
60
When the TWAIN Driver Cannot be Started
60
The Network Delivery Function Cannot be Used
60
Operations Are Not Possible When Messages Appear
61
When a Message Is Displayed
62
When a Message Is Displayed on the Display Panel
62
When a Message Is Displayed on the Client Computer
66
Ricoh Aficio MP 171SPF Operating Instructions Manual (104 pages)
Brand:
Ricoh
| Category:
Copier
| Size: 5.5 MB
Table of Contents
Documentation for this Machine
3
Table of Contents
4
Manuals for this Machine
7
Notice
9
Important
9
How to Read this Manual
10
Symbols
10
Name of Major Item
10
Notes
11
Laws and Regulations
12
Legal Prohibition
12
When the Machine Does Not Operate as Wanted
13
Indicators
13
Panel Tone
14
When the Function Status Indicator Lights up in Red
15
When You Have Problems Operating the Machine
17
When a Job Is Not Performed
21
Troubleshooting When Using the Copy Function
23
Messages Displayed When Using the Copy Function
23
When You Cannot Make Clear Copies
25
When You Cannot Make Copies as Wanted
28
When Memory Is Full
31
Troubleshooting When Using the Facsimile Function
33
Adjusting the Volume
33
Messages Displayed When Using the Facsimile Function
36
When You Cannot Send or Receive Fax Messages as Wanted
47
When Memory Is Full
52
If an Error Report Is Printed
54
Turning off the Main Power / in the Event of Power Failure
55
When an Error Occurs Using Internet Fax
56
Error Mail Notification
56
Error Report (E-Mail)
56
Server-Generated Error E-Mail
56
Troubleshooting When Using the Printer Function
57
Messages Displayed When Installing the Printer Driver
57
Windows 2000
57
Windows XP Professional or Windows Server 2003/2003 R2
57
Windows XP Home Edition
58
Windows Vista
58
Windows Server 2008
59
If USB Connection Fails
60
Messages Displayed When Using the Printer Function
61
Status Messages
61
Alert Messages
62
Printing the Error Log
63
When You Cannot Print
65
When the Data in Indicator Does Not Light up or Flash
67
Other Printing Problems
69
Troubleshooting When Using the Scanner Function
79
When Scanning Is Not Done as Expected
79
Advertisement
Related Products
Ricoh Aficio MP 171F
Ricoh Aficio MP 171
Ricoh Aficio MP1812L
Ricoh Aficio MP1911
Ricoh Aficio MP1800
Ricoh Aficio MP1810L
Ricoh Aficio MP 1810LD
Ricoh Aficio MP1610L
Ricoh Aficio MP 1610LD
Ricoh MP 1900
Ricoh Categories
All in One Printer
Printer
Digital Camera
Copier
Printer Accessories
More Ricoh Manuals
Login
Sign In
OR
Sign in with Facebook
Sign in with Google
Upload manual
Upload from disk
Upload from URL