Sign In
Upload
Manuals
Brands
Promise Technology Manuals
Storage
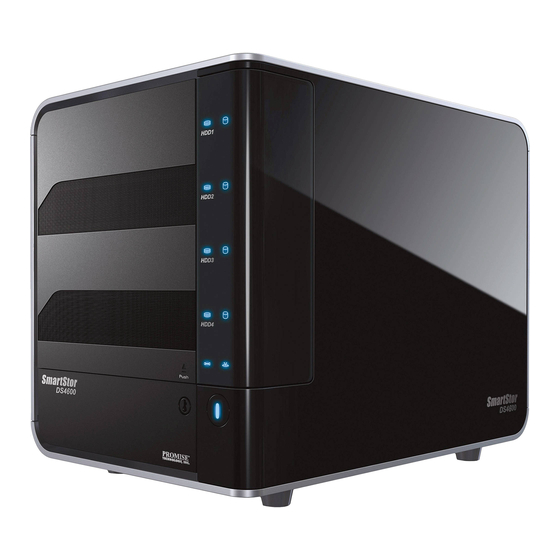
Smartstor NS4600
Promise Technology Smartstor NS4600 Manuals
Manuals and User Guides for Promise Technology Smartstor NS4600. We have
2
Promise Technology Smartstor NS4600 manuals available for free PDF download: Product Manual, Quick Start Manual
Promise Technology Smartstor NS4600 Product Manual (370 pages)
Brand:
Promise Technology
| Category:
Storage
| Size: 8.06 MB
Table of Contents
Important Data Protection Information
2
Notice
2
Recommendations
2
Trademarks
2
Table of Contents
3
Contents
5
Chapter 1: Introduction to Smartstor
13
About this Manual
13
Architecture
14
Protocol Support
14
Key Benefits
14
Specifications
15
Compatible Backup Software
16
Client os Support
16
Browser Support
17
Chapter 2: Installation and Setup
19
Unpacking the Smartstor NS4600
19
Installing Disk Drives
21
Connecting to the Network
22
Connecting the Power
22
Installing the Software
22
OS Support
23
Installation: Windows
23
Installation: Mac
26
Setting up the Smartstor
27
One Click Setup
29
Advanced Setup
31
Connecting to PASM
35
Browser Support
35
Finding the Smartstor's IP Address
35
PASM in Your Browser
37
PASM in Smartnavi
38
PASM in Bonjour
40
Method 1
40
Method 2
40
Shutting down the Smartstor
42
Chapter 3: Connecting to the Smartstor
43
Setting up a Network Drive on a Windows PC
43
Setting up a Network Drive on a UNIX or Linux PC
48
On a Windows or Mac
48
Setting up Unix/Linux Service
48
Setting up File Sharing
49
On the Unix/Linux PC with Command Line Interface
50
On the Linux PC with Graphic Desktop
51
Setting up a Network Drive on a Mac
53
In PASM
53
On the Mac Desktop
55
Connecting a USB Printer to Smartstor
57
Setting up the Print Server on Smartstor
58
Setting up Windows Printing
59
Setting up Linux Printing
62
Setting up Mac Printing
65
Connecting a USB Drive
67
Windows PC
68
Linux PC
68
Mac
69
Disconnecting a USB Drive
69
Setting-Up Apple Itunes
70
Downloading the Firefly Plug-In
70
Installing the Firefly Plug-In
70
Installing and Configuring Apple Itunes
72
Chapter 4: Smartnavi
75
Working with Smartnavi
75
Opening the Main Window
75
Choosing a Smartnavi Language
77
Starting the Advanced Storage Manager (PASM)
78
Main Window
78
Smartnavi Tray Icon (Windows Only)
79
Viewing Smartnavi Information
79
Closing Smartnavi
81
Alternative Method for Windows
81
Managing Users and Groups
83
Creating a User
83
Creating the Default User
85
Changing User Passwords
86
Viewing a List of Users
88
Deleting a User
88
Creating a Group
89
Viewing a List of Groups
90
Adding Members to a Group
91
Deleting Members from a Group
92
Deleting a Group
93
Viewing Quotas
94
Setting Quotas
95
Managing RAID Volumes
97
Creating a RAID Volume
97
Expanding a RAID Volume
99
Viewing RAID Volume Status
100
Viewing a List of RAID Volumes
101
Recreating a RAID Volume
102
Managing Backups
104
Doing a Backup Now
104
Main Window
104
Device List
108
Tray Icon
109
Scheduling a Backup
110
Viewing Backup Schedules
116
Changing a Scheduled Backup
116
Deleting a Scheduled Backup
120
Restoring Backed-Up Files
121
Viewing the Backup Event Log
124
Saving the Event Log
125
Clearing the Event Log
127
Setting the Port
128
Managing Share Folders
130
Creating a Share Folder
130
Opening a Share Folder
131
Viewing a List of Share Folders
135
Changing Share Folder Permissions
137
Deleting a Share Folder
138
Mounting a Share Folder /Creating a Network Drive
139
Un-Mounting a Share Folder /Disconnecting a Network Drive
141
Setting up a Share Folder for Time Machine
142
On Smartnavi
142
On the Mac
142
Pre-Existing Time Machine Configuration on the Mac
142
Making Management Settings
144
Configuring a NAS System
144
One Click Setup
144
Advanced Setup
145
Changing Network Settings
149
Locating the Smartstor
151
Wake-On-LAN
152
Choosing a Default NAS System
153
Enabling or Disabling Event Notification
154
Enabling Event Notification
154
Disabling Event Notification
155
Viewing the System Event Log
155
Adding Application Plug-Ins
156
Viewing a List of Plug-Ins
160
Viewing Plug-In Version Numbers
161
Enabling and Disabling Plug-Ins
162
Enabling Plug-Ins
162
Disabling Plug-Ins
164
Removing Plug-Ins
165
Rebooting the Smartstor
166
Shutting down the Smartstor
168
Using Smartnavi
168
Directly
170
Restarting the Smartstor
170
Managing Downloads
171
Adding a Link
171
Drag and Drop Files
174
Windows
174
Mac os X
174
Dragging and Dropping Files
174
Batch Downloading Files
175
Viewing the Download List
177
Removing a Link
179
Pausing and Resuming a Download
180
Pausing a Download
180
Resuming a Download
180
Viewing the Downloaded List
181
Opening a Downloaded File
182
Deleting a Downloaded File
183
Using Media Center
185
Viewing Playlists
185
Creating a Playlist
186
Playing a Playlist
187
Renaming a Playlist
187
Deleting a Playlist
188
Playing a Single Music or Video File
188
Using the Panel
189
Managing Photo Albums
191
Making an Album
191
Part 1: Making Your Album
191
Part 2: Exporting or Uploading Your Album
196
Part 3: Viewing Your Album
199
Viewing an Album
199
Editing an Album
202
Deleting an Album
203
Chapter 5: PASM
205
Connecting to PASM
205
PASM in Your Browser
205
PASM in Smartnavi
206
PASM in Bonjour
208
Method 1
208
Method 2
208
Choosing a Language
210
Navigating in PASM
210
Logging out of PASM
211
Managing Monitor and Wizard
212
Viewing the Information of the Resource Monitor
212
Setting up Smartstor with the Setup Wizard
213
Changing the Default Computer Name
213
Setting Network Configuration
214
Viewing File System
214
Managing Users and Groups
216
Viewing a List of Users
216
Creating a User
216
Changing the User's Password
217
Deleting a User
218
Viewing a List of Groups
218
Creating a Group
219
Adding Members to a Group
219
Removing Members from a Group
220
Deleting a Group
221
Viewing Quotas
221
Setting Quotas
222
Managing File & Print Services
224
Viewing a List of Protocols
224
Setting up Windows Access
225
Setting up Windows Service
225
Setting up File Sharing
226
Setting up Unix/Linux Access
228
Setting up Unix/Linux Service
228
Setting up File Sharing
229
Setting up Mac Access
230
Setting up Mac Service
230
Setting up File Sharing
231
Setting up FTP Access
232
Setting up FTP Service
232
Setting up File Sharing
233
Setting up Your Print Server
234
Setting up Your DLNA Server
235
Viewing a List of Application Plug-Ins
236
Enabling and Disabling Application Plug-Ins
236
Enabling Application Plug-Ins
236
Disabling Application Plug-Ins
237
Viewing a List of Folders
238
Adding a Folder
238
Deleting a Folder
239
Setting up Folder Sharing: Windows, Mac, FTP
240
Setting up Folder Sharing: UNIX and Linux
241
Managing RAID Volumes & File System
243
Viewing RAID Volume Status
243
Viewing Disk Drive Information
244
Creating a RAID Volume
245
Designating a Spare Drive
246
Migrating a RAID Volume
246
Deleting a RAID Volume
247
Viewing the File System Status
248
Viewing an External USB Drive or Memory Stick
249
Formatting an External USB Drive or Memory Stick
250
Viewing the Iscsi Status
250
Creating the Iscsi Volume
252
Modifying the Iscsi Volume
253
Managing Backups
254
Viewing a List of Snapshot Backups
254
Setting up a Snapshot Backup
255
Scheduling a Snapshot Backup
255
Recovering Snapshot Backups
256
Viewing the NAS Replication Schedule
257
Setting up NAS Replication
258
Enabling One Touch Backup
259
Setting USB Backup
260
Setting Esata Backup
262
Managing the Network Connection
264
Viewing Network Setup Information
264
Making Network Settings
264
Working with Jumbo Frames
265
Working with DDNS
266
Making DDNS Settings
266
Making Management Settings
268
Viewing the Event Log
268
Setting up SMTP Authentication
269
Sending a Test Message
270
Viewing the Email Alert List
271
Adding an Email Alert Recipient
271
Deleting an Email Alert Recipient
272
Upgrading the System Firmware
272
Adding Application Plug-Ins
273
Removing Plug-Ins
273
Enabling and Disabling the Buzzer
274
Enabling and Disabling the LED
274
Viewing UPS Status
275
Setting up a UPS
275
Setting up System Standby
276
Enabling and Disabling the Power on LAN
277
Power On/Off Automatically
278
Managing the System
280
Setting System Date and Time
280
Adjusting for Daylight Saving Time
281
Running the Network Time Protocol
281
Viewing the Results of NTP Synchronization
282
Rebooting the Smartstor
282
Shutting down the Smartstor
283
Using PASM
283
Directly
284
Restarting the Smartstor
284
Locating the Smartstor
284
Viewing System Information
285
Viewing Enclosure Information
286
Enabling the Smart Fan
287
Media Center
288
Accessing Media Center
288
Using Media Center
290
All
290
Music
290
Video
291
Picture
291
Configuration
291
Download
293
Transfers
293
Add Download
293
Options
294
Search
295
Servers
296
Itunes Server
297
Create Playlist
297
Playlist
298
Web File Manager
299
Database Server
300
Web Server
300
Windows Mapped Shares
300
Smartnavi
302
FTP Upload
304
Squeeze Center
305
Chapter 6: Technology Background
307
Introduction to RAID
307
RAID 0 - Stripe
308
RAID 1 - Mirror
309
RAID 5 - Block Striping with Distributed Parity
310
RAID 10 - Mirror / Stripe
311
Choosing a RAID Level
312
Raid 0
312
Raid 1
312
Raid 5
313
Raid 10
313
Spare Drive
313
Automatic Rebuilding
314
Partition and Format
314
RAID Volume Migration
315
Raid 0
315
Raid 1
315
Raid 5
316
Raid 10
316
Chapter 7: Troubleshooting
317
Responding to an Audible Alarm
317
Checking the System Status LED
318
Checking Disk Status Leds
318
Replacing a Failed Disk Drive
319
Checking RAID Volume Status in PASM
320
Smartstor Responds to a Critical RAID Volume
320
Additional Details about Rebuilds
320
Responding to an Invalid RAID Volume
321
Using the Recover Function
321
Checking File System Status in PASM
322
Rebuilding the File System
322
Checking the Event Log in PASM
323
Responding to Events
324
Checking Enclosure Status in PASM
327
Solving Network Connection Problems
328
Verifying Connections with Smartnavi
330
Smartstor Lockup
331
Checking Your Email Inbox
333
Restoring the Default Password
333
Resolving a Windows Firewall Issue
334
Chapter 8: Support
337
Frequently Asked Questions
337
Contacting Technical Support
341
Technical Support Services
341
United States
341
The Netherlands
342
Germany
342
Italy
342
Taiwan
343
China - Beijing
343
China - Shanghai
343
Limited Warranty
344
Disclaimer of Other Warranties
344
Your Responsibilities
345
Returning Product for Repair
346
Appendix A: Maintenance
349
Upgrading the Firmware
349
Downloading the Firmware Upgrade File
349
Installing the Firmware Upgrade File
349
Error During Upgrade
350
No Reboot after Upgrade
350
Booting the Smartstor in Safe Mode
350
Hard Booting the Smartstor
350
Connection Problems after Restart
352
Replacing the Power Supply
352
Removing the Power Supply
352
Installing the Power Supply
353
Replacing the Cooling Fan
354
Removing the Cooling Fan
354
Installing the Cooling Fan
355
Replacing the Battery
356
Removing the Battery
356
Installing the Battery
358
Appendix B: Important Information
361
GNU General Public License
361
Battery
361
Advertisement
Promise Technology Smartstor NS4600 Quick Start Manual (362 pages)
Brand:
Promise Technology
| Category:
Network Storage Server
| Size: 7.75 MB
Table of Contents
Installation: Windows
8
One Click Setup
13
Advanced Setup
15
Setting up a Network Drive on a Windows PC
21
Setting up a Network Drive on a UNIX or Linux PC
26
Connecting a USB Printer to Smartstor
33
Setting up the Print Server on Smartstor
33
Setting up Windows Printing
34
Setting up Linux Printing
35
Gnu General Public License
36
Schritt 4: Anschließen an die Stromversorgung
43
Erweiterte Einstellungen
51
Systèmes D'exploitation Supportés
80
Installation : Sous Windows
80
Configuration Avancée
87
Impostazione Rapida
121
Расширенная Настройка
195
Advertisement
Related Products
Promise Technology VTrak N1008
Promise Technology VTrak N1616
Promise Technology SmartStor NAS
Promise Technology SmartStor DS4600
Promise Technology SMARTSTOR NS4300N
Promise Technology SmartStor NS4700
Promise Technology SmartStor NS2300N
Promise Technology SmartStor NS6700
Promise Technology Apollo
Promise Technology Apollo Cloud 2 Duo
Promise Technology Categories
Storage
Computer Hardware
Network Storage Server
Controller
Disk array system
More Promise Technology Manuals
Login
Sign In
OR
Sign in with Facebook
Sign in with Google
Upload manual
Upload from disk
Upload from URL