Sign In
Upload
Manuals
Brands
Polycom Manuals
Conference System
CX5500
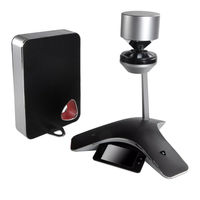
Polycom CX5500 Unified Conference Station Manuals
Manuals and User Guides for Polycom CX5500 Unified Conference Station. We have
4
Polycom CX5500 Unified Conference Station manuals available for free PDF download: Administrator's Manual, User Manual, Setting Up
Polycom CX5500 Administrator's Manual (386 pages)
Unified Conference Station for Microsoft Lync
Brand:
Polycom
| Category:
Conference System
| Size: 16.36 MB
Table of Contents
Table of Contents
3
About this Guide
12
Who Should Read this Guide
12
Conventions Used in this Guide
12
Recommended Software Tools
14
Read the Feature Parameter Tables
14
Example One: Feature Parameter Tables
15
Example Two: Configuring Grouped Parameters
16
Get Help and Support
19
About the CX5500 Unified Conference Station for Microsoft Lync
20
The Polycom UC Software Big Picture
21
Understand Polycom UC Software Architecture
22
What Is the Polycom UC Software
22
What Are the Configuration Files
22
What Are the Resource Files
23
Set up Your Device Network
24
Establish Link Connectivity
25
Wired Devices
25
Security and Quality of Service Settings
25
Vlans and Wired Devices
25
Authentication
26
IP Communication Settings
27
Provisioning Server Discovery
28
Supported Provisioning Protocols
29
Phone Network Menus
31
Main Menu
32
Provisioning Server Menu
33
DHCP Menu
35
Network Interfaces Menu (Ethernet Menu)
36
VLAN Menu
37
Menu
38
PAC File Information
39
Login Credentials Menu
39
TLS Security Menu
39
TLS Profile Menu
40
Applications Menu
41
Syslog Menu
41
Set up the Provisioning Server
43
Why Use a Provisioning Server
43
Provisioning Server Security Notes
44
Set up an FTP Server as Your Provisioning Server
44
Download Polycom CX5500 Software Files to the Provisioning Server
45
Deploy and Update the CX5500 System with a Provisioning Server
46
Deploy CX5500 Systems with a Provisioning Server
46
Upgrade Polycom UC Software
48
Configuration Methods
50
Use the Centralized Provisioning Method: Configuration Files
51
Understand the Master Configuration File
52
Understand Variable Substitution
54
Use the Template Configuration Files
56
Change Configuration Parameter Values
57
Provision with the Web Configuration Utility
59
Access the Web Configuration Utility
59
Choose Language Files for the Web Configuration Utility Interface
61
Phone User Interface - Menu System Settings
62
Set up Basic Phone Features
64
Basic Phone Features at a Glance
64
Configure the Call Logs
65
Example Call Log Configuration
66
Understand the Call Timer
68
Configure Call Waiting Alerts
68
Example Call Waiting Configuration
69
Called Party Identification
69
Configure Calling Party Identification
69
Example Calling Party Configuration
70
Enable Missed Call Notification
70
Example Missed Call Notification Configuration
71
Connected Party Identification
71
Distinctive Incoming Call Treatment
72
Example Call Treatment Configuration
73
Apply Distinctive Ringing
74
Example Distinctive Ringing Configuration
75
Apply Distinctive Call Waiting
75
Example Distinctive Call Waiting Configuration
76
Configure Do Not Disturb
76
Example Do Not Disturb Configuration
78
Use the Local Contact Directory
78
Example Configuration
80
Configure the Local Digit Map
81
Understand Digit Map Rules
82
Microphone Mute
83
Configure the Speed Dial Feature
83
Example Speed Dial Configuration
84
Set the Time and Date Display
86
Example Configuration
87
Set a Graphic Display Background
88
Example Graphic Display Background Configuration
89
Enable Automatic Off-Hook Call Placement
90
Example Automatic Off-Hook Placement Configuration
91
Configure Call Hold
91
Example Call Hold Configuration
92
Use Call Transfer
93
Example Call Transfer Configuration
94
Create Local and Centralized Conferences
94
Enable Conference Management
95
Example Conference Management Configuration
96
Configure Call Forwarding
97
Example Call Forwarding Configuration
98
Configure Lync Call Forwarding
99
Configure Directed Call Pick-Up
100
Example Directed Call Pickup Configuration
100
Enable Group Call Pickup
101
Example Group Call Pickup Configuration
102
Configure Call Park and Retrieve
102
Example Call Park and Retrieve Configuration
103
Enable Last Call Return
104
Example Configuration for Last Call Return
104
Set up Advanced Phone Features
106
Assign Multiple Line Keys Per Registration
107
Example Configuration
108
Enable Multiple Call Appearances
108
Example Multiple Call Appearances Configuration
110
Set the Phone Language
111
Example Phone Language Configuration
112
Synthesized Call Progress Tones
113
Configure Real-Time Transport Protocol Ports
114
Example Real-Time Transport Protocol Configuration
115
Configure Network Address Translation
115
Example Network Address Translation Configuration
116
Use the Corporate Directory
116
Example Corporate Directory Configuration
118
Configure Enhanced Feature Keys
120
Some Guidelines for Configuring Enhanced Feature Keys
121
Enhanced Feature Key Examples
122
Understanding Macro Definitions
123
Macro Actions
123
Prompt Macro Substitution
124
Expanded Macros
125
Special Characters
125
Example Macro
125
Speed Dial Example
126
Configure Soft Keys
127
Example Soft Key Configurations
128
Enable the Power Saving Feature
130
Example Power-Saving Configuration
131
Configure Group Paging
131
Configure Shared Call Appearances
133
Example Configuration
135
Enable Bridged Line Appearance
136
Example Bridged Line Appearance Configuration
137
Enable Voicemail Integration
138
Example Voicemail Configuration
139
Enable Multiple Registrations
140
Example Multiple Registration Configuration
141
Set up Server Redundancy
142
DNS SIP Server Name Resolution
143
Behavior When the Primary Server Connection Fails
144
Recommended Practices for Fallback Deployments
145
Use the Presence Feature
146
Example Presence Configuration
147
Configuring the Static DNS Cache
148
Example Static DNS Cache Configuration
149
Displaying SIP Header Warnings
152
Example Display of Warnings from SIP Headers Configuration
153
Quick Setup of the CX5500 System
153
Example Quick Setup Configuration
155
Provisional Polling of the CX5500 System
155
Example Provisional Polling Configuration
156
Set up Microsoft Lync Server 2010 and 2013
157
Register with Microsoft Lync Server 2010
158
Example Configuration: Setting the Base Profile to Lync
160
Enable Microsoft Exchange Calendar Integration
162
Example Exchange Calendar Configuration
164
Set up Phone Audio Features
166
Customize Audio Sound Effects
167
Example Configuration
168
Voice Activity Detection
168
Generate Dual Tone Multi-Frequency (DTMF) Tones
169
DTMF Event RTP Payload
169
Acoustic Echo Cancellation
170
Audio Codecs
170
IP Type-Of-Service
172
IEEE 802.1P/Q
172
Voice Quality Monitoring (Vqmon)
173
Built-In Audio Processing Features
174
Automatic Gain Control
174
Background Noise Suppression
174
Comfort Noise Fill
174
Dynamic Noise Reduction
174
Jitter Buffer and Packet Error Concealment
174
Low-Delay Audio Packet Transmission
174
Set up User and Phone Security Features
175
Local User and Administrator Passwords
176
Incoming Signaling Validation
176
Configuration File Encryption
177
Digital Certificates
177
Generating a Certificate Signing Request
179
Configure TLS Profiles
180
Download Certificates to a CX5500 System
182
Set TLS Profiles
183
Support Mutual TLS Authentication
183
Configurable TLS Cipher Suites
184
Secure Real-Time Transport Protocol
185
Lock the Phone
188
Support 802.1X Authentication
189
Set User Profiles
191
Use the CX5100/5500 Control Panel
195
Find Your Default System Password
196
Create or Load a System Profile
196
Update the CX5500 System's Software Automatically
197
Troubleshoot Your CX5500 System
198
Understand Error Message Types
198
Error Messages
199
Polycom UC Software Error Messages
199
Status Menu
201
Log Files
202
Reading a Boot Log File
205
Reading an Application Log File
206
Reading a Syslog File
207
Manage the CX5500 System's Memory Resources
208
Identify Symptoms
208
Check the Phone's Available Memory
208
Test Phone Hardware
209
Upload a Phone's Configuration
210
Network Diagnostics
210
Ports Used on the CX5500 System
210
Power and Startup Issues
211
Touch Screen Issues
212
Screen and System Access Issues
212
Calling Issues
213
Display Issues
213
Audio Issues
214
Licensed Feature Issues
214
Upgrading Issues
214
Miscellaneous Maintenance Tasks
216
Trusted Certificate Authority List
216
Encrypt Configuration Files
219
Internal Key Functions
220
Assign a VLAN ID Using DHCP
223
Parse Vendor ID Information
225
Product, Model, and Part Number Mapping
226
Capture the Phone's Current Screen
226
LLDP and Supported Tlvs
227
Supported Tlvs
228
Configuration Parameters
233
Apps
235
Button
238
Call
239
Calllists
243
Device
243
Dialplan
252
Dir
255
Broadsoft
256
Local
256
Corp
257
Divert
259
Dns
260
Dns-A
260
Dns-Naptr
261
Dns-Srv
262
Efk
262
Exchange
264
Feature
265
Httpd
267
Keyboard
268
Lcl
268
Datetime
271
Loc
272
Log
273
Level/> <Change/>And<Render
274
Sched
275
Msg
276
Mwi
277
Nat
277
Phonelock
278
Powersaving
279
Pres
280
Prov
281
Ptt
283
Qos
283
Reg
285
Request
294
Roaming_Buddies
294
Roaming_Privacy
294
Saf
295
Pat
297
Sec
302
Encryption
302
Pwd/><Length
303
Srtp
304
Dot1X><Eapollogoff
306
Hostmovedetect
306
Tls
306
Softkey
309
Tcpipapp
311
Dhcp
312
Dns
312
Ice
313
Sntp
313
Port/><Rtp
315
Keepalive
316
Filetransfer
316
Tones
317
Dtmf
317
Chord
318
Upgrade
322
Video
322
Camera
324
Codecs
325
Voice
328
Codecpref
329
Volume
330
Vad
330
Quality Monitoring
331
Rxqos
332
Voipprot
333
Server
334
Sdp
337
Sip
337
Webutility
345
Xmpp
345
Session Initiation Protocol (SIP)
347
RFC and Internet Draft Support
347
Request Support
348
Header Support
349
Response Support
352
Hold Implementation
356
Reliability of Provisional Responses
356
Transfer
356
Third Party Call Control
356
Sip for Instant Messaging and Presence Leveraging Extensions
357
Shared Call Appearance Signaling
357
Bridged Line Appearance Signaling
357
Polycom UC Software Menu System
358
Third-Party Software
364
Advertisement
Polycom CX5500 User Manual (130 pages)
Unified Conference Station for Microsoft Skype for Business
Brand:
Polycom
| Category:
Conference System
| Size: 1.6 MB
Table of Contents
Limitation of Liability
2
Table of Contents
3
Before You Begin
12
Who Should Read this Guide
12
Typographic Conventions
12
Related Documentation
12
Getting Started with Polycom CX5500 Unified Conference Station
14
Overview of the Polycom CX5500 Unified Conference Station
14
Using the CX5500 Unified Conference Station as a Conference Phone
15
CX5500 Hardware and Keys
15
System Indicators and Status
16
Navigating the Unified Conference Station Interface
17
Phone Screens
17
Home Screen
17
Calls Screen
18
Lines Screen
19
Active Call Screen
19
Dial Pad Screen
20
Switch Among Phone Screens
20
Understanding Icons and Status Indicators
21
Entering Information in Data Fields
22
Enter Information Using the Onscreen Keyboard
23
Entering Information Using the Onscreen Keyboard
23
Logging into and Locking the Unified Conference Station
24
Log into the Unified Conference Station
24
Log out of the Unified Conference Station
25
Change Your Password
25
Sign in Using Your Skype for Business Credentials
25
Set the Time and Date Format
26
Sign out of Skype for Business
26
Log into a Visitor Desk Phone
26
Log out of a Visitor Desk Phone
27
Sign in Using Your Broadsoft UC-One Credentials
27
Locking the Unified Conference Station
27
Lock the Unified Conference Station
28
Unlock the Unified Conference Station
28
Change Your User Password
28
Using the CX5500 Unified Conference Station with Skype for Business
30
Minimum Requirements for a Laptop Connected to the CX5500 Unified Conference Station
30
Connect the CX5500 Unified Conference Station to Your Laptop
31
Place a Video Call
32
Add Participants to Video Call
32
Answer Video Calls
32
Decline a Video Call
32
End a Call
33
Initiate a Video Conference in the Skype for Business Client
33
Adjust Audio and Video
33
Mute the Microphone
33
Stop Video
34
Managing Audio Calls
35
Placing Audio Calls
35
Place Calls from the Dial Pad Screen
36
Place an International Call
36
Place Calls from Recent Call Lists
36
Place Calls to Favorites
37
Call a Favorite from the Home or Lines Screen
37
Place Calls from Directories
37
Place a Call from the Directory Search Screen
37
Place Calls from a Locked or Logged out Phone
38
Place an Intercom Call
38
Place a Call with a Hidden Number
39
Redial a Number
39
Answer Audio Calls
39
Answer Calls in the Incoming Call Screen
40
Answer Calls from the Calls Screen
40
Answer a Call When in a Call
40
Answering Calls on Shared Lines
41
Answer Calls Automatically
41
Answer Calls on a Locked Phone
41
Answer Intercom Calls
42
Mute and Unmute Audio
42
End Audio Calls
42
Holding and Resuming Calls
42
Hold Calls
42
Resume Calls
43
Transferring Calls
43
Choose a Default Transfer Type
43
Transfer a Call
43
Cancel a Transfer
44
Parking and Retrieving Calls
44
Parking and Retrieving Calls on the Skype for Business Server
44
Park Calls
44
Retrieving Parked Calls
44
Parking and Retrieving Calls on the Broadworks Server
45
Park Calls
45
Retrieve Calls
45
Managing Multiple Calls
46
Display Calls from the Lines Screen
47
Display Calls from the Calls Screen
47
Manage Calls from the Calls Screen
48
Ignoring or Rejecting Incoming Calls
48
Ignore or Silence Incoming Calls
49
Reject Incoming Calls
49
Reject Calls from a Contact
49
Rejecting Calls with Do Not Disturb
49
Enable Do Not Disturb
50
Reject Calls with Do Not Disturb on Multiple Lines
50
Reject Anonymous Calls
50
Redirecting Incoming Calls
51
Forwarding Incoming Calls to a Contact
51
Forward an Incoming Call to a Contact
51
Forward All Incoming Calls to a Contact
51
Disable Call Forwarding
52
Forwarding Incoming Skype for Business Calls
52
Forward Skype for Business Calls to a Contact
52
Forward Calls to Voicemail
53
Simultaneously Ring a Group of Contacts
53
Forward Calls to Delegates
53
Simultaneously Ring Delegates
53
Divert Calls to a Contact
54
Audio Conference Calls
55
Tips for Conference Calls
55
Initiate Conference Calls
56
Join Calls to Create a Conference Call
56
Join a Conference Call
56
End Conference Calls
57
Hold Conference Calls
57
Resume Conference Calls
57
Split Conference Calls
57
Manage Conference Call Participants
57
Skype for Business Conference Calls
58
Initiating a Skype for Business Conference Call
59
Initiate a Skype for Business Conference
59
Initiating a Group Conference Call
59
Initiate a Group Conference Call
59
Initiate a Group Conference Call in the Skype for Business Client
59
Initiate a Conference Call During a Skype for Business Call
60
Add Contacts to a Skype for Business Conference Call
60
Send Contacts Active Conference Information
60
Viewing a Roster of Skype for Business Conference Participants
61
Exit the Roster
61
Return to the Roster
61
Managing Skype for Business Conference Participants
61
Muting Conference Participants
61
Demote or Promote Conference Participants
62
Enable and Disable Conference Announcements
62
Remove Conference Participants
62
Lock and Unlock a Conference Call
63
Alcatel-Lucent Advanced Conference Calls
63
Initiate an Advanced Conference Call
64
Initiate an Advanced Conference Call During a Call
64
Add Contacts to an Advanced Conference Call
64
Join Calls to an Advanced Conference Call
64
Join Two Calls into an Advanced Conference Call
65
Viewing a Roster of Conference Participants
65
Exit the Roster
65
Return to the Roster
65
Managing Advanced Conference Participants
65
Muting Conference Participants
66
Remove Conference Participants
66
Shared Lines
67
Shared Line Limitations
67
Missed and Received Calls on Shared Lines
67
Hold Calls Privately on Shared Lines
67
Barge in on Calls for Busy Lamp Field Lines
68
Boss-Admin for Skype for Business
68
Assign Delegates
69
View the Delegates Group
70
View the Boss Group
71
Set a Ringtone for Boss Calls
71
Edit the Delegates Group
71
Managing Calls on the Boss's Line
72
Respond to Incoming Calls
72
Viewing Call Status on the Boss's Line
73
View Held Calls
73
Resume Held Calls
73
Transfer Boss Calls
74
Call on Behalf of a Boss
74
Join Conference Calls
75
Genband's Multiple Appearance Directory Number - Single Call Appearance
75
Placing a Call
75
Answering Calls
75
Barge in on an Active Call
76
Leave a Bridge Call
76
Resume Held Calls
76
Enabling Privacy
77
Enable Privacy
77
Disable Privacy Temporarily
78
Enable Privacy on a Bridge Call
78
Alcatel-Lucent Shared Call Appearance
78
Placing a Call
78
Answering Calls
79
Bridging into Active Calls
79
Leave a Bridge Call
79
Make Active Calls Public
79
Holding or Passing Calls
80
Pass SCAP Calls
80
Create a Personal Ring Group with Broadsoft UC-One Simultaneous Ring
80
Add Numbers to Your Simultaneous Ring List
81
Delete Numbers from the Simultaneous Ring List
81
Managing Call Lists and Directories
82
View Recent Calls
82
View Call Details
83
Save a Recent Contact
83
Delete a Contact
83
Edit Recent Contact Entries
83
Sort Recent Call Entries
83
Sort Entries by Call Type
84
View Recent Skype for Business Calls
84
View Recent Skype for Business Calls in Outlook
84
Managing the Contact Directory
85
Search for Contacts
85
Add a Contact to the Contact Directory
85
View Contact Information
86
Update a Contact's Information
86
Delete a Contact
86
Managing the Corporate Directory
87
Searching the Corporate Directory
87
Perform a Quick Search
87
Perform an Advanced Search
87
Save Search Results
87
Clear Search Results
88
Add Contacts to the Contact Directory
88
Search the Skype for Business Directory
88
Saving Contacts from the Skype for Business Directory
89
Save Contacts to Skype for Business Contacts
89
Save Contacts to the Contact Directory
89
Search the Outlook Directory
89
Save Outlook Contacts to the Contact Directory
89
Managing the GENBAND Address Books
90
Using the Global Address Book
90
Searching the Global Address Book
90
Save a Contact
91
Save Search Results
91
Using the Personal Address Book
91
View Contacts in the Personal Address Book
91
Search Your Personal Address Book
92
Add Contacts to the Personal Address Book
92
Delete Contacts
92
Edit Contacts in the Personal Address Book
92
Managing Buddy Lists, Favorites, and Contact Lists
94
Managing Favorites
94
Add Favorites
94
View Favorites
94
View Favorites on the Home Screen
95
View Favorites from the Lines Screen
95
Reorder Favorites
95
Delete Favorites
95
Using Buddy Lists
96
Add Contacts to Your Buddy List
96
View Your Buddy List
96
Monitor Contacts on Your Buddy List
97
View Watcher List
97
Block Contacts from Viewing Your Status
97
View Blocked List
98
Managing Skype for Business Contacts
98
Add Contacts to Your Microsoft Skype for Business Contact List
98
View Skype for Business Favorites and Groups
99
Viewing Skype for Business Contacts' Presence Information
99
View Contact Information
100
View the Skype for Business Contact Card for Contact Information
100
Change the Privacy Relationship for a Contact
101
Updating Your Presence Status
102
Update Your Skype for Business Presence
102
Update Your Buddy Status
102
Automatically Update Your Buddy Status
103
Accessing and Broadcasting Messages
104
Access Voicemail
104
Remove Message Alert
104
Access Skype for Business Voicemail Messages
105
Managing Skype for Business Voicemail Messages
105
Call a Contact
105
Delete Voicemail Messages
106
Mark Message as Read
106
Broadcasting Messages with Group Paging
106
Sending and Receiving Pages
106
Send Pages
106
Receiving Pages
107
Changing Group Paging Settings
108
Change the Default Paging Group
108
Update Paging Group Subscriptions
108
Enable Pages to Play During Active Calls
109
Using the Calendar
110
Open the Calendar
110
Navigate Day View
110
Navigate to Other Views
111
Navigate Month View
111
Display Meeting View
111
Return to Day View
111
Use Meeting Reminders
112
Choose a Meeting Reminder Type
112
Choose an Alert Tone
112
Disable Meeting Reminders
113
Joining Calendar Meetings
113
Join Meetings from the Calendar
113
Join a Meeting from a Meeting Reminder
113
Join a Meeting with an Alternate Number
113
Join Skype for Business Meetings from the Calendar
114
Customizing the CX5500 Unified Conference Station
115
Password Required to Customize the CX5500
115
Set the Language
115
Set the Time and Date Display
116
Disable the Time and Date Display
116
Setting the Backlight Intensity and Timeout
116
Change the Backlight Intensity
117
Change the Backlight Timeout
117
Select a Background Picture
117
Adding Personal Photos as Your Background
118
Using the Web Configuration Utility
118
Reset Your Background
119
Enable Transparent Line Keys
119
Using Power-Saving Mode
119
Change Your Office Hours
120
Change Timeouts
120
Changing Audio Settings
121
Change Incoming Call Notifications
121
Set a Ringtone for Incoming Calls
121
Set a Ringtone for Individual Contacts
121
Using Accessibility Features on the Unified Conference Station
123
Features for Hearing-Impaired Users
123
Features for Vision-Impaired and Blind Users
124
Features for Mobility-Impaired Users
124
Performing Maintenance Tasks
125
Investigate Phone Warnings
125
Remove Warnings
125
Restart the Phone
125
Update the Phone Configuration
126
Test Phone Hardware
126
Clean the Touchscreen
127
View Software Details
127
Update the Phone Software
127
Exit the Software Update Notification
128
Update Software Later
128
Postpone Software Updates
128
Troubleshooting Issues
129
Troubleshoot Calendar Issues
129
Login Issues
129
GENBAND Address Book Issues
129
View the Status of the Personal Address Book
130
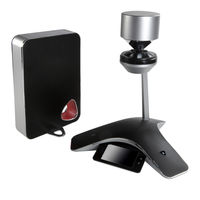
Polycom CX5500 User Manual (92 pages)
Unified Conference Station for Microsoft Lync
Brand:
Polycom
| Category:
Conference System
| Size: 4.57 MB
Table of Contents
Table of Contents
3
About this Guide
6
Who Should Read this Guide
6
Conventions Used in this Guide
6
Terms and Writing Conventions
6
Information Elements
7
Typographic Conventions
8
Get Help and Support Resources
9
Get Started
10
About the Polycom CX5500 Unified Conference Station
10
Use the CX5500 System with Microsoft Lync Client
10
Use the CX5500 System as a Conference Phone
11
Understand the CX5500 System Hardware
12
System Hardware Overview
12
Understand the Indicator Lights
13
Connect the CX5500 System to a Computer
14
Access the Web Configuration Utility
15
Sign in to the CX5500 System with Lync
15
Best Practices for Effective Camera Tracking
16
Use the CX5500 System with Microsoft Lync
17
Place a Video Call
17
Answer a Video Call
17
Hang up a Call
18
Adjust Audio and Video
18
Use the CX5500 System as a Conference Phone
19
Navigate Phone Views
19
Home View
20
Lines View
22
Active Call View
23
Calls View
24
Understand Phone Icons and Status Indicators
25
Navigate Your Phone's Interface
26
Enter Data and Update Fields
27
Use the Onscreen Keyboard
28
Clean the Touchscreen
30
Manage Calls on Your Phone
30
Place and End Calls
30
Manage Active Calls
33
Manage Incoming Calls
35
Redirect Calls
38
Enable Do Not Disturb
41
Manage Multiple Calls
43
Dial in to Conference Calls
44
Manage Conference Calls
44
Initiate Conference Calls
45
Hold and Resume Conference Calls
45
End Conference Calls
46
Split Conference Calls into Two Held Calls
46
Manage Conference Call Participants
46
Manage Contacts and Directories
48
Use Your Contact Directory
48
Manage Favorites
51
Work with a Corporate Directory
53
Listen to Voicemail
55
View Recent Calls
56
Control Audio and Volume
57
Change the Speaker and Ringer Volume
58
Update the Incoming Call Ringtone
58
Update a Contact's Ringtone
58
Mute the Microphone
59
Work with Shared Lines
59
Use Advanced Features
61
Use the Contact List
61
Update Your Status
61
Manage Your Contact List
62
View Lync Contacts' Presence Status
63
Integrate with Microsoft Lync Server
65
Broadcast Messages Using Group Paging
65
Group Paging Mode
65
Use the Calendar
68
Open and Close the Calendar
69
Navigate Month View
70
Navigate Day View
70
Navigate Meeting View
71
Work with Meeting Reminders
72
Join Meetings from the Calendar
73
Log in to a Phone
74
Log in and out of a Phone
74
Place Calls from Phones that Are in the Logged-Out State
75
Change Your Password
75
Lock the Phone
76
Change Your User Password
76
Lock and Unlock Your Phone
76
Call and Answer from a Locked Phone
77
Access Features with Your Login Credentials
77
Customize the Phone's Display
78
Change the Language on Your Phone
78
Change the Time and Date Display
79
Change the Backlight
79
Change the Background Picture
80
Use Power-Saving Mode
81
Change Your Office Hours
82
Change Timeouts
82
Administrative Tasks
84
Investigate Phone Warnings
84
Restart the Phone
84
Update Phone Configuration
85
Test Phone Hardware
85
Troubleshoot Issues
86
Get Help
87
Polycom and Partner Resources
87
The Polycom Community
88
Copyright, Safety, and Regulatory Notices
89
Service Agreements
89
Governing Law
89
Limitations of Liability
89
Polycom Limited Warranty and Limitation Liability
89
Exclusions
90
Warranty Exclusive
90
Safety, Compliance, and Disposal Information
90
Advertisement
Polycom CX5500 Setting Up (2 pages)
Brand:
Polycom
| Category:
Conference System
| Size: 8.24 MB
Advertisement
Related Products
Polycom CX5000 HD
Polycom CX5100
Polycom SoundStructure C16
Polycom SoundStructure C12
Polycom SoundStructure C8
Polycom CX7000 series
Polycom SoundStructure CR12
Polycom RealPresence Utility Cart 500
Polycom RealPresence Practitioner Cart 8000
Polycom CX5000
Polycom Categories
IP Phone
Telephone
Conference System
Conference Phone
Server
More Polycom Manuals
Login
Sign In
OR
Sign in with Facebook
Sign in with Google
Upload manual
Upload from disk
Upload from URL