Sign In
Upload
Manuals
Brands
Pioneer Manuals
Receiver
SPH-DA120
User Manuals: Pioneer SPH-DA120 Car Receiver
Manuals and User Guides for Pioneer SPH-DA120 Car Receiver. We have
3
Pioneer SPH-DA120 Car Receiver manuals available for free PDF download: Operation Manual, Important Information For The User, Installation Manual
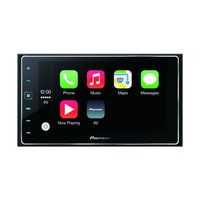
Pioneer SPH-DA120 Important Information For The User (112 pages)
Smartphone receivers
Brand:
Pioneer
| Category:
Receiver
| Size: 2.49 MB
Table of Contents
English
3
Table of Contents
3
Engb
3
Precaution
4
Introduction
5
Ipod
5
Rear Display
5
Terms Used in this Manual
5
Video Image
5
Important Safety Information
6
Functions Related to Iphone and Smartphone-Based Apps
7
Protecting the LCD Panel and Screen
7
Additional Safety Information
8
Handbrake Interlock
8
To Ensure Safe Driving
8
To Avoid Battery Exhaustion
8
When Using a Display Connected to
8
Out
8
Handling the USB Connector
9
Notice Regarding MP3 File Usage
9
Notice Regarding Video Viewing
9
Rear View Camera
9
Using the LCD Screen Correctly
9
Handling the LCD Screen
9
Liquid Crystal Display (LCD) Screen
10
Maintaining the LCD Screen
10
LED (Light-Emitting Diode) Backlight
10
About this Product
11
Details of Functions and Operation of this Product
11
In Case of Trouble
11
Notes before Using the System
11
Visit Our Website
11
Android Device Compatibility
12
Appendix
12
Bluetooth
12
DIVX
12
Ipod Compatibility
12
Wma/Wmv
12
Aac
13
Android
13
Detailed Information Regarding Connected Ipod Devices
13
Ipod and Iphone
13
Itunes
13
Lightning
13
Apple Carplay
13
App Store
13
Ios
13
Mirrorlink
13
Hdmi
14
Mhl
14
Using App-Based Connected Content
14
Specifications
15
Français
17
Image VIDéo
19
Introduction
19
Ipod
19
Termes Utilisés Dans Ce Manuel
19
Écran Arrière
19
Consignes Importantes de Sécurité
21
Fonctions Relatives Aux Applications Pour Iphone Et Smartphone
21
Protection du Panneau Et de L'écran LCD
21
Consignes de Sécurité Supplémentaires
22
Verrouillage Par Le Frein À Main
22
Pour Garantir Une Conduite en Toute Sécurité
22
Avis Concernant la Visualisation de Données VIDéo
23
Caméra de Rétrovisée
23
Lors de L'utilisation D'un Afficheur Branché À la Borne V out
23
Manipulation du Connecteur USB
23
Pour Éviter L'épuisement de la Batterie
23
Avis Concernant L'utilisation de Fichiers MP3
24
Utilisation Correcte de L'écran LCD
24
Manipulation de L'écran LCD
24
Écran À Cristaux Liquides (LCD)
24
Entretien de L'écran LCD
24
Rétroéclairage Par del (Diode Électroluminescente)
24
Détails des Fonctions Et de L'utilisation de Ce Produit
26
En Cas D'anomalie
26
Notre Site Web
26
Remarques Avant D'utiliser Le Système
26
À Propos de Ce Produit
26
Annexe
27
Bluetooth
27
Compatibilité Avec L'ipod
27
Compatibilité D'appareil Android
27
DIVX
27
Wma/Wmv
27
Aac
28
Android
28
Informations Détaillées Concernant Les Dispositifs Ipod Connectés
28
Ipod Et Iphone
28
Itunes
29
Lightning
29
Apple Carplay
29
App Store
29
Ios
29
Mirrorlink
28
Utilisation de Contenus Connectés Via Une Application
29
Hdmi
30
Mhl
30
Spécifications
31
Italiano
33
Display Posteriore
35
Immagine Video
35
Introduzione
35
Ipod
35
Termini Utilizzati Nel Presente Manuale
35
Funzioni Relative alle Applicazioni Per Iphone E Smartphone
37
Informazioni Importanti Per la Sicurezza
37
Protezione del Pannello LCD E Dello
37
Informazioni Aggiuntive Sulla Sicurezza
38
Interblocco DI Sicurezza del Freno DI
38
Stazionamento
38
Per Garantire una Guida Sicura
38
Uso DI un Display Collegato All'uscita
38
Out
38
Note Riguardanti la Visualizzazione Video
39
Per Evitare DI Scaricare la Batteria
39
Telecamera DI Visione Posteriore
39
Uso del Connettore USB
39
Note Riguardanti L'uso Dei File MP3
40
Uso Corretto Dello Schermo LCD
40
Uso Dello Schermo LCD
40
Schermo a Cristalli Liquidi (LCD)
40
Manutenzione Dello Schermo LCD
40
Retroilluminazione a LED (Light- Emitting Diode, Diodo a Emissione Luminosa)
41
Dettagli Delle Funzioni E Utilizzo del Prodotto
42
In Caso DI Problemi
42
Informazioni Sul Prodotto
42
Note da Leggere Prima Dell'uso del
42
Sito Internet
42
Appendice
43
Bluetooth
43
Compatibilità con Ipod
43
Compatibilità con un Dispositivo Android
43
DIVX
43
Wma/Wmv
43
Aac
44
Android
44
Informazioni Dettagliate Riguardo I Dispositivi Ipod Connessi
44
Ipod E Iphone
44
Itunes
45
Lightning
45
Apple Carplay
45
App Store
45
Ios
45
Mirrorlink
44
Uso DI Contenuti Connessi Basati Su Applicazioni
45
Hdmi
46
Mhl
46
Dati Tecnici
47
Español
49
Precaución
50
Imagen de Vídeo
51
Introducción
51
Ipod
51
Pantalla Trasera
51
Términos Utilizados en Este Manual
51
Funciones Relacionadas con Aplicaciones Basadas en Dispositivos Iphone y Smartphones
53
Información Importante de Seguridad
53
Protección de la Pantalla y el Panel LCD
53
Cuando Utilice una Pantalla Conectada a V
54
Out
54
Información Adicional de Seguridad
54
Interbloqueo con el Freno de Mano
54
Para Garantizar una Conducción Segura
54
Para Evitar la Descarga de la Batería
54
Aviso Acerca de la Visualización de Vídeo
55
Aviso Acerca del Uso de Archivos MP3
55
Cámara de Retrovisor
55
Uso del Conector USB
55
Utilización Correcta de la Pantalla LCD
55
Manipulación de la Pantalla LCD
55
Pantalla de Visualización de Cristal Líquido (LCD)
56
Mantenimiento de la Pantalla LCD
56
Luz de Fondo LED (Diodo Emisor de Luz)
56
Acerca de Este Producto
57
Detalles sobre las Funciones y el Uso de Este Producto
57
En Caso de Problemas
57
Notas para Antes de Utilizar el Sistema
57
Visite Nuestro Sitio Web
57
Apéndice
58
Bluetooth
58
Compatibilidad con Dispositivos Android
58
Compatibilidad con Ipod
58
DIVX
58
Wma/Wmv
58
Aac
59
Android
59
Información Detallada Relacionada con Los Dispositivos Ipod Conectados
59
Ipod E Iphone
59
Itunes
60
Lightning
60
Apple Carplay
60
App Store
60
Ios
60
Mirrorlink
59
Uso del Contenido con Conexión Basado en Apps
60
Hdmi
61
Mhl
61
Especificaciones
62
Deutsch
64
In dieser Anleitung Verwendete
66
Ipod
66
Videobild
66
Zusätzliches Display
66
Wichtige Sicherheitshinweise
67
Funktionen für Iphone- und Smartphone-Basierte Apps
68
Schutz der LCD-Tafel und des
68
Bei Verwendung eines Displays, das an
69
OUT Angeschlossen ist
69
Handbremsensperre
69
Für Sicheres Fahren
69
Zusätzliche Sicherheitsinformationen
69
Anmerkung zum Gebrauch von MP3-Dateien
70
Anmerkung zur Video-Wiedergabe
70
Anmerkungen zum USB-Anschluss
70
Heckkamera
70
So Vermeiden Sie eine Batterieentleerung
70
Korrekter Gebrauch des LCD-Bildschirms
71
Handhabung des LCD-Bildschirms
71
Flüssigkristallanzeige (LCD- Bildschirm)
71
Pflege des LCD-Bildschirms
72
LED-Hintergrundbeleuchtung (Licht Emittierende Dioden)
72
Anmerkungen zu diesem Produkt
73
Besuchen Sie unsere Webseite
73
Einzelheiten zu Funktionen und Bedienung dieses Produkts
73
Anhang
74
Hinweise vor der Verwendung des
73
IM Störungsfall
73
Bluetooth
74
DIVX
74
Ipod-Kompatibilität
74
Kompatibilität mit Android™-Gerät
74
Wma/Wmv
74
Aac
75
Android
75
Ausführliche Informationen zu Angeschlossenen Ipod-Geräten
75
Ipod und Iphone
75
Itunes
76
Lightning
76
Apple Carplay
76
App Store
76
Ios
76
Mirrorlink
75
Verwendung von auf Appbasierten Verknüpften Inhalten
76
Hdmi
77
Mhl
77
Technische Daten
78
Dutch
80
Achterdisplay
82
Inleiding
82
Ipod
82
Terminologie die in Deze Handleiding Wordt
82
Videobeeld
82
Belangrijke Veiligheidsvoorschriften
83
Bescherming Van Het Lcd-Paneel en Het
84
Functies Gerelateerd Aan Op Iphone en Smartphone Gebaseerde Apps
84
Bijkomende Veiligheidsinformatie
85
Handremvergrendeling
85
Advies Voor Veilig Rijden
85
Wanneer U Een Scherm Gebruikt Dat Is Aangesloten Op de V out
85
Achteruitkijkcamera
86
Omgaan Met de USB-Stekker
86
Ontladen Van de Accu Voorkomen
86
Opmerking over Het Bekijken Van Video's
86
Opmerking over Het Gebruik Van MP3-Bestanden
86
Correct Gebruik Van Het Lcd-Scherm
87
Omgaan Met Het Lcd-Scherm
87
Lcd-Scherm (Liquid Crystal Display)
87
Onderhoud Van Het Lcd-Scherm
87
Led-Verlichting (Lichtgevende Diode)
87
Bezoek Onze Website
88
Details Van de Functies en de Bediening Van Dit Product
88
Indien Zich Problemen Voordoen
88
Opmerkingen Vóór Het Gebruik Van Het
88
Over Dit Product
88
Aanhangsel
89
Bluetooth
89
Compatibiliteit Met Android™ Apparaat
89
DIVX
89
Ipod-Compatibiliteit
89
Wma/Wmv
89
Aac
90
Android
90
Gedetailleerde Informatie over de Aangesloten Ipod Apparaten
90
Ipod en Iphone
90
Itunes
91
Lightning
91
Apple Carplay
91
App Store
91
Ios
91
Mirrorlink
90
Gebruik Van App-Gebaseerde Verbonden Content
91
Hdmi
92
Mhl
92
Specificaties
93
Русский
95
Меры Предосторожности
96
Ipod
97
Видеоизображение
97
Задний Дисплей
97
Предисловие Термины, Используемые В Данном Руководстве
97
Важные Сведения О Безопасности
98
Защита ЖК-Панели И Экрана
99
Функции, Связанны С Приложениями На Основе Iphone И Смартфона
99
Блокировка Стояночного Тормоза
100
Для Обеспечения Безопасности Движения
100
Во Избежание Разрядки Аккумуляторных Батарей
101
Использование USB-Разъема
101
Камера Заднего Вида
101
При Использовании Экрана, Подключенного К V out
101
Надлежащее Использование ЖК-Экрана
102
Обращение С ЖК-Экраном
102
Жидкокристаллический (ЖК) Экран
102
Уход За ЖК-Экраном
103
Светодиодная Подсветка
103
Примечание О Просмотре Видео
102
Примечание Об Использовании Файлов MP3
102
Информация Об Изделии
104
Перед Эксплуатацией Системы Изучите Приведенную Ниже Информацию В Случае Неисправности
104
Подробная Информация О Функциях И Управлении Данным Изделием
104
Приложение
105
Посетите Наш Веб-Сайт
104
Bluetooth
105
DIVX
105
Wma/Wmv
105
Совместимость С Ipod
105
Совместимость С Устройствами Android
105
Aac
106
Android
106
Mirrorlink
106
Подробная Информация О Подсоединенных Устройствах Ipod
106
Ipod И Iphone
107
Itunes
107
Lightning
107
Apple Carplay
107
App Store
107
Ios
107
Использование Контента, Связанного На Основе Приложения
107
Hdmi
108
Mhl
108
Серийный Номер
109
Технические Характеристики
110
Advertisement
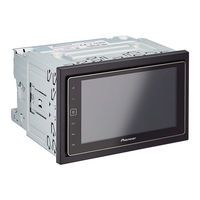
Pioneer SPH-DA120 Operation Manual (132 pages)
smartphone receiver
Brand:
Pioneer
| Category:
Car Receiver
| Size: 5.26 MB
Table of Contents
Operation Manual
1
Table of Contents
2
Introduction
7
Manual Overview
7
How to Use this Manual
7
Conventions Used in this Manual
7
Terms Used in this Manual
7
Notes on Internal Memory
7
Before Removing the Vehicle Battery
7
Data Subject to Erasure
7
Basic Operation
8
Checking Part Names and Functions
8
Connecting Media
8
Connecting and Disconnecting an Ipod
8
Plugging and Unplugging a USB
8
Storage Device
8
Startup and Termination
9
On First-Time Startup
9
Regular Startup
9
Turning off the Display
9
When the Application Screen Is Available
9
When the Application Screen Is Not Available
9
How to Use the Screens
10
Switching Screens Using the Touch Panel Keys
10
Switching Screens Using the Buttons
11
Supported AV Source
11
Displaying the AV Operation Screen
12
Selecting a Front Source on the AV Source Selection Screen
12
Selecting a Front Source on the Source List
12
Selecting a Rear Source
13
Turning off the AV Source
13
Changing the Display Order of Source Icons
13
Changing the Display Order of Source Keys
13
Using the Touch Panel
14
Using the Common Touch Panel Keys
14
Operating List Screens
14
Operating the Time Bar
14
Operating the On-Screen Keyboard
15
Registering and Connecting a Bluetooth
16
Preparing Communication Devices
16
Registering Your Bluetooth Devices
16
Searching for Nearby Bluetooth Devices
16
Pairing from Your Bluetooth Devices
17
Connecting to a Bluetooth Device Automatically
18
Deleting a Registered Device
18
Connecting a Registered Bluetooth Device Manually
19
Switching Visibility
19
Entering the PIN Code for Bluetooth Wireless Connection
19
Displaying the Bluetooth Device Address
20
Clearing the Bluetooth Memory
20
Updating Bluetooth Software
20
Displaying the Bluetooth Software Version
20
Using Hands-Free Phoning
22
Displaying the Phone Menu
22
Touch Panel Keys
22
Reading the Screen
22
Making a Phone Call
23
Direct Dialling
23
Calling a Number in the Phone Book
23
Dialling from the History
24
Using the Preset Dial Lists
25
Receiving a Phone Call
26
Answering an Incoming Call
26
Minimising the Dial Confirmation Screen
26
Changing the Phone Settings
26
Answering a Call Automatically
26
Switching the Ring Tone
27
Inverting Names in the Phone Book
27
Setting the Private Mode
27
Adjusting the Other Party's Listening Volume
27
Using the Voice Recognition Function (for Iphone)
28
Notes for Hands-Free Phoning
28
Ipod / Iphone or Smartphone Setup Operation
30
The Basic Flow of Ipod / Iphone or Smartphone Setup
30
Setting the Device Connection Method
30
Ipod Compatibility
30
Android Device Compatibility
31
Apple Carplay Compatibility
31
Mirrorlink Device Compatibility
31
Information on the Connections and Functions for each Device
32
Using the Touch Panel Keys
34
Reading the Screen
34
Using the Radio
35
Starting Procedure
35
Selecting a Band
35
Manual Tuning
35
Seek Tuning
35
Selecting a Preset Channel from the Preset Channel List
36
Storing Broadcast Frequencies
36
Storing the Strongest Broadcast Frequencies
36
Tuning into Strong Frequencies
36
Receiving Traffic Announcements
37
Using News Programme Interruption
38
Tuning into Alternative Frequencies
38
Limiting Stations to Regional Programming
39
Switching Auto PI Seek
39
Activating the Auto PI Seek for Preset Stations
39
Switching the Sound Quality of the FM Tuner
39
Storing Song Information to an Ipod (Itunes Tagging)
40
Operating with the Buttons
40
Playing Compressed Audio Files
41
Using the Touch Panel Keys
41
Reading the Screen
42
Starting Procedure
42
Switching the Browse Mode
43
Selecting Files from the File Name List
43
Selecting a File from the List Related to the Song Currently Playing (Link Search)
43
Displaying the Album List
44
Playing Files in Random Order
44
Setting a Repeat Play Range
44
Switching the Media File Type
44
Operating with the Buttons
45
Playing Compressed Video Files
46
Using the Touch Panel Keys
46
Reading the Screen
46
Starting Procedure
47
Selecting Files from the File Name List
47
Setting a Repeat Play Range
47
Slow Motion Playback
47
Switching the Media File Type
48
Operating with the Buttons
48
Playing Compressed Still Image Files
49
Using the Touch Panel Keys
49
Reading the Screen
49
Starting Procedure
50
Selecting Files from the File Name List
50
Playing Files in Random Order
50
Setting a Repeat Play Range
50
Switching the Media File Type
50
Setting the Slideshow Interval
51
Operating with the Buttons
51
Using an Ipod
52
Using the Touch Panel Keys (for Audio)
52
Using the Touch Panel Keys (for Video)
52
Reading the Screen (for Audio)
53
Reading the Screen (for Video)
53
Starting Procedure
54
Setting the Shuffle Play
55
Setting a Repeat Play Range
55
Selecting Song or Video Sources from the Playlist Screen
55
Using this Product's Ipod Function from Your Ipod
56
Changing the Speed of Audiobook Playback
56
Displaying Lists Related to the Song Currently Playing (Link Search)
57
Operating with the Buttons
57
Playing Back Music from a Music App Other than Ipod Music, as the Ipod Source
57
Using the Touch Panel Keys
57
Reading the Screen
58
Using Your Iphone or Smartphone
59
Using Appradio Mode
59
Using the Touch Panel Keys (App Control Side Bar)
59
Starting Procedure
60
Using the Keyboard
61
Adjusting the Image Size (for Smartphone Users)
62
Displaying the Image of Your
62
Application (Iphone with 30-Pin Connector)
62
Displaying the Image of Your
63
Application (Iphone with Lightning Connector)
63
Application (Smartphone)
63
Using Apple Carplay
64
Using the Touch Panel Keys
64
Starting Procedure
65
Setting the Driving Position
65
Adjusting the Volume
65
Using Mirrorlink
65
Using the Touch Panel Keys (App Control Side Bar)
66
Starting Procedure
66
Using the Audio MIX Function
66
Using a Bluetooth Audio Player
69
Reading the Screen
69
Starting Procedure
69
Selecting Files from the File Name List
70
Playing Files in Random Order
70
Setting a Repeat Play Range
70
Operating with the Buttons
70
Using an HDMI Source
71
Using the Touch Panel Keys
71
Reading the Screen
71
Using an Aux Source
72
Switching the Operation Screen
73
Using Av Input
74
Setting the Video Signal
75
Using Mixtrax
76
Selecting an Item to Play Songs
76
Selecting Songs Not to be Played
76
System Settings
78
Setting the Fm Tuning Step
78
Activating the Bluetooth Audio Source
78
Setting the Ever Scroll
78
Setting Av Input
78
Setting Rear View Camera Activation
79
Setting the Rear View Camera
79
Setting the Polarity of the Rear View Camera
80
Setting the Camera for Camera View Mode
80
Displaying the Parking Assist Guidelines
80
Setting Guidelines on the Rear View Image
81
Setting the Safe Mode
82
Turning off the Demo Screen
82
Selecting the System Language
82
Setting Keyboard Language for Iphone
83
Application for Iphone
83
Setting the Beep Sound
83
Adjusting the Picture
83
Displaying the Firmware Version
84
Updating Firmware
84
Checking the Connections of Leads
85
Audio Adjustments
86
Using Fader/Balance Adjustment
86
Using Balance Adjustment
86
Adjusting Source Levels
87
Using the Subwoofer Output
89
Adjusting the Front and Rear Speaker Output
89
Adjusting the Filter
89
Selecting the Listening Position
90
Adjusting the Time Alignment
91
Customising the Equaliser Curves
93
Recalling Equaliser Curves
93
Using the Equaliser
93
Before Operating the Auto Eq Function
94
Using the Auto-Adjusted Equaliser
94
Performing Auto Eq
95
Usb Storage Device
97
Theme Menu
97
Selecting the Background Display
97
Creating a User-Defined Colour
98
Selecting the Theme Colour
98
Setting the Illumination Colour
98
Selecting the Clock Image
99
Changing the Preinstalled Splash Screen
99
Displaying Your DIVX Vod Registration Code
101
Setting the Video Signal for the Rear View Camera
101
Setting up the Video Player
101
Setting the Video Output Format
102
Favourite Menu
103
Creating a Shortcut
103
Selecting a Shortcut
103
Removing a Shortcut
103
Storing Song Information to Ipod
104
Common Operations
104
Setting the Time and Date
104
Changing the Wide Screen Mode
105
Other Functions
107
Setting the Anti-Theft Function
107
Deleting the Password
108
Entering the Password
108
Forgotten Password
109
Default Settings
109
Restoring the Default Settings
109
Appendix
110
Troubleshooting
110
Error Messages
111
When Positioning by Gps Is Impossible
115
Positioning by Gps
115
Positioning Technology
115
Handling Large Errors
115
Detailed Information for Playable Media
117
Media Compatibility Chart
120
DIVX Compatibility
122
System Menu
125
Phone Menu
125
Display Information
125
Audio Menu
127
Video Setup Menu
127
Bluetooth Menu
128
Pioneer SPH-DA120 Installation Manual (64 pages)
Smartphone receiver
Brand:
Pioneer
| Category:
Receiver
| Size: 2 MB
Table of Contents
English
2
Table of Contents
2
Precautions
3
Your New Product and this Manual
3
Important Safeguards
3
Connection
4
Precautions before Connecting the System
4
Before Installing this Product
4
To Prevent Damage
5
Notice for the Blue/White Lead
5
Parts Supplied
6
Connecting the Power Cord (1)
8
Connecting the Power Cord (2)
10
Connecting the System
11
Connecting to Separately Sold Power Amp
12
Connecting an Iphone with Lightning Connector
13
Connecting Via the USB Port
13
Connecting Via the HDMI Port
13
Connecting an Iphone with 30-Pin Connector
14
Connecting Via the AUX Input
14
Connecting Via the RGB Input
15
Connecting the Android™ Device
15
Connecting an Android Device with an HDMI Port
15
Connecting an Android Device with an MHL Port
16
Connecting the Mirrorlink Device
16
Securing the High Speed HDMI ® Cable
17
Connecting a Rear View Camera
18
Connecting the External Video Component
19
Using AV Input
19
Using an AUX Input
19
Connecting an HDMI Device
20
Connecting the Rear Display
21
When Using a Rear Display Connected to Rear Video Output
21
Installation
22
Precautions before Installation
22
To Avoid Electromagnetic Interference
22
Before Installing
22
Installation Precautions before Installation
22
Installing this Product
23
Installation Notes
23
Parts Supplied
24
Installation Using the Screw Holes on the Side of this Product
24
Installing the GPS Antenna
25
Installation Notes
25
Parts Supplied
25
When Installing the Antenna Inside the Vehicle (on the Dashboard or Rear Shelf)
26
Installing the Microphone
27
Parts Supplied
27
Mounting on the Sun Visor
27
Installation on the Steering Column
28
Adjusting the Microphone Angle
28
After Installation
29
After Installing this Product
29
Français
30
Importantes Mesures de Sécurité
31
Précautions
31
Votre Nouveau Produit Et Ce Manuel
31
Avant D'installer Ce Produit
33
Connexion
33
Précautions À Prendre Avant de Brancher Le Système
33
Pour Éviter Toute Détérioration
34
Pièces Fournies
35
Branchement du Cordon D'alimentation (1)
36
Branchement du Cordon D'alimentation (2)
38
Branchement du Système
39
Connexion À un Amplificateur de Puissance Vendu Séparément
40
Connexion D'un Iphone Avec Connecteur Lightning
41
Connexion Via Le Port USB
41
Connexion Via Le Port HDMI
41
Connexion D'un Iphone Avec Connecteur À 30Broches
42
Connexion Via L'entrée AUX
42
Connexion Via L'entrée RGB
43
Connexion D'un Périphérique Android
43
Connexion D'un Périphérique Android Via un Port HDMI
43
Connexion D'un Périphérique Android Via un Port MHL
44
Connexion D'un Périphérique Mirrorlink
44
Fixation du Câble HDMI Haute Vitesse
45
Connexion D'une Caméra de Rétrovisée
46
Connexion D'un Élément VIDéo Externe
47
Utilisation de L'entrée AV
47
Utilisation D'une Entrée AUX
47
Connexion D'un Périphérique HDMI
48
Connexion de L'afficheur Arrière
49
Utilisation D'un Écran Arrière Raccordé À la Sortie VIDéo Arrière
49
Installation
50
Pour Éviter Les Parasites Électromagnétiques
50
Précautions À Prendre Avant
50
Avant de Procéder À L'installation
51
Installation de Ce Produit
51
Remarques Sur L'installation
51
Pièces Fournies
52
Installation en Utilisant Les Trous de Vis Sur Les Côtés de Ce Produit
52
Installation de L'antenne GPS
53
Remarques Sur L'installation
53
Pièces Fournies
53
Installation de L'antenne Dans Le Véhicule (Sur Le Tableau de Bord Ou la Lunette Arrière)
54
Installation du Microphone
55
Pièces Fournies
55
Installation Sur Le Pare-Soleil
55
Installation Sur la Colonne de Direction
56
Réglage de L'angle du Microphone
56
Après Avoir Installé Ce Produit
57
Après L'installation
57
Advertisement
Advertisement
Related Products
Pioneer SPH-DA230DAB
Pioneer SPH-C10BT
Pioneer SPH-10BT
Pioneer SPH-T20BT
Pioneer SPH-20DAB
Pioneer SPH-EVO93DAB-DUC
Pioneer SPH-C19BT/XNID
Pioneer SPH-C10BT/XNES
Pioneer SPH-EVO98DAB
Pioneer SPH-10BT/XNEW5
Pioneer Categories
Car Receiver
Receiver
Stereo Receiver
Amplifier
CD Player
More Pioneer Manuals
Login
Sign In
OR
Sign in with Facebook
Sign in with Google
Upload manual
Upload from disk
Upload from URL