Sign In
Upload
Manuals
Brands
Paravan Manuals
Wheelchair
PR Biolution
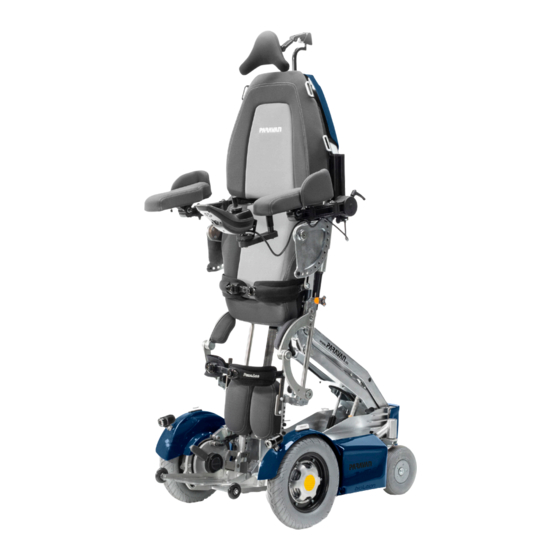
Paravan PR Biolution Standing wheelchair Manuals
Manuals and User Guides for Paravan PR Biolution Standing wheelchair. We have
1
Paravan PR Biolution Standing wheelchair manual available for free PDF download: User Manual
Paravan PR Biolution User Manual (127 pages)
Brand:
Paravan
| Category:
Wheelchair
| Size: 13.98 MB
Table of Contents
Table of Contents
4
Table of Illustrations
12
1 Company Details
13
Your Manufacturer
13
Fig. 1: QR Code
13
Copyright
14
Technical Nature of Documentation
14
2 Regarding These Operating Instructions
15
Fig. 2: Travel Direction
15
Liability Exclusion
16
Guarantee
17
Technical Modifications
18
Target Group
20
Explanation of Symbols
21
Structure of Safety Information
22
Fig. 3: Safety Instruction
22
3 Safety Instructions
23
Generally Valid Safety Instructions
23
Operation Instructions
23
Information Regarding Use
27
Information Regarding Transport
28
4 Performance Description
29
Manufacturing Standard
29
Correct Use
30
Usability of the Biolution
31
Declaration of no Objection Dangerous Goods (Storage Battery)
32
German Regulations on Assistive Technology (Hilfsmittelverordnung, HMV No.)
33
Definition of Auxiliary Equipment (Incomplete Excerpt)
33
Indication
34
Contraindications
34
5 Product-Specific Information
35
Trademark and Type Designation (Type Plate)
35
Fig. 4: Type Plate
35
Location of the Type Designation (Type Plate)
36
Fig. 5: Location of Type Plate
36
Information on Your Biolution
37
The Type Plate of Your Biolution
37
Accessories
38
Supplied Accessories
38
Deliverable Accessories
38
Fig. 6: Docking Station
38
6 Description/Function of the Biolution
39
The Special Orthopaedic Seat
39
Joystick Control
40
Special Control System
40
Lift and Tilt (Seat Inclination)
41
Road-Safe in Accordance with the Road Traffic Licensing Act (Stvzo)
42
Special Means of Transportation
42
Fig. 7: Illumination at the Front
42
Fig. 8: Illumination at the Rear
42
7 Overview of the Biolution
43
Definition of Parts and Their Location
43
Fig. 9: Wheelchair Overview
43
Definition of Parts and Their Installation Position, Chassis
44
Fig. 10: Parts, Chassis Rear
44
Fig. 11: Parts, Chassis Front
45
8 Supply of Biolution
46
Receiving Your New Biolution
46
Biolution Is Supplied to You in Accordance with this Procedure
46
Tools Supplied
47
Fig. 12: Socket Wrench
47
Fig. 13: allen Key
47
9 Settings on the Biolution, Electronic
48
10 Settings on the Biolution, Mechanical
49
Receiving Your New Biolution
49
The Armrest Pad
50
Set the Angle of the Armrest Pad
50
Fig. 14: Angle of Armrest Pad
50
Set the Horizontal Position of the Armrest Pad
51
Fig. 15: Position of the Armrest Pad
51
Armrest
52
Fig. 16: Position Check of the Armrest
52
Set the Height of the Armrest
53
Fig. 17: Height of Armrest
53
Fig. 18: Lever, Clamping Screw
54
Set the Angle of the Armrest
55
Fig. 19: Armrest Angle
55
Set the Projection of the Armrest
56
Fig. 20: Armrest Projection
56
Setting the Mobility of the Control Panel
57
Fig. 21: Swivel Mechanism
57
Footrest Unit
58
Setting the Lower Leg Length
58
Fig. 22: Lower Leg Length
58
Setting the Tibial Angle
59
Fig. 23: Tibial Angle
59
Mechanically Folding Biometric Knee Joints
60
Fig. 24: Biometric Foot Angle
60
Fig. 25: Biometric Joints
60
Fig. 26: Spring Plunger Latch Locked
61
Fig. 27: Spring Plunger Latch Unlocked
61
Fig. 28: Folded Joint
61
Fig. 29: Spring Plunger Latch Unlocked
62
Fig. 30: Spring Plunger Latch Locked
62
Fig. 31: Decoupling Biometric Joints
63
Fig. 33: Inserting the Quick-Release Pin
63
Fig. 32: Folding up the Joint
63
11 Driving with the Biolution
64
Insurance, Liability Insurance
64
Function Check before the Trip
65
Fig. 34: Brake Lock Release Lever (Emergency Release)
65
Controlling the Biolution, Directions of Travel
66
Fig. 35: Joystick
66
Navigating Bends, Turning Corners
67
Braking with the Biolution
68
Braking Systems on the Biolution
68
Braking the Biolution
69
Travelling on Hills, up and Downhill Travel
70
The Movement Programs / Movement Levels
71
Manual Driving, Push Mode
72
Operation of the Brake Lock Release Lever (Emergency Release)
72
Fig. 36: Brake Lock Release Lever (Emergency Release)
72
Requirement for Roads, Grounds
73
Fording Ability, Driving through Water
73
Climbing / Traversing Ability
74
Load Bearing Capacity
74
Rough Ground or Terrain
74
Slippery Ground, Traction
74
12 Parking and Storing the Biolution
75
Control Panel R-NET CJSM2
76
Fig. 38: Control Panel R-NET CJSM2
76
Fig. 37: Lock Symbol
76
13 Loading and Transport of the Biolution
77
Rules for Loading Wheelchairs
77
Securing of the Biolution, Fastening
78
Fig. 39: Attachment Point at the Front
78
Fig. 40: Attachment Point at the Rear
78
14 Controls
79
Control Panel R-NET CJSM2
79
Overview of the Control Elements
79
Fig. 41: Control Panel R-NET CJSM2
79
Status Display
80
Fig. 42: Function Keys
80
Fig. 43: Status Display
80
Start, Switch off
81
Fig. 44: "On / Off" Key
81
Fig. 45: Speed Control (Tortoise) Active
81
Switch Direction Indicator on and off
82
Switch Light on and off
82
Fig. 47: Light on and off
82
Fig. 48: Turn Signal Right / Left
82
Fig. 46: Light Symbol (Colour)
82
Switch Hazard Lights on and off
83
Fig. 50: Hazard Lights on / off
83
Fig. 49: Symbols (Colour)
83
Driving Functions Overview
84
Fig. 51: Driving Functions
84
Fig. 52: Charging Status Indicator (Driving Function Blocked)
84
Select Drive Program, Drive
85
Fig. 53: Select Drive Program
85
Fig. 54: Joystick Travelling Direction
85
Electrical Seat Adjustment
86
Fig. 55: Display of Seat Functions
86
Set Time/Date
87
Fig. 56: "Set Time" Function Menu
87
Fig. 57: Setting the Time and Date
87
Show/Hide Clock, Configure 12H/24H Display
88
Fig. 58: Set Clock to Visible/Invisible
88
Adjust Display Brightness
89
Adjust Display Brightness, Automatic
89
Fig. 60: Setting the Display Brightness
89
Fig. 59: Autom. Display Brightness
89
Block the Controls (with the Wheelchair Switched On)
90
Release the Controls (with the Wheelchair Switched Off)
90
Fig. 62: Turn Signal Right / Left
90
Fig. 61: Lock Symbol
90
15 Moving from the Biolution's Seat
91
Procedure When Moving Sideways from the Seat
92
Fig. 63: Move from the Seat, Footrests
92
Fig. 64: Move from the Seat, Armrest
92
16 Maintenance and Servicing
93
Service Partner
93
Cleaning and Care
94
17 Disposal and Environmental Protection
95
Packaging Material
96
Fig. 65: Recycling
96
Recommissioning
97
Information Regarding Transfer
98
18 Fault Elimination
99
Flash Code of the Status Display of the Control Panel
99
19 Electrical Unit
101
Automatic Fuses
101
Main Fuse
102
Reset Triggered Main Fuse
102
Fig. 66: Main Fuse, Active
102
Fig. 67: Main Fuse
102
Overload Protection
103
Reset the Triggered Overload Protection
103
Connection Option for Auxiliary Units
104
The Lighting Installation
105
Fig. 68: Illumination at the Front
105
Fig. 69: Illumination at the Rear
105
Maintenance-Free Storage Batteries
106
Information Regarding Storage Batteries
107
Charging the Biolution
108
Procedure When Charging the Biolution
109
Fig. 70: Plug in Charging Cable
109
The Charger
110
Installing the Charger, Installation Site
110
Fig. 71: Set up Charger
110
20 Technical Equipment
111
Technical Data and Measurements
111
Spare Parts
116
21 Fault Elimination
118
Flash Code of the Status Display of the Control Panel
118
Compliance Level
119
22 Electromagnetic Compatibility (EMC)
120
Information Regarding Electromagnetic Compatibility
120
Handling of Sealed Storage Batteries
122
Customer Service Booklet
123
23 Annexes and Technical Documentation
124
EC Declaration of Conformity
124
Fig. 72: EC Declaration of Conformity
124
Log of Instructions Upon Supply
125
Advertisement
Advertisement
Related Products
Paravan PR 50
PARAVAN PR Heavy Duty
Paravan PR 25
Paravan PR 40
Paravan PR 35
Paravan PR 30
Paravan PR heavy duty
Paravan WHEELCHAIR Series
Paravan Categories
Wheelchair
Automobile Accessories
Exercise Bike
Mobility Aid
More Paravan Manuals
Login
Sign In
OR
Sign in with Facebook
Sign in with Google
Upload manual
Upload from disk
Upload from URL