Sign In
Upload
Manuals
Brands
Panasonic Manuals
Camcorder
AJ-PX270
Panasonic AJ-PX270 Manuals
Manuals and User Guides for Panasonic AJ-PX270. We have
4
Panasonic AJ-PX270 manuals available for free PDF download: Operating Instructions Manual, Specifications, Settings Manual, Quick Manual
panasonic AJ-PX270 Operating Instructions Manual (217 pages)
Brand:
panasonic
| Category:
Camcorder
| Size: 16.53 MB
Table of Contents
Operating Instructions
1
Read this First
2
Declaration of Conformity
3
Fcc Warning
3
Important Safety Instructions
4
Table of Contents
8
Chapter 1 Overview
10
Before Using the Camera
11
Before Using the Camera
12
Use of the Camera on a System
13
Basic Configuration Devices
13
Expanded Configuration Devices
13
What You Can Do with this Camera
14
Recording to the Memory Card
14
Linking to External Devices
14
Connecting to the Network
15
What You Can Do with this Camera
15
Chapter 2 Description of Parts
16
Left Side
17
Left Side
18
Right Side
19
Right Side
20
Front Side, Rear Side
21
Top Side
23
Chapter 3 Preparation
25
Power Supply
26
Charging the Battery
26
Attaching and Removing the Battery
27
Using the AC Adaptor
27
Attaching and Adjusting Accessories
29
Adjusting the Grip Strap
29
Attaching the Shoulder Strap
29
Attaching the Lens Hood
29
Attaching the Eye Cup
30
Attaching and Adjusting Accessories
30
Attaching the Front Microphone
31
Attaching a Tripod
31
Attaching and Adjusting Accessories
31
Turning On/Off the Power
32
How to Turn on the Power
32
How to Turn off the Power
32
Setting the Date/Time of the Internal Clock
33
P2 Card
34
Inserting a P2 Card
34
Removing a P2 Card
35
Preventing Accidental Erasure
35
P2 Card Access Leds and Status of P2 Cards
35
P2 Card Recording Time
36
CPS (Content Protection System)
37
How to Handle Data Recorded on P2 Cards
37
Assigning Functions to the USER Buttons
39
Adjusting and Setting the LCD Monitor
41
Using the LCD Monitor
41
Adjusting the LCD Monitor
41
Mirror Shooting
41
Highlighting the Outlines of Images
41
Adjusting and Setting the Viewfinder
42
Using the Viewfinder
42
Adjusting the Viewfinder
42
Highlighting the Outlines of Images
42
Tally Lamp
43
Chapter 4 Shooting
44
Basic Procedures
45
Preparation
45
Shooting
45
Selecting the Resolution, Codec, and Video Format for Recording
46
Basic Procedures
47
Adjustable Settings When Shooting
48
Iris
48
Gain
48
Super Gain
48
Brightness Adjustment
48
Macro
48
Focusing (Manual Focus)
48
Focus Assist Function
49
Area Mode Function
50
Level Gauge Function
51
Adjusting the White and Black Balance
52
Adjusting the White Balance
52
Adjusting the Black Balance
53
Using the Zoom Function
55
Setting the <ZOOM> Switch
55
Adjusting the Zoom Position
55
Zoom Ring
55
Adjusting Image Quality
56
Detail Function
56
Skin Tone Function
56
RB Gain Control Function
57
Chroma Setting Function
57
Matrix Function
57
Color Correction Function
58
Black Control Function
58
Gamma Function
58
Knee Function
58
High Color Function
59
White Clip Function
59
Setting the Electronic Shutter
60
Shutter Mode
60
Adjusting with the <SEL/PUSH SET> Dial Button and <MODE/MENU CANCEL> Button
60
Flash Band Compensation (FBC) Function
61
Setting the Flash Band Compensation Function
61
Variable Frame Rate (VFR) Recording Function
62
Native Variable Frame Rate Recording
62
Standard Variable Frame Rate Recording (Pull-Down Recording)
62
Selecting Audio Input and Adjusting Recording Levels
64
Selecting Audio Input Signals
64
Using the Built-In Microphone
64
Using the External Microphone and Audio Device
64
Adjusting the Recording Level
65
Displaying the Audio Level Detailed
65
Getting Position Information Using the GPS
66
Special Recording Functions
67
Pre-Recording
67
Interval Recording
67
One-Shot Recording
68
Loop Recording
68
One-Clip Recording
69
Simultaneous Recording
70
Background Recording
70
Hot Swap Recording
71
Recording Check Function
72
Shot Mark Recording Function
72
Text Memo Recording Function
72
Convenient Shooting Functions
73
Low Angle Shooting
73
Scan Reverse Shooting
73
Zebra Patterns Display
73
Displaying the Center Marker
73
Displaying the Safety Zone Marker
73
Displaying Frame Marker
74
Checking and Displaying the Shooting Status
74
Changing Image Size
74
Image Stabilization Function
74
Dynamic Range Stretcher Function
74
Backlight Compensation
74
Color Bars
74
Time Stamp Function
74
Deleting Last Clip Function
75
Waveform Monitor Function
75
Direct Menu Operation
75
Multi Formats
76
Selecting Recording Signals
76
System Modes and Recording Functions
76
List of Recording Settings and Recording Functions
81
Selecting Video Output
82
Recording/Playback and Output Format List
83
Dual Codec Recording
85
Dual Codec Recording Setting
85
Recording the Proxy Data
86
Recording to the SD Memory Card
86
Checking the Proxy Data
87
Error Displays about Proxy Data Recordings
87
Streaming Function
89
Setting the Network Connection
89
Using the Streaming Function
89
List of System Modes and Supported Streaming Output
89
List of Streaming Modes and Resolution/Frame Rates
90
Handling Setting Data
91
Setting Data File Configuration
91
Handling SD Memory Cards
91
Performing Operations on SD Memory Cards
92
How to Use User Data
93
How to Use Scene File Data
93
How to Restore the Scene File or Menu Setting Status to the Factory Settings
95
Saving to an SD Memory Card and Loading Saved Data
95
Selection of External Reference Signal and Generator Lock Setting
96
Locking the Video Signal to the External Reference Signal
96
Setting the Time Data
97
Recording of Time Codes and User Bits
97
Time Code
97
User Bits Settings
102
How to Input User Bits
102
Setting the Time Code
103
Externally Locking the Time Code
104
Supplying the Time Code Externally
105
Connecting and Setting the Genlock and Time Code Input/Output
106
Setting and Displaying the Counter
106
Chapter 5 Playback
107
Basic Procedures
108
Preparation
108
Playback
108
Thumbnail Operations
109
Thumbnail Operation Overview
109
Thumbnail Screen
109
Selecting Thumbnails
111
Setting Thumbnail Screen Display
112
Changing Thumbnails
113
Shot Mark
113
Text Memo
113
Deleting Clips
115
Restoring Clips
115
Reconnecting Incomplete Clips
115
Copying Clips
115
Setting Clip Metadata
116
Formatting a P2 Card
118
Formatting SD Memory Cards
118
Properties
119
Sd Memory Card Status Display
123
Chapter 6 Menu Operations
124
Setting Menu Structure
125
Menu Types and How to Open Them
125
Main Menu Structure
125
Setting Menu Display
126
Setting Menu Basic Operations
126
Setting [USER MENU]
127
Setting Menu Initialization
127
Menu List
129
[Scene File]
129
[System Mode]
134
[User Sw]
135
[Sw Mode]
136
[Auto Sw]
137
[Recording Setup]
138
[Clip]
140
[Audio Setup]
142
[Output Sel]
143
[Network Setup]
144
[Display Setup]
147
[Card Functions]
150
[Other Functions]
150
[Maintenance]
150
[Diagnostic]
150
[User Menu Sel]
151
[OPTION MENU] List
152
[Area Select]
152
[Awb Pre Control]
152
[Cam Remote Adj.]
152
[Lcd Sub Brightness]
152
[Eng Security]
152
Chapter 7 Display
153
Screen Status Display
154
Configuration of Status Display on Screen
154
Selecting Display Items on Screen
154
Displaying Screen
154
Camera Status Display
158
Checking and Displaying Shooting Status
159
Mode Check Display
161
Chapter 8 Connecting to External Devices
163
Connecting with Headphones, Remote Control, or Tv/Monitor
164
Headphones
164
Remote Control
164
Tv/Monitor
164
Connection Function Via <USB2.0 DEVICE> or <USB3.0
166
HOST> Terminal
166
Connecting to a Computer in the USB Device Mode
166
Connecting to External Devices in USB Host Mode
166
Switching to the Usb Host Mode
167
Connecting to the Remote Operation Panel (AK-HRP200G)
175
Switch Function in Remote Control Mode
175
Recording and Playback Operations in Remote Control Mode
175
Remote Control Unit Connected to the Camera
175
Connecting to P2 ROP Application
177
Switch Functionality in Remote Control Mode
177
Recording and Playback Operations in Remote Control Mode
177
Chapter 9 Network Connection
178
Network Connection
179
Available Functions
179
Operating Environment
179
Preparing for Connection
180
When Using Wireless Module AJ-WM30
180
For Wireless Module Other than AJ-WM30
181
For Wired LAN
181
Network Settings
182
Wireless LAN Settings
182
Wired LAN Settings
185
Network Function
186
P2 Browser Function Settings and Connection Status Check
186
Setting the P2 Playlist Edit Function
186
Setting for Connection with P2 ROP Application
187
Setting for Connection with Remote Operation Panel (AK-HRP200G)
188
Connection Settings for the Streaming Function
188
Using FTP Client Function
190
FTP Client Function Setting
190
FTP Server Folder List (FTP Explorer Screen)
191
Deleting Clips on the FTP Server
192
Viewing Information of Clips on FTP Server
193
Transferring from a P2 Card to an FTP Server (Copy)
193
Writing Back from an FTP Server to a P2 Card (Copy)
193
Transferring from an SD Card to an FTP Server (Export)
194
Writing Back from an FTP Server to an SD Memory Card (Import)
194
Rec During Upload Function
196
Transferring Recorded Clips Automatically (Automatic Transfer Mode)
196
Transferring Selected Clips Automatically (Manual Selection Mode)
196
Displaying the Upload List
197
Chapter 10 Maintenance and Inspection
199
Maintenance
200
Charging the Built-In Battery
200
Frequently Asked Questions
201
Power Supply
201
Battery
201
Shooting
201
Editing
201
Playback
201
Others
202
Warning System
203
Cases Indicated by Error Codes
203
Cases Indicated by Error Messages
203
Updating the Camera Firmware
207
Cleaning and Storing
208
Cleaning the Camera Recorder
208
Cautions When Storing the Camera Recorder
208
Chapter 11 Specification Specifications
210
Specifications
210
Dimensions
210
Digital Audio
212
Audio Input
213
Audio Output
213
Battery Charger
214
Index
215
Advertisement
Panasonic AJ-PX270 Specifications (12 pages)
Memory Card Camera Recorder
Brand:
Panasonic
| Category:
Camcorder
| Size: 3.06 MB
Table of Contents
Camera Section
5
Simultaneous Recording
6
Recorder Section
7
Operation & Connection
9
Specifications
11
Panasonic AJ-PX270 Settings Manual (8 pages)
P2 Camera - TVU networks Direct connection live streaming
Brand:
Panasonic
| Category:
Camcorder
| Size: 0.55 MB
Table of Contents
Confirm Product and Version to Support Integration
2
Configure P2 Device
3
Menu Settings
4
Streaming Settings
5
Configure TVU Receiver
6
Note on TVU Receiver Settings
7
Advertisement
Panasonic AJ-PX270 Quick Manual (2 pages)
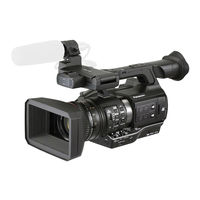
AVC-ULTRA Handheld Memory Card Camera Recorder
Brand:
Panasonic
| Category:
Camcorder
| Size: 0.65 MB
Advertisement
Related Products
Panasonic AJ-PX5000G
panasonic AJ-PX800G
Panasonic AJ-PX270EJ
Panasonic AJ-PX380G
Panasonic AJ-PX230 Series
Panasonic AJ-PX5100G
Panasonic AJ-PX230E
Panasonic AJ-PD900W
Panasonic AJ-P2C016RG
Panasonic AJ-P2C002SG
Panasonic Categories
Camcorder
Air Conditioner
TV
Digital Camera
Cordless Telephone
More Panasonic Manuals
Login
Sign In
OR
Sign in with Facebook
Sign in with Google
Upload manual
Upload from disk
Upload from URL