Sign In
Upload
Manuals
Brands
Oki Manuals
Printer
B432dn
Oki B432dn Manuals
Manuals and User Guides for Oki B432dn. We have
3
Oki B432dn manuals available for free PDF download: User Manual, Maintenance Manual
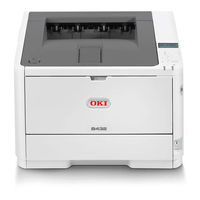
Oki B432dn User Manual (638 pages)
Brand:
Oki
| Category:
Printer
| Size: 11.23 MB
Table of Contents
Table of Contents
2
Using the Print Functions
10
Printing from a Computer (Basic Operation)
11
Printing
12
For Windows PCL Printer Driver
13
For Windows PS Printer Driver
14
For Windows XPS Printer Driver
15
For Mac os X PS Printer Driver
16
For Mac os X PCL Printer Driver
17
Cancelling a Print Job
18
For Windows
18
For Mac os X
18
About Screens and Functions of Printer Drivers
19
Windows PCL Printer Driver
20
Setup Tab
20
Job Options Tab
20
Extend Tab
21
Windows PS Printer Driver
22
Layout Tab
22
Paper/Quality Tab
22
Windows XPS Printer Driver
24
Mac os X PS Printer Driver
26
Cover Page Panel
27
User Authentication Panel
27
Printer Features Panel
27
Mac os X PCL Printer Driver
28
Paper Handling Panel
28
Setup Panel
29
Job Options Panel
29
Image Panel
29
Printing with Various Settings from a Computer
31
Printing on Envelopes
32
Loading Envelopes
32
Printing on Labels
36
Loading Labels
36
Printing with Changed Paper Size
40
Printing on Long Paper
43
Printing on Custom Size Paper (Custom Page)
46
Printing Manually One by One
49
Printing on both Sides of Paper (Duplex Printing)
53
Combining Multiple Pages Onto One Sheet of Paper
56
Collating a Multiple Page Document in Units of Copies (Collated)
59
Printing from the Last Page of a Document
62
Printing Only the Cover from a Different Tray
63
Making a Booklet (Booklet Printing)
65
Dividing a Document to Print on some Sheets for Making a Poster
69
Printing a Watermark (Watermark)
71
Overlaying Forms or Logos (Overlay Print)
75
Changing Print Quality (Resolution)
78
Emphasizing Fine Lines
81
Adjusting the Image Finished Quality
84
Selecting a Tray Automatically for the Specified Paper
86
Set the Paper Tray to be Used
86
Switch to Another Paper Feed Tray Auto When Tray Runs out of Paper
89
Setting Trays for the Auto Tray Switching
89
Registering Frequently-Used Settings
93
Saving the Settings
94
Printing with Registered Settings
94
Registering Settings
96
Changing the Default Settings with a Printer Driver
99
Saving Toner
100
Storing Print Data in the Printer before Printing
103
Specifying the Font to Use
105
Printing with the Printer's Fonts
106
Printing with the Computer's Fonts
108
Setting a Password to the Print Data (Authentication Print)
109
Setting a Password on a Computer
110
Printing a Password-Protected Document from the Printer
110
Outputting a Document to a File Instead of Printing
114
Using a Windows Printer Driver
114
Saving Frequently-Printed Documents in the Printer
116
Printing Without Opening a PDF File (PDF Print Direct)
121
Adjusting the Tone of Photographs for Printing (PS Gamma Adjuster)
122
Registering an Adjusted Halftone
123
Printing with a Registered Halftone
123
Printing with OKI LPR Utility
127
Sending a File to a Printer
128
Deleting an Unnecessary Print Job
129
Checking the Print Status
130
Checking the Menu Hierarchy of the Print Functions (Menu Tree)
131
Using Google Cloud Print
137
About Google Cloud Print
138
Setting Google Cloud Print
139
Printing with Google Cloud Print
141
Printing Automatically
141
Printing Manually
141
Changing Printing Settings
141
Cancelling Printing
141
Managing Google Cloud Print
143
Checking Google Cloud Print Registrations
144
Checking from the Management Screen of Google Cloud Print
144
Checking from the Web Page
144
Checking from the Operator Panel
144
Checking or Changing the Use of Cloud Service Settings
146
Changing from the Web Page
146
Changing from the Operator Panel
146
Deleting the Registered Information
148
Checking that Deletion Is Complete
149
Checking from the Web Page/Operator Panel
149
If You Deleted Info on the Management Screen of Google Cloud Print
149
About Importing the CA Certificate of the Proxy Server
151
Using Airprint
152
About Airprint
153
Setting Airprint
154
Registering the Printer in a Computer (Mac os X)
155
Printing with Airprint
156
Printing from an Ios Device
156
Printing from a Computer (Mac os X)
156
Basic Information
158
Names of Components
159
Front of the Printer
160
Rear of the Printer
161
Inside the Printer
162
Names and Functions on the Operator Panel
163
Checking the Device Information and Status
164
Setting or Checking by Opening the Web Page of the Printer
165
About the Web Page of the Printer
166
About the Operating Environment
166
Opening the Web Page from a Computer
166
Logging in as the Administrator
166
About the Status Window
168
About the Printer Status Icons
168
Display Examples
168
Description of Functions
168
About Items that Can be Set or Checked
170
Device Information
170
Printer Menu
170
Admin Setup
171
Device PIN and User Settings (Editing)
171
Network Setup
171
Direct Print
172
Job List
172
PS Setup (Not Supported by B412)
172
Management
172
Links
173
Loading Paper or Envelopes
174
About Paper Types that Can be Loaded and Storage Methods
175
Available Paper Types
175
Paper Recommendations
176
Paper Storage
176
Envelopes Recommendations
176
Labels Recommendations
176
Loading in Tray 1
177
Loading in Tray 2
177
Loading in the MP Tray
178
Loading Paper
180
Loading in Tray 1 or Tray 2
181
To Load in the MP Tray
184
To Load Envelopes
186
Registering the Paper Size, Type, or Weight
189
About Paper Output
190
Outputting with the Print Side down (Facedown Stacker)
190
Outputting with the Print Side up (Faceup Stacker)
190
Saving Power Consumption with the Power Save Function
192
Setting Power Save Mode
193
Opening the Web Page of the Printer from a Computer
194
Using the Operator Panel
195
Setting the Length of Idle Time before Entering Power Save Mode
195
Exiting Power Save Mode to Standby Status
195
Setting Sleep Mode
196
Setting the Length of Idle Time before Entering Sleep Mode
196
Exiting Sleep Mode or Deep Sleep Mode to Standby Status
196
About Restrictions in Sleep Mode and Deep Sleep Mode
197
The Printer Does Not Enter Deep Sleep Mode/Cannot Print/Set
197
Protocols that Have the Client Function Do Not Operate
197
The Printer Automatically Enters Sleep Mode from Deep Sleep Mode
197
Reducing Power Consumption by Automatically Turning the Machine off
198
About the Auto Power off Function Setting Items
199
Setting Auto Power off
200
Enabling Auto Power off
200
Setting the Transition Time
200
Switching the Printer Online
201
Windows Operation
202
Displaying the Property Screen of the Printer Driver
203
Windows 8.1 and Windows Server 2012 R2
204
Windows Vista
205
Windows Server 2008 R2
206
Windows Server 2008
207
Displaying the Print Setup Screen of the Printer Driver
208
Checking the Menu Hierarchy of the Printer (Menu Tree)
213
Troubleshooting
214
If an Error Message Is Displayed on the Operator Panel
215
Checking an Error Message (Error Message Search)
216
If a Paper Jam Occurs
217
If the Error Code Is "391" or "392"
218
If the Error Code Is "380", "381", "382", "385" or "390" (Inside)
219
If the Error Code Is "380"/"381"/"382"/"385"/"390" (Paper Output Part)
222
If the Rear End of the Paper Is Visible Inside the Printer
223
If the Rear End of Paper Is Not Visible but Its Top Side Is Visible
223
If the Error Code Is "372"
226
If You Suspect Something Is Wrong
229
Attention/Ready Indicator Lights Up/Flashes on the Operator Panel
231
If Paper in the Tray Is Not Fed Properly
232
If Paper Cannot be Fed from the Second Tray Unit (Optional)
234
If You Cannot Print from Windows
236
Information to be Checked First
237
Problem
237
If the Network Connection Caused the Problem
237
If the Problem Still Persists
238
Windows Server 2003
238
Causes and Solutions for Other Cases
240
Cannot Print
240
Free Space in Memory Is Insufficient/Printing Is Slow
240
Setup Cannot be Performed through Network Connection. Unable to Print
240
If You Cannot Print from Mac os X
241
Printing Is Slow
244
An EPS File Cannot be Printed in High Quality
244
Setup Cannot be Performed through Network Connection
244
If You Cannot Print Via the Network
245
Unix
245
Utilities
245
Unable to Set up a Printer Driver
246
If Setup Is Not Possible through USB Connection (Windows)
247
If a Printer Icon Is Not Created in the [Printer] Folder
247
A Printer Icon Created in Printer Folder but Printing Isn't Possible
247
Install Printer Driver Failed Message Displayed in Setup Program
247
Other Cases
247
If Setup Is Not Possible through USB Connection (Mac os X)
249
If Configuration Tool Has a Problem
250
User Setting Tab
250
Alert Info Tab
250
If a Power Failure Occurs
251
Printer Operation
251
About Problems of each Function
252
Print Problems
253
Airprint Problems
255
Google Cloud Print Problems
256
An Error Code Is Displayed on the Panel
256
About Problems with Printing Results
258
List of Examples of Problems
259
Vertical White Lines Appear
260
Printed Images Are Fading Vertically
261
Printed Images Are Light
262
White Spots and Lines Appear
263
Vertical Lines Appear
264
Horizontal Lines and Spots Appear Periodically
265
White Area on Paper Is Lightly Stained
266
The Periphery of Characters Is Smudged
267
Entire Paper Lightly Stained When Printing on Envelopes/Coated Paper
268
Toner Comes off When Printed Paper Is Rubbed
269
Uneven Gloss
270
Black or White Dots Appear
271
Dirt Is Printed
272
The Entire Page Is Printed Black
273
Nothing Is Printed
274
White Patches Appear
275
The Peripheral Area of the Page Is Dirty
276
The Printed Image Is Skewed
277
Other Problems
278
About Restrictions on each os
280
Windows Server 2003 Service Pack 1
282
About Restrictions Based on the Windows Firewall Settings
282
Checking and Changing the Settings of the Printer
283
Setting Menu Items and Functions of the Printer
284
Print Secure Job
285
Configuration
286
Print Info
288
Menus
289
Tray Config
289
System Adjust
289
Print Adjust
290
Print Statistics
293
Check the Airprint Setting in the Printer
294
Google Cloud Print
295
Wireless Setting
296
Enabling Wired
297
Advanced
298
Setting Menu Hierarchy of the Printer (Menu Tree)
299
Changing General Settings
313
Using the Web Page of the Printer
314
Changing the Administrator Password
314
Changing the Printer's Settings
315
Obtaining the Date Automatically
315
Using Configuration Tool (Windows Only)
317
About Configuration Tool
318
List of Icons Used in Configuration Tool
319
List of Icons Used in Configuration Tool Plug-Ins
319
Installing Configuration Tool
321
Registering or Removing a Printer
322
Checking the Printer Status
323
Setting the Alert Info Plug-In
324
Basic Settings
324
Device Settings
324
Filter Settings
325
Checking Logs
325
Setting the Network Setting Plug-In
327
Searching for the Printer on a Network
327
Setting the Printer's Network Settings
328
Displaying the Web Page
329
Changing the Network Password
329
Changing the Display Order of Printer Information
330
Cloning the User Setting
332
Setting the Storage Manager Plug-In
333
Registering Forms (Form Overlay)
334
Creating a Form
334
Registering a Form in the Printer with Configuration Tool
334
Checking the Free Space in Memory
336
Deleting Unnecessary Jobs from Memory
337
Using Network Extension (Windows Only)
339
About Network Extension
340
Starting Network Extension
341
Checking the Printer's Settings
342
Setting Options Automatically
343
Uninstalling Network Extension
344
Changing the Advanced Network Settings
345
Network Setting Items
346
Tcp/Ip
347
Nbt
348
Snmp
349
Printer Trap
350
SMTP (E-Mail Transmission)
351
Maintenance
354
Security
355
IP Filtering
356
MAC Address Filtering
357
Ssl/Tls
358
Sntp
359
Job List Table
360
Ieee802.1X
361
Ipsec
362
Using Network Card Setup with Mac os X
365
Starting Network Card Setup
366
Searching for a Printer
367
Setting the Printer Search Criteria
367
Setting the Timeout Conditions
367
Setting the IP Address
369
Web Setup
370
Enabling the Web Setting
370
Opening the Web Page
370
Changing the Password
370
Quitting Network Card Setup
372
Changing the Display Language on the Operator Panel
373
For Windows (Operator Panel Language Setup)
374
For the Network Connection
375
For the USB Connection
378
For Mac os X (Panel Language Setup)
381
Restart the Printer
381
Checking the Printer Fonts on the Operator Panel
382
Checking/Changing the Image Quality
383
Adjusting the Contrast (Contrast)
384
Adjusting the Density
385
About the Included Utility Software
387
Installing Software
388
Installing from the "Software DVD-ROM"
389
Uninstalling Software
390
List of Utility Software
391
Utilities Common to Windows and Mac os X
391
Windows Utilities
391
Mac os X Utilities
392
Replacing Consumables
394
Precautions for Replacement
395
Replacing the Toner Cartridge
397
Estimated Replacement Cycle for Toner Cartridges
398
To Replace the Toner Cartridge
400
Replacing the Image Drum
403
Estimated Replacement Cycle for Image Drum
404
To Replace the Image Drum
405
Cleaning the Main Unit and Parts
408
Cleaning the Surface of the Main Unit
409
Cleaning the Paper Feed Rollers
410
Tray 1 and Tray 2 (Optional) Cleaning
411
MP Tray
413
Cleaning the LED Head
415
Removing the Installed Printer Driver
417
Removing the Printer Driver from a Computer (Windows)
418
Removing the Printer Driver from a Computer (Mac os X)
424
Updating the Installed Printer Driver
425
Updating the Printer Driver (Windows)
426
Updating the Printer Driver (Mac os X)
432
Preparations Required
433
Installing the Printer
434
Installation Environment
435
Installation Space
435
Checking the Accessories
437
Unpacking and Installing the Printer
439
Installing Options (Purchasers Only)
442
Installing the Second Tray Unit (Optional) to the Printer
443
Setting the Printer Driver
445
Setting Tray 2 (Optional) to the Windows PCL Printer Driver
445
Setting Tray 2 (Optional) to the Windows PS Printer Driver
445
Setting Tray 2 (Optional) to the Windows XPS Printer Driver
446
Setting Tray 2 (Optional) to the Mac os X Printer Driver
446
Installing the Wireless LAN Module (Optional) to the Printer
447
Turning the Printer on or off
448
About the Power Supply
449
Turning the Printer on
450
Turning the Printer off
451
If You Do Not Use the Printer for a Long Period of Time
452
Checking Operations by Performing a Test Print
453
Connecting the Printer to a Network
455
Connecting with a LAN Cable (Network Connection)
456
Connecting to a Wireless LAN (Optional)
458
Cautions for Using a Wireless LAN
458
Preparations to Use a Wireless LAN
458
Checking the Wireless LAN Setting Method
458
Connecting with WPS
459
Selecting a Wireless Access Point from the Operator Panel to Connect
460
Setting from the Operator Panel Manually to Connect
462
Checking that Connection Is Established Correctly
464
If the Wireless LAN Connection Is Unstable
464
Obtaining Automatically
466
Setting Manually
467
Setting an IP Address by Using the "Software DVD-ROM" (for Windows)
469
Connecting a Computer to the Printer Via a USB Interface
476
Installing Printer Drivers in a Computer
477
How to Install a Printer Driver that Supports Windows
478
Operating Environment
479
Installing Software with Recommended Install
480
Installing Software You Want to Use with Custom Install
482
For the USB Connection - Installing Software with Recommended Install
486
For the USB - Installing Software You Want to Use with Custom Install
488
How to Install a Printer Driver that Supports Mac os X
492
For the Network Connection - Installing the Printer Driver
494
Registering a Printer with Bonjour
494
Registering a Printer with TCP/IP Protocol
496
For the USB - Printer Driver Operating Environment
499
Installing the Printer Driver
499
Installing a Utility in a Computer
501
For Your Safety
502
Cautions Related to Safety
503
General Cautions
504
Operating Management Tips
506
To Change the Administrator Password
507
Changing from a Computer
508
Changing from the Printer
510
Checking the Operations of the Printer
511
Checking the Remaining Amount of Consumables
512
Checking from a Computer/Checking from the Web Page
513
Checking from Configuration Tool
513
Checking with Mac os X
513
Checking on the LCD Panel of the Operator Panel
514
Checking by Printing a Menu Map
514
Checking the Number of Printed Pages
515
Checking from a Computer
516
Checking from Operator Panel
517
Checking the Number of Printed Pages from each Tray
517
Checking by Printing Menu Map
517
Checking the Status of the Printer and Error by E-Mail
518
Setting to Send an E-Mail from the Printer
519
Setting to Send an E-Mail from the Printer Regularly
522
Setting to Send an E-Mail Only if an Error Occurs
525
Checking the Network Setting Information
528
Using SNMP
531
Checking the Status of the Printer by Using Snmpv3
532
Administrator Menu Items and Functions in the Printer (ADMIN SETUP)
535
Network Setup Table
536
USB Setup
537
Print Setup
538
PS Setup
540
PCL Setup
541
XPS Setup
543
IBM PPR Setup
544
EPSON FX Setup
546
Panel Setup
548
Power Setup
549
Tray Setup
550
Others Setup
551
Settings
552
Change Password
553
Administrator Menu Items and Functions in the Printer (BOOT MENU)
554
Changing the Operation Mode of the Printer (Emulation)
555
Limiting Computers that Can Access the Printer
556
Limiting by Using IP Addresses (IP Filtering)
557
Limiting by Using MAC Addresses (MAC Address Filtering)
560
Setting the User Name and Job Account ID to the Printer Driver
563
Setting in the Windows Environment
564
Setting the User Name and Job Account ID
564
Setting Popup Mode
564
Setting a Job Account ID for each User in Hide Mode
564
Setting in the Mac os X Environment
566
Registering a User ID
566
Registering Multiple Users at the same Time
566
Changing a User ID and User Name
566
Deleting a User ID and User Name
567
Improving Security by Encrypting Communication over a Network
568
Encrypting Communication with SSL/TLS
569
Creating a Certificate
570
Using a Certificate that You Signed
570
Using a Certificate that the Certificate Authority Issued
572
Enabling Encryption Settings
575
Using IPP Print
576
Enabling IPP Print
576
Setting the Printer as the IPP Printer in a Windows Environment
576
Setting the Printer as the IPP Printer in a Mac os X Environment
578
Performing IPP Print
578
Encrypting Communication with Ipsec
579
Setting the Printer
580
Setting a Computer
581
Connecting Printer to Authentication Network by Using IEEE802.1X
584
Procedure for Setting up IEEE802.1X
585
Setting by Using PEAP
586
Setting by Using EAP-TLS
589
Setting the Network According to the Usage Environment and Application
592
Using DHCP
593
Setting the DHCP Server
594
To Set the Printer to Use DHCP
596
Using the Printer in the Ipv6 Environment
597
About Ipv6
598
Checking the Ipv6 Address
599
Printing by Using OKI LPR Utility
600
Starting OKI LPR Utility
601
Setting Remote Print
602
Registering a Printer to OKI LPR Utility
603
Downloading a File
604
Displaying and Deleting a Job
605
Adding a Comment to a Registered Printer
606
Checking the Status of a Registered Printer
607
Forwarding Print Jobs to a Registered Printer
608
Forwarding the Selected Print Jobs
609
Forwarding Print Jobs Automatically
610
Printing the same Document from the Registered Multiple Printers
612
Opening the Web Page of the Registered Printer
614
Maintaining the Connection with a Registered Printer
615
Setting the OKI LPR Utility Port Number Again
616
Uninstalling OKI LPR Utility (Uninstall)
617
Moving or Transporting the Printer
618
Moving the Printer
619
Transporting the Printer
620
Initializing Flash Memory and Settings
621
Initializing Flash Memory
622
Flash Memory Areas that Users Can Initialize
622
Initializing Four Areas at Once (FLASH INITIALIZE)
622
Specify an Area to Initialize (Formatting Area Name)
622
Initializing the Menu Settings
624
Initializing the Network Settings
625
Initializing from the Setting Menu of the Printer
625
Initializing from the Operator Panel on the Printer
625
Specifications
626
General Specifications
627
Outline Dimensions (Approximate Values)
629
USB Interface Specifications
631
Basic Specifications
631
Connector Pin Assignments
631
Interface Signal
631
Network Specifications
632
Wireless LAN Specifications
633
Environmental Information
636
Advertisement
Oki B432dn Maintenance Manual (128 pages)
Brand:
Oki
| Category:
All in One Printer
| Size: 6.87 MB
Table of Contents
Table of Contents
4
1 Configuration
6
System Configuration
7
Structure of Printer
8
Offer of Options
10
Specifications
11
Interface Specifications
14
USB Interface Specification
14
Outline of USB Interface
14
USB Interface Connector and Cable
14
USB Interface Signal
14
Network Interface Specification
15
Network Interface Connector and Cable
15
Network Interface Signal
15
Wireless LAN Interface (Option)
16
Outline of Wireless LAN
16
2 Procedures for Repairing
17
Troubleshooting
18
Points to be Checked before Modifying Printing Problems
18
Points to be Checked When the Printing Problems Are Modified
18
Preparation for Troubleshooting
19
Troubleshooting Flow
20
LCD Status Message/ Trouble Table
20
Service Call List
29
LCD Message Troubleshooting
31
Print Troubleshooting
38
3 Adjustment
45
Category and Function of Maintenance Mode
46
Admin Menu
46
Boot Menu
50
Service Menu (the Member of Maintenance)
51
System Maintenance Menu (the Member of Maintenance)
52
Factory Maintenance Menu (for a Factory)
53
Self-Diagnostic Mode (Engine Maintenance Mode)
54
Operation Panel
54
Ordinary Self-Diagnostic Mode (Level 1)
57
How to Enter the Self-Diagnostic Mode (Level 1)
57
How to Exit the Self-Diagnostic Mode
57
Switch Scan Test
58
Motor Clutch Test
60
Test Print
61
Consumable Item Counter Display
63
Number of Print Copies Counter Display
64
Switching between the Factory Mode and the Shipping Mode
64
Self-Diagnostic Function Setting
65
LED Head Serial Number Display
66
NVRAM Parameter Setting
66
Energy Conservation Mode Setting
67
EEPROM Initialization
67
Adjustment at Part Replacement
68
EEPROM Data Upload / Download Method
68
4 Replacement of Parts
69
Preparation for Parts Replacement
70
Maintenance Tools
71
Parts Replacement Procedure
72
LED Head
72
Roller-Transfer
73
Duplex Belt
74
Cover-Side-R / Cover-Lower-R (B512 Only)
75
Cover-Side-L / Cover-Lower-L (B512 Only)
76
CU-Board
77
Power Supply Unit
78
DC Motor
79
Hopping / MPT / Regist Clutch
80
HV-Board / Motor-FAN
81
Cover Assy OPE
82
Ope PCB Assy
82
Cover Assy Stacker
83
Stacker Cover
84
Fuser Assy
85
MPT Assy
86
Cover Assy Rear
87
Guide Eject Lower Assy
88
Eject Motor
89
Plate Side R Assy / Plate Side L Assy / Front Assy
90
Plate Side L Assy
91
Plate Side R Assy
92
Roller Regist
93
Roller Feed Assy
93
Lever in Sensor / Lever WR Sensor / Photo Interrupter
94
Paper Feeding Roller (Roller-Pick-Up,Roller-Feed-NOW)
95
Paper Feeding Roller(Roller-Assy-Mpt)/Paper Feeding Sub Roller
96
Frame-Assy-Retard , Spring-Retard
97
Lubricating Points
98
5 Periodic Maintenance
110
Cleaning
111
Cleaning of LED Lens Array
112
Cleaning the Feed Rollers and the Retard Roller
113
Cleaning the MPT Feed Rollers
115
6 Connection Diagram
117
Board Layout
119
Resistance Value
127
Oki B432dn Maintenance Manual (18 pages)
Option Tray
Brand:
Oki
| Category:
Printer
| Size: 0.94 MB
Table of Contents
Table of Contents
4
Maintenance of Option-Tray
5
Overview
6
Function
6
Exterior and Parts Name
6
Description for Operation of Second Tray Unit
7
Part Replacement
8
Precautions on Replacing Parts
8
Arrangement of Parts
9
How to Replace Parts
10
Roller-Pick-Up, Roller-Feed-Now
10
Guard-Connector, Connector (9715S-08Z02-G4C)
11
Board-GOG
12
CONN Cord-AMP8P-AMP8P
13
Gear-Assy-Clatch (Hop, Regist), Motor-Pulse
13
Frame-Assy-Retard, Spring-Retard
15
Cleaning of Paper Feed Roller and Separation Roller
16
Procedure for Troubleshooting
17
Precautions for Troubleshooting
17
Preparation before Troubleshooting
17
1.4.2 Connection Diagram
18
Board Arrangement
18
Advertisement
Advertisement
Related Products
Oki B430d
Oki B4300
Oki B4300n
Oki B4350n PS
Oki B431dn
Oki B431d
OKI B4300nPs
OKI B431 Series
Oki B430
Oki B431L6
Oki Categories
Printer
All in One Printer
Printer Accessories
Fax Machine
Label Maker
More Oki Manuals
Login
Sign In
OR
Sign in with Facebook
Sign in with Google
Upload manual
Upload from disk
Upload from URL