Sign In
Upload
Manuals
Brands
Kyocera Manuals
Fax Machine
ECOSYS M3540idn
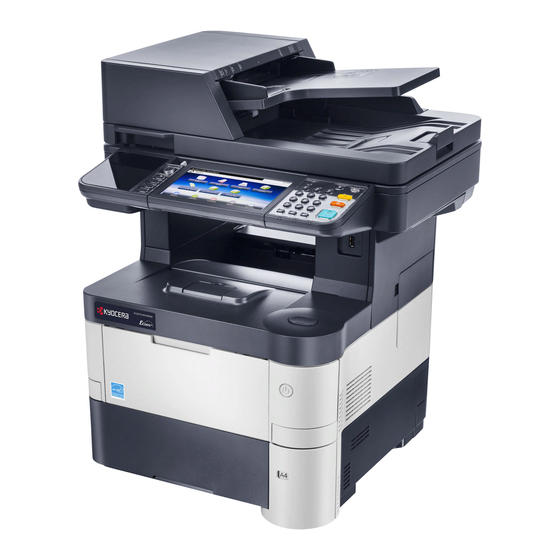
Kyocera ECOSYS M3540idn Manuals
Manuals and User Guides for Kyocera ECOSYS M3540idn. We have
6
Kyocera ECOSYS M3540idn manuals available for free PDF download: Service Manual, Operation Manual, Quick Manual, First Steps Quick Installation Manual
Kyocera ECOSYS M3540idn Operation Manual (427 pages)
ECOSYS Series MFP
Brand:
Kyocera
| Category:
All in One Printer
| Size: 28.85 MB
Table of Contents
Operation Guide
1
Table of Contents
3
Overview
9
Machine Features
10
Guides Provided with the Machine
14
About the Operation Guide (this Guide)
15
Structure of the Guide
15
Conventions Used in this Guide
16
Quiet Mode
17
Custom Box
17
Copy Screen
17
Menu Map
19
1 Legal and Safety Information
31
Notice
32
Safety Conventions in this Guide
32
Environment
33
Precautions for Use
34
Laser Safety (Europe)
35
Safety of Laser Beam (Usa)
36
Safety Instructions Regarding the Disconnection of Power
37
Warning
37
Radio Tag Technology
37
Other Precautions (for Users in California, the United States)
37
Warranty (the United States and Canada)
38
Legal Restriction on Copying/Scanning
40
En Iso 7779
40
Ek1-Itb 2000
40
Legal Information
41
Regarding Trade Names
41
Energy Saving Control Function
47
Automatic 2-Sided Copy Function
47
Resource Saving - Paper
47
Environmental Benefits of "Power Management
47
Energy Star (ENERGY STAR®) Program
48
2 Installing and Setting up the Machine
49
Part Names
50
Machine Exterior
50
Connectors/Interior
51
With Optional Equipments Attached
52
Connecting the Machine and Other Devices
53
Connecting Cables
54
Connecting LAN Cable
54
Connecting USB Cable
55
Connecting the Power Cable
55
Power On/Off
56
Power on
56
Power off
56
Login/Logout
57
Login
57
Logout
58
Default Settings of the Machine
59
Setting Date and Time
59
Set the Date
60
Set the Time
60
Network Setup (LAN Cable Connection)
61
Energy Saver Function
62
Low Power Mode and Auto Low Power Mode
62
Sleep and Auto Sleep
63
Quick Setup Wizard
65
Installing Software
68
Software on DVD (Windows)
68
Installing Software in Windows
69
Express Install
69
Finish the Installation
70
Custom Install
71
Uninstalling the Software
74
Uninstall the Software
74
Installing Software in Mac Computer
75
Install the Printer Driver
75
Configure the Printer
76
Setting TWAIN Driver
77
Setting WIA Driver
78
Checking the Counter
79
Additional Preparations for the Administrator
80
Sending Documents to a PC
80
Strengthening the Security
80
Command Center RX
82
Accessing Command Center RX
83
Changing Security Settings
85
Changing Device Information
87
E-Mail Settings
89
Registering Destinations
93
Creating a New Custom Box
95
Printing a Document Stored in a Custom Box
96
Transferring Data from Our Other Products
98
Migrating the Address Book
98
Load the Address Book Data
100
3 Preparation before Use
102
Using the Operation Panel
103
Operation Panel Keys
103
Adjusting the Operation Panel Angle
104
Touch Panel Display
105
Home Screen
105
Editing the Home Screen
106
Display for Device Information
109
Display of Keys that Cannot be Set
110
Enter Key and Quick No. Search Key
111
Help Screen
112
Loading Paper
113
Precaution for Loading Paper
114
Loading in the Cassettes
115
Load Paper
117
Operation Panel
118
Loading Paper in the Multi Purpose Tray
119
The Operation Panel
120
Specifying Paper Size and Media Type
123
Paper Stopper
125
Preparation for Sending a Document to a Shared Folder in a PC
126
Making a Note of the Computer Name and Full Computer Name
126
Making a Note of the User Name and Domain Name
127
Create a Folder
128
Creating a Shared Folder, Making a Note of a Shared Folder
128
Configuring Windows Firewall
132
Registering Destinations in the Address Book
136
Adding a Destination (Address Book)
136
Editing and Deleting Address Book Entries
140
Adding a Destination on One Touch Key (One Touch Key)
142
Editing and Deleting One Touch Key
143
4 Printing from PC
144
Printing from PC
145
Start Printing
146
Printing on Non-Standard Sized Paper
147
Printer Driver Print Settings Screen
148
Canceling Printing from a Computer
149
Changing the Default Printer Driver Settings (Windows 7)
149
Printer Driver Help
149
Printing by Airprint
150
Printing Data Saved on the Printer
151
Specifying the Job Box from a Computer and Storing the Job
151
Printing Documents from Private Print Box
151
Printing Document from Stored Job Box
154
Printing Document from Quick Copy Box
157
Printing Document from Proof and Hold Box
160
5 Operation on the Machine
163
Loading Originals
164
Placing Originals on the Platen
164
Loading Originals in the Document Processor
165
How to Load Originals
165
Place the Originals
166
Favorites
167
Registering Favorite
168
Program Mode
170
Recalling Favorite
171
Editing and Deleting Favorite
172
Application
173
Installing Applications
173
Using Applications
174
Uninstalling Applications
175
Registering Shortcuts
176
Adding Shortcuts
176
Editing and Deleting Shortcuts
177
Copying
178
Basic Operation
178
Reserve Next
179
Canceling Jobs
180
Sending
181
Basic Operation
182
Specify the Destination
182
Specifying Destination
184
Choosing from the Address Book
184
Specifying a New Pc Folder
188
Checking and Editing Destinations
192
Confirmation Screen of Destinations
193
Recall
194
Send to Me (E-Mail)
194
Sending to Different Types of Destinations (Multi Sending)
195
Canceling Sending Jobs
196
WSD Scan
197
Scanning Using TWAIN
199
Scanning with FMU Connection
201
How to Use the FAX Function
202
What Is Document Box
203
Job Box
203
Basic Operation for Document Box
204
Document List
204
Using a Custom Box
205
Creating a New Custom Box
205
Editing and Deleting Custom Box
207
Storing Documents
208
Printing Documents
209
Editing Documents
210
Deleting Documents
211
Printing Documents Stored in Removable USB Memory
212
Saving Documents to USB Memory (Scan to USB)
214
Check the USB Memory Information
215
Removing USB Memory
216
6 Using Various Functions
217
Functions Available on the Machine
218
Copy
218
Send
219
Custom Box (Printing)
221
Store File
222
Removable Memory (Store File, Printing Documents)
222
Functions
224
Original Size
224
Paper Selection
225
Original Orientation
226
Collate
226
Density
227
Original Image
227
Ecoprint
228
Color Selection
228
Sharpness
229
Background Density Adj. (Background Density Adjustment)
229
Prevent Bleed-Thru
230
Zoom
230
Combine
232
Layout Image
232
Duplex
234
Continuous Scan
235
Job Finish Notice
236
File Name Entry
237
Priority Override
237
Quiet Mode
237
Duplex (2-Sided Original)
238
Sending Size
239
File Format
240
Pdf Encryption Functions
241
File Separation
243
Scan Resolution
243
E-Mail Subject/Body
243
FTP Encrypted TX
244
Delete after Printed
244
Storing Size
245
Encrypted PDF Password
245
JPEG/TIFF Print
246
XPS Fit to Page
246
7 Status/Job Cancel
247
Checking Job Status
248
Displaying Status Screens
249
Details of the Status Screens
250
Send Job Status Screen
251
Store Job Status Screen
252
Scheduled Job Status Screen
253
Checking Detailed Information of Jobs
254
Checking Job History
255
Checking the Detailed Information of Histories
257
Sending the Log History
257
Job Operation
258
Pause and Resumption of Jobs
258
Canceling of Jobs
258
Device/Communication
259
Usb Keyboard
259
Checking the Remaining Amount of Toner and Paper (Paper/Supplies)
261
8 Setup and Registration (System Menu)
262
System Menu
263
Operation Method
263
System Menu Settings
265
Language
267
Report
267
Report Print
267
Admin Report Settings
268
Result Report Settings
269
Sending Log History
269
User Property
270
Cassette/Mp Tray Settings
270
Multi Purpose Tray
271
Common Settings
272
Default Screen
272
Original Settings
273
Paper Settings
274
Function Defaults
276
Error Handling
278
Preset Limit
278
Keyboard Layout
279
Format Ssd
279
Home
280
Format Sd Card
280
Function Key Usage
280
Copy
281
Send
282
Document Box
283
Fax
283
Application
284
Internet
284
Address Book/One Touch
284
Print List
285
One Touch Key
285
User Login/Job Accounting
285
Printer
286
System/Network
288
Secure Protocol
292
Lan Interface
292
Optional Network
293
Wireless Network
294
Interface Block Setting
295
Network Interface (Send)
295
Security Level
296
Ram Disk Setting
296
Optional Memory
297
Data Security
297
Optional Function
298
Date/Timer/Energy Saver
298
Adjustment/Maintenance
301
9 User Authentication and Accounting (User Login, Job Accounting)
303
Overview of User Login Administration
304
Enabling User Login Administration
305
Setting User Login Administration
307
Adding a User (Local User List)
307
Changing User Properties
311
User Account Lockout Setting
315
User Login Administration for Printing
317
To Manage the Users to Scan Using TWAIN
318
To Manage the Users to Scan Using WIA
319
To Manage the Users that Send Faxes from a PC
320
Local Authorization
321
Group Authorization Settings
322
Group List
323
Obtain NW User Property
325
Obtain NW User Property
326
Simple Login Settings
327
Simple Login Setup
328
ID Card Settings
331
Using User Login Administration
333
Login/Logout
333
User Login Administration on a PC
333
Overview of Job Accounting
334
Enabling Job Accounting
335
Job Accounting Access
336
Setting an Account
337
Adding an Account
337
Restricting the Use of the Machine
339
Editing an Account
340
Deleting an Account
342
Delete an Account
342
Job Accounting for Printing
343
Job Accounting for Scan Using TWAIN
344
Job Accounting for Scan Using WIA
345
Job Accounting for the FAX Transmitted from a Computer
346
Configuring Job Accounting
347
Default Setting
347
Counting the Number of Pages Printed
348
Print Accounting Report
349
Print the Report
350
Using Job Accounting
351
Login/Logout
351
Job Accounting on a PC
351
Unknown ID Job
352
10 Troubleshooting
353
Regular Maintenance
354
Cleaning
354
Registration Roller
355
Toner Container Replacement
357
Waste Toner Box Replacement
360
Troubleshooting
362
Solving Malfunctions
362
Responding to Messages
367
Responding to Send Error
375
Adjustment/Maintenance
377
Clearing Paper Jams
378
Jam Location Indicators
378
Cassettes 1 to
380
Inside the Machine
382
11 Appendix
386
Optional Equipment
387
Overview of Optional Equipment
387
Expansion Memory
389
Optional Applications
395
Character Entry Method
397
Entry Screens
397
Entering Characters
399
Paper
400
Basic Paper Specifications
400
Choosing the Appropriate Paper
401
Supported Paper Sizes
401
Moisture Content
402
Special Paper
404
Thick Paper
406
Colored Paper
407
Preprinted Paper
407
Recycled Paper
407
Advertisement
Kyocera ECOSYS M3540idn Service Manual (484 pages)
Brand:
Kyocera
| Category:
All in One Printer
| Size: 44.65 MB
Table of Contents
Service Manual
1
Notation of Products in the Manual
2
Revision History
3
Safety Precautions
5
Safety Warnings and Precautions
6
Symbols
6
Installation Precautions
7
Precautions for Maintenance
8
Miscellaneous
9
Contents
11
Maintenance Mode
11
Specifications
11
Troubleshooting
11
Specifications
17
Main Part Appearance
21
Parts Names
21
A Connector and an Inside
22
Option
24
Basic Model
25
Operation Panel
25
Hypas Model
26
Machine Cross Section
27
Option Composition
28
Installation Environment
29
Unpacking and Installation
30
Install the Paper Feeder (Option)
32
Precaution for Carrying the Machine
32
Remove the Tapes and Spacer
32
Setup of a Toner Container
33
Connecting at Network
36
Connecting at USB
36
Connecting the Cable
36
Installing the Waste Toner Box
36
Loading Paper
37
Before Loading Paper
39
Replace the Operation Panel Sheet (Except 240V AC Model)
40
Connecting the Power Code
41
Setting of the Fuser Pressure Release Lever (40 Ppm Model Only)
41
Installing Software
42
Power on
42
Clearing the Counter (Maintenance Item U927)
43
Exit Maintenance Mode
43
Output an Own-Status Report (Maintenance Item U000)
43
Setting the Country Code (Maintenance Item U600) (with Fax Model Only)
43
Installing an Accessories Option
44
Installing the SD Card
44
Installing the Expansion Memory
45
Installing the HD-6/HD-7(SSD)
46
Installing the IC Card Reader Holder (50/60 Ppm Model Only)
48
Enabling IC Card Authentication
51
Executing a Maintenance Item
53
Maintenance Mode
53
Maintenance Modes Item List
54
Contents of the Maintenance Mode Items
59
Event Log
60
Service Status Page
64
Engine Information
65
Error Codes
70
U001/Exit Mainte
70
U002/Set Factory Def
70
U004/Machine No.
71
U010/Set Mainte ID
72
U019/Firm Version
73
U021/Init Memory
74
U025/Firm Update(S)
75
U034/Adj Paper Timing
76
U065/Adj Scn
79
U066/Table Timing
81
U067/Table Center
82
U068/DP Scn Start Pos
83
U070/Adj DP Motor
84
Adjustment: Leading Edge Registration
85
U071/DP Timing
85
Adjustment: Trailing Edge Registration
86
U072/DP Center
87
U130/Set Toner Install
88
U147/Set Toner Apply
89
U201/Init Touch Panel (Hypas Only)
90
U203/Chk DP Ope
91
Display Description
92
U207/Chk Panel Key
92
U222/Set IC Card Type
93
U250/Mnt Cnt Pre-Set
94
U251/Clr Mnt Cnt
95
U252/Set Dest
96
U253/Sel D/S Count
97
U260/Set Count Mode
97
U265/Set Model Dest
98
U285/Set Svc Sts Page
98
U332/Adj Calc Rate
99
U339/Chk Drum Heater
100
U345/Set Mnt Time Disp
101
U346/Slct Sleep Mode
102
U402/Adjust Margin
103
U403/Scan Margin Tbl
104
U404/Scan Margin DP
105
U411/Auto Adj Scn
106
U425/Set Target
110
U520/Set TDRS
113
U600/Init All Data
115
U601/Init Keep Data
117
U603/User Data 1
118
U604/User Data 2
119
U605/Clr Data
119
U610/System Setting 1
120
U611/System Setting 2
122
U612/System Setting 3
123
U620/FAX System
124
U625/Set Comm
125
U630/Comm Ctrl 1
126
U631/Comm Ctrl 2
128
U632/Comm Ctrl 3
130
U633/Comm Ctrl 4
131
Setting the Number of Times of DIS Signal Reception
132
Setting the Reference for RTN Signal Output
132
U634/Comm Ctrl 5
133
U640/Comm Time 1
134
Setting: T0 Time out
135
Setting: T1 Time out
135
U641/Comm Time 2
135
Setting: T2 Time out
136
Setting: Tb1 Time out
136
Setting: Tb2 Time out
137
Setting: Tc Time out
137
Setting: Td Time out
137
U650/Modem 1
138
U651/Modem 2
139
U660/Set Calls
140
Setting: Busy Tone
141
Setting: DC Loop
141
Setting: PBX Setting
141
U670/Output List
142
U695/Custom FAX Func
143
U699/Set Soft SW
144
U901/Clr Paper FD Cnt
147
U905/Option Cnt
148
U910/Clr Coverage Dat
149
U917/R/W Bkup Data
150
U920/Chg Cnt
152
U927/Clr Chg/Life Cnt
153
U928/Life Cnt
153
U969/Toner Area Code
154
U995/Mem Data Indi
154
Executing a Service Mode
155
Service Setting
156
Description of Service Mode
157
Jam Lacation Indicators
163
Paper Misfeed Indication
163
Machine + PF (Option)
164
Paper Misfeed Detection Condition
164
List of JAM Code
165
First Check Items
171
Troubleshooting
171
Paper Jam at Feeding from Cassette 1
177
Paper Jam at Feeding from Cassette 2 (Paper Feerder)
178
Paper Jam at Feeding from Multi Paper Feed
179
Paper Jam at the Duplex Re-Feeding Part
180
Electrical Parts that Could Cause Paper Jam at the Transfer , the Fuser and the Eject Parts
181
Self Diagnostic Codes
182
Self-Diagnostic Function
182
Check the Control Software and Upgrade
189
Check the Control Software and Upgrade to the Latest, if Necessary
189
Confirm that the Wiring Connector Is
189
Connect Right PWB and Control PWB (YC29)
189
If the Wiring Is Disconnected, Shorted or Grounded, Replace the Wiring
189
Replace the Control PWB and Check for Correct Operation
189
Replace the Main Motor
189
Table of Contents
189
Image Formation Problems
205
Poor Image (Due to DP and Scanner Reading)
206
No Image Appears (Entirely White)
207
DP-Scanning
208
No Image Appears (Entirely Black)
209
Image Is too Light
210
The Background Is Colored
212
White Streaks Are Printed Vertically
214
Black Streaks Appear Longitudinally
216
Streaks Are Printed Horizontally
218
One Side of the Print Image Is Darker or Brighter than the Other
220
Black Dots Appear on the Image
222
Image Is Blurred
223
The Leading Edge of the Image Is Consistently Misaligned with the Original
225
Part of Image Is Missing
226
Image Is out of Focus
228
Image Center Does Not Align with the Original Center
230
Moires
231
Skewed Image
232
Abnormal Image
233
Poor Image (Image Rendering Problems: Printer Engine)
234
Uneven Density Longitudinally
245
Uneven Density Horizontally
246
Offset Occurs
248
Image Is Partly Missing
249
Poor Grayscale Reproducibility
250
Unevenly Repeating Horizontal Streaks in the Printed Objects. Spots in the Printed Objects
251
Image Is Blurred (Shifted Transferring)
252
Paper Is Wrinkled
254
Fusing Is Loose
255
Dirty Paper Edges with Toner
256
Dirty Reverse Side of Paper
257
Electric Problems
258
Mechanical Problems
265
Scan to SMB Error Codes
267
Send Error Code
267
Scan to FTP Error Codes
268
Scan to E-Mail Error Codes
270
Error Codes
272
Table of General Classification
273
U004XX Error Code Table: Interrupted Phase B
276
U006XX Error Code Table: Problems with the Unit
277
U008XX Error Code Table: Page Transmission Error
277
U009XX Error Code Table: Page Reception Error
277
U010XX Error Code Table: G3 Transmission
278
U011XX Error Code Table: G3 Reception
280
U017XX Error Code Table: V.34 Transmission
281
U018XX Error Code Table: V.34 Reception
282
U023XX Error Code Table: Relay Command Abnormal Reception
282
U044XX Error Code Table: Encrypted Transmission
282
Drum Unit
283
Precautions for Assembly and Disassembly
283
Toner
283
How to Tell a Genuine Kyocera Toner Container
284
Cassette Paper Feed Section
285
Component Formation
285
Control Block Diagram
286
Detaching and Refitting the Primary Paper Feed Unit and the Pickup Roller
287
Detaching and Refitting the Retard Roller
287
MP Tray Paper Feed Section
289
Detaching and Refitting the MP Paper Feed Pulley
291
Conveying Section
294
Image Scanner Section
296
Optical Section
296
Detaching and Refitting the Exposure Lamp
298
Detaching and Refitting the Image Scanner Unit
302
Laser Scanner Section
305
Detaching and Refitting the Laser Scanner Unit
307
Develolper Unit
310
Developer Section
310
Detaching and Refitting the Developer Unit
312
Chager Roller Unit
314
Drum Section
314
Detaching and Refitting the Drum Unit
316
Cleaning Unit
317
Transfer/Separation Section
318
Detaching and Refitting the Transfer Roller
320
Detaching and Refitting the Separation Needle Holder
321
Fuser and Eject/Feedshift Section
322
40 Ppm Model
324
Detaching and Refitting the Fuser Uni
326
Eject Section
330
Detaching and Refitting the Eject Unit
334
Duplex Conveying Section
344
Detaching and Refitting the Duplex Conveying Unit
346
Document Processer
354
Original Feed Section
354
Detaching and Refitting DP Paper Feed Roller or DP Pickup Pulley
356
Detaching and Refitting the DP Separation Pad
358
Original Conveying Section and Switchback/Eject Section
359
Detaching and Refitting the DP Switchback Motor
361
Detaching and Refitting the DP Paper Feed Motor and the DP Conveying Motor
362
Detaching and Refitting the DP Unit
364
Covers
365
Detaching and Refitting the Inlet Cover and the Interface Slot Cover
367
Detaching and Refitting the Right Stay Cover
367
Detaching and Refitting the Left Upper Cover
368
Detaching and Refitting the Right Upper Cover
368
Detaching and Refitting the Center Stay Cover
369
Detaching and Refitting the Front Right Cover
369
Detaching and Refitting the Top Tray Cover
370
Detaching and Refitting the Rear Left Cover
373
Detaching and Refitting the Right Lower Cover
373
Detaching and Refitting the Left Lower Cover
374
Detaching and Refitting the Left Middle Cover and the Waste Toner Box Cover
374
Detaching and Refitting the Rear Cover
375
Detaching and Refitting the Main Driving Motor Unit
376
Detaching and Refitting the Paper Feed Driving Motor Unit
377
Detaching and Refitting the Language Sheets
378
Detaching and Refitting the FAX Control PWB (FAX Model Only)
380
Direction of Installing the Principal Fan Motors
381
Pwbs
383
List of Correspondences of PWB Names
385
Switches and Sensors
387
Motors
390
List of Correspondences of Motor Names
391
Upgrading the Firmware
395
Connector Position
397
Control PWB (CONPWB)
397
PWB Photograph
397
Connector Lists
398
Detaching and Refitting the PWB. (CONPWB)
406
Remarks on Control PWB Replacement
409
Connect Left PWB (CLPWB)
411
Detaching and Refitting the PWB. (C-LPWB)
414
Connect Right PWB (CRPWB)
421
Detaching and Refitting the PWB. (CRPWB)
425
High Voltage PWB (HVPWB)
428
Detaching and Refitting the PWB. (HVPWB)
430
Power Source PWB (PSPWB)
440
Detaching and Refitting the PWB. (PSPWB)
442
Operation Panel PWB (OPPWB) for Hypas Model
446
Detaching and Refitting the PWB. (OPPWB)
450
Operation Panel PWB (OPPWB) for Basic Model
452
Appendixes
455
List of Maintenance Parts
455
Maintenance Kits
456
Repetitive Defects Gauge
457
Firmware Environment Commands
458
Using FRPO Commands for Reprogramming the Firmware
458
Chart of Image Adjustment Procedures
467
Image Quality
469
Wiring Diagram (40 Ppm (LED Model))
470
Wiring Diagram (40 Ppm (Hypas Model))
473
Wiring Diagram (50/60 Ppm (Hypas Model))
476
Adjustment of Paper Size
480
Installation Guide
480
Removing Paper Jams
481
Kyocera ECOSYS M3540idn Operation Manual (205 pages)
Brand:
Kyocera
| Category:
Fax Machine
| Size: 6.65 MB
Table of Contents
Table of Contents
2
Contents
6
Preface
6
About the FAX Operation Guide (this Guide)
6
Structure of the Guide
6
Conventions Used in this Guide
7
1 Legal and Safety Information
9
Notice
10
Safety Conventions in this Guide
10
About this Operation Guide
11
Legal Notice
11
Fcc Part 68 Requirements
11
Important Safety Instructions
12
Importantes Mesures de Securite
12
Canadian IC Requirements
13
Conditions de L'IC Canadienne
13
Declarations to European Directives
13
Technical Regulations for Terminal Equipment
14
Network Compatibility Declaration
14
Trademark Information
15
2 Before Using the Fax Machine
16
Part Names and Functions
17
Machine
17
Document Processor
18
Operation Panel
19
Touch Panel
20
Home Screen
20
Enter Key and Quick No. Search Key
21
Quick Setup Wizard (Fax Setup)
22
Fax Setup Items
22
Fax Setup Procedure
23
Setting Date and Time
24
PBX Setting (Europe Only)
26
Registering Destinations in the Address Book
27
Adding a Destination (Address Book)
27
Adding a Group
30
Editing and Deleting Address Book Entries
32
Printing Address List
34
Adding a Destination on One Touch Key
35
Editing and Deleting One Touch Key
36
3 Sending Faxes
37
Basic Transmission Procedure
38
Checking the Send Status
39
Priority Override Send
40
Cancelling the Transmission
41
Using Redial
43
Methods for Entering the Destination
44
Entering the Destination Fax Number with the Numeric Keys
44
Choosing from the Address Book
46
Choosing by One Touch Key
48
Using the Speed Dial Key
49
Broadcast Transmission
50
Login/Logout
52
Logging in When User Accounting Has Been Enabled
52
Logging in When Job Accounting Has Been Enabled
53
Fax Transmission Functions
54
Quiet Mode
55
Original Size
55
Original Orientation
55
Duplex
55
FAX TX Resolution
56
Density
56
Original Image
56
Continuous Scan
56
FAX Direct Transmission
57
Cancelling Direct Transmission
57
Manual Send
58
FAX Delayed Transmission
59
Cancelling and Sending Delayed Transmissions (Queued)
60
Standby Transmission
61
Interrupt Send
62
Job Finish Notice
63
File Name Entry
63
FAX TX Report
63
Using Chain Dial
64
Using Favorites
66
4 Receiving Faxes
67
Reception Method
67
FAX Automatic Reception
68
Reception Method
68
Checking and Changing the Reception Method
68
Flow of Reception
69
Canceling Reception (Disconnection of Communication)
69
Manual Reception
70
Flow of Reception
70
Fax Reception Functions
71
Fax Reception Settings
72
Duplex Printing
72
In 1 Print
72
Batch Print
72
Reception Date/Time
72
Media Type for Print Output
73
5 Using Convenient Fax Functions
74
Forward Settings
75
Type of Forwarding Destination
75
Setting Forwarding
75
Registering Forwarding Destination
75
Changing and Deleting Registration Contents
76
Forwarding Time Setting
77
File Format Setting
78
File Separation
78
E-Mail Subject Add. Info. Setting
79
FTP Encrypted TX Setting
79
Print Setting
79
File Name Registration
80
Settings for Forwarding from Command Center RX (Forward Settings)
81
Sub Address Box Function
82
Sub Address Box
82
Sub Address Communication
82
Sub Address Box
83
Registering a Sub Address Box
83
Changing/Deleting Sub Address Box
84
Printing Originals from a Sub Address Box
85
Checking Details
86
Deleting Originals after Printing from a Sub Address Box
86
Deleting Originals from a Sub Address Box
87
Printing a Sub Address Box List
88
Sub Address Transmission
89
Polling Communication
91
Polling Transmission
91
Cancelling Polling Transmissions
93
Polling Reception
94
Sub Address Bulletin Board Reception
94
Printing from a Polling Box
96
Checking Details
97
Deleting Originals in a Polling Box
97
Encryption
98
Registering an Encryption Key
99
Changing and Deleting Registration Contents of Encryption Key
100
Using the Encrypted Transmission
101
Setting the Encrypted Reception
103
Using a Connected Telephone
104
FAX/TEL Auto Switch Reception
104
Fax/Answering Machine Auto Switch Reception
106
DRD Reception (Available for Inch Versions Only)
108
Manual Send
110
Manual Reception
111
Remote Switch Function
113
6 Sending Faxes from PC
114
Flow of Network FAX Sending
115
Flow of Network FAX Receiving
115
Setup
116
Installing the Fax Driver
117
Uninstalling the FAX Driver
119
Basic Transmission
120
Configuring the Driver Default Settings
123
Default Settings Dialog Box
124
Changing Transmit Settings
127
Using Cover Pages
131
Cover Page Registration (Default Settings)
136
Transmission Control
141
7 Managing Jobs
142
Various Tools for Checking Transmission Results and Registration Status
143
Checking FAX Job History
144
Displaying Job Log Screen
144
Printing Administrative Reports (Result Report Setting)
145
Send Result Reports
145
Report for Job Canceled before Sending
146
Recipient Format
146
FAX RX Result Reports
147
Activity Report (Outgoing FAX Report and Incoming FAX Report)
148
Printing Activity Reports
148
Automatic Printout
149
Status Page
150
Reporting FAX Receipt Result by E-Mail
151
Confirmation Screen of Destinations
153
8 Fax Settings
155
Default Fax Settings
155
Default Fax Settings
156
Operation Method
156
Default Login and Password
157
System Menu Settings
157
Report
158
System Menu Settings
158
Report
159
Report Print
159
Cassette/Mp Tray Settings
160
Common Settings
160
Fax
161
Adjustment/Maintenance
164
Transmission Restriction
165
Registering Permit FAX no
167
Changing and Deleting Permit FAX no
168
Registering Reject FAX no
169
Changing and Deleting Reject FAX no
169
Registering Permit ID no
171
Changing and Deleting Permit ID no
171
Setting Send Restriction
172
Setting Reception Restriction
173
Unknown Number Reception
173
Unusable Time
174
Account Management
176
9 Troubleshooting
178
Indicators During Sending/Receiving Operation
179
Responding to an Attention Indicator Flashes
179
Precautions When Turning Power off
180
Messages
181
Error Code List
182
Troubleshooting
185
Advertisement
Kyocera ECOSYS M3540idn Quick Manual (48 pages)
Brand:
Kyocera
| Category:
All in One Printer
| Size: 5.46 MB
Table of Contents
Connect Cable
6
Loading Paper
7
Connect Power Cord
8
Quick Setup Wizard
11
Print Status Page
16
Cancel Printing
22
Status Page
31
Private Printing
39
Troubleshooting
44
Clear Paper Jam
46
Kyocera ECOSYS M3540idn First Steps Quick Installation Manual (48 pages)
Brand:
Kyocera
| Category:
All in One Printer
| Size: 5.57 MB
Table of Contents
Connect Cable
6
Loading Paper
7
Connect Power Cord
8
Quick Setup Wizard
11
Cancel Printing
22
Private Printing
39
Troubleshooting
44
Clear Paper Jam
46
Kyocera ECOSYS M3540idn Operation Manual (9 pages)
Brand:
Kyocera
| Category:
All in One Printer
| Size: 0.29 MB
Table of Contents
Operation Guide
1
Table of Contents
2
Security Kit Functions
3
Touch Panel Display after the Security Kit Is Installed
4
Installing the Security Kit
5
Changing Security Password
6
System Initialization
7
Warning Message
8
Advertisement
Related Products
Kyocera ECOSYS M3540dn
Kyocera MIP-650
Kyocera MIP-670
Kyocera MIP-2400
Kyocera ECOSYS M3550idn
Kyocera ECOSYS M3560idn
Kyocera MP-80/FAX System(T)
Kyocera TASKalfa MA4500ci
Kyocera ECOSYS FS-1035MFP/DP
Kyocera ECOSYS FS-1135MFP
Kyocera Categories
All in One Printer
Cell Phone
Printer
Printer Accessories
Software
More Kyocera Manuals
Login
Sign In
OR
Sign in with Facebook
Sign in with Google
Upload manual
Upload from disk
Upload from URL