Sign In
Upload
Manuals
Brands
Krone Manuals
Lawn Mower
Swadro TC 760
Krone Swadro TC 760 Rotary Rake Manuals
Manuals and User Guides for Krone Swadro TC 760 Rotary Rake. We have
3
Krone Swadro TC 760 Rotary Rake manuals available for free PDF download: Original Operating Instructions
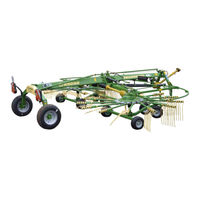
Krone Swadro TC 760 Original Operating Instructions (138 pages)
Rotary Rake
Brand:
Krone
| Category:
Lawn Mower
| Size: 3.61 MB
Table of Contents
1 Table of Contents
3
2 To this Document
7
Validity
7
Re-Ordering
7
Further Applicable Documents
7
Target Group of this Document
7
How to Use this Document
7
Directories and References
7
Direction Information
8
Term "Machine
8
Figures
8
Scope of Document
8
Means of Representation
8
Conversion Table
11
3 Safety
12
Purpose of Use
12
Intended Use
12
Service Life of the Machine
12
Basic Safety Instructions
12
Importance of the Operating Instructions
12
Personnel Qualification
13
Children in Danger
13
Coupling
13
Structural Changes to the Machine
13
Additional Equipment and Spare Parts
14
Workstations on the Machine
14
Operational Safety: Technically Perfect Condition
14
Danger Zones
16
Keeping Safety Devices Functional
18
Personal Protective Equipment
18
Safety Signs on the Machine
19
Traffic Safety
19
Parking the Machine Safely
20
Consumables
20
Sources of Danger on the Machine
21
Dangers Associated with Certain Activities: Work on the Machine
22
Dangers Associated with Certain Activities: Working on Wheels and Tyres
23
Behaviour in Hazardous Situations and When Accidents Occur
23
Safety Routines
24
Stopping and Securing the Machine
24
Supporting Lifted Machine and Machine Parts Securely
24
Safely Checking the Oil Level and Changing the Oil and Filter Element
25
Safety Stickers on the Machine
26
Position and Meaning of the Safety Stickers on the Machine
26
Re-Ordering Safety Labels and Information Labels
31
Attaching Safety Labels and Information Labels
31
Contact
31
Safety Equipment
32
Stop Cocks on the Machine
32
SMV Emblem
32
Support Jack
33
Safety Chain
33
Overload Protection
34
Wheel Chocks
34
4 Machine Description
36
Machine Overview
36
Identification Plate
39
Information Required for Questions and Orders
39
5 Technical Data of the Machine
40
Technical Data
40
Consumables
44
Tyres
44
Airborne Sound Emission
44
Ambient Temperature
44
6 Control and Display Elements
45
7 Commissioning
48
First Installation
48
Preparations on Tractor
49
Adjusting the Lower Suspension Arms
49
Connecting the Lower Link
49
PTO Shaft
50
Length Adjustment
50
Regulating Direction of Travel
51
Checking / Setting Distance between Tine Arm and Outrigger Arm
52
Basic Setting of Rotor Inclination
53
8 Start-Up
54
Preparations on Tractor
55
Adjusting the Lower Suspension Arms
55
Connect the Machine to the Tractor
56
Connecting the Hydraulic Lines
57
Lighting Connection
58
Connecting the Operation
59
Install the PTO Shaft
60
Using the Safety Chain
61
9 Operation
63
Removing the Tine Protections from the Tine Tips
63
Lowering Outrigger Arms into Working Position
64
For Design Without Single-Rotor Lifting Mechanism
64
For Design with Hydraulic Single-Rotor Lifting Mechanism
65
For Plus Version
66
Swivel Tine Arms to Working Position
67
For Design with Collapsible Tine Arm
68
Move the Hoop Guards to the Working Position
68
Lowering Additional Rotor to Working Position
69
Setting the Working Height
70
With Mechanically Adjustable Working Height
70
For Plus Version
71
Adjusting the Working Width
73
Move the Hoop Guards to Transport Position
75
Swivelling Tine Arms into Transport Position
76
With Rigid Tine Arms Design
76
For Design with Collapsible Tine Arm
77
Raising Outrigger Arms into Transport Position
78
For Design Without Single-Rotor Lifting Mechanism
78
For Design with Hydraulic Single-Rotor Lifting Mechanism
79
For Plus Version
80
Protecting the Tine Tips (Transport Position and Rotary Rake Switched Off)
81
Swivelling Parking Support into Transport Position
82
Raising Additional Rotor to Transport Position
83
Selecing Rotor Operation
84
For Design with Hydraulic Single-Rotor Lifting Mechanism
84
In Case of Electro-Hydraulic Single-Rotor Lifting Mechanism Design
85
Travelling Speed und Drive Speed
86
Swathing
86
10 Driving and Transport
87
Preparations for Road Travel
88
Driving on Slopes
89
Switching off the Machine
90
11 Settings
91
Setting the Rotor Inclination
92
Rotor Chassis (Serial)
92
For the "Trailing Guide Wheels" Version
93
For the "Tandem Chassis with Trailing Wheels" Version
94
Fixing the Trailing Guide Wheels
95
Calibrating the Sensor - with Electrical Rotor Height Adjustment Design
96
Setting the Speed of the Additional Rotor
97
Setting the Spreading Angle of the Additional Rotor
98
Setting of Tines
99
12 Maintenance
101
Spare Parts
101
Maintenance Table
102
Tightening Torques
103
Metric Thread Screws with Control Thread
103
Metric Thread Screws with Fine Thread
104
Metric Thread Screws with Countersunk Head and Hexagonal Socket
104
Tightening Torques for Locking Screws and Bleed Valves on the Gearboxes
105
Deviating Torque
106
Testing the Screws on the Tines
106
Torque of Wheels on the Running Gear
106
Tyres
107
Checking and Maintaining Tyres
107
Replacing the Tine Arms (in Case of Repair)
108
Replacing the Tines (in Case of Repairs)
110
13 Maintenance - Lubrication Chart
111
Lubrication Points on the Universal Shafts
111
Lubrication Points on the Machine
112
Lubrication Points on the Additional Rotor
114
14 Maintenance - Hydraulic System
115
Circuit Diagrams of the Hydraulic System
115
15 Maintenance - Gearbox
116
Main Gearbox
117
16 Special Equipment
118
Tine Loss Safeguard
118
Chain for Height Restriction of Suspension Arms
119
17 Malfunctions - Causes and Remedies
120
18 Placing in Storage
122
At the End of the Harvest Season
122
Before the Start of the New Season
123
19 Disposal of the Machine
124
20 Appendix
125
21 Index
127
Advertisement
Krone Swadro TC 760 Original Operating Instructions (116 pages)
Rotary Rake
Brand:
Krone
| Category:
Farm Equipment
| Size: 3.56 MB
Table of Contents
1 Table of Contents
3
2 Foreword
6
3 To this Document
7
Validity
7
Identifying Symbols in the Operating Instructions
7
Direction Information
7
Means of Representation
8
4 Safety
9
Purpose of Use
9
Intended Use
9
Service Life of the Machine
9
Basic Safety Instructions
9
Importance of the Operating Instructions
9
Personnel Qualification
10
Children in Danger
10
Coupling
10
Structural Changes to the Machine
10
Additional Equipment and Spare Parts
11
Workstations and Passengers
11
Operational Safety: Technically Perfect Condition
11
Danger Zones
13
Keeping Safety Devices Functional
15
Personal Protective Equipment
15
Safety Signs on the Machine
16
Traffic Safety
16
Parking the Machine Safely
17
Consumables
17
Sources of Danger on the Machine
18
Dangers Associated with Certain Activities: Work on the Machine
19
Dangers Associated with Certain Activities: Working on Wheels and Tyres
20
Behaviour in Hazardous Situations and When Accidents Occur
20
Safety Routines
21
Stopping and Securing the Machine
21
Supporting Lifted Machine and Machine Parts Securely
21
Coupling the Machine Safely
22
Uncoupling the Machine Safely
22
Preparing the Machine for Repair, Maintenance and Adjustment Work
23
Starting the Machine Safely
23
Safety Stickers on the Machine
24
Position and Meaning of the Safety Stickers on the Machine
24
Re-Ordering the Adhesive Safety and Information Labels
27
Affixing the Adhesive Safety and Information Labels
27
Contact
27
5 Machine Description
28
Machine Overview
28
Identification Plate
30
Information Required for Questions and Orders
30
Contact
30
Overload Protection
31
6 Technical Data of the Machine
32
Technical Data
32
Tyres
36
Consumables
36
Filling Quantities and Lubrication Designations for Gearboxes
36
7 Control and Display Elements
37
8 Commissioning
40
General
40
First Installation
40
Preparations on Tractor
41
Adjusting the Lower Suspension Arms
41
Connecting the Lower Link
41
PTO Shaft
42
Length Adjustment
42
Regulating Direction of Travel
43
9 Start-Up
44
Preparations on Tractor
45
Adjusting the Lower Suspension Arms
45
Connect the Machine to the Tractor
46
Connecting the Hydraulic Lines
47
Lighting Connection
48
Connecting the Operation
49
Install the PTO Shaft
50
Using the Safety Chain
51
Swivelling Parking Support into Transport Position
53
10 Driving and Transport
54
Preparations for Road Travel
55
Travelling on an Incline
56
Switching off the Machine
57
11 Operation
58
Removing the Tine Protections from the Tine Tips
58
Lowering Outrigger Arms into Working Position
59
For Design Without Single-Rotor Lifting Mechanism
59
For Design with Hydraulic Single-Rotor Lifting Mechanism
60
In Case of Electro-Hydraulic Single-Rotor Lifting Mechanism Design
61
Swivel Tine Arms to Working Position
62
For Design with Collapsible Tine Arm
63
Move the Hoop Guards to the Working Position
63
Setting the Working Height
64
Adjusting the Working Width
66
Move the Hoop Guards to Transport Position
68
Swivelling Tine Arms into Transport Position
69
With Rigid Tine Arms Design
69
Fixing the Rotors
69
For Design with Collapsible Tine Arm
70
Raising Outrigger Arms into Transport Position
71
For Design Without Single-Rotor Lifting Mechanism
71
For Design with Hydraulic Single-Rotor Lifting Mechanism
72
In Case of Electro-Hydraulic Single-Rotor Lifting Mechanism Design
73
Protecting the Tine Tips (Transport Position and Rotary Rake Switched Off)
74
Selecing Rotor Operation
75
For Design with Hydraulic Single-Rotor Lifting Mechanism
75
In Case of Electro-Hydraulic Single-Rotor Lifting Mechanism Design
76
Travelling Speed und Drive Speed
77
Swathing
77
12 Settings
79
Setting the Rotor Inclination
80
Rotor Chassis (Serial)
80
For the Version with Trailing Guide Wheels (Optional)
81
With Tandem Chassis Version (Optional)
82
Fixing the Trailing Guide Wheels
83
13 Maintenance
84
Spare Parts
84
Maintenance Table
85
Tightening Torques
86
Tightening Torques (Countersunk Screws)
87
Deviating Torque
88
Testing the Screws on the Tines
88
Torque of Wheels on the Running Gear
88
Tyres
89
Checking and Maintaining Tyres
89
Replacing the Tine Arms (in Case of Repair)
90
Replacing the Tines (in Case of Repairs)
92
14 Maintenance - Lubrication Chart
93
Lubrication Points on the Universal Shafts
93
Lubrication Points on the Machine
94
15 Maintenance - Hydraulic System
96
16 Maintenance - Gearbox
97
Main Gearbox
98
17 Special Equipment
99
Tine Loss Safeguard
99
Chain for Height Restriction of Suspension Arms
100
18 Placing in Storage
101
Special Safety Instructions
101
At the End of the Harvest Season
102
Before the Start of the New Season
103
Special Safety Instructions
103
19 Malfunctions - Causes and Remedies
104
20 Disposal of the Machine
106
21 Appendix
107
22 Index
108
Krone Swadro TC 760 Original Operating Instructions (102 pages)
Rotary Swather, from serial no.: 890 251
Brand:
Krone
| Category:
Farm Equipment
| Size: 4.88 MB
Table of Contents
1 Table of Contents
3
2 Foreword
6
3 To this Document
7
Validity
7
Direction Information
7
Identifying Symbols in the Operating Instructions
7
Identification of the Hazard Warnings
7
4 Safety
8
Purpose of Use
8
Intended Use
8
Personnel Qualification and Training
8
Dangers in Case of Non-Compliance with the Safety Instructions
8
Safety-Conscious Work Practices
8
Safety Instructions and Accident Prevention Regulations
9
Hitched Implements
10
PTO Operation
11
Hydraulic System
12
Tyres
12
Maintenance
13
Working in the Vicinity of Power Transmission Lines
14
Unauthorised Conversion/Modification and Spare Parts Production
14
Inadmissible Modes of Operation
14
Safety Instructions on the Machine
14
5 Machine Description
16
Machine Overview
16
Identification Plate
18
Information Required for Questions and Orders
18
Contact for KRONE NORTHAMERICA
18
Introduction
19
Re-Ordering the Adhesive Safety and Information Labels
19
Affixing the Adhesive Safety and Information Labels
19
Position of the Adhesive Safety Stickers on the Machine
20
6 Technical Data of the Machine
22
Technical Data
22
Lubricants
28
Filling Quantities and Lubrication Designations for Gearboxes
28
Tyres
28
7 Control and Display Elements
29
8 Commissioning
32
General
32
First Installation
33
Preparations on Tractor
33
Adjusting the Lower Suspension Arms
33
Connecting the Lower Link
33
PTO Shaft
34
Length Adjustment
34
Regulating Direction of Travel
35
9 Start-Up
36
Mounting Onto the Tractor
36
Connecting the Lower Link
36
Hydraulics
37
Special Safety Instructions
37
Connecting the Hydraulic Lines
38
Lighting Connection
39
Connecting the Electrical Controls
40
Install the PTO Shaft
41
Using the Safety Chain
42
Swivelling Parking Support into Transport Position
43
10 Driving and Transport
44
Retracting the Working Width
45
Swivelling Tine Arms into Transport Position
46
With Rigid Tine Arms Design
46
Fixing the Rotors
46
For Design with Collapsible Tine Arm
47
Lifting the Rotor Arms to Transport Position
48
For Design Without Single-Rotor Lifting Mechanism
48
For Design with Hydraulic Single-Rotor Lifting Mechanism
49
For Design with Electrical Single-Rotor Lifting Mechanism
50
Protecting the Tine Tips (Transport Position and Rotary Rake Switched Off)
51
11 Operation
52
Preparation for Swathing
52
Removing the Tine Protections from the Tine Tips
52
Lowering the Rotor Arms into Working Position
53
For Design Without Single-Rotor Lifting Mechanism
53
For Design with Hydraulic Single-Rotor Lifting Mechanism
54
For Design with Electrical Single-Rotor Lifting Mechanism
55
Swivel Tine Arms to Working Position
56
For Design with Collapsible Tine Arm
57
Move the Hoop Guards to the Working Position
57
Move the Hoop Guards to Transport Position
58
Adjusting the Working Width
59
Setting the Working Depth
61
Selecing Rotor Operation
63
Rotor Operation (with Hydraulic Single-Rotor Lifting Mechanism Design)
63
Rotor Operation (with Electric Single-Rotor Lifting Mechanism Design)
64
Travelling Speed und Drive Speed
65
Swathing
65
Overload Protection
66
Travelling on an Incline
66
Parking
67
12 Settings
68
Setting the Rotor Inclination
68
Rotor Chassis (Serial)
68
With Trailing Wheel Version (Optional)
70
With Tandem Chassis Version (Optional)
71
13 Maintenance
72
Special Safety Instructions
72
Compensation Spring(S)
72
Test Run
72
Maintenance Table
73
Tightening Torques
74
Tightening Torques (Countersunk Screws)
75
Deviating Torque
76
Testing the Screws on the Tines
76
Torque of Wheels on the Running Gear
76
Tyres
77
Checking and Maintaining Tyres
77
Replacing the Tine Arms (in Case of Repair)
78
Replacing the Tines (in Case of Repairs)
80
14 Maintenance - Lubrication Chart
81
Special Safety Instructions
81
Lubrication Points on the Universal Shafts
81
Lubrication Points on the Machine
82
15 Maintenance - Hydraulic System
84
16 Maintenance - Gearbox
85
Main Gearbox
85
17 Special Equipment
86
Tine Loss Safeguard
86
Chain for Height Restriction of Suspension Arms
87
18 Placing in Storage
88
Special Safety Instructions
88
At the End of the Harvest Season
89
Before the Start of the New Season
90
Special Safety Instructions
90
19 Malfunctions - Causes and Remedies
91
Special Safety Instructions
91
20 Appendix
93
21 Index
94
Advertisement
Advertisement
Related Products
Krone Swadro TC 680
Krone Swadro TC 880
Krone Swadro TC 1000
Krone Swadro TC 640
Krone Titan 6/50 GL
Krone TITAN 6/36 D
Krone TITAN 4/32 L
Krone Swadro TS 620
Krone Swadro TS 620 Twin
Krone Swadro TS 740
Krone Categories
Farm Equipment
Lawn Mower
Lawn and Garden Equipment
Utility Vehicle
Industrial Equipment
More Krone Manuals
Login
Sign In
OR
Sign in with Facebook
Sign in with Google
Upload manual
Upload from disk
Upload from URL