Sign In
Upload
Manuals
Brands
Komatsu Manuals
Excavators
PW180-7E0
Komatsu PW180-7E0 Manuals
Manuals and User Guides for Komatsu PW180-7E0. We have
1
Komatsu PW180-7E0 manual available for free PDF download: Operation & Maintenance Manual
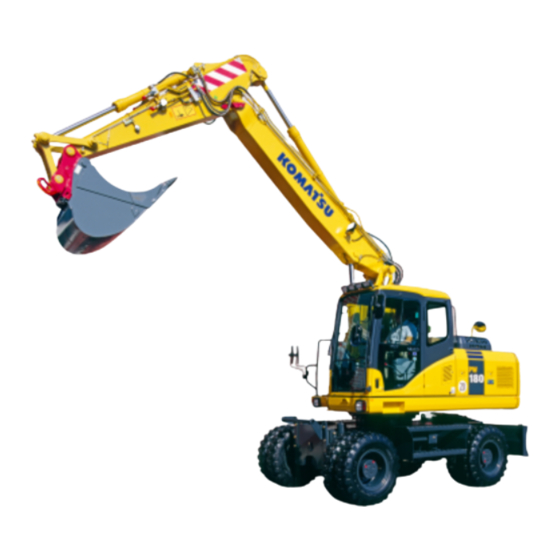
Komatsu PW180-7E0 Operation & Maintenance Manual (450 pages)
WHEELED EXCAVATOR
Brand:
Komatsu
| Category:
Excavators
| Size: 29.7 MB
Table of Contents
Foreword
3
Foreword
4
Safety Information
5
Safety Messages
5
Noise Emission Levels
6
Vibration Levels
7
Guide to Reduce Vibration Levels on Machine
7
Emergency Steering
9
Introduction
10
Intended Use
10
Running in Your New Machine
11
Locations of Plates, Table to Enter Serial No. and Distributor
12
Machine Serial No. Plate Position
12
Engine Serial No. Plate Position
12
Machine Serial Plates
13
Table of Contents
14
Safety
25
General Precautions
26
Safety Rules
26
Safety Features
26
Clothing and Personal Protective Items
26
Unauthorised Modification
27
Always Apply (Raise) Safety Lock Lever When Leaving Operator's Seat
27
Always Chock the Wheels before Going under the Machine
28
Mounting and Dismounting
28
Fire Prevention for Fuel and Oil
29
Precautions When Handling at High Temperatures
30
Machines Fitted with Wheels
30
Asbestos Dust Hazard Prevention
30
Crushing or Cutting Prevention
31
Fire Extinguisher and First Aid Kit
31
Protection against Falling or Flying Objects
32
Precautions for Attachments
33
Precautions for Accumulators
33
Emergency Exit
34
Rotating Beacon (Option)
34
Electromagnetic Interference
34
Precaution During Operation
35
Before Starting Engine
35
Safety at Worksite
35
Fire Prevention
35
In Operator's Cab
36
Ventilation for Enclosed Areas
36
Precautions for Mirrors, Windows and Lights
36
Operating Machine
37
When Starting the Engine
37
Check Direction before Starting Machine
37
Check that no One Is in the Area before Swinging or Travelling in Reverse
38
Precautions When Travelling
39
Travelling on Slopes
40
Prohibited Operations
41
Do Not Go Close to High-Voltage Cables
42
Do Not Hit Work Equipment
42
Ensure Good Visibility
42
Operate Carefully on Snow
43
Working on Loose Ground
43
Do Not Hit the Operator Cab (for Two Piece Boom Only)
43
Operations on Slopes
44
Parking the Machine
44
Transportation
45
Loading and Unloading
45
Shipping
45
Battery
46
Battery Hazard Prevention
46
Starting with Booster Cables
47
Towing
48
When Towing, Attach Wire to Frame
48
View on Transmission
48
Bucket with Hook or Bucket Link with Lifting Eye
49
General Precautions
49
Precautions for Lifting Operation
52
Handling of Fluids
53
Handling of Used Engine Oils
53
Handling of Oils
53
Precautions for Maintenance
54
Before Carrying out Maintenance
54
Warning Tag
54
Proper Tools
54
Periodic Replacement of Safety Critical Parts
54
Stop the Engine before Carrying out Inspection and Maintenance
55
Rules to Follow When Adding Fuel or Oil
55
Radiator Water Level
56
Use of Lighting
56
During Maintenance
57
Personnel
57
Attachments
57
Work under the Machine
57
Keep the Machine Clean
57
Precautions with Battery
58
Handling High-Pressure Hoses
58
Precautions with High Pressure Oil
58
Precautions When Carrying out Maintenance at High Temperature or
59
Rotating Fan and Belt
59
Waste Materials
59
Position for Attaching Safety Labels
60
Lifting Capacity Chart PW180-7E0
68
One Piece Boom - Lift Capacity Tables for 2.5 Metre Undercarriage
68
One Piece Boom - Lift Capacity Tables for 2.75 Metre Undercarriage
74
Two Piece Boom - Lift Capacity Tables for 2.5 Metre Undercarriage
80
Two Piece Boom - Lift Capacity Tables for 2.75 Metre Undercarriage
86
Overload Caution
92
Monoboom - Overload Caution
93
Two Piece Boom - Overload Caution
93
Operation
95
General View
96
General View of Machine
96
General View of Controls and Gauges
98
Explanation of Components
100
Machine Monitor
100
Basic Operation of Machine Monitor
101
If There Is Abnormality When Starting Engine
101
If any Abnormality Occurs During Operation
102
Basic Check Items
103
Caution Items
105
Emergency Stop Items
109
Meter Display Portion
112
Meters
115
Monitor Switches
119
Adjustment Screens
133
Switches
136
Control Levers, Pedals
148
Front Window
155
When Opening
155
When Closing
158
Removing Front Bottom Window
159
Emergency Exit from Operator's Cab
160
Ceiling Window
160
Clear Rain Visor
160
Pull down Sun Visor
161
Door Lock
161
Cap, Cover with Lock
162
Method of Opening and Closing Cap with Lock (for the Fuel Tank Filler Port)
162
Method of Opening and Closing Cover with Lock (Cover with Lock)
163
Fuse
164
Fuse Box 1
164
Fuse Box 2
165
Luggage Tray
166
Ashtray
166
Cup Holder
166
Hot and Cool Box
167
Cab Radio
167
Power Pick-Up Port
168
Handling Air Conditioner
169
General Locations of Control Panel
169
Method of Operation
174
Automatic Operation
174
Stopping Automatic Operation
175
Manual Operation
176
Stopping Manual Operation
177
Operation with Cold Air to Face and Warm Air to Feet
178
Defroster Operation
179
Precautions When Using Air Conditioner
181
Check, Maintain Machine Equipped with Air Conditioner
182
Other Functions
182
Self-Diagnostic Function
182
Switch Set Temperature Display between °F and °C
183
Fusible Link
184
Controller
184
Tool Box (Chassis)
184
Refuelling Pump
185
Safety
185
Procedure
185
Maintenance
186
Warning Lamps
187
Handling Accumulators
188
Control Circuit Accumulator (A)
188
Clutch Control Accumulator (B)
189
Brake Circuit Accumulators (C) × 3
189
Operation
190
Check before Starting Engine
190
Walk-Around Check
190
Check before Starting
192
Check Coolant Level, Add Water
192
Check Oil Level in Engine Oil Pan, Add Oil
193
Check Fuel Level, Add Fuel
194
Check Oil Level in Hydraulic Tank, Add Oil
195
Check Air Cleaner for Clogging
196
Check Electric Wiring
196
Check Function of Horn
197
Check for Water and Sediment in Water Separator, Drain Water
197
Adjustment of Operator's Seat (Air Suspension Seat)
199
Rearview Mirrors
201
Seat Belt
202
Fastening and Removing Seat Belt
202
Adjustment of Operator's Seat (Mechanical Seat)
203
Seat Belt
203
Operations and Checks before Starting Engine
204
Starting Engine
206
Starting in Cold Weather
207
Operations and Checks after Starting Engine
208
Warming up Operation
209
In Cold Areas (Automatic Warming-Up Operation)
212
Moving Machine off
216
Moving Machine Forward
216
3.23.10 Steering
219
3.23.11 Travelling on Public Highway
220
3.23.12 Stopping and Parking
221
Stopping Machine (Emergency)
222
Swinging (Slewing the Upper Carriage)
223
3.23.14 Operation of Work Equipment
224
Operation of Dozer and Outriggers
226
Precautions for Using the Dozer
227
3.23.15 Working Mode Selection
228
Working Mode
228
One Touch Power Max Switch
228
3.23.16 Prohibitions for Operation
229
3.23.17 Precautions for Operation
231
3.23.18 Recommendations for Travelling
232
3.23.19 Precautions When Travelling up or down Hills
233
3.23.20 How to Escape from Mud
234
When One Side Is Stuck
234
When both Sides Are Stuck
234
3.23.21 Work Possible Using Hydraulic Excavator
235
Backhoe Work
235
Shovel Work
235
Ditching Work
235
Loading Work
236
Levelling Work
236
3.23.22 Replacement and Inversion of Bucket
237
Replacement
237
Inversion
238
3.23.23 Stopping Engine
239
Check after Finishing Work
239
3.23.24 Check after Stopping Engine
240
Locking
240
Handling the Wheels
240
Transportation
245
Transportation Procedure
245
Loading, Unloading Work
245
Securing Machine
248
Unloading
249
How to Lift the Machine
251
Precautions for Transportation
253
Travelling Posture
255
Cold Weather Operation
257
Precautions for Low Temperature
257
Fuel and Lubricants
257
Battery
258
Precautions after Completion of Work
259
After Cold Weather
259
Long-Term Storage
260
Before Storage
260
During Storage
260
After Storage
261
Starting Machine after Long-Term Storage
261
Troubleshooting
262
Phenomena that Are Not Failures
262
Method of Towing Machine
263
Precautions on Particular Jobsites
264
Discharged Battery
265
Removal and Installation of Battery
266
Battery Charges
266
Starting Engine with Booster Cables
267
Connecting and Disconnecting Booster Cables
267
Booster Cable Connection
268
Starting the Engine
268
Booster Cable Disconnection
269
Other Trouble
270
Electrical System
270
Chassis
271
Engine
272
Electronic Control System
274
Maintenance
275
Guides to Maintenance
276
Outline of Service
280
Outline of Oil, Fuel, Coolant
281
Oil
281
Fuel
282
Coolant
283
Grease
284
Carrying out KOWA (KOMATSU Oil Wear Analysis)
284
KOWA Analysis Items
285
Oil Sampling
285
Storing Oil and Fuel
286
Filters
286
Outline of Electric System
287
Outline of Hydraulic System
288
Wear Parts List
289
Use Fuel, Coolant and Lubricants According to Ambient Temperature
290
Proper Selection of Fuel, Coolant and Lubricants
291
Recommended Brands, Recommended Quality for Products Other than KOMATSU
293
Standard Tightening Torques for Bolts and Nuts
294
Introduction of Necessary Tools
294
Tightening Torque Specifications
295
Tightening Torque List
295
Periodic Replacement of Safety Critical Parts
296
Safety Critical Parts
297
Maintenance Schedule Chart
298
Key to Lubrication Points
302
Maintenance Interval for Hydraulic Breaker
304
Maintenance Procedure
305
Initial 50 Hours Maintenance (Only after the First 50 Hours)
305
Check and Tighten Wheel Nuts
305
Initial 250 Hours Maintenance (Only after the First 250 Hours)
305
Replace Fuel Pre-Filter Cartridge
305
Change Oil in Transmission, Hubs and Axles
305
Initial 500 Hours Maintenance (Only after the First 500 Hours)
306
Replace Fuel Main Filter Cartridge
306
When Required
307
Check, Clean and Replace Air Cleaner Element
307
Clean Inside of Cooling System
313
Checking Coolant Level
317
Check the Fan
320
Check and Tighten Wheel Nuts
320
Check Electrical Intake Air Heater
321
Check Alternator
321
Check Start Motor
322
Replace Bucket Side Cutters
322
Replace Bucket Teeth
323
Adjust Bucket Clearance
327
Check Window Washer Fluid Level, Add Fluid
328
Check and Adjust Air Conditioner
329
Drain Engine Breather Oil Catcher
330
Check before Starting
331
Check Coolant Level, Add Water
331
Check Oil Level in Engine Oil Pan, Add Oil
331
Check Fuel Level, Add Fuel
332
Check Oil Level in Hydraulic Tank, Add Oil
333
Check Air Cleaner for Clogging
334
Check Electric Wiring
334
Check for Water and Sediment in Sedimentor. Drain Water and Sediment
334
Every 50 Hours Service
335
Drain Water and Sediment from Fuel Tank
335
Every 100 Hours Service
336
Lubricating
336
Cleaning Fresh Air Filter
341
Every 250 Hours Service
342
Check Oil Level in Swing Machinery Case, Add Oil
342
Check Oil Level in Wheel Hubs, Add Oil (Front Axle)
343
Check Oil Level in Wheel Hubs, Add Oil (Rear Axle)
343
Check Oil Level in Axles, Add Oil
344
Check Oil Level in Transmission, Add Oil
344
Check Level of Battery Electrolyte
345
Belts, General
346
Check Fan Belt Tension, Adjust Tension
347
Check, Adjust Tension of Air Conditioner Compressor Belt
348
Every 500 Hours Service
349
Replace Fuel Pre-Filter Cartridge
349
Check Swing Pinion Grease Level, Add Grease
352
Change Oil in Engine Oil Pan, Replace Engine Oil Filter Cartridge
352
Clean and Inspect Radiator Fins, Oil Cooler Fins and Condenser Fins
354
Clean Internal and External Air Filters of Air Conditioner System
355
Cleaning Recirculated Air Filter
355
Replace Hydraulic Tank Breather Element
356
Check Condition of Main Valve Rubber Mounts
356
4.11.10 Every 1000 Hours Service
357
Replace Hydraulic Filter Element
357
Change Oil in Swing Machinery Case
359
Replace Fuel Main Filter Cartridge
360
Check All Tightening Points of Engine Exhaust Pipe Clamps
361
Check Oil Level in Damper Case, Add Oil
362
Check All Tightening Parts of Turbocharger
363
Check Play of Turbocharger Rotor
363
Check and Adjust Valve Clearance
363
Check Fan Belt Tensioner Bearing Belt and Fan Hub
363
Check Fan Belt Tension and Replace Fan Belt
363
Change Oil in Axles
364
Change Oil in Hubs
365
Change Oil in Transmission Assembly
366
Change Oil in Damper
366
4.11.11 Every 2000 Hours Service
367
Clean Hydraulic Tank Strainer
367
Cleaning the Strainer of the Brake Filter
368
Checking Charge Pressure of Nitrogen Gas in Accumulator (for Control Circuit)
369
Checking Function of Accumulator
370
Method of Releasing Pressure in Hydraulic Circuit
371
Clean, Check Turbocharger
372
Check Alternator, Starting Motor
372
Change Antifreeze
372
Check and Adjust Valve Clearance
372
4.11.12 Every 4000 Hours Service
373
Check Water Pump
373
Check Vibration Damper
373
Replace Accumulator (for Control Circuit)
374
Check for Looseness of High-Pressure Piping Clamp, Hardening of Rubber
375
Check for Missing Fuel Spray Prevention Cap, Hardening of Rubber
375
Check Operating Condition of Compressor
376
4.11.13 Every 5000 Hours Service
377
Change Oil in Hydraulic Tank and Replace Steer/Brake Circuit Strainer
377
Procedure for Bleeding Air
379
Technical Data
381
Specifications
382
One Piece Boom
383
Two Piece Boom
384
Working Range - One Piece Boom
385
Working Range - Two Piece Boom
386
Attachments, Options
387
General Precautions
388
Precautions Related to Safety
388
Precautions When Installing Attachments
389
Hydraulic Quick Coupler Piping
391
Locations
392
Operation
393
To Release a Bucket or Attachment
393
To Pick up a New Bucket or Attachment
394
Handling Bucket with Hook
396
Checking for Damage to Bucket with Hook
396
Prohibited Operations
396
Precautions During Operations
396
Machines Ready for Attachments
397
Clamshell Operation Selector Valves
397
Selector Valve in Normal Position for Bucket Cylinder Operation
397
Handling the Clamshell Bucket
399
How to Install Clamshell Bucket
399
How to Operate
399
Hydraulic Circuit
401
Switching Hydraulic Circuit
401
Operation
402
When Using Crusher or Other General Attachment
404
When Using Breaker
405
Method for Releasing Pressure in Control Circuit of Machines Equipped with Accumulator
406
Long-Term Storage
406
Specifications
406
Introduction of Attachments and Extending Machine Service Life
407
Hydraulic Breaker
407
Power Ripper
411
Fork Grab
413
Grapple Bucket
415
Scrap Grapple
417
Crusher and Smasher
419
Hydraulic Pile Driver
421
Hydraulic Excavator with Multipurpose Crane
423
Rotating Arm
425
General Location and Specifications
425
Maintenance Requirement
426
Every 100 Hours Service
426
Every 250 Hours Service
427
Every 500 Hours Service
428
Every 1000 Hours Service
428
General View of Controls
429
Left Control Lever (with Auto-Deceleration Device)
430
Right Control Lever (with Auto-Deceleration Device)
430
Upper Boom Control Pedal (Two Piece Boom)
431
Excavator's Work
432
Replacement of Bucket
434
Handling the Trapezoidal Bucket (Option)
435
How to Perform Excavation
436
Index
437
Index
438
Notes
443
Advertisement
Advertisement
Related Products
Komatsu PW130ES-6K
Komatsu PW160-7H
Komatsu PW118MR-11
Komatsu PW98MR-10
Komatsu PW160-7K Series
Komatsu PW160-7K-K40001
Komatsu PW170ES-6K
Komatsu PW400MH-6
Komatsu GALEO PC50MRx-2
Komatsu PC5500-6
Komatsu Categories
Excavators
Compact Loader
Trucks
Construction Equipment
Tractor
More Komatsu Manuals
Login
Sign In
OR
Sign in with Facebook
Sign in with Google
Upload manual
Upload from disk
Upload from URL