Sign In
Upload
Manuals
Brands
Husqvarna Manuals
Motorcycle
TE 300i
User Manuals: Husqvarna TE 300i Motorcycle Racing
Manuals and User Guides for Husqvarna TE 300i Motorcycle Racing. We have
2
Husqvarna TE 300i Motorcycle Racing manuals available for free PDF download: Owner's Manual
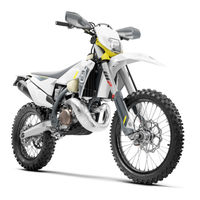
Husqvarna TE 300i Owner's Manual (171 pages)
Brand:
Husqvarna
| Category:
Motorcycle
| Size: 9.24 MB
Table of Contents
Table of Contents
4
Means of Representation
8
Symbols Used
8
Formats Used
8
Safety Advice 2
9
Use Definition - Intended Use
9
Misuse
9
Degrees of Risk and Symbols
10
Tampering Warning
10
Safe Operation
10
Protective Clothing
11
Work Rules
11
Environment
11
Owner's Manual
12
Important Notes 3
13
Manufacturer Warranty, Implied Warranty
13
Fuel, Auxiliary Substances
13
Spare Parts
13
Husqvarna Motorcycles Technical Accessories
13
Service
13
Figures
13
Customer Service
14
View of Vehicle 4
15
View of Vehicle, Front Left (Example)
15
View of Vehicle, Rear Right (Example)
16
Serial Numbers 5
17
Vehicle Identification Number
17
Type Label (All EU Models)
17
Key Number (All EU Models)
17
Engine Number
17
Fork Article Number
18
Shock Absorber Article Number
18
Controls 6
19
Clutch Lever
19
Hand Brake Lever
19
Throttle Grip
19
Stop Button (All EU Models)
19
Stop Button (All US Models)
20
Horn Button (All EU Models)
20
Light Switch (All EU Models)
20
Light Switch (All US Models)
20
Turn Signal Switch (All EU Models)
21
Emergency off Switch (All EU Models)
21
Start Button (All US Models)
21
Start Button (All EU Models)
21
Map Switch
22
Overview of Indicator Lamps (All EU Models)
22
Overview of Indicator Lamps (All US Models)
22
Opening Fuel Tank Filler Cap
23
Closing the Fuel Tank Filler Cap
23
Opening 2-Stroke Oil Tank Cap
24
Closing 2-Stroke Oil Tank Cap
24
Cold Start Button
24
Idle Speed Adjusting Screw
25
Shift Lever
25
Foot Brake Lever
25
Side Stand
26
Steering Lock (All EU Models)
26
Locking the Steering (All EU Models)
26
Unlocking the Steering (All EU Models)
27
Combination Instrument
28
Overview
28
Activation
28
Messages on the Combination Instrument
28
Adjusting the Combination Instrument
28
Setting the Kilometers or Miles
29
Setting the Clock
30
Setting the Service Display
30
Speed, Time, and DST Distance 1
31
Speed, Time, and DST2 Distance 2
31
AVG Average Speed, ART Operating Hours, and ODO Total Distance Covered
32
Preparing for Use 8
33
Advice on Preparing for First Use
33
Running in the Engine
34
Starting Power of Lithium-Ion Batteries at Low Temperatures
35
Preparing the Vehicle for Difficult Operating Conditions
35
Preparing the Vehicle for Rides on Dry Sand
35
Preparing the Vehicle for Rides on Wet Sand
37
Preparing the Vehicle for Rides on Wet and Muddy Circuits
38
Preparing Vehicle for High Temperatures or Slow Riding
38
Preparing the Vehicle for Low Temperatures or Snow
39
Riding Instructions
40
Checks and Maintenance Measures When Preparing for Use
40
Starting the Vehicle
40
Starting off
41
Shifting, Riding
41
Braking
42
Stopping, Parking
43
Transporting
43
Refueling
44
Adding 2-Stroke Oil
45
10 Service Schedule
46
Additional Information
46
Required Work
46
Recommended Work
47
Tuning the Chassis 11
49
Checking the Basic Chassis Setting with Rider's Weight
49
Compression Damping of the Shock Absorber
49
Adjusting the Low-Speed Compression Damping of the Shock Absorber
49
Adjusting the High-Speed Compression Damping of the Shock Absorber
50
Adjusting the Rebound Damping of the Shock Absorber
51
Measuring the Dimension of the Rear Wheel Unloaded
51
Checking the Static Sag of the Shock Absorber
52
Checking the Riding Sag of the Shock Absorber
52
Adjusting the Spring Preload of the Shock Absorber
53
Adjusting the Riding Sag
54
Checking the Basic Setting of the Fork
54
Adjusting the Compression Damping of the Fork
55
Adjusting the Rebound Damping of the Fork
55
Adjusting the Spring Preload of the Fork
56
Handlebar Position
56
Adjusting the Handlebar Position
57
12 Service Work on the Chassis
58
Raising the Motorcycle with a Lift Stand
58
Removing the Motorcycle from the Lift Stand
58
Bleeding the Fork Legs
58
Cleaning the Dust Boots of the Fork Legs
59
Removing the Fork Legs
59
Installing the Fork Legs
60
Removing the Fork Protector
61
Installing the Fork Protector
61
Removing the Lower Triple Clamp
61
Installing the Lower Triple Clamp
62
Checking Steering Head Bearing Play
64
Adjusting Steering Head Bearing Play
65
Greasing the Steering Head Bearing
65
Removing Front Fender
65
Installing Front Fender
66
Removing the Shock Absorber
67
Installing the Shock Absorber
68
Removing the Seat
70
Mounting the Seat
70
Removing the Air Filter Box Cover
71
Installing the Air Filter Box Cover
71
Removing the Air Filter
72
Cleaning the Air Filter and Air Filter Box
72
Installing the Air Filter
73
Removing the Main Silencer
73
Installing the Main Silencer
74
Changing the Glass Fiber Yarn Filling of the Main Silencer
74
Removing the Right Side Cover
75
Installing the Right Side Cover
75
Removing the Fuel Tank
76
Installing the Fuel Tank
77
Checking the Chain for Dirt
79
Cleaning the Chain
79
Checking the Chain Tension
80
Adjusting the Chain Tension
80
Checking the Chain, Rear Sprocket, Engine Sprocket, and Chain Guide
81
Checking the Frame
84
Checking the Link Fork
84
Checking the Throttle Cable Routing
84
Checking the Rubber Grip
85
Adjusting the Basic Position of the Clutch Lever
86
Checking/Correcting the Fluid Level of the Hydraulic Clutch
86
Changing the Hydraulic Clutch Fluid
87
Removing the Engine Guard
88
Installing the Engine Guard
88
Brake System 13
89
Adjusting the Basic Position of the Hand Brake Lever
89
Checking the Brake Discs
89
Checking the Front Brake Fluid Level
90
Adding Front Brake Fluid
90
Checking the Front Brake Linings
91
Changing the Brake Linings of the Front Brake
92
Checking the Free Travel of the Foot Brake Lever
94
Adjusting the Basic Position of the Foot Brake Lever
95
Checking the Rear Brake Fluid Level
95
Adding Rear Brake Fluid
96
Checking the Brake Linings of the Rear Brake
97
Changing the Rear Brake Linings
97
Wheels, Tires 14
101
Removing the Front Wheel
101
Installing the Front Wheel
102
Removing the Rear Wheel
103
Installing the Rear Wheel
104
Checking the Tire Condition
105
Checking Tire Pressure
106
Checking Spoke Tension
106
15 Electrical System
108
Removing the 12-V Battery
108
Installing the 12-V Battery
110
Charging the 12-V Battery
111
Changing Main Fuse
113
Changing the Fuses of Individual Electrical Power Consumers
114
Removing the Headlight Mask with the Headlight
116
Installing the Headlight Mask with the Headlight
116
Changing the Headlight Bulb
118
Changing the Turn Signal Bulb (All EU Models)
118
Checking the Headlight Setting
119
Adjusting the Headlight Range
120
Changing the Combination Instrument Battery
120
Diagnostics Connector
121
16 Cooling System
122
Checking the Antifreeze and Coolant Level
122
Checking the Coolant Level
123
Draining the Coolant
123
Refilling with Coolant
124
Changing the Coolant
126
17 Tuning the Engine
128
Checking the Play in the Throttle Cable
128
Adjusting the Play in the Throttle Cable
128
Setting the Characteristic Map of the Throttle Response
129
Adjusting the Idle Speed
130
Programming Ambient Air Pressure
131
Checking the Basic Position of the Shift Lever
131
Adjusting the Basic Position of the Shift Lever
132
Service Work on the Engine 18
133
Changing the Fuel Screen
133
Checking 2-Stroke Oil Level
134
Priming Oil Pump
134
Cleaning the Oil Screen in the Oil Tank
136
Checking the Gear Oil Level
139
Changing the Gear Oil
139
Adding the Gear Oil
140
19 Cleaning, Care
142
Cleaning the Motorcycle
142
Checks and Maintenance Steps for Winter Operation
143
20 Storage
144
Preparing for Use after Storage
145
21 Troubleshooting
146
Blink Code 22
149
Technical Data 23
151
Engine
151
All te 250I Models
151
All te 300I Models
151
Engine Tightening Torques
152
Capacities
154
Gear Oil
154
Coolant
154
Fuel
154
Chassis
154
Electrical System
155
Tires
155
Fork
156
Shock Absorber
156
Chassis Tightening Torques
157
Substances 24
159
Auxiliary Substances 25
161
Standards 26
163
27 Index of Special Terms
164
List of Abbreviations 28
165
29 List of Symbols
166
Red Symbols
166
Yellow and Orange Symbols
166
Green and Blue Symbols
166
Index
167
Advertisement
Husqvarna TE 300i Owner's Manual (165 pages)
Brand:
Husqvarna
| Category:
Motorcycle
| Size: 6.64 MB
Table of Contents
Table of Contents
4
1 Means of Representation
8
Symbols Used
8
Formats Used
8
2 Safety Advice
9
Use Definition - Intended Use
9
Misuse
9
Degrees of Risk and Symbols
10
Tampering Warning
10
Safe Operation
10
Protective Clothing
11
Work Rules
11
Environment
12
Owner's Manual
12
3 Important Notes
13
Manufacturer and Implied Warranty
13
Operating and Auxiliary Substances
13
Spare Parts, Accessories
13
Service
13
Figures
13
Customer Service
14
4 View of Vehicle
15
View of Vehicle, Front Left (Example)
15
View of Vehicle, Rear Right (Example)
16
5 Serial Numbers
17
Chassis Number
17
Type Label (All EU Models)
17
Key Number (All EU Models)
17
Engine Number
17
Fork Article Number
18
Shock Absorber Article Number
18
6 Controls
19
Clutch Lever
19
Hand Brake Lever
19
Throttle Grip
19
Kill Switch (All EU Models)
19
Kill Switch (te 250I US)
20
Horn Button (All EU Models)
20
Light Switch (All EU Models)
20
Light Switch (te 250I US)
20
Turn Signal Switch (All EU Models)
21
Electric Starter Button
21
Map Switch
21
Indicator Lamps Overview (All EU Models)
21
Indicator Lamps Overview (te 250I US)
22
Opening the Filler Cap
22
Closing the Filler Cap
23
Opening 2-Stroke Oil Tank Cap
23
Closing 2-Stroke Oil Tank Cap
23
Cold Start Button
24
Idle Speed Adjusting Screw
24
Shift Lever
24
Kick Starter
25
Foot Brake Lever
25
Side Stand
25
Steering Lock (All EU Models)
26
Locking the Steering (All EU Models)
26
Unlocking the Steering (All EU Models)
26
7 Combination Instrument
27
Overview
27
Activation
27
Messages on the Combination Instrument
27
Adjusting the Combination Instrument
27
Setting the Kilometers or Miles
28
Setting the Clock
29
Setting the Service Display
29
Speed, Time, and DST Distance 1
30
Speed, Time, and DST2 Distance 2
30
AVG Average Speed, ART Operating Hours, and ODO Total Distance Covered
31
8 Preparing for Use
32
Advice on First Use
32
Running in the Engine
33
Starting Power of Lithium-Ion Batteries at Low Temperatures
34
Preparing the Vehicle for Difficult Riding Conditions
34
Preparing Vehicle for Rides on Dry Sand
35
Preparing Vehicle for Rides on Wet Sand
36
Preparing Vehicle for Rides on Wet and Muddy Circuits
37
Preparing Vehicle for High Temperatures or Slow Riding
37
Preparing Vehicle for Low Temperatures or Snow
38
9 Riding Instructions
39
Checks and Maintenance Measures When Preparing for Use
39
Starting the Vehicle
39
Starting off
40
Shifting, Riding
40
Braking
41
Stopping, Parking
42
Transporting
42
Refueling
43
Adding 2-Stroke Oil
44
10 Service Schedule
45
Additional Information
45
Required Work
45
Recommended Work
46
11 Tuning the Chassis
48
Checking the Basic Chassis Setting with the Rider's Weight
48
Compression Damping of the Shock Absorber
48
Adjusting the Low-Speed Compression Damping of the Shock Absorber
48
Adjusting the High-Speed Compression Damping of the Shock Absorber
49
Adjusting the Rebound Damping of the Shock Absorber
50
Measuring the Rear Wheel Dimension Unloaded
50
Checking the Static Sag of the Shock Absorber
51
Checking the Riding Sag of the Shock Absorber
51
Adjusting the Spring Preload of the Shock Absorber
52
Adjusting the Riding Sag
53
Checking the Basic Setting of the Fork
53
Adjusting the Compression Damping of the Fork
54
Adjusting the Rebound Damping of the Fork
54
Adjusting the Spring Preload of the Fork
55
Handlebar Position
56
Adjusting the Handlebar Position
56
Service Work on the Chassis
58
Raising the Motorcycle with a Lift Stand
58
Removing the Motorcycle from the Lift Stand
58
Bleeding the Fork Legs
58
Cleaning the Dust Boots of the Fork Legs
59
Removing the Fork Legs
59
Installing the Fork Legs
60
Removing the Fork Protector
61
Installing the Fork Protector
61
Removing the Lower Triple Clamp
61
Installing the Lower Triple Clamp
62
Checking the Play of the Steering Head Bearing
64
Adjusting the Play of the Steering Head Bearing
65
Greasing the Steering Head Bearing
65
Removing Front Fender
66
Installing Front Fender
66
Removing the Shock Absorber
67
Installing the Shock Absorber
68
Removing the Seat
70
Mounting the Seat
71
Removing the Air Filter Box Cover
71
Installing the Air Filter Box Cover
72
Removing the Air Filter
72
Cleaning the Air Filter and Air Filter Box
73
Installing the Air Filter
73
Sealing the Air Filter Box
74
Removing the Main Silencer
74
Installing the Main Silencer
75
Changing the Glass Fiber Yarn Filling in the Main Silencer
75
Removing the Right Side Cover
76
Installing the Right Side Cover
76
Removing the Fuel Tank
76
Installing the Fuel Tank
78
Checking the Chain for Dirt
80
Cleaning the Chain
80
Checking the Chain Tension
81
Adjusting the Chain Tension
82
Checking the Chain, Rear Sprocket, Engine Sprocket, and Chain Guide
83
Checking the Frame
85
Checking the Swingarm
85
Checking Throttle Cable Routing
85
Checking the Rubber Grip
86
Adjusting the Basic Position of the Clutch Lever
87
Checking/Correcting the Fluid Level of the Hydraulic Clutch
87
Changing the Hydraulic Clutch Fluid
88
Removing the Engine Guard
89
Installing the Engine Guard
90
13 Brake System
91
Adjusting the Basic Position of the Hand Brake Lever
91
Checking the Brake Discs
91
Checking the Front Brake Fluid Level
92
Adding Front Brake Fluid
92
Checking the Front Brake Linings
93
Changing the Front Brake Linings
94
Checking the Free Travel of the Foot Brake Lever
96
Adjusting the Basic Position of the Foot Brake Lever
96
Checking the Rear Brake Fluid Level
97
Adding Rear Brake Fluid
98
Checking the Brake Linings of the Rear Brake
99
Changing the Rear Brake Linings
99
14 Wheels, Tires
103
Removing the Front Wheel
103
Installing the Front Wheel
104
Removing the Rear Wheel
104
Installing the Rear Wheel
105
Checking the Tire Condition
107
Checking the Tire Air Pressure
107
Checking Spoke Tension
108
15 Electrical System
109
Removing the Battery
109
Installing the Battery
110
Recharging the Battery
110
Changing the Main Fuse
112
Changing the Fuses of Individual Power Consumers
114
Removing the Headlight Mask with the Headlight
115
Installing the Headlight Mask with the Headlight
116
Changing the Headlight Bulb
117
Changing the Turn Signal Bulb (All EU Models)
118
Checking the Headlight Setting
119
Adjusting the Headlight Range
119
Changing the Combination Instrument
120
Diagnostics Connector
120
16 Cooling System
121
Checking the Antifreeze and Coolant Level
121
Checking the Coolant Level
122
Draining the Coolant
122
Refilling with Coolant
123
17 Tuning the Engine
126
Checking the Play in the Throttle Cable
126
Adjusting the Play in the Throttle Cable
126
Setting the Characteristic Map of the Throttle Response
127
Adjusting the Idle Speed
128
Programming Ambient Pressure
129
Ignition Curve Plug-In Connector
130
Changing the Ignition Timing Map
130
Checking the Basic Position of the Shift Lever
131
Adjusting the Basic Position of the Shift Lever
131
18 Service Work on the Engine
132
Changing the Fuel Screen
132
Checking 2-Stroke Oil Level
133
Timing Oil Pump
134
Checking the Gear Oil Level
135
Changing the Gear Oil
136
Adding Gear Oil
137
19 Cleaning, Care
139
Cleaning the Motorcycle
139
Checks and Maintenance Steps for Winter Operation
140
20 Storage
141
Preparing for Use after Storage
142
21 Troubleshooting
143
22 Technical Data
146
Engine
146
All te 250I
146
TE 300I EU
146
Engine Tightening Torques
147
Capacities
149
Gear Oil
149
Coolant
149
Fuel
149
Chassis
149
Electrical System
150
Tires
150
Fork
151
Shock Absorber
151
Chassis Tightening Torques
152
23 Substances
154
24 Auxiliary Substances
156
25 Standards
157
26 Index of Special Terms
158
27 List of Abbreviations
159
28 List of Symbols
160
Red Symbols
160
Yellow and Orange Symbols
160
Green and Blue Symbols
160
Index
161
Advertisement
Related Products
Husqvarna TE 300i 2021
Husqvarna TE 300i EU 2021
Husqvarna TE 300i US 2021
Husqvarna TE 300i 2022
Husqvarna TE 300i CKD 2022
Husqvarna TE 300i EU 2022
Husqvarna TE 300i US 2022
Husqvarna TE 300i AR 2022
Husqvarna TE 300i ROCKSTAR EDITION 2022
Husqvarna TE 300i EU 2020
Husqvarna Categories
Lawn Mower
Trimmer
Chainsaw
Motorcycle
Saw
More Husqvarna Manuals
Login
Sign In
OR
Sign in with Facebook
Sign in with Google
Upload manual
Upload from disk
Upload from URL