Sign In
Upload
Manuals
Brands
Graco Manuals
Car Seat
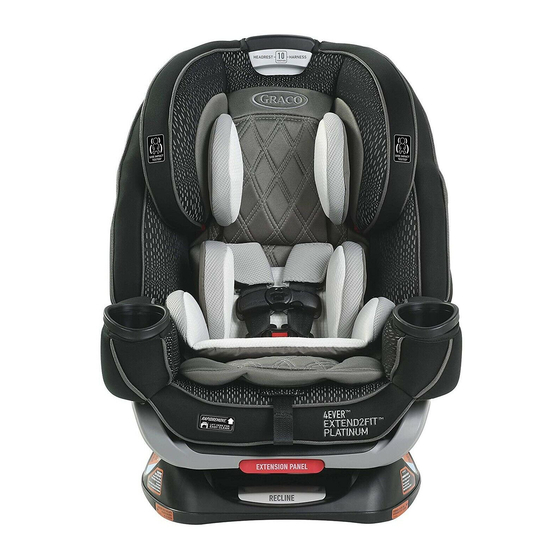
4EVER EXTEND2FIT
User Manuals: Graco 4EVER EXTEND2FIT Car Seat
Manuals and User Guides for Graco 4EVER EXTEND2FIT Car Seat. We have
1
Graco 4EVER EXTEND2FIT Car Seat manual available for free PDF download: Instruction Manual
Graco 4EVER EXTEND2FIT Instruction Manual (257 pages)
4-IN-1 CAR SEAT
Brand:
Graco
| Category:
Car Seat
| Size: 26.07 MB
Table of Contents
Contents
2
Quick Guide to Your Manual
6
Install Cup Holders (Adult Assembly Required)
6
Cup Holders MUST be Installed
6
Get to Know Your Car Seat
7
What Seating Location Should I Use?
7
Which Installation Method Should I Use?
8
What Is Latch?
9
When Installing Rear-Facing or Forward-Facing
10
Latch System
10
Latch Can Only be Used if the Vehicle
10
Vehicle Seat Belt
11
When Installing as a Booster
11
Does Your Car Seat Fit Your Child Correctly?
12
For Rear-Facing, You Need to Adjust
12
Harness Height, Rear-Facing/Buckle Position
12
Harness Tightness
12
Harness Height, Forward-Facing
13
Buckle Position
13
For Booster, You Need to Adjust
14
Use Lap/Shoulder Belt Only
14
Position Lap Belt
14
Position Shoulder Belt
14
DID You Do Everything Correctly?
15
Rear-Facing
15
Use the Top Tether Strap When
16
Booster
17
Never Use Lap Belt Only
17
Lap Belt Behind Armrest and Lies Low Across Hips and Thighs
17
Shoulder Belt Lies on the Shoulder, between the Neck and Edge of Shoulders
17
Welcome to the Graco Family!
18
Right Mode of Use
19
Before You Begin
20
Register this Child Restraint
20
If You Need Help
21
Certification
22
Car Seat’s Useful Life
22
Vehicle Seat Protection
23
Warm Weather Use
23
Safety Warnings
24
Car Seat Features
28
Rear-Facing Use
34
Latch Strap
34
Vehicle Seat Lap/Shoulder Belt
35
Vehicle Seat Lap Belt
35
Install Rear-Facing with Latch Straps
36
Store Top Tether Strap
36
Remove Latch Strap from Storage Location
36
Make Sure Latch Strap Is in the Rear-Facing Belt Path Marked with a Blue Label
37
Recline the Car Seat
37
To Keep Your Child Rear Facing Longer
38
Place Car Seat Rear-Facing in Back Seat of the Vehicle
38
Make Sure Base Is a Minimum of 80% on Vehicle Seat
39
Check the Level Indicator
39
Extend the Latch Strap
40
Attach Latch Connectors to Vehicle’s Lower Latch Anchors
40
Tighten the Latch Strap
41
Test for Tightness
41
Is Everything Correct?
43
Car Seat Does Not Move more than 1” (2.5 CM) at the Belt Path
43
Level Indicator’s Bubble in the Blue Zone and Vehicle on Level Ground
43
Chest Clip Even with Armpits
43
Install Rear-Facing with Vehicle Seat Belt
44
Store Top Tether and Latch Straps
44
Place Car Seat Rear-Facing in Backseat of the Vehicle
45
Route the Vehicle Seat Belt
47
Lock Vehicle Seat Belt
47
Tighten the Vehicle Seat Belt
48
Harness Straps at or Just below the Child’s Shoulders
49
Cannot Pinch Harness Straps at the Shoulder
49
Forward-Facing Use
50
Latch Strap with Top Tether Strap
50
Vehicle Lap/Shoulder Belt with Top Tether Strap
51
Vehicle Seat Lap Belt with Top Tether Strap
51
Install Forward-Facing with Latch Straps
52
Remove Latch Strap from Storagelocation
52
Make Sure Latch Strap Is in the Forward-Facing Belt Path Marked with Orange Label
52
Unhook Top Tether Strap from Storage
53
Place Car Seat Forward- Facing in Back Seat of the Vehicle
54
Attach Latch Connector to Vehicle’slower Latch Anchors
55
Attach Top Tether Strap
56
Tighten Top Tether Strap
56
Harness Straps at or Just above the Child’s Shoulders
57
Install Forward-Facing with Vehicle Seat Belt
58
Store Latch Straps
58
Using with the Lock-Off
60
Expose the Lock-Off
60
Open the Lock- off
61
Review Your Vehicle’s Owner Manual for Vehicle Seat Belt Use
62
Replace the Seat Pad
63
Using Without the Lock-Off
64
Lock the Vehicle Seat Belt
64
Tighten the Top Tether Strap
66
Booster Use With/Without Back
68
Vehicle Lap/Shoulder Seat Belt
68
Never Use a Vehicle Lap-Only Belt Across Front of Child
69
Install Backed Booster
70
Store the Harness System
70
Loosen the Shoulder Straps as Much as Possible
70
Raise the Headrest to the Highest Position
70
Unbuckle the Chest Clip and the Buckle Strap as Shown
71
Unsnap Pad and Expose Seat Back
72
Lift the Headrest Pad Flap up out of the Way
73
Pull Bottom Seat Pad Back to Expose the Plastic Shell
74
Open the Harness Storage Door
74
Place Harness, Chest Clip, Buckle Tongues, and Buckle Strap Inside Storage Compartment, then Close the Door
75
Replace Seat Pad
75
Unhook Top Tether Strap Fromstorage Location and Lay It in the Seat
78
Remove the Slack from the Latch Trap
79
Thread the Vehicle Seat Shoulder Belt through Seat Belt Guide on the Headrest
80
Install Backless Booster
81
Remove the Seat Back by First Loosening the Harness Straps
81
Remove Harness Straps from Splitter Plate
81
Make Sure Latch Straps Are in the Forward-Facing Belt Path and in the Stored Position
82
Unsnap Bottom Seat Pad
82
Remove the Buckle Strap
83
Rotate Metal Retainer and Insert It up through the Shell and Pad
83
Lift the Red Backrest Locks up
84
Remove Seat Back from Seat Base
85
Relock the Red Backrest Locks
86
Store Splitter Plate
86
Attach Base Pad to the Back of Base
87
Place the Booster Seat Forward-Facing in the Back Seat of Vehicle
87
Securing Child 5-Point Harness
88
Loosen Harness Straps
88
Place Your Child in the Seat
89
Place Harness Straps over Child’s Shoulders and Buckle
89
Be Sure the Harness Straps Are at the Proper Height
89
To Raise or Lower Headrest/Harness Adjustment Lever
90
Check the Buckle Position
90
To Adjust Buckle Strap When the Buckle Is in the Outer/Inner most Position
91
Rotate Metal Retainer and Insert It through the Shell and Pad
92
Insert Metal Retainer in the New Buckle Strap Slot
93
Installing in the Outer/Inner most
93
Pull up on Buckle Strap to Make Sure It Is Secured
94
Buckle the Chest Clip
95
Pull All the Slack out from Around the Waist
95
Tighten the Harness by Pulling the Harness Adjustment Strap
96
Raise the Chest Clip to Child’s Armpit Level
97
Check Tightness Again, Tighten more if Needed
97
Securing Child Backed Booster
98
Place Child in Seat
98
Thread Vehicle’s Shoulder Belt into Seat Belt Guide in the Headrest
98
Buckle the Vehicle Lap/Shoulder Seat Belt
99
Securing Child Backless Booster
101
Ears Must be below the Top of the Vehicle Seat Back or Headrest
101
Seat Belt
102
Make Sure Vehicle’s Seat Shoulder Belt Lays in the Red Zone as Shown
104
Attach Belt Positioning Clip
104
Push Clip and Strap through Loop
105
Pull to Tighten Strap
105
Push Clip through Slot in Pad
105
Attach Seat Pad to Base
105
Place Child in Seat, Buckle Child in Seat and Attach Belt Positioning Clip
106
Adjust the Belt Positioning Clip to Fit Your Child
106
For Ease of Moving the Latch Strap
107
Unsnap Bottom Seat Pad to Expose the Latch Strap
108
Pull Latch Connectors out of the Belt Path Openings into the Center of the Car Seat
108
Slide Entire Latch Strap Along Bar to the Desired Belt Path Openings
108
Push the Latch Connectors out through the Desired Belt Path Openings on each Side of Car Seat
109
Move the Headrest to Its Proper Position for Your Child
110
Accessories
111
Harness Covers
111
Body Support
111
Headrest Pillow
111
Vehicle Infotmation
112
How to Remove Latch and Top Tether
112
Choosing Vehicle Seat Location
113
Review Your Vehicle’s Owner Manual for Seating Locations
113
The Best Seating Location for this Car Seat Is One that
113
Unsafe Vehicle Seat Location
114
Vehicle Seat Belt Terms
115
Retractor/Latch Plate
115
Seat Bight
115
Identify Your Seat Belt Type
116
Lap/Shoulder Belt and Lap Belt Only
116
The Following Types of Vehicle Seat Belts Cannot be Used Safely with this Car Seat
116
Lap/Shoulder Belt Installation - Rear-Facing/Forward Facing Modes
117
There Are Three Types of Retractors
117
How to Lock Your Lap and Shoulder Vehicle Seat Belt
118
Sliding Latch Plate and Switchable Retractor
118
Locking Latchplate and ELR Retractor
119
Sliding Latch Plate and ALR Retractor
120
Sliding Latch Plate and ELR Retractor
121
Lap Belt Installation - Do Not Use in Booster Mode
122
Locking Latch Plate and no Retractor
122
Sewn on Latch Plate and ALR
122
Care & Cleaning
123
Cleaning Seat Pad
123
Headrest Pad
123
Seat Pad
124
Cleaning Buckle Strap
125
Cleaning Harness and Latch Straps
126
Cleaning Extender Panel
126
Replacement Parts
128
Advertisement
Advertisement
Related Products
Graco 41413ZOL
Graco SnugRide Click Connect 40
Graco 4Ever
Graco 4EVER DLX SNUGLOCK
Graco 4EVER DLX GRAD
Graco 4E02LJG - Bumper Jumper in Little Jungle
Graco Bumper Jumper 4E02LJG1
Graco 4530 & 4540
Graco AIRLESSCO Mustang 4700 Stand
Graco 495 233975
Graco Categories
Paint Sprayer
Water Pump
Stroller
Baby & Toddler Furniture
Industrial Equipment
More Graco Manuals
Login
Sign In
OR
Sign in with Facebook
Sign in with Google
Upload manual
Upload from disk
Upload from URL