Sign In
Upload
Manuals
Brands
Dynojet Manuals
Measuring Instruments
424xLC2
Dynojet 424xLC2 Manuals
Manuals and User Guides for Dynojet 424xLC2. We have
2
Dynojet 424xLC2 manuals available for free PDF download: Installation Manual
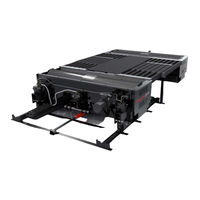
Dynojet 424xLC2 Installation Manual (253 pages)
automotive dynamometers
Brand:
Dynojet
| Category:
Measuring Instruments
| Size: 19.4 MB
Table of Contents
Table of Contents
3
Warnings
9
Chapter 1 Specifications and Operating Requirements
14
Introduction
14
File Menu
16
Dynamometer Specifications and Requirements
17
Chassis Specifications
17
Compressed Air
21
Computer Specifications
21
Electrical Requirements
22
Environmental Requirements
22
Fire Suppression
22
Forklift Requirements
22
Grounding Requirements
23
Hydraulic Motor
23
Phone and Internet Access
23
Tool Requirements
23
Model 424 Stationary and 4WD Dynamometer
24
Model 424 4WD Dynamometer with Bridge and Deck
25
Dynoware RT Electronics
26
Main Module Connections
27
Network Connections
28
Lift Specifications and Requirements
29
Chapter 2 Stationary Dyno Installation
32
Unpacking and Inspecting the Dyno
32
Above Ground Model 424X/424Xlc 2 Automotive Dynamometer Installation Guide
32
Dyno Installation
37
Removing the Dyno from the Crate
37
Placing the Dyno in Front of the Lift
39
Installing the Interface Guide
40
Anchoring the Dyno
43
Installing the Air Fittings
44
Eddy Current Brake Installation
45
Chapter 3 4WD Dyno Installation
48
Unpacking and Inspecting the Dyno
48
Track Assembly
51
Installing the Track Assembly
53
Dyno Installation
55
Removing the Dyno from the Crate
55
Placing the Dyno on the Track
56
Eddy Current Brake Installation
58
Cable Routing
59
Identifying the Cables
59
Routing the Cables-Without the Eddy Current Brakes
59
Routing the Cables-With One Eddy Current Brake
59
Routing the Cables-With Two Eddy Current Brakes
59
Hydraulic Movement Installation
73
Rotating the Hydraulic Motor
77
Wiring the Hydraulic Motor
79
Filling the Hydraulic Motor with Hydraulic Fluid
81
Air Can Sleeve
82
4WD Dyno Movement Test
83
Bridge Installation-Stationary Dyno
84
Installing the Drum Guards
91
Installing the Runner Assemblies
93
Bridge Installation-4WD Dyno
93
Installing the Cover and Runner Tie Straps
94
Linx Installation
95
Deck Installation
96
Logo Panel Installation
102
Chapter 4 Eddy Current Brake Installation
105
Eddy Current Brake Installation
106
Before Installing the Eddy Current Brake: Verify Optimal Brake Cooling
106
Unpacking the Eddy Current Brake
108
Installing the Temperature Sensor
114
Installing the Load Cell
119
Installing the Front and Rear Brake Covers and Eddy Current Brake Driver
120
Installing the Top and Logo Panel Covers
122
Load Cell Calibration
123
Chapter 5 Linx Installation
129
Linx Belt Drive Specifications
130
Unpacking the Linx Parts
131
Inner Mounting Plate Installation
135
Flange Bearing, Outer Shaft, and Splined Shaft Installation
138
Drive Pulley Installation
140
Idler Pulley Assembly Installation
142
Belt and Tensioner Pulley Assembly Installation
143
Pulley Mounting Plates and Outer Bearings Installation
145
Routing the Linx Detect Sensor Cable
156
Brake Signal Relay Installation
158
Tension the Belt
160
Above Ground Covers
162
Installing the Left Cover Assembly
165
Installing the Lid and Door Assemblies
167
Continue Dyno Installation
170
Disconnect the Belt Drive from the Dyno Drums
171
Reconnecting the Belt Drive
172
Chapter 6 Side Deck Assembly Installation
174
Side Deck Installation
174
Installing the Side Deck Assembly
175
Chapter 7 Basic Dyno Operation
180
Loading the Vehicle
180
Connecting the RPM Pickup
184
RPM Pickup Descriptions
184
Connecting the Secondary Inductive Pickup
185
Connecting the Primary Inductive Pickup
186
Grounding the Vehicle
187
Pre-Run Inspection
188
Before Starting the Engine
188
Engine Warm up
189
After Engine Warm up
189
Making a Test Run
190
Preventative Maintenance
191
Things to Check
191
Verifying the SAAR Brake Pressure
192
Preventative Maintenance
192
Appendix A Red Head Anchor Installation
197
Warnings
197
Contact Information for ITW Ramset/Red Head
197
Appendix B Power Requirements and Installation
201
Power Requirements and Installation-North America, Japan, and Locations Using 60 Hz Power
202
Installing the Wall Receptacle
202
Testing for Correct Voltages
203
Hard Wiring to the Building
204
Power Requirements and Installation-Excluding North America and Japan
205
Installing the Wall Receptacle
206
Testing for Correct Voltages
207
Hard Wiring to the Building
207
Appendix C Stationary Dyno Upgrade
209
Deck Relocation
210
Removing the New Style Deck from a New Model Dyno
214
Installing the Early Style Deck on the 4WD Dyno
219
Installing the New Style Deck on the 4WD Dyno
223
Lift Kit Installation
224
Air Fittings Upgrade
225
Appendix D Bridge Extension Assembly
227
Bridge Extension Installation
228
Appendix E Interface Roller Assembly Installation
233
Interface Roller Assembly Installation
233
Disconnect the Belt Drive from the Dyno Drums
238
Appendix F Linx Belt Drive-Early Version Shafts
241
Appendix G Shaft Safety Wire Installation
241
Appendix H D-Lok Bearing Installation
243
Warnings
243
Contact Information for Baldor•Dodge
243
Bearing Lubrication
244
Appendix I Torque Values
245
Standard Bolt Torque Values
246
Grade 5
246
Grade 8
246
Metric Bolt Torque Values
248
Index
249
Advertisement
Dynojet 424xLC2 Installation Manual (218 pages)
Automotive Dynamometer
Brand:
Dynojet
| Category:
Measuring Instruments
| Size: 15.7 MB
Table of Contents
Table of Contents
3
Warnings
9
Chapter 1 Specifications and Operating Requirements
14
Introduction
14
Version
14
Technical Support
16
Dynamometer Specifications and Requirements
17
Chassis Specifications
17
Compressed Air
21
Computer Specifications
21
Electrical Requirements
22
Environmental Requirements
22
Fire Suppression
22
Forklift Requirements
22
Grounding Requirements
22
Hydraulic Motor
23
Phone and Internet Access
23
Tool Requirements
23
Model 424 Stationary and 4WD Dynamometer
24
Model 424 4WD Dynamometer with Pit Covers
25
Dynoware RT Electronics
26
Main Module Connections
27
Network Connections
28
Pit Specifications
29
Chapter 2 Stationary Dyno Installation
32
Unpacking and Inspecting the Dyno
32
Dyno Installation
37
Removing the Dyno from the Crate
37
Placing the Dyno in the Pit
40
Anchoring the Dyno
41
Installing the Air Fittings
42
Eddy Current Brake Installation
43
Chapter 3 4WD Dyno Installation
46
Unpacking and Inspecting the Dyno
46
Track Assembly Installation
49
Installing the Track Assembly
51
Dyno Installation
53
Removing the Dyno from the Crate
53
Placing the Dyno on the Track
54
Chapter 4 Eddy Current Brake Installation
56
Cable Routing
57
Identifying the Cables
58
Routing the Cables-Without the Eddy Current Brakes
58
Routing the Cables-With One Eddy Current Brake
58
Routing the Cables-With Two Eddy Current Brakes
58
Aligning the Speed Pickup Card
73
Hydraulic Movement Installation
74
Filling the Hydraulic Motor with Hydraulic Fluid
78
Wiring the Hydraulic Motor
79
Air Can Sleeve
81
4WD Dyno Movement Test
82
Bridge Installation-Stationary Dyno
83
Installing the Drum Guards
84
Installing the Runner Mounts and Runner Supports
85
Installing the Runner Assemblies and Runner Extension
86
Installing the Bridge Cover
89
Bridge Installation-4WD Dyno
90
Installing the Runner Mounts
92
Installing the Runner Assemblies
93
Installing the Bridge Cover and Runner Tie Straps
94
Chapter 5 Linx Installation
95
Forward Pit Covers
96
Ground Hook Installation
98
Eddy Current Brake Installation
99
Before Installing the Eddy Current Brake: Verify Optimal Brake Cooling
100
Unpacking the Eddy Current Brake
102
Installing the Temperature Sensor
106
Installing the Bearing, Spline Shaft, and Driveline Assembly
107
Installing the Load Cell
111
Pit Covers Installation
114
Load Cell Calibration
117
Linx Installation
123
Linx Belt Drive Specifications
124
Unpacking the Linx Parts
125
Inner Mounting Plate Installation
129
Inner Mounting Plate Installation
130
Flange Bearing, Outer Shaft, and Splined Shaft Installation
131
Flange Bearing, Outer Shaft, and Splined Shaft Installation
132
Drive Pulley Installation
133
Idler Pulley Assembly Installation
135
Belt and Tensioner Pulley Assembly Installation
136
Pulley Mounting Plates and Outer Bearings Installation
138
Linx Detect Sensor Cable Routing
149
Brake Signal Relay Installation
151
Tension the Belt
153
Linx Belt Covers Installation
155
Continue Dyno Installation
158
Disconnect the Belt Drive from the Dyno Drums
159
Reconnecting the Belt Drive
160
Chapter 6 Basic Dyno Operation
161
Loading the Vehicle
162
Connecting the RPM Pickup
166
RPM Pickup Descriptions
166
Connecting the Secondary Inductive Pickup
167
Connecting the Primary Inductive Pickup
168
Grounding the Vehicle
169
Pre-Run Inspection
170
Before Starting the Engine
170
Engine Warm up
171
After Engine Warm up
171
Making a Test Run
172
Preventative Maintenance
173
Things to Check
173
Appendix A Red Head Anchor Installation
179
Warnings
179
Contact Information for ITW Ramset/Red Head
179
Appendix B Power Requirements and Installation
183
North America, Japan, and Locations Using 60 Hz Power
184
Installing the Wall Receptacle
184
Testing for Correct Voltages
185
Hard Wiring to the Building
186
Installing the Wall Receptacle
188
Testing for Correct Voltages
189
Hard Wiring to the Building
189
Lift Kit Installation
192
Air Fittings Upgrade
193
Appendix C Stationary Dyno Upgrade
195
Appendix D Bridge Extension Assembly
195
Bridge Extension Installation
196
Disconnect the Belt Drive from the Dyno Drums
204
Appendix E Linx Belt Drive-Early Version Shafts
207
Appendix F Shaft Safety Wire Installation
207
Appendix G D-Lok Bearing Installation
209
Warnings
209
Contact Information for Baldor • Dodge
209
Bearing Lubrication
210
Appendix H Torque Values
211
Standard Bolt Torque Values
212
Grade 5
212
Grade 8
212
Index
215
Advertisement
Related Products
Dynojet 424
Dynojet POWER VISION 4
Dynojet 200
Dynojet 224
Dynojet 250
Dynojet 250i
Dynojet Dynoware RT
Dynojet DynoWare RT 250i
Dynojet DynoWare RT 250iP
Dynojet sd12
Dynojet Categories
Motorcycle Accessories
Automobile Accessories
Control Unit
Measuring Instruments
Tuner
More Dynojet Manuals
Login
Sign In
OR
Sign in with Facebook
Sign in with Google
Upload manual
Upload from disk
Upload from URL