Sign In
Upload
Manuals
Brands
Christie Manuals
Projector
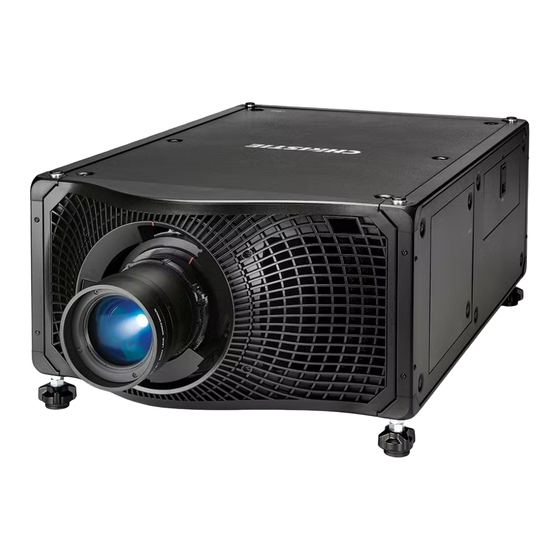
Mirage 304K
Christie Mirage 304K Manuals
Manuals and User Guides for Christie Mirage 304K. We have
6
Christie Mirage 304K manuals available for free PDF download: Service Manual, User Manual, Installation And Setup Manual, Manual
Christie Mirage 304K Service Manual (113 pages)
Brand:
Christie
| Category:
Projector
| Size: 30.01 MB
Table of Contents
Table of Contents
3
Introduction
7
Affected Products
7
Site Requirements
7
Physical Operating Environment
7
Power Connection
7
Projector Components
8
IR Remote Keypad
9
Service Guidelines
12
Ordering Parts
12
Replacing Modules
12
Interconnections and Line Drawings
12
Servicing Live Equipment
12
Safety and Warning Guidelines
13
Light Intensity Hazard Distance
14
Product Labels
16
General Hazards
16
Mandatory Action
17
Electrical Labels
17
Additional Hazard Labels
17
Service Setups
18
Turning the Projector on
18
Turning the Projector off
18
Adjusting Boresight
18
Adjusting the Fold Mirror
20
Optimizing the Integrator Zoom and Focus
21
Adjusting DMD Convergence
22
Disconnecting the Liquid Cooling System Hoses
23
Parts and Module Replacement
26
Maintenance Prerequisites
26
Tools Required for Service
26
Index of Parts and Modules
27
Projector Covers and Feet
31
Removing the Filter Doors
31
Replacing the Captive Lock Screws
31
Removing the Front Cover
33
Removing the Top Cover
34
Removing the Rear Cover
35
Removing the Optics-Side Cover
35
Removing the Electronics-Side Cover
36
Removing the Bottom Cover
36
Replacing a Projector's Foot
37
Filtration
38
Replacing the Front Air Filters
38
Replacing the User Interface Air Filter
39
Replacing the Laminar Airflow Device Filter
40
Ventilation and Cooling
42
Replacing the Lamp Blower Fans (#1, 2, 3)
42
Replacing the Lamp Blower Fans (#4, 5, 6)
43
Replacing the Lamp Fans (#7, 9, 11)
43
Replacing the Lamp Fans (#8, 10, 12)
44
Replacing the Radiator Fans (#13, 14, 15, and 16)
45
Replacing the HIP Blower Fans (#17 and 18)
46
Replacing the Side Intake Duct
47
Replacing the Side Intake Fans (#19 and 20)
47
Replacing the Lamp Driver Intake Fan (#21)
48
Replacing the Lamp Driver Exhaust Fan (#22)
49
Replacing the Green Fan (#23)
50
Replacing the Red Blower Fan (#24)
50
Replacing the Blue Fan (#25)
51
Removing the Laminar Airflow Device Blower Fans (#26 and 27)
52
Replacing the Lamp Duct Housing Fans (#28 and 29)
53
Replacing the Card Cage Exhaust Fans (#30 and 31)
54
Replacing the Power Supply Module Fans
55
Removing the Laminar Airflow Device Blower Module
56
Replacing the Liquid Cooling Module
56
Replacing the Radiator
57
Electronics
59
Removing the Card Cage
59
Replacing the Option Cards
60
Removing the User Interface Module
60
Replacing the Lamp Door Interlock-Design a
62
Replacing the Lamp Door Interlock-Design B
63
Replacing the Lamp Driver Housing
64
Replacing the Lamp Driver
65
Replacing the Power Supply Module
66
Testing Ground Continuity
67
Optics
69
Replacing Lamp Cartridge a or B
69
Replacing the Lamp Module
70
Repairing a Lamp Module Lens
70
Removing the Light Dump
72
Replacing the Shutter
72
Replacing the Light Engine
73
Replacing the Integrator Module
77
Removing the Integrator Front Plate Assembly
80
Replacing the Integrator Zoom and Focus Module
82
Replacing the Relay Optics Housing
83
Cleaning or Replacing Fold Mirror 1
84
Cleaning or Replacing Fold Mirror 2
85
Lens Mount Components
87
Removing the Lens Boot
87
Removing the Lens Mount Barrel
87
Replacing the Offset Motor
89
Harnesses
91
Replacing the Mini-SAS Light Engine Harnesses
91
Replacing the NFCR Harnesses
92
Replacing the IKB Harnesses
94
Replacing the HKB and SLB Harnesses
94
Replacing the Lamp Driver Harnesses
96
Replacing the Lens Mount Harnesses
97
Printed Circuit Boards and Sensors
99
Replacing the IMXB Board
99
Replacing the High-Speed Imaging Processing Board (HIP)
99
Replacing the Backplane Board (C4BP)
100
Replacing the Rear Convenience Light Board (CLB)
101
Replacing the Card Cage Convenience Light Boards (CLB)
102
Replacing the Near Field Communication Tags (NFCT) on the Lamp Duct
103
Replacing the Rear IR Sensor Board
104
Replacing the Front IR Sensor Board
105
Replacing the Housekeeping Board (HKBA)
105
Replacing the Status LED Board (SLB)
106
Replacing the Dual Temperature Sensor Module (DTSM)
107
Replacing the Lens Connector Board Projector
107
Replacing the Light Sensor Module (LSM)
108
Replacing the Remote Temperature Sensor Module (RTSM)
108
Replacing the Manual Focus Sensor
109
Replacing the Auto Focus Sensor
110
Replacing the Vertical and Horizontal Offset Adjust Sensor
110
Advertisement
Christie Mirage 304K User Manual (79 pages)
Brand:
Christie
| Category:
Projector
| Size: 1.92 MB
Table of Contents
Table of Contents
3
Introduction
8
Safety and Warning Guidelines
8
Light Intensity Hazard Distance
9
Product Labels
10
Projector Overview
12
Contact Your Dealer
12
Key Features
13
How the Projector Works
13
List of Components
13
Product Documentation
14
Related Documentation
14
Site Requirements
14
Physical Operating Environment
14
Power Connection
15
Projector Components
15
IR Remote Keypad
16
Display Panel Components
19
Turning on the Projector
20
Projector LED Status Indicators
20
Projector LED Shutter Indicators
21
Turning off the Projector
21
Adjusting the Image
22
Selecting Screen Image Orientation
22
Setting the Image Resize Preset
22
Adjusting Lens Settings
22
Adjusting Offset
22
Resetting the Lens to Home Position
23
Aligning the Image with Lens Zoom and Focus
23
Locking the Lens Motor
23
Calibrating the Zoom Motor
23
Determining What Lens Warnings Are Displayed
24
Lens Control Limitations
25
Ultra Short Throw Lens Control Limitations
26
Enabling the Ultra Short Throw Lens Keep-Out Area
26
Adjusting Primary Colors
27
DMD Color Correction
27
Adjusting Color by Precise Chromaticity Values
27
Adjusting Color by Saturation
28
Signal Color Correction
28
Adjusting the Color Space
28
Adjusting Color by Temperature
28
Adjusting Color Values Based on Gamma Function
29
Selecting the Color Correction Mode
29
Correcting for Ambient Light
29
Setting the Frame Delay
30
Enabling Film Mode Detect
30
Adjusting the Image Sharpness
30
Creating a Seamless Image with Edge Blending
30
Adding Edge Blends to the Projector
30
Enabling Basic Edge Blending
31
Resetting Edge Blending
31
Geometry Correction
31
Enabling Warping
31
Correcting the Shape of a Keystoned Image
32
Cropping Pixels from the Display Edges
34
Configuring System Settings
35
Setting the Date on the Projector
35
Setting the Time on the Projector
35
Synchronizing the Date and Time
35
Changing the Splash Screen
35
Determining the On-Screen Display Position
36
Changing the Language
36
Changing the Temperature Units
36
Changing the User Account Password
36
Accessing the Generated User Account Password
37
Resuming Projector Operation after an AC Power Interruption
37
Keeping Electronics on in Standby Mode
37
Enabling Direct Pass-Through of HDMI, 3G, and Displayport Input Signals
38
Disabling Secondary DVI Receivers
38
Informing the Source of Signal Preferences
38
Enabling or Disabling the High Frame Rate (HFR)
38
Adjusting Lamp Power
39
Brightselect
39
Selecting Lamps Using Brightselect
39
Turning on the Projector with Low Voltage
39
Implementing Stealth Mode
40
Configuring Communications
41
Enabling Projector Communication
41
Setting the Remote Access Level
41
Communicating with Mirage 304K through Art-Net
42
Art-Net Channel Listing
42
Index List for the Input Channel
44
Working with Macros
46
Adding a Scheduled Event Macro
46
Adding a GPIO Event Macro
47
Copying a Macro
47
Editing a Macro
48
Deleting a Macro
48
Configuring the GPIO
48
GPIO Connector
49
Setting up Projector Profiles
50
Creating a New Projector Profile
50
Importing a Projector Profile
50
Restoring Settings from a Profile
50
Renaming a Projector Profile
51
Exporting a Projector Profile to an External Device
51
Deleting a Projector Profile
51
Backing Up, Restoring, and Upgrading Projector Files
52
Upgrading the Mirage 304K Software
52
Adding a Software License to a Projector
52
Exporting Backup Settings to an External Device
53
Importing a File from an External Device to Restore Settings
53
Restoring Projector Default Settings
54
Diagnostic Tools
55
Viewing Mirage 304K Information
55
Viewing Lamp Information
55
Adding Lamp End-Of-Life Indicator
55
Freezing an Image
55
Test Patterns
56
Selecting a Test Pattern
56
Modifying Grey Level Test Pattern Characteristics
56
Modifying Ramp Test Pattern Characteristics
56
Modifying Grid Test Pattern Characteristics
57
Enabling a Specific Test Pattern Color
57
Selecting an Engine Test Pattern
57
Viewing Mirage 304K Status
57
Monitoring Projector and Lamps with Christie TAP
58
Running the Mirage 304K Interrogator
58
Identifying Where Alarm and Trap Messages Are Sent
58
Setting the SNMP Read Community String
58
Configuring Traps
59
Defining a Trap IP Address
59
Restoring Factory Default Settings
59
Mirage 304K Specifications
60
Display
60
Control Signal Compatibility
60
Shipped Input Cards
61
Optional Input Cards
62
Temperature Sensor Thresholds
62
Warning Thresholds for Fans
63
Warning Threshold for Liquid Cooling Module
64
Power Requirements
64
Physical Specifications
65
Accessories
65
Regulatory
66
Safety
66
Near Field Communication Reader
67
Electro-Magnetic Compatibility
67
Environmental
67
Environment
68
Signal Connectivity Specifications
69
HBMIC Video Formats for Mirage Projectors
69
QDPIC Video Formats
71
TDPIC Video Formats for Mirage Projectors
71
DDIC Video Formats for Mirage Projectors
72
THIC Video Formats for Mirage Projectors
72
Hdbase-T Video Formats for Mirage Projectors
73
3GIC Video Formats for Mirage Projectors
73
Dual-Input 3D for Mirage Projectors
74
Christie Mirage 304K Installation And Setup Manual (68 pages)
Bm.1
Brand:
Christie
| Category:
Projector
| Size: 3.49 MB
Table of Contents
Table of Contents
3
Introduction
6
Safety and Warning Guidelines
6
Installation Safety and Warning Guidelines
8
Light Intensity Hazard Distance
8
Product Labels
10
Projector Overview
12
Contact Your Dealer
12
Key Features
12
How the Projector Works
13
List of Components
13
Product Documentation
13
Related Documentation
14
Installation and Setup
15
Site Requirements
15
Physical Operating Environment
15
Power Connection
15
Projector Components
16
Ir/Wired Remote Keypad
17
Display Panel Components
20
Positioning the Projector
21
Leveling the Projector
21
Installing the Projector Lens
21
Connecting to AC Power
22
Turning on the Projector
23
Projector LED Status Indicators
23
Projector LED Shutter Indicators
24
Lamp States
25
Turning off the Projector
25
Calibrating the Lens Motor
26
Removing the Projection Lens
26
Aligning the Image
27
Selecting a Test Pattern
27
Adjusting Offset
27
Adjusting Boresight
28
Adjusting the Fold Mirror
30
Optimizing the Integrator Zoom and Focus
31
Adjusting DMD Convergence
33
Aligning the Image with Lens Zoom and Focus
34
Running Auto Setup to Optimize Display Settings
34
Configuring Mirage 304K to Work with Christie Link
34
Disposing of the Product Packaging
35
Connecting Devices and Establishing Communication
36
IMXB Ports
36
Connecting a Video Source Using 3G Input Card
37
Connecting a Video Source Using DVI
38
Connecting a Video Source Using Displayport
38
Connecting a Video Source Using HDMI
39
Connecting a Video Source Using HBMIC
40
Connecting a Video Source Using TSIC
40
Connecting a Video Source Using Hdbaset
41
Selecting a Port Configuration
41
Selecting a Video Source
42
Connecting to a Computer or Server
42
Configuring the RS232 Port
42
Setting up the Ethernet
43
Setup for Mirage Projectors
44
3D Requirements
44
Hardware Requirements
44
Software and Content Requirements
44
Active Stereo 3D Configuration
45
Passive Stereo 3D Configuration
45
3D System Timing
46
3D Input Video Configurations
46
Setting up a Single Projector to Display 3D Content
46
Enabling 3D Mode
46
Confirming the Emitter Setup
47
Configuring the Projector for the 3D Source
47
Connecting Devices to the 3D Sync Ports
47
Mirage 304K Specifications
49
Display
49
Control Signal Compatibility
49
Shipped Input Cards
50
Optional Input Cards
51
Temperature Sensor Thresholds
51
Warning Thresholds for Fans
52
Warning Threshold for Liquid Cooling Module
53
Power Requirements
53
Physical Specifications
54
Accessories
54
Regulatory
55
Safety
55
Near Field Communication Reader
56
Electro-Magnetic Compatibility
56
Environmental
56
Environment
57
Signal Connectivity Specifications
58
HBMIC Video Formats
58
TSIC Video Formats for Mirage Projectors
60
QDPIC Video Formats
60
TDPIC Video Formats
61
DDIC Video Formats
61
THIC Video Formats
62
Hdbase-T Video Formats
62
3GIC Video Formats
63
Dual-Input 3D
64
Advertisement
Christie Mirage 304K Installation And Setup Manual (52 pages)
Bb.2
Brand:
Christie
| Category:
Projector
| Size: 8.07 MB
Table of Contents
Table of Contents
3
Introduction
6
Safety and Warning Guidelines
6
Installation Safety and Warning Guidelines
7
Light Intensity Hazard Distance
8
Product Labels
9
Projector Overview
11
Contact Your Dealer
11
Key Features
11
How the Projector Works
12
List of Components
12
Product Documentation
12
Related Documentation
13
Installation and Setup
14
Site Requirements
14
Physical Operating Environment
14
Power Connection
14
Projector Components
15
IR Remote Keypad
16
Display Panel Components
19
Positioning the Projector
20
Leveling the Projector
20
Installing the Projector Lens
20
Calibrating the Lens Motor
21
Removing the Projection Lens
22
Connecting to AC Power
22
Turning the Projector on
23
Projector LED Status Indicators
23
Projector LED Shutter Indicators
24
Lamp States
24
Turning the Projector off
25
Adjusting Offset
25
Resetting the Lens to Home Position
26
Adjusting Boresight
26
Adjusting the Fold Mirror
28
Optimizing the Integrator Zoom and Focus
29
Adjusting DMD Convergence
30
Aligning the Image with Lens Zoom and Focus
31
Running Auto Setup to Optimize Display Settings
31
Configuring Boxer 30 to Work with Christie Link
31
Selecting a Test Pattern
32
Connecting Devices and Establishing Communication
33
IMXB Ports
33
Connecting a Video Source Using HBMIC
34
Connecting a Video Source Using Displayport
34
Connecting a Video Source Using 3G Input Card
35
Connecting a Video Source Using HDMI
35
Connecting a Video Source Using DVI
35
Connecting a Video Source Using Hdbaset
36
Connecting a Video Source Using TSIC
36
Selecting a Video Source
36
Connecting to a Computer or Server
36
Configuring the RS232 Port
37
Setting up the Ethernet
37
Boxer 30 Specifications
38
Display
38
Control Signal Compatibility
38
Shipped Input Cards
39
Optional Input Cards
39
Temperature Sensor Thresholds
40
Warning Thresholds for Fans
41
Warning Threshold for Liquid Cooling Module
42
Power Requirements
42
Physical Specifications
43
Accessories
43
Regulatory
44
Safety
44
Near Field Communication Reader
44
Electro-Magnetic Compatibility
45
Environmental
45
Environment
46
Signal Connectivity Specifications
47
HBMIC Video Formats
47
TSIC Video Formats
48
QDPIC Video Formats
48
TDPIC Video Formats
48
DDIC Video Formats
49
THIC Video Formats
49
Hdbase-T Video Formats
49
3GIC Video Formats
50
Christie Mirage 304K Manual (7 pages)
Installing the Boxer harness connector backplates
Brand:
Christie
| Category:
Projector
| Size: 2.77 MB
Table of Contents
Installing the Boxer Harness Connector Backplates
2
Safety Precautions
2
Turning the Projector off
2
Removing the Top Cover
2
Removing the Optics-Side Cover
3
Removing the Rear Cover
3
Removing the Integrator Module
4
Christie Mirage 304K Manual (4 pages)
Upgrading the shutter and light dump performance
Brand:
Christie
| Category:
Projector
| Size: 1.55 MB
Advertisement
Related Products
Christie Matrix 3000
Christie 3308-VIV303-01
Christie 38-VIV202-01
Christie 38-VIV204-01
Christie 38-VIV212
Christie 38-VIV206-01
Christie 35/70
Christie 38-VIV208-01
Christie 38-VIV303-01 LX45
Christie 38-VIV306-01 LX50
Christie Categories
Projector
Monitor
Projector Accessories
Racks & Stands
Speakers
More Christie Manuals
Login
Sign In
OR
Sign in with Facebook
Sign in with Google
Upload manual
Upload from disk
Upload from URL