Sign In
Upload
Manuals
Brands
Chevrolet Manuals
Automobile
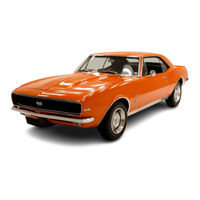
1967 CAMARO
User Manuals: Chevrolet 1967 CAMARO Automotive Car
Manuals and User Guides for Chevrolet 1967 CAMARO Automotive Car. We have
2
Chevrolet 1967 CAMARO Automotive Car manuals available for free PDF download: Service Manual, Overhaul Manual
Chevrolet 1967 CAMARO Service Manual (660 pages)
Chassis
Brand:
Chevrolet
| Category:
Automobile
| Size: 119.79 MB
Table of Contents
General Information and Lubrication
3
Model Identification - Chevrolet
3
Vehicle Dimensions - Chevrolet
3
Model Identification - Chevelle
4
Vehicle Dimensions - Chevelle
4
Model Identification - Chevy II
4
Vehicle Dimensions - Chevy II
5
Model Identification - Camaro
5
Vehicle Dimensions - Camaro
5
Unit and Serial Number Locations
5
Keys and Locks
6
Lock Cylinder Assembly
8
Tumbler Requirement Diagram
8
Automatic Transmission
9
Towing
9
Pushing
9
Manual Transmission
9
Attachment of Towing Chain Hooks to Lower Control Arms
10
Towing the Camaro
10
Vehicle Lifting Points - Chevelle
10
Towing Sling Attachment
11
Attachment of Towing Chain Hooks to Axle Tube
11
Towing Sling Attachment - Rear
11
Strapping Wood Block to Rear Spring
11
Lifting Car with Drive-On Hoist
12
Vehicle Lifting Points - Chevy II
12
Lifting with Auto Jack
12
Lifting the Corvette
12
Vehicle Lifting Points - Camaro
13
Vehicle Lifting Points - Corvette
14
Frame Lift Adapters - Corvette
14
Lubrication
15
Engine Crankcase Oil
15
Crankcase Capacity
15
SAE Viscosity Oils
15
Maintaining Oil Level
16
Types of Oils
16
Crankcase Breather Cap
16
Oil Filter
16
Crankcase Ventilation Valve
17
Fuel Filter
17
Air Cleaner
17
Distributor
17
Turbo Hydra-Matic
18
Front Wheel Bearings
18
Power Steering
18
Air Conditioning
18
Lubrication Diagram - Chevrolet
19
Lubrication Diagram - Chevelle
20
Lubrication Diagram - Chevy II
21
Body Lubrication
22
Lubrication Diagram - Comaro
22
Body Lubrication Points (Corvette)
23
Lubrication Diagram - Corvette
23
Heater Air Flow
24
Heater and Air Conditioning
24
Heater General Description
24
Heater Controls
25
Control Assembly
25
Heater Schematic (Chevy II)
25
Heater Control Panel (Chevrolet Shown as Typical)
25
Component Replacement and Repair
26
Blower Assembly
26
Temperature Damper Door
26
Air and Defrost Damper Doors
26
Core Replacement
27
Heater Blower and Air Inlet (Chevrolet, Chevelle, Comaro)
27
Defroster Duct
28
Bowden Cables
28
Fan Switch Replacement
28
Chevy II Heater Assembly
28
Corvette Blower Assembly
29
Corvette Blower and Air Inlet Assembly
29
Chevy II Fan Control
29
Chevy II Blower Motor
29
Control Assembly (Comaro)
31
Chevy II Heater Components Removal
31
Defroster Duct (Chevy II)
31
Heater Control Assembly and Cables (Chevy II)
32
Corvette Heater and Blower Inlet Assembly
32
Heater Hose Routing (Chevy II)
32
Corvette Heater Core Removal
33
Heater Assembly Installation
33
Heater and Defroster Cables (Corvette)
34
Heater Hoses - Corvette
35
Air Conditioning General Description
36
Four-Season System
36
Four-Season System Components (Chevrolet)
37
Four-Season System Components (Chevelle)
37
Four-Season System Components (Comaro)
38
Airflow - Four-Season (Chevrolet, Comaro) Comfortron (Chevrolet)
38
Four-Season System (Chevrolet, Comaro)
39
Comfortron Underdash Components
40
Outlets and Defroster Levers
40
Fan Switch
40
Comfortron System
41
Comfortron Engine Compartment Components
41
In-Car Sensor
41
Feedback Potentiometer
41
Mode Door Diaphragm
42
Outside Air Diaphragm
42
Power Servo
42
Transducer
42
Electronic Circuit
43
Changing the Electronic Signal to Electrical Voltage
43
Changing the Electrical Voltage to a Vacuum Signal
43
Changing the Vacuum Signal to Mechanical Energy
43
Universal System
44
Chevy II All-Weather System
44
"De-Fog" Position
44
Universal System Components
45
Weather System Components (Chevy II)
46
Weather System Schematic
46
Controls Corvette
47
Controls - All Weather (Chevy II)
47
Corvette Four-Season System Schematic
47
Corvette Four-Season System Components
48
Precautions in Handling Refrigerant-12
49
Additional Cooling Hints
49
Heating
49
Cycle of Operation - Universal and All Weather
50
Cycle of Operation - Four-Season and Comfortron
50
Precautions in Handling Refrigerant Lines
51
Maintaining Chemical Stability in the Refrigerant System
51
System Contaminants
51
Gauge Set
51
Charging Station
52
Leak Testing the System
52
System Charging Station
52
Leak Detector
53
Vacuum Pump
53
Availability of Refrigerant
53
Pre-Delivery Inspection
54
Compressor Oil
54
Compressor Serial Number
54
6000 Mile Inspection
55
Periodic Service
55
Installing Gauge Set to Check System Operation
55
Performance Test
55
Performance Data
56
Comfortron System Operational Test
56
Chevrolet Comfortron Tester
57
To Install the Tester
57
Quick Test Procedure
57
Complete System Checks
58
Checking Condition of Thermistors (Sensors)
58
Comfortron Tester Installation
58
Comfortron System Tester
58
System Checks
59
Maintenance and Adjustments
60
Checking for Proper Operation
60
Evaporator Control Valve (POA)
60
Thermostatic Switch
60
Comfortron Wiring Diagram - Underhood
61
Comfortron Wiring Diagram - Underdash
62
Adjusting Switch
63
Comfortron Vacuum Diagram
63
Expansion Valve
64
Evaporator Pressure Control Valve - POA
64
P.O.A. Valve Installed
64
Thermostatic Switch Removal
64
Evacuating and Charging Procedures
65
Engine Idle Compensator
65
1967 Air Conditioning System Capacities
65
Purging the System
65
Installing Charging Station to System
66
Filling Charging Cylinder
66
Checking Oil
66
Evacuating and Charging the System
66
Charging Schematic
67
Component Replacement and Minor Repairs
68
Refrigerant Line Connections "O" Rings
68
Checking Compressor Oil Charge
68
Adding Oil to the System
68
Repair of Refrigerant Leaks
69
Refrigerant Hose Failure
69
Preparing System for Replacement of Component Parts
69
Hose Clamps
69
Foreign Material in the System
70
Condenser
70
Condenser Mounting (Chevrolet and Chevelle)
70
Receiver-Dehydrator
71
Condenser Mounting (Comaro)
71
Chevrolet and Comaro Four-Season System
72
Sight Glass Replacement - All Vehicles
72
Evaporator
72
Universal System All Vehicles Core And/Or Expansion Valve Replacement
73
Chevelle Four-Season System Removal
73
Chevelle Four-Season System Installation
73
Chevelle Four-Season System Core Replacement
73
Universal System All Vehicles Removal
74
Evaporator Mounting (Chevrolet and Comaro)
74
Evaporator Mounting (Chevelle)
74
Wiring and Vacuum Lines-Four-Season (Chevrolet)
75
Underhood Wiring - Four-Season (Chevelle)
75
Chevy II All-Weather System Removal
76
Chevy II All-Weather System Within the Car
76
Chevy II All-Weather System Care And/Or Expansion Valve Replacement
76
Wiring-All Weather (Chevy II)
77
Evaporator Mounting - Universal Unit
78
Cable Removal - All Weather
79
Terminal Removal - Universal System
79
Underdash Wiring - Universal System (Typical)
79
Evaporator Removal - All Weather
80
Four-Season System Chevrolet, Chevelle, Corvette, and Comaro Replacement
81
Underdash Wiring - All Weather
81
Chevy II All-Weather System Replacement of Valve Assembly
82
P.O.A. Installation (Camaro)
83
P.O.A. Installation (Chevelle)
83
P.O.A. Installation (Corvette)
83
All-Weather System (Thermostatic Switch Only) Chevy II Replacement
84
All-Weather System Chevy II Installation
84
All-Weather System Chevy II Removal
84
Universal Blower Assembly
86
Air Inlet Valve
87
Blower and Evaporator Assembly
87
Air Distributor Assembly and Outlet Ducts
87
Air Distributor Assembly
88
Comfortron Automatic Control Components
89
Heater and Air Distributor Assembly
90
Resistor Assembly
91
Relays
91
Thermal Vacuum Valve
91
Vacuum Tank
91
Control Head
92
Refrigerant and Vacuum Hoses (Corvette)
92
Comfortron Vacuum Tank
92
Collision Procedure - All Systems
93
Mode Shift Vacuum Diaphragm
93
Comfortron Underhood Wiring
94
Comfortron Underdash Vacuum Lines
95
Comfortron Underhood Vacuum Lines
95
Fuses
96
Four Season Heater Components
96
Comfortron Power Servo Installation
97
Compressor Mount - L-6 Engines
97
Comfortron Heater Components
98
Compressor
99
Compressor Failure
100
Compressor Belt Tension Adjustment
100
Wiring Diagrams
101
Chevrolet - Four-Season Wiring Diagram
101
Chevelle - Four-Season Wiring Diagram
102
Camaro - Four-Season Wiring Diagram
103
Universal System Wiring Diagram (Typical)
104
All Weather Wiring Diagram (Chevy II)
105
Corvette - Four-Season Wiring Diagram
106
Heater and Air Conditioning Special Tools
107
Hood
108
Corvette Maintenance & Replacements
108
Front End Adjustments
108
Corvette Body General Description
108
Hood Assembly
109
Hood Prop
109
Front Emblem
109
Vent Grilles
109
Hood Hinge and Catch
110
Cowl Ventilator Assembly
111
Sun Visor
111
Rear View Mirror
111
Cowl Area Trim
111
Windshield Removal
112
Checking Windshield Body Opening
112
Scribing Line Around Hood Hinge
112
Windshield Installation
113
Console Trim
113
Special Clip
113
Sun Visor and Inside Rear View Mirror
113
Door Hinges
114
Doors Adjustments
114
Door Window and Vent Adjustment
114
Door Lock Striker
114
Windshield Glass and Reveal Moldings
115
Trim Panel, and Inside Handles
118
Weatherstrip
118
Door Ventilator Assembly
119
Ventilator Window Assembly Replacement
119
Door Weatherstrip
120
Window Glass
120
Glass Run Channel - Upper
121
Window Outer Seal Assembly
121
Window Inner Seal
121
Glass Run Channel - Rear
122
Window Regulator - Manual
122
Window Regulator - Power
122
Model 19467 Ventilator Assembly
123
Outer Handle
123
Door Lock and Remote Controls
123
Lock Cylinder Replacement
124
Hinges - Door Assembly Removal
124
Rear Quarter
126
Door Sill Plate and Molding
126
Rear End Folding Top Compartment Lid
126
Power Window Regulator
127
Rear Window - Adhesive Caulced - 19437 Model
128
Locking Regulator Arm in Place
128
Folding Top Lid Assembly
130
Spare Tire Mount
130
Rear Filler Panel
130
Gas Tank Door and Rear Trim Plate
130
Rugs and Interior Trim
132
Procedure for Cleaning Coated Fabrics
132
Cleaning Soft Trim
132
Procedure for Cleaning Folding Top Material
132
Carpets and Covers - All Models
133
Rear Body Trim
133
Applying Silane Primer
133
Garnish Moldings Plus Headliner - 19437 Model
134
Seats
134
Body Mounting
134
Body Repairs
134
Precautions
136
Plastic Solder Kit
136
Body Mounts
136
Resin Kit
137
Front Body Construction
137
Center Body Construction
138
Scratched Panels, Spot Refinishing
139
Underbody Construction
139
Specific Repairs
139
Dents or Pits in Panels, Cracks in Glaze Coat
140
Bonding Strips - Roof Reinforcement
140
Rear Body Construction
141
Cracked Panels
142
Typical Body Bonds
142
Mixing Plastic Solder Material
142
Fractured Panels
144
Typical Pitted Panel
144
Typical Cracked Panel
144
Cracked Panel Preparation
144
Hard Top Weatherstrip and Moldings
145
Marking Molding Position
146
Installing Reveal Molding Retainers
146
Panel Replacement
146
Hard Top Window Moldings
146
Applying Sealer to Frame
147
Pulling Cord from Weatherstrip
147
Installing Window Assembly
147
Applying Sealer to Weatherstrip
147
Rear Window Installation
148
Applying Cement to Window
148
Rear Window Removal
148
Hard Top Care and Storage
148
Garnish Moldings and Latches
149
Headlining
150
Weatherstrip and Drip Moldings
150
Vinyl Covering on Removable Hardtop
150
Vinyl Roof Cover Repairs
152
Scuffs or Small Cuts Near Exterior Moldings
152
Hardtop Weatherstrips and Moldings
152
Wrinkles, Blisters and Bubbles
153
Care of Rear Window
153
Care of the Folding Top
153
Folding Top Adjustments
154
Folding Top Trim Installation
154
Trim of Header
155
Rear Bow Retaining Screws
155
Installing Trim and Weatherstrip to Rear Bow
155
Rear Bow Hold-Down Locks
156
Hinge
156
Header
156
Top Assembly Removal and Installation
156
Top Trim and Rear Window Assembly
157
Installing Binding
157
Top Frame and Linkage
157
Side Rail Weatherstrips
158
Hardtop Attachments of Rear Bow
158
Header Weatherstrip
158
Hardtop Attachments of Lock Pillar Area
158
Side Rail Weatherstrip
159
Adding Hardtop (Roof Panel Assembly)
159
Frame and Linkage
159
Corvette Body Special Tools
160
Frame General Description
161
Tramming Sequence
161
Frame Repair Procedures
161
Checking Frame Alignment
161
Frame Dimensions (Chevrolet)
162
Frame Dimensions (Chevelle)
163
Frame Dimensions (Corvette)
164
Front Suspension General Description
165
Front Suspension - Chevrolet
166
Front Suspension - Chevelle & Camaro
166
Front Suspension Maintenance and Adjustments
167
Front Wheel Bearing Adjustment
167
Front Suspension - Corvette
167
Front Suspension - Chevy II
168
Caster and Camber
168
Caster and Camber Adjustment
169
Front End Alignment
169
Steering Axis Inclination Adjustment
170
Toe-In Adjustment
170
Riding Height and Coil Spring Sag
170
Checking Riding Height
171
Front Suspension Repair Procedures
172
Front Brake Drum - Chevrolet, Camaro, Chevelle, Chevy II
172
Front Wheel Hub
172
Steering Knuckle Removal
173
Steering Knuckle Installation
173
Installing Front Hub Inner Bearing
173
Backing Plate Removed - Chevy II
173
Shock Absorber Removal
174
Shock Absorber Installation
174
Upper Control Arm Support Installed - Chevy II
174
Strut Rod Removal
175
Removing Shock Absorber and Bracket - Chevy II
175
Stabilizer Bar Installation
175
Stabilizer Bar Removal
175
Front Spring Removal - Chevrolet
176
Spring Removal Tools
176
Front Spring Removal
176
Compressing Front Spring - Chevy II
178
Removing Spring and Seal Assembly - Chevy II
178
Spring Seat - Exploded View - Chevy II
178
Installing Spring Compressor - Chevy II
178
Lower Control Arm Spherical Joint
180
Removing Lower Ball Joint - Chevelle & Camaro
180
Installing Lower Ball Joint
181
Disassembling Lower Ball Stud
181
Lube Fittings
182
Lower Control Arm Attachment
182
Lower Control Arm Bushing - Chevrolet
183
Lower Control Arm Bushing - Chevelle & Camaro
183
Lower Control Arm Bushing - Small - Chevelle & Camaro
183
Installing Lower Control Arm Cross Shaft Bushing
184
Removing Lower Control Arm Cross Shaft Bushing
184
Removing Lower Control Arm Pivot Bushing - Chevy II
184
Cross Shaft And/On Bushings
185
Upper Control Arm Spherical Joint
185
Upper Control Arm
186
Upper Control Arm Cross Shaft And/Or Bushings
187
Removing Pivot Shaft Bushing - Chevy II
188
Installing Pivot Shaft Bushing - Chevy II
188
Removing Upper Control Arm Cross Shaft Bushings
188
Installing Upper Control Arm Cross Shaft Bushing
188
Front Suspension Special Tools
190
Rear Suspension and Drive Line
191
Rear Suspension General Description
191
Chevrolet Rear Suspension Components
192
Chevelle Rear Suspension Components
192
Chevy II Rear Suspension Components
193
Camaro Rear Suspension Components
193
Rear Suspension Maintenance and Adjustments
194
Corvette Rear Suspension and Driveline Components
194
Measuring Rear Riding Height (Chevrolet and Chevelle)
195
Adjusting Rear Wheel Camber (Corvette)
195
Wheel Alignment (Corvette)
195
Riding Height Check
195
Wheel Bearing Adjustment (Corvette)
196
Toe-In Adjusting Shim Location (Corvette)
196
Checking Wheel Bearing Adjustment (Corvette)
196
Removing Drive Spindle from Support (Corvette)
196
Rear Suspension and Drive Line Component Parts Replacement
197
Coil Spring
197
Coil Spring Installation (Chevrolet)
198
Installing Coil Spring to Lower Control Arm (Chevrolet)
198
Coil Spring Installation (Chevelle)
198
Leaf Spring, Spring Seat Pads, Spring Eye Bushings Chevy II
199
Rear Spring - Exploded View
199
Removing Lower Pad Bracket (Chevy II)
199
Removing Front Eye Bushings (Chevy II)
199
Rear Spring Shackle Exploded View - Station Wagon (Chevy II)
200
Rear Spring - Exploded View (Camaro)
200
Removing Spring Front Bushing (Camaro)
200
Shock Absorber Mounting - Exploded View (Chevelle)
201
Installing Spring Front Bushing (Camaro)
201
Shock Absorber
201
Control Arm
202
Removing Shock Absorber Eye Bolt (Chevy II)
202
Shock Absorber Mounting - Exploded View (Chevy II)
202
Shock Absorber Mounting - Exploded View (Camaro)
203
Rear Suspension Upper Control Arm Attaching Points (Chevrolet)
203
Upper Control Arm Bushing Removal (Chevrolet)
203
Lower Control Arm Front Bushing Installation (Chevrolet)
204
Lower Control Arm Front Bushing Removal (Chevrolet)
204
Upper Control Arm Bushing Installation (Chevrolet)
204
Chevelle Upper and Lower
205
Lower Control Arm Rear Bushing Removal (Chevrolet)
205
Lower Control Arm Rear Bushing Installation (Chevrolet)
205
Control Arm Bushing Removal (Chevelle)
206
Control Arm Bushing Installation (Chevelle)
206
Carrier Mounted Suspension Bushing Removal (Light-Duty) (Chevelle)
206
Carrier Mounted Suspension Bushing Installation (Light-Duty) (Chevelle)
206
Upper and Lower Control Arm Assembly (Chevelle)
207
Rear Suspension Tie Rod - Chevrolet
207
Carrier Mounted Suspension Bushing Removal (Heavy-Duty) (Chevelle)
207
Carrier Mounted Suspension Bushing Installation (Heavy-Duty) (Chevelle)
207
Rear Suspension and Drive Line Component Parts Replacement (Corvette)
208
Wheel Spindle and Support
208
Rear Suspension Tie Rod Attaching Points (Chevrolet)
208
Tie Rod Bushing Replacement (Chevrolet)
208
Wheel Spindle and Support Cross-Section
209
Bearing Cup Removal (Corvette)
209
Installing Spindle Bearing Cup (Corvette)
209
Unseating Drive Spindle Outer Bearing (Corvette)
209
Differential Carrier Support Bracket Replacement
210
Strut Rod and Bracket
210
Shock Absorber Installation (Corvette)
210
Removing Strut Rod Shaft (Corvette)
210
Strut Rod Bushing Replacement
211
Spring Mounting (Corvette)
211
Marking Camber Cam and Bracket (Corvette)
211
Spring
211
Removing Clamp Plate (Corvette)
212
Lowering Spring (Corvette)
212
Removing Center Bolt (Corvette)
212
Aligning Spring Leaves (Corvette)
212
Torque Control Arm
213
Torque Control Arm Bushing Cross-Section (Corvette)
213
Drilling out Retainer Flare (Corvette)
213
Flaring Tool Back-Up Plate (Corvette)
214
Suspension Crossmember
214
Installing Bushings (Corvette)
214
Removing Bushings (Corvette)
214
Stabilizer Shaft Replacement
215
Removing Crossmember (Corvette)
215
Crossmember Mount Cross-Section (Corvette)
215
Stabilizer Shaft Installation (Corvette)
215
Drive Line
216
Rear Axle
216
Axle Bolts and Wheel Nuts
217
Rear Axle Cross-Section
217
Rear Axle Cross-Section (Corvette)
218
Rear Axle Noise Diagnosis
219
Gear Noise
219
Bearing Noise
219
Failure Analysis
219
Component Parts Replacement
220
Axle Assembly
220
Differential Gear Failure
220
Wheel Bearing Removal
221
Axle Shaft
221
Wheel Bolt Replacement
221
Differential Pinion Shaft Removal
221
Pinion Flange, Dust Deflector And/Or Oil Seal
222
Wheel Bearing And/Or Oil Seal Installation
222
Measuring Drive Pinion Bearing Preload
222
Drive Pinion Nut Removal
222
Drive Pinion Flange Installation
223
Drive Pinion Flange Oil Seal Installation
223
Drive Pinion Flange Removal
223
Axle Driveshaft
224
Removing Driveshaft
224
"U" Joint Trunnion Seal Installation
224
Removing Carrier Front Support
225
Removing Companion Flange Nut
225
Removing Companion Flange
225
Pinion Seal Installed
226
Installing Pinion Oil Seal
226
Installing Carrier Assembly
226
Differential Carrier
226
Table of Contents
227
Propeller Shaft and Universal Joints General Description
227
Positraction Differential Unit
227
Measuring Positraction Rotating Torque
227
Light-Duty Propeller Shaft Cross-Section (Dana Design)
227
Component Parts Replacement
228
Removing Propeller Shaft from Companion Flange
228
Propeller Shaft Sleeve and Damper Assembly
228
Heavy-Duty Propeller Shaft Cross-Section (Saginaw Design)
228
Propeller Shaft (Dana)
228
Removal
228
Repairs
228
Removing Bearing Caps
229
Installation
229
Pressing Trunnion Bearing from Propeller Shaft
230
Service Kit Trunnion (Saginaw)
230
Propeller Shaft (Saginaw)
230
Removal
230
Repairs
230
Bearing Partially Pressed from Propeller Shaft
231
Removing Bearing from Propeller Shaft
231
Installing Trunnion to Propeller Shaft
231
Installing Snap Ring to Retain Trunnion
231
Advertisement
Chevrolet 1967 CAMARO Overhaul Manual (325 pages)
Brand:
Chevrolet
| Category:
Automobile
| Size: 11.21 MB
Table of Contents
Air Conditioning Compressor
3
Minor Repair Procedures
4
Major Repair Procedures
6
Seal Assembly
8
Special Tools
16
Special Tools
41
General Description
53
Repair Procedures
57
Cylinder Head Assemblies
62
Cylinder Head
65
Oil Pump
67
Main Bearings
69
Connecting Rod Bearings
72
Camshaft Bearings
80
Cylinder Block
81
Removing Bearing
83
Special Tools
87
Water Pump
88
General Description
88
Idle System
94
Power System
94
Pump System
94
See Specifications
137
Special Tools
138
Starting Motor
145
Installation
150
Special Tools
158
Clutch and Transmissions
159
Clutch Assembly
159
Transmission Assembly
165
Main Drive Gear
192
Clutch and Transmissions
194
Clutch Drum
209
Valve Body
215
Vacuum Modulator
215
Transmission Case
215
Throttle Valve Adjustment
219
Transmission Disassembly and Reassembly
221
Control Valve Assembly
225
Rear Servo Assembly
225
Dial Indicator
227
Governor Assembly
228
Return Spring
229
Speedometer Drive Gear
233
Accumulator Piston
235
Pump Cover
239
Forward Clutch Disassembly/ Inspectiona N D Re-Assembly
239
Pump Assembly
242
Direct Clutch Housing
243
Modulator Valve
251
Inspection of Case Assembly
251
Case Bushing
251
Thrust Bearing
253
Speedometer Driven Gear Assembly
263
Special Tools
264
Steering Gear
269
Advertisement
Related Products
Chevrolet 1967 Chevelle
Chevrolet 1967CHEVY II
Chevrolet 1967 CORVETTE
Chevrolet 1960 Corvair
Chevrolet 1964 Corvette Sting Ray Sport Coupe
Chevrolet 1960 6
Chevrolet 1960 V8
Chevrolet 1961 Corvette
Chevrolet 1962 Corvair
Chevrolet 1963 Corvette
Chevrolet Categories
Automobile
Trucks
Car Navigation system
Car Video System
Automobile Accessories
More Chevrolet Manuals
Login
Sign In
OR
Sign in with Facebook
Sign in with Google
Upload manual
Upload from disk
Upload from URL