Sign In
Upload
Manuals
Brands
Brother Manuals
Printer
GTX-4
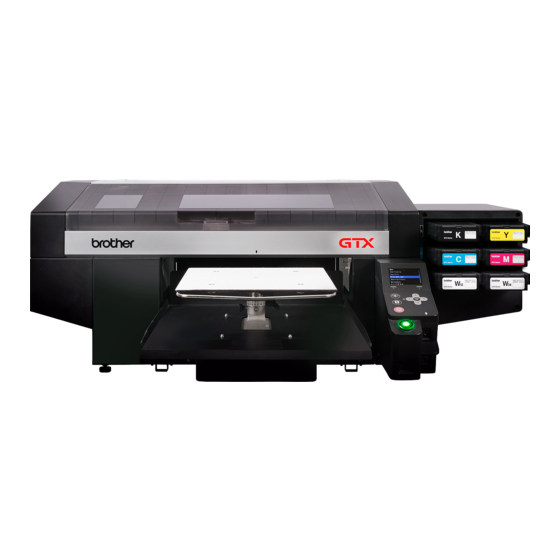
Brother GTX-4 Manuals
Manuals and User Guides for Brother GTX-4. We have
4
Brother GTX-4 manuals available for free PDF download: Service Manual, Instruction Manual, Setup Manual
Brother GTX-4 Service Manual (501 pages)
Brand:
Brother
| Category:
Printer
| Size: 35.18 MB
Table of Contents
Disassembling
2
When You Dispose of the Machine
2
Safety Instructions
3
Warning Labels
8
Table of Contents
10
1 Before Using Your Printer for the First Time
15
Be Sure to Read the Following Notes before Using the Printer
15
About Pretreatment
16
About Maintenance
16
Components Included with Printer
20
Other Items You Must Make Available for Use
21
Name and Function of each Component
23
Front Part
23
Right Side View
24
Left Side View/Rear Side View
25
Inner-Side View of
26
Bottom View of Platen
28
Operation Panel
29
Liquid Crystal Panel
31
Menu List
33
On-Screen Menu Manipulation
33
Technical Description of the Product
37
Details of the Print Head
37
Front-End Nozzle Plate
37
Back-End Components and Their Primary Functions
38
Damper Assy
38
Air Flushing Unit
38
Damper Functionality
39
Air Buffering Functionality
39
About White Ink Circulation Functionality
42
About White Ink Refilling
42
Ink Channel Block Diagram
43
About Closure Cleaning
44
Characteristic of Ink Cartridges
44
Wind-Up Mechanism
44
Remaining Ink Level Detection Mechanism
44
Correct Way of Operation
45
About Head Maintenance Mechanism
47
Head Wiper Cleaner Mechanism
48
2 Installation and Preparation
49
Installation of Printer
50
Levelness Adjustment for GTX-4
52
Power Supply of Printer
53
Turning on the Power
53
Turning off the Power
54
When There Is no Prospect of Electric Power Recovery for a While Due to Power Outage
55
Connection between Printer and PC
56
Installing Printer Driver Onto Your PC
57
Connect with USB2.0 Cable
58
When Connecting Via LAN: Printer Static IP Address Setting
60
Manual Setting
61
Automatic Acquisition
62
When Connecting Via LAN: Adding a Printer to PC
64
CR (Carriage) Speed Adjustment
71
V-Rating Setting
72
Firing Adjustment
73
Platen Feed Adjustment
74
White/Color Alignment
75
Setting of the Time Displayed on the Nozzle Check Pattern
76
Operating and Adjusting the Menu Panel
78
3 What to Do
78
Relationship between the User Menu and Advanced Menu
79
Supplement to the Description of User Menu Items
79
Maintenance Part Clean/Replace
79
White Ink Pause Mode
80
How to Display Advanced Menu
80
List of Advanced Menu Items
81
Firmware Update
81
Cap Cleaning
81
Exhaust Cleaning
82
White Tube Cleaning
82
Color Tube Cleaning
82
Setting Special Work Mode
84
Exchange Filter
84
Output Check
85
Input Check
86
Location of the Output Check Solenoids
87
Solid Print
88
Print Position Adjust
88
Set Info Restore
89
Cap Pump Check
89
Log Level
89
Procedures for Firmware Updates Conducted Using an USB Memory
91
Difference between Firmware Updates Conducted Using "Firmware Update Tool" and USB Memory
91
Procedures for When Update Is Interrupted
92
Resuming Update for Firmware Other than the Main Program
92
Update Using the Boot System Program
93
Service Tool
94
Demonstration Mode
94
Points to be Noted in Using the GTX-4 Service Tool
94
Acquisition of Logs and the Confirmation of Their Contents
95
Points to be Noted Concerning Logs
95
Checking of Logs by GTX-4 Service Tool
96
4 Improvement of Print Quality
98
Solutions to Print Quality Problems
99
Check Flow When Ink Ejection Failure of Head Occurs
100
Prior Confirmation
104
Replacing the Flushing Foam
105
Confirmation and Disposal of Waste Ink
108
Replacement of Ink Pouch
109
Re-Install the Ink
113
Printing Nozzle Check Pattern
114
After Replacing the Head Circuit Boards of Head and Color Head
118
After Replacing the Carriage Circuit Board
120
After Replacing the Main Circuit Board, Is such Failure Cleared?
121
After Cleaning the Maintenance Parts
122
Cleaning Wiper
125
Cleaning Exhaust Cap
126
Cleaning Conditions
127
Cleaning Suction Cap
128
Clean the Surrounding Area of Nozzle Surface
130
Is Maintenance Operation (Suction, Exhaust) Normal?
133
After Replacing the Suction Cap, Is such Failure Cleared?
134
Results after Performing Suction Purge/Pin Check Twice Additionally
135
After Cleaning the Surrounding Areas of Wiper and Nozzle Surface
136
After Replacing the Wiper, Is such Failure Cleared?
140
After Cleaning Surrounding Areas of Wiper and Nozzle Surface
145
After Replacing the Wiper Cleaner, Is such Failure Cleared?
149
When Performing Solid Printing, Does Non-Ink Ejecting Occur?
150
After Cleaning the Exhaust Portion, Is such Failure Cleared?
151
After Replacing the Filter, Is such Failure Cleared?
152
White Head Cleaning
155
Install White Ink after Cleaning
158
How to Solve Ink Pouch Wind-Up Failure
162
How to Solve Ink Pouch Wind-Up Failure
163
Ink Pouch Wind-Up Stops When Ink Level Lowers (to Middle or Near)
164
What to Do if an Error Code Is Displayed
165
5 Regular Maintenance
166
Cleaning
166
Cleaning the Nozzle Guard, Wiper, Exhaust Cap, and Suction Cap
166
Perform Cleaning of the White Side
168
Perform Cleaning of the Color Side
168
Cleaning the Nozzle Guard
169
Cleaning the Internal Area of Printer
176
Cleaning the CR (Carriage) Plate
180
Cleaning of Head Nozzle
182
Cleaning the Surrounding Area of Nozzle Surface
184
Cleaning of Exhaust Opening
187
Cleaning of Encoder Strip
190
Disassembly / Replacement / Adjustment
192
6 Disassembly / Replacement / Adjustment
193
Parts Exchange
193
Screw Tightening Torque
193
Necessary Tools
193
Disassembly / Assembly of Covers
194
Disassembly / Assembly of Platen
201
Replacement of Platen and Deceleration Belts
203
Tension Adjustment for Platen and Deceleration Belts
207
Replacement of Platen Motor
209
Replacement of Platen Pulley Unit
211
Replacement of Platen Arm
213
Replacement of Platen Origin Sensor
217
Print Position Adjust
218
Level Setting for Top Surface of Platen
219
Replacement of Carriage Belt
221
Carriage Belt Tension Adjustment
227
Replacement of Carriage Motor
229
Replacement of Ball Bushing
233
Height Adjustment of Carriage
238
Replacement of Encoder Strip
240
Replacement of Maintenance Unit
242
Replacing the Wiper Cleaner
247
Exchanging Wiper Blade Assembly
249
Replacement of Pump Assy
254
Replacement of Pump Sensors
258
Replacement of the Switching Solenoid
259
Replacement of the Flushing Case
260
Cap Rubber Replacement
262
Replacement of Cleaning Solution Tank
265
Replacement of Filters for Print Head on Color Side
267
Replacement of Filters of Print Head on White Side
269
Replacement of Tubes, Sub Tanks, and Needles on Color Side
272
Replacement of Tube, Circulation Pump, and Needles on White Side
284
Replacement of Print Head
289
Replacement Procedures for Print Head on the Color Side
289
Replacement Procedures for Print Head on the White Side
295
Procedures for Returning the Print Head
308
Replacement of Waste Ink-Related Components
310
Replacement of Felt Within Cartridge Base
312
Disassembly / Assembly of Ink Cartridge
314
Replacement of Electric Parts
321
Cautions for Adjustment
321
Layout Positions of Main Electric Parts
322
Operation Panel and Maintenance Unit
322
Arriage, Sensor, and Switch
323
Ink Supply, Power, Platen Motor
324
Top of Maintenance Unit
325
Rear Side of Maintenance Unit
326
Inside of Rear Side of Maintenance Unit
327
Connector Position and Indicator Lamp
328
Main Circuit Board
328
Replacement of Main Circuit Board
335
How to Connect or Disconnect FFC Connector
338
How to Connect or Disconnect New Connector JST PSI Type
339
Replacement of Lithium Battery
340
Replacement of Power Circuit Board Plate Assy
341
Replacement of Power Unit
343
Replacement of Power Circuit Board
345
Replacement of AC Inlet
347
Replacement of Panel Main Unit Assy
349
Preparation for Replacement of Electric Components Inside Panel Unit
355
Replacement of Print Switch
358
Replacement of Power Switch
362
Replacement of Panel Circuit Board
363
Replacement of Panel Control Circuit Board
364
Replacement of LCD Panel
367
Replacement of Speaker
368
Replacement of Cover Switch Assy
369
Replacement of Carriage Circuit Board
371
Replacement of Encoder Circuit Board
379
Replacement of Obstacle Sensor
381
Replacement of Platen Origin Sensor
383
Replacement of Maintenance Circuit Board
384
Preparation for Replacement of Electric Components Inside Maintenance Unit
385
Replacement of Maintenance Motor
386
Replacement of Pump Motor and Cleaner Motor
386
Assembly of Pump Motor and Cleaner Motor
387
Replacement of Wiper Motor
388
Assembly of Wiper Motor
389
Replacement of Maintenance Sensor Circuit Board
390
Replacement of Pump Sensor
393
Replacing the Wiper Cleaner Sensor
394
Assembly of Wiper Cleaner Sensor
394
Replacement of Wiper Sensor
395
Assembly of Wiper Sensor
395
Replacement of Maintenance Solenoid Valve Assy
396
Layout of Maintenance Solenoid Valve Assy
396
Replacement of Solenoid Valve A, B, C, K, L, and M
397
Assembly of Solenoid Valve A, B, C, K, L, and M
398
Replacement of Solenoid Valve D, E, F, G, N, P, R, and S
399
Replacement of Cleaning Solution Tank Sensor
402
Replacement of Ink Supply Circuit Board
403
Replacement of Remaining Ink Level Detection Circuit Board
404
Assembly of Remaining Ink Level Detection Circuit Board
404
Replacement of Tank Sensor
409
Replacement of Sub Tank Solenoid
410
Replacement of Circulation Pump Motor
411
Replacement of Mist Exhaust Fan Motor
413
7 Transportation / Maintenance in Long-Term Storage
414
When Not Using for a Long Period of Time: Within 2 Weeks
415
When Not Using for a Long Period of Time: more than 2 Weeks
416
When Not Using for a Long Period of Time: Within 2 Weeks with White Ink Pause Mode
416
When Not Using for a Long Period of Time: more than 2 Weeks with White Ink Pause Mode
417
8 Error Code List
418
Display on Screen
418
Error Message
418
9 Block Diagram, Control Circuitry
456
10 Specifications
457
Apparatus
457
Software
458
Ink, Maintenance Solution, Cleaning Solution, Pretreatment
459
Ink
459
Maintenance Solution
459
Cleaning Solution
460
Pretreatment
460
About Consumable Supplies, Optional Items and Replacement Parts
461
Setup Manual
464
Installation
473
Checking the Installation Site
473
Unpacking
474
Supplied Accessories
475
Transporting the Printer
476
Setup Procedure
477
Removing the Protection Materials
477
Mounting the Supplied Accessories
477
Rear Cover Mounting
477
Setup of the Printer
477
Cable Clamp Mounting
478
Filter Cover and Fan Filter Mounting
478
Waste Ink Tank Mounting
478
Flushing Receiver Mounting
479
Carriage Fixing Pin Mounting
479
Wiper Cleaner Mounting
480
Print Head Mounting
481
Filling the Cleaning Solution
484
Ink Cartridge Setup and Installation
484
Configuring the Language
488
Installing the Ink
488
Connection to a PC
489
Installing the Driver
489
When Connecting Via USB
489
When Connecting Via LAN
490
Adjusting the Carriage Speed
495
Checking the Nozzle Check Pattern
495
Adjustment
495
Making Adjustments after the Print Head Is Mounted
497
Maintenance List
498
Advertisement
Brother GTX-4 Instruction Manual (320 pages)
Brand:
Brother
| Category:
Printer
| Size: 5.01 MB
Table of Contents
Safety Instructions
3
Environmental Requirements
5
Table of Contents
10
1 Before Using Your Printer for the First Time
16
Be Sure to Read the Following Notes before Using the Printer
16
Components Included with Printer
21
Other Items You Must Make Available for Use
22
2 Name and Function of each Component
24
Front Part
24
Right Side View
25
Cable Clamp
25
Left Side View/Rear Side View
26
Inner-Side View of
27
Maintenance Unit
27
Bottom View of Platen
29
Operation Panel
30
Liquid Crystal Panel
32
3 Menu List
34
4 Installation and Preparation
38
Installation of Printer
39
Power Supply of Printer
41
Turning on the Power
41
Turning off the Power
42
When There Is no Prospect of Electric Power Recovery for a While Due to Power Outage
43
Carriage Fixing Pin
43
Connection between Printer and PC
44
Installing Printer Driver Onto Your PC
45
Connect with USB2.0 Cable
46
When Connecting Via LAN: Printer Static IP Address Setting
48
When Connecting Via LAN: Adding a Printer to PC
50
5 Creating Print Data
57
Common Items that Apply to All Software Applications
57
Creating Print Data from Graphix Lab
59
What Is Graphix Lab
59
Specifications
59
Starting up Application Software
60
On-Screen Instructions
61
Name
61
Editing Text
63
Editing Image
67
Creating Print Data (ARX4 File)
69
Printer Driver's Setting from Graphix Lab
71
For Graphix Lab: Selecting a Printer
72
For Graphix Lab: Creating/Selecting Preset
72
For Graphix Lab: Selecting Inks
74
For Graphix Lab: White Ink Settings
75
For Graphix Lab: Use Background Black Color
76
For Graphix Lab: Color Multiple Pass Printing
77
For Graphix Lab: Color Ink Settings
78
For Graphix Lab: White Ink Advanced Settings
80
For Graphix Lab: Color Processing
82
For Graphix Lab: Specifying Print Direction
83
Creating Print Data from Other Applications
84
Coreldraw
84
Print Size
85
Adobe Photoshop
91
Adobe Illustrator
96
Color Setting
97
Adobe Photoshop Elements
102
Printer Driver's Setting from Other Applications
105
For Other Applications: Selection of Platen Size
107
For Other Applications: Selecting Inks
108
For Other Applications: White Ink Settings
109
For Other Applications: Use Background Black Color
111
For Other Applications: Color Multiple Pass Printing
112
For Other Applications: Color Ink Settings
113
For Other Applications: White Ink Settings
114
For Other Applications: Color Processing
116
For Other Applications: Specifying Print Direction
117
How to Use Useful Tools
118
Color Palette for Adobe Photoshop, Photoshop Elements, Illustrator and Coreldraw
118
Action File for Photoshop
118
Color Sample
119
Printing a Grid Pattern Onto Platen Sheet
120
Printing Ink Volume
120
Print out of Highlight Check Pattern
121
6 Basic Printing Procedures
122
Basic Printing Process Flow
124
Tasks to be Performed before Starting Print Operation
125
Confirmation and Disposal of Waste Ink
125
Confirmation and Replenishment of Cleaning Solution
126
Daily Agitation of the White Ink
127
Pretreating Process for Print Medium
130
Provisions for Pretreatment
130
Dilution of Pretreatment
133
Application of Pretreatment
135
Fixation of Pretreatment
141
Platen Adjustment
143
Replacing the Currently Used Platen with Another One
143
Platen Height Adjustment
146
Using the 16X21 Platen
150
Placing Print Medium in Position
152
Sending/Loading Print Data
155
Sending Print Data from ARX4 File Preview
155
Sending Print Data from Graphix Lab
159
Sending Print Data from Other Applications
161
Loading Print Data (ARX4 File) from USB Flash Memory
165
Executing a Printing Job
167
Executing a Print Job Once for a Single Print Medium
167
Executing a Print Job Several Times for Multiple Print Media
167
Performing the Printing from Receiving History
168
Removing Printed Matter from Platen
169
Fixation of Ink
170
7 Precautions to Keep Good Printing Quality/Use Printer over the Long Term
172
Tasks to be Performed Regularly
173
Replacement of Ink Pouch with a New One
173
Cleaning the Nozzle Guard, Wiper, Exhaust Cap, and Suction Cap
177
Cleaning Wiper
182
Replacing the Wiper Cleaner
187
Replacing the Flushing Foam
189
Flushing Receiver
190
Flushing Foam
190
Cleaning the Internal Area of Printer
192
Replacing the Fan Filter
196
Tasks to be Performed When Needed
198
Print out of the Nozzle Check Pattern (Checking on the Print Heads)
198
Head Cleaning
200
White Ink Circulation
202
Cleaning the CR (Carriage) Plate
203
Replacing the Platen Sheet
205
What to Do in the White Ink Pause Mode
207
Disabling White Ink
207
Reusing White Ink
210
Adjustment
214
CR (Carriage) Speed Adjustment
214
V-Rating Setting
215
Firing Adjustment
216
Platen Feed Adjustment
217
White/Color Alignment
218
When Not Using for a Long Period of Time
219
When Not Using for a Long Period of Time: Within 2 Weeks
219
When Not Using for a Long Period of Time: more than 2 Weeks
220
When Not Using for a Long Period of Time: Within 2 Weeks with White Ink Pause Mode
220
When Not Using for a Long Period of Time: more than 2 Weeks with White Ink Pause Mode
221
8 What to Do When Needed
222
Setting the Print Direction
224
Auto Cleaning Setting
225
Flushing Interval Setting
226
Flushing Volume Setting
226
Print Operation Settings under Low Temperature
227
Screen Back Light Adjustment
227
Setup of Auto Screen Erase Time
228
Setting the Menu Timeout Period
228
Speaker Volume Adjustment
229
Setup of Temperature Indication
229
Automatic Deletion of Print Data
229
Settings to Start Printing During Reception of Data
230
Static IP Address Setting
230
Display of Total Printed Sheets
231
Display of Temperature/Humidity Info
231
Confirm Network Setting
232
Language Setting
233
Display of Version
233
Updating of Firmware
234
9 Troubleshooting
235
Troubleshooting Instructions
236
Solutions to Print Quality Problems
239
Recovery Action to be Taken for such a Nozzle that Is Unable to Eject Ink-Jet Droplets
245
White Head Cleaning
251
Cleaning of Head Nozzle
257
Print Head
258
Cleaning the Surrounding Area of Nozzle Surface
259
Replacing the Color Filter
262
Replacement of Print Head
264
Replacing the Wiper
282
Re-Install the Ink
287
Error Message
288
Acquisition of Log File
313
10 Specifications
315
Apparatus
315
Software
316
Ink, Maintenance Solution, Cleaning Solution, Pretreatment
317
Ink
317
Maintenance Solution
317
Cleaning Solution
318
Pretreatment
318
About Consumable Supplies, Optional Items and Replacement Parts
319
Brother GTX-4 Setup Manual (37 pages)
GARMENT PRINTER
Brand:
Brother
| Category:
Printer
| Size: 2.04 MB
Table of Contents
Table of Contents
1
Installation
10
Setup of the Printer
14
Connection to a PC
26
Adjustment
32
Maintenance List
36
Advertisement
Brother GTX-4 Instruction Manual (18 pages)
Brand:
Brother
| Category:
Printer
| Size: 3.32 MB
Table of Contents
Table of Contents
2
1 Before Using Your Printer for the First Time
3
Be Sure to Read the Following Notes before Using the Printer
3
What Is GTX Graphics Lab
4
Specifications
4
2 Preparation
5
Setting up Application Software
5
Activating GTX Graphics Lab
6
3 Screen Display and Functions
7
Using GT Transparency to Set RGB=255 to "Transparent Color
7
Structure of GTX Graphics Lab Screen
8
Use GTX Graphics Lab to Edit Text
10
Editing Images in GTX Graphics Lab
14
Creating Print Data (AR3/ARX4 File) from GTX Graphics Lab
16
Advertisement
Related Products
Brother GTX Series
Brother GTX
Brother GTX pro
Brother GTX pro Bulk
Brother GTX600NB
Brother GTX600
Brother GTX600SB
Brother GTXpro B
Brother GTX-424
Brother GT-3 Series
Brother Categories
Sewing Machine
All in One Printer
Printer
Label Maker
Fax Machine
More Brother Manuals
Login
Sign In
OR
Sign in with Facebook
Sign in with Google
Upload manual
Upload from disk
Upload from URL