Sign In
Upload
Manuals
Brands
Brother Manuals
Printer
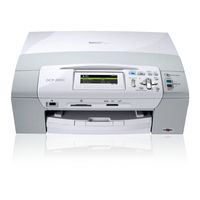
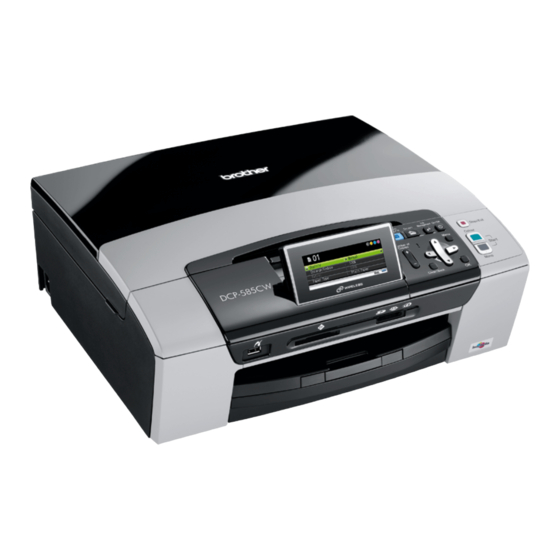
DCP-585CW
Brother DCP-585CW Manuals
Manuals and User Guides for Brother DCP-585CW. We have
7
Brother DCP-585CW manuals available for free PDF download: Service Manual, User Manual, Quick Setup Manual, Guía De Configuración Rápida, Brochure & Specs
Brother DCP-585CW Service Manual (529 pages)
Inljet MFC/DCP
Brand:
Brother
| Category:
Printer
| Size: 24.12 MB
Table of Contents
Chapter 1 Parts Names and Functions
20
Service Manual
1
How this Manual Is Organized
4
Choosing a Location
7
Parts Names and Functions
19
Outline
21
Control Panel
24
Combinations of Two Keys for Special Functions
35
Components
36
Components View
36
Specifications
37
Chapter 2 Specifications
38
Table of Contents
38
General
40
Media Specifications
41
Paper Handling
42
Lcd/Led/Panel
43
Memory
44
Security
44
Others
45
Interface
46
Telephone
48
Volume
48
Quick/Auto Dials
49
Tel Service
49
Message Center
50
List/Report
50
Fax
52
Not Available
52
Sending
53
Receiving
54
Pc Fax
54
Printer
55
Copy
57
Scanner
59
Photo Capture
60
Pictbridge
62
Bluetooth
62
Software
63
Network
64
Wired
65
Wireless
66
Supplies/Options
67
Service Information
69
Paper
70
Paper Specifications
70
Printable Area
72
Language List
73
ITU-T Test Chart #1
74
Brother Chart
75
Theory of Operation
76
Chapter 3 Theory of Operation
77
Overview
78
Mechanical Components
79
Scanner Mechanism
82
Printing Mechanism
85
1 ] Overview
87
Ink Supply and Ink Jet Mechanism
87
2 ] Features
88
3 ] Head/Carriage Unit
89
4 ] Ink Cartridges
94
5 ] Ink Refill Assembly
96
6 ] Ink Supply Tubes
97
1 ] Overview
98
Head Maintenance Mechanism
98
2 ] Maintenance Unit Components
99
3 ] Mechanisms Constituting the Head Maintenance Mechanism
101
4 ] Power Transmission Route to the Head Maintenance Mechanism and Motor Rotational Direction
106
5 ] Purge Types, Ink Usage, Purge Counts, and Purge Codes
109
6 ] Ink Cartridge Capacities
109
Carriage Drive Mechanism
110
Paper Pulling-In, Registration, Feeding and Ejecting Mechanisms
114
Sensors and Actuators
119
Control Electronics
122
Components
122
Error Indication and Troubleshooting
123
Chapter 4 Error Indication and Troubleshooting
124
Error Indication
126
Equipment Errors
126
1 ] Error Messages Appearing on the LCD
127
2 ] Error Codes Contained in "MACHINE ERROR X X" Messages
133
Communications Errors (for MFC Only)
150
Troubleshooting
157
Introduction
157
Precautions
157
Checking Prior to Troubleshooting
157
Troubleshooting Based on Problem Type
159
1 ] Control Panel and LCD Problems
159
2 ] Fax/Telephone Problems (for MFC Only)
159
3 ] Communications Problems (for MFC Only)
160
4 ] Paper/Document Feeding Problems
160
5 ] Print-Image Problems
161
6 ] PC-Driven Printing Problems
166
8 ] Wireless LAN (WLAN)*2
167
9 ] Others
167
Problems Encountered Frequently in the Past
168
1 ] Paper Jams
168
2 ] Ink-Related Problems
169
3 ] Auto Document Feeder (ADF) Malfunction (for Models with ADF)
170
Possible Component Defects and Resulting Problems
171
1 ] ADF Mechanism (for Models with ADF)
171
2 ] Scanner Mechanism
172
3 ] Head/Carriage Unit Drive and Purge Mechanisms
173
4 ] Print Head Mechanism
174
5 ] Sheet Feeder (SF) Mechanism
175
6 ] Paper Feeding Mechanism
175
7 ] Speaker
175
8 ] Control Panel
176
9 ] Pcbs
176
10 ] Adjustments/Data in the Memories
177
Chapter 6 Disassembly/Reassembly and Lubrication
183
Disassembly/Reassembly
185
Safety Precautions
185
Tightening Torque
186
Preparation
187
How to Access the Target Component
188
Disassembly Flowchart
189
Jam Clear Cover
190
Scanner Cover (Scanner Unit)
191
ADF & Document Cover ASSY (Document Cover) (for Models with ADF), Document Cover (for Models Without ADF)
201
Disassembly of ADF & Document Cover ASSY (for Models with ADF)
204
Control Panel ASSY
215
Disassembly of Control Panel ASSY
217
Charge Stand ASSY (for Models with Cordless Handset)
223
Antenna & Cordless PCB ASSY (for Models with Cordless Handsets)
230
Ink Cartridge Cover, Inner Media Module Cover
232
Main PCB
234
MJ/PS Shield Unit (MJ PCB* and Power Supply PCB)
238
Hook Switch PCB (for Models with Handset)
246
Head/Carriage Unit and Ink Refill ASSY
248
Ink Absorber Box, Ink Absorber Felts, and PF Encoder Disk
260
Engine Unit and Flushing Box
262
Outing of Harnesses/Flat Cables/Ink Supply Tubes
278
Chapter 7 Adjustments and Updating of Settings, Required after Parts Replacement
297
Required after Parts Replacement
297
Preparation
299
Requirements
299
Installing the Maintenance USB Printer Driver
301
If You Replace the Head/Carriage Unit or Engine Unit
305
1 ] Update the Head Property Information Stored in the EEPROM on the Main PCB
305
2 ] Clean the New Head/Carriage Unit (Function Code 76)
309
3 ] Print out a Test Pattern (Function Code 09)
310
4 ] Correct the Positioning Error of the Head/Carriage Unit
311
5 ] Update the Paper Feeding Correction Value (Function Code 58)
314
6 ] Align Vertical Print Lines (Function Code 65)
318
7 ] Adjust Margins in Borderless Printing (Function Code 66)
320
8 ] Print out a Total Check Pattern
325
9 ] Switch Back to Standby
327
10 ] Replace the Ink Cartridges with the Protective Part
327
If You Replace the Main Pcb
328
1 ] Load Update Programs/Data
328
2 ] Initialize the EEPROM on the Main PCB (Function Code 01)
328
3 ] Customize the EEPROM on the Main PCB (Function Code 74)
328
4 ] Specify the CIS Type (Function Code 59)
328
5 ] Register Base ID Code to the Main PCB and Base Unit (Cordless PCB) (for Models with Cordless Handsets)
328
6 ] Check the Control Panel PCB for Normal Operation (Function Code 13)
329
7 ] Check the Sensor Operation (Function Code 32)
329
8 ] Acquire White Level Data and Set CIS Scanner Area (Function Code 55)
329
9 ] Set an ID Code and Update the Head Property Information
329
10 ] Back up Machine Information (Function Code 46)
331
11 ] Update the Paper Feeding Correction Value (Function Code 58)
332
12 ] Align Vertical Print Lines (Function Code 65)
332
13 ] Adjust Margins in Borderless Printing (Function Code 66)
332
Print out an ADF Copy Chart and Make a Copy of that Chart in ADF Scanning (for Models with ADF)
332
Check LCD Operation and Specify the LCD Type (Function Code 12)
332
Adjust the Touch Panel (Function Code 78) (for Models with Touch Panel)
332
Get EEPROM Data (Incl. MAC Address) from the WLAN PCB (for Wireless LAN-Enabled Models)
332
18 ] Switch Back to Standby
333
19 ] Register Cordless Handsets (for Models with Cordless Handsets)
333
If You Replace the Adf & Document Cover Assy or Adf-Related Parts (for Models with Adf)
335
1 ] Check the "Total Quality Check Pattern
335
Print out an ADF Copy Chart and Make a Copy of that Chart in ADF Scanning
335
If You Replace the Ink Absorber Box or Flushing Box
338
1 ] Reset each of the Purge and Flushing Counters
338
If You Replace the Control Panel Assy or Control Panel Pcb
339
Check LCD Operation and Specify the LCD Type (Function Code 12)
339
2 ] Check the Operation of the Control Panel PCB (Function Code 13)
339
Adjust the Touch Panel (Function Code 78) (for Models with Touch Panel)
339
If You Replace the Fb Unit* or Scanner Cover (Scanner Unit)
339
1 ] Load Update Programs/Data
339
2 ] Specify the CIS Type (Function Code 59)
339
Acquire White Level Data and Set CIS Scanner Area (Function Code 55)
339
4 ] Check the "Total Quality Check Pattern" (for Models with ADF)
339
Print out an ADF Copy Chart and Make a Copy of that Chart in ADF Scanning (for Models with ADF)
339
If You Replace the Cordless Pcb (for Models with Cordless Handsets)
340
Register Base ID Code to the Main PCB and Base Unit (Cordless PCB)
340
2 ] Register Cordless Handsets
340
If You Replace the Wlan Pcb (for Wireless Lan-Enabled Models)
340
1 ] Transfer EEPROM Data (Incl. MAC Address) to the Main PCB
340
If You Replace the Cordless Handsets
341
1 ] Deregister and Register Cordless Handsets
341
Chapter 9 Maintenance Mode
350
Maintenance Mode for the Machine
353
Entry into the Machine Maintenance Mode
353
List of Machine Maintenance-Mode Functions
355
User-Access to the Machine Maintenance Mode
356
Detailed Description of Functions in the Machine Maintenance Mode
357
EEPROM Parameter Initialization (Function Code 01, 91)
357
Printout of Scanning Compensation Data (Function Code 05)
358
ADF Performance Test (Function Code 08)
360
Test Pattern (Function Code 09)
361
Firmware Switch Setting and Printout (Function Codes 10 and 11) (User-Accessible)
363
Operational Check of LCD and Specifying of the LCD Type (Function Code 12) (User-Accessible)
368
Operational Check of Control Panel PCB (Function Code 13)
370
Updating of Firmware Using an External Memory (Function Code 28)
372
Sensor Operational Check (Function Code 32)
373
Addition of Cordless Handsets (Function Code 33) (User-Accessible)
375
Cordless Handset Transmitter Volume (Function Code 39) (User-Accessible)
377
Printout of Dial Log (Function Code 37) (User-Accessible)
377
Backup of Machine Information (Function Code 46) (User-Accessible)
378
Setting of Country/Language (Function Code 52) (User-Accessible)
380
Transfer of Received FAX Data And/Or Equipment's Log (Function Code 53) (User-Accessible)
381
Fine Adjustment of Scanning Start/End Position (Function Code 54)
383
Acquisition of White Level Data and CIS Scanner Area Setting (Function Code 55)
384
Updating of Paper Feeding Correction Value (Function Code 58)
385
Checking of CIS Travel and Specifying of CIS Type (Function Code 59)
389
Travel Check of the Head/Carriage Unit and Initial Setup Mode (Function Code 63)
391
Alignment of Vertical Print Lines in Monochrome (Function Code 65)
392
Margin Adjustment in Borderless Printing (Function Code 66) (User-Accessible)
395
Updating of Property Data (Function Code 68)
400
Head/Carriage Unit Traveling Speed Check (Function Code 69)
401
EEPROM Customizing (Function Code 74)
402
Travel of Head/Carriage Unit (for Removing Paper Particles and Dust Accumulated on the Maintenance Unit) (Function Code 75) (User-Accessible)
405
Purge Operation (Function Code 76) (User-Accessible)
406
Print of the Equipment's Log (Function Code 77)
409
Adjustment of Touch Panel (Function Code 78)
411
Display of the Equipment's Log (Function Code 80) (User-Accessible)
412
Equipment Error Code Indication (Function Code 82) (User-Accessible)
414
Output of Transmission Log to the Telephone Line (Function Code 87) (User-Accessible)
414
Assurance Mode Switch Setting (Function Code 88) (User-Accessible)
415
Cancellation of the Pin TX Lock Mode (Not Applicable to Japanese and U.S.A. Models)
425
Maintenance Functions for Cordless Handsets
426
Overview
426
Maintenance Functions for U.S.A. Models
426
List of Maintenance Functions
426
Checking of Cordless Handset ID Code and Base ID Code (Function Code 086)
427
Measuring of RSSI (Received Signal Strength Indicator) (Function Code 195)
428
Measuring of BER (Bit Error Rate) (Function Code 196)
429
Version Information on Cordless Handset (Function Code 197)
429
EEPROM Parameter Initialization (Function Code 198)
430
Maintenance Functions for European Models
431
Version Information on Cordless Handset
431
Checking of Base ID Code
432
Checking of Cordless Handset ID Code
432
Setting of Country for Cordless Handset
433
Appendix 2. Firmware Installation
438
1 ] Preparation
439
2 ] Installing the Brother Maintenance USB Printer Driver
439
A2.1 Loading the Programs to the Flash ROM
439
Appendix 2. Firmware Installation
439
This Appendix Provides Instructions on How to Change Firmware Stored in the Flash ROM on the Main
439
3 ] Loading the Programs Onto the Flash ROM of the Machine
443
[3.1] if the Main PCB Is Replaced with a New One
443
[3.2] if the Main PCB Loaded with Programs Is Used
445
To Load Programs from the PC
445
To Load Programs Using an External Memory
446
Advertisement
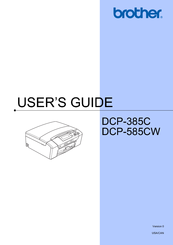
Brother DCP-585CW User Manual (132 pages)
Brother DCP-385C: User Guide
Brand:
Brother
| Category:
All in One Printer
| Size: 4.78 MB
Table of Contents
Brother Numbers
3
For Customer Service
3
Ordering Accessories and Supplies
4
Compilation and Publication Notice
5
Usa and Canada
5
Table of Contents
9
1 General Information
14
Using the Documentation
14
Symbols and Conventions Used in the Documentation
14
Accessing the Software User's Guide and Network User's Guide
14
Viewing Documentation
14
Accessing Brother Support (for Windows ® )
17
Control Panel Overview
18
LCD Screen
19
Basic Operations
19
Status LED Indications
20
2 Loading Documents and Paper
21
Loading Paper and Other Print Media
21
Loading Envelopes and Post Cards
23
Loading Photo Paper
25
Removing Small Printouts from the Machine
26
Printable Area
27
Acceptable Paper and Other Print Media
28
Recommended Print Media
28
Handling and Using Print Media
28
Choosing the Right Print Media
30
Loading Documents
32
Using the Scanner Glass
32
Scannable Area
33
3 General Setup
34
Paper Settings
34
Paper Type
34
Paper Size
34
Sleep Mode
35
LCD Screen
35
Changing LCD Language
35
LCD Contrast
35
Setting the Backlight Brightness
36
Setting the DIM Timer for the Backlight
36
Printing Reports
36
How to Print a Report
36
4 Making Copies
38
How to Copy
38
Making a Single Copy
38
Making Multiple Copies
38
Stop Copying
38
Copy Options
38
Changing Copy Quality
39
Enlarging or Reducing the Image Copied
39
Making N in 1 Copies or a Poster
40
Adjusting Brightness and Contrast
41
Paper Options
42
Book Copy
42
Watermark Copy
43
Setting Your Changes as the New Default
44
Restoring All Settings to the Factory Settings
44
Section III Walk-Up Photo Printing
45
5 Photocapture Center ® : Printing Photos from a Memory Card or
45
USB Flash Memory Drive
46
Photocapture Center ® Operations
46
Printing from a Memory Card or USB Flash Memory Drive Without a PC
46
Scanning to a Memory Card or USB Flash Memory Drive Without a PC
46
Using a Memory Card or USB Flash Memory Drive
46
Using Photocapture Center ® from Your Computer
46
Memory Cards or a USB Flash Memory Drive Folder Structure
47
Getting Started
48
Entering Photocapture Mode
49
Print Images
49
View Photo(S)
49
Print Index (Thumbnails)
50
Printing Photos
50
Enhance Photos
51
Search by Date
54
Print All Photos
55
Slide Show
55
DPOF Printing
56
Trimming
56
Photocapture Center ® Print Settings
57
Paper Options
58
Print Quality
58
Adjusting Brightness, Contrast and Color
59
Borderless Printing
60
Cropping
60
Print Date
60
Entering Scan Mode
61
Restoring All Settings to the Factory Settings
61
Scan to a Memory Card or USB Flash Memory Drive
61
Setting Your Changes as the New Default
61
How to Scan to a Memory Card or USB Flash Memory Drive
62
How to Reset to the Factory Settings
63
How to Set New Default
63
Understanding the Error Messages
63
6 Printing Photos from a Camera
64
Printing Photos Directly from a Pictbridge Camera
64
Pictbridge Requirements
64
Setting Your Digital Camera
64
DPOF Printing
65
Printing Images
65
Printing Photos Directly from a Digital Camera (Without Pictbridge)
65
Printing Images
66
Understanding the Error Messages
66
Section IV Software
67
7 Software and Network Features
68
A Safety and Legal
70
Choosing a Location
70
To Use the Machine Safely
71
Important Safety Instructions
74
Federal Communications Commission (FCC) Declaration of Conformity (USA Only)
75
Industry Canada Compliance Statement (Canada Only)
76
LAN Connection (DCP-585CW Only)
76
International ENERGY STAR Compliance Statement
77
Radio Interference
77
Legal Limitations for Copying
78
Trademarks
79
B Troubleshooting and Routine Maintenance
80
Troubleshooting
80
If You Are Having Difficulty with Your Machine
80
Copying Difficulties
82
Scanning Difficulties
82
Photocapture Center ® Difficulties
83
Software Difficulties
83
Network Difficulties
84
Error and Maintenance Messages
85
Error Animation
88
Printer Jam or Paper Jam
88
Routine Maintenance
90
Replacing the Ink Cartridges
90
Cleaning the Outside of the Machine
93
Cleaning the Scanner
93
Cleaning the Machine Printer Platen
94
Cleaning the Paper Pick-Up Roller
94
Cleaning the Print Head
95
Checking the Print Quality
95
Checking the Print Alignment
96
Checking the Ink Volume
97
Machine Information
97
Checking the Serial Number
97
Packing and Shipping the Machine
97
C Menu and Features
100
On-Screen Programming
100
Menu Table
100
Mode and Menu Keys
100
Menu Table
101
Print Settings Menu
111
D Specifications
114
General
114
Print Media
116
Copy
117
Photocapture Center
118
Pictbridge
119
Scanner
120
Printer
121
Interfaces
122
Computer Requirements
123
Consumable Items
124
Network (LAN) (DCP-585CW Only)
125
Wireless One-Push Configuration
126
E Glossary
127
Index
128
Brother DCP-585CW User Manual (126 pages)
Brand:
Brother
| Category:
Copier
| Size: 4.79 MB
Table of Contents
Compilation and Publication Notice
3
Table of Contents
5
1 General Information
10
Using the Documentation
10
Symbols and Conventions Used in the Documentation
10
Accessing the Software User's Guide and Network User's Guide
10
Viewing Documentation
10
Viewing Documentation
12
Accessing Brother Support (for Windows ® )
13
Control Panel Overview
14
LCD Display Indications
15
Basic Operations
15
Warning LED Indications
16
2 Loading Documents and Paper
17
Loading Paper and Other Print Media
17
Loading Envelopes and Post Cards
19
Loading Photo Paper
21
Removing Small Printouts from the Machine
22
Printable Area
23
Acceptable Paper and Other Print Media
24
Recommended Print Media
24
Handling and Using Print Media
24
Choosing the Right Print Media
26
Loading Documents
28
Using the Scanner Glass
28
Scannable Area
28
3 General Setup
29
Paper Settings
29
Paper Type
29
Paper Size
29
Sleep Mode
30
LCD Display
30
Changing LCD Language
30
LCD Contrast
30
Setting the Backlight Brightness
31
Setting the DIM Timer for the Backlight
31
Printing Reports
31
How to Print a Report
31
4 Making Copies
34
How to Copy
34
Making a Single Copy
34
Making Multiple Copies
34
Stop Copying
34
Copy Options
34
Changing Copy Speed and Quality
35
Enlarging or Reducing the Image Copied
35
Making N in 1 Copies or a Poster
36
Adjusting Brightness and Contrast
37
Paper Options
38
Book Copy
38
Watermark Copy
39
Setting Your Changes as a New Default
40
Restoring All Settings to the Factory Settings
40
Section III Direct Photo Printing
41
5 Printing Photos from a Memory Card or USB Flash Memory Drive
42
Photocapture Center™ Operations
42
Printing from a Memory Card or USB Flash Memory Drive Without a PC
42
Scanning to a Memory Card or USB Flash Memory Drive Without a PC
42
Using Photocapture Center™ from Your Computer
42
Using a Memory Card or USB Flash Memory Drive
42
Memory Cards or a USB Flash Memory Drive Folder Structure
43
Getting Started
44
Entering Photocapture Mode
45
Print Images
45
View Photo(S)
45
Print Index (Thumbnails)
46
Printing Photos
46
Enhance Photos
47
Search by Date
50
Print All Photos
51
Slide Show
51
Trimming
52
DPOF Printing
52
Photocapture Center™ Print Settings
53
Print Speed and Quality
54
Paper Options
54
Adjusting Brightness, Contrast and Colour
55
Cropping
56
Borderless Printing
56
Date Print
56
Setting Your Changes as a New Default
57
Restoring All Settings to the Factory Settings
57
Scan to a Memory Card or USB Flash Memory Drive
57
Entering Scan Mode
57
How to Scan to a Memory Card or USB Flash Memory Drive
58
How to Set New Default
59
How to Reset to Factory Settings
59
Understanding the Error Messages
59
6 Printing Photos from a Camera
60
Printing Photos Directly from a Pictbridge Camera
60
Pictbridge Requirements
60
Setting Your Digital Camera
60
Printing Images
61
DPOF Printing
61
Printing Photos Directly from a Digital Camera (Without Pictbridge)
61
Printing Images
62
Understanding the Error Messages
62
Section IV Software
63
7 Software and Network Features
64
A Safety and Legal
66
Choosing a Location
66
To Use the Machine Safely
67
Important Safety Instructions
70
IMPORTANT - for Your Safety
71
LAN Connection (DCP-585CW Only)
71
Radio Interference
71
EU Directive 2002/96/EC and EN50419
72
International ENERGY STAR ® Compliance Statement
72
Legal Limitations for Copying
73
Trademarks
74
Troubleshooting and Routine Maintenance Troubleshooting
75
If You Are Having Difficulty with Your Machine
75
Copying Difficulties
77
Scanning Difficulties
77
Software Difficulties
78
Photocapture Center™ Difficulties
78
Network Difficulties
79
Error and Maintenance Messages
80
Error Animation
83
Printer Jam or Paper Jam
83
Routine Maintenance
85
Replacing the Ink Cartridges
85
Cleaning the Outside of the Machine
88
Cleaning the Scanner Glass
88
Cleaning the Machine Printer Platen
89
Cleaning the Paper Pick-Up Roller
89
Cleaning the Print Head
90
Checking the Print Quality
90
Checking the Print Alignment
91
Checking the Ink Volume
92
Machine Information
92
Checking the Serial Number
92
Packing and Shipping the Machine
92
C Menu and Features
95
On-Screen Programming
95
Menu Table
95
Mode and Menu Keys
95
Menu Table
96
Print Settings
106
D Specifications
109
General
109
Print Media
111
Copy
112
Photocapture Center
113
Pictbridge
114
Scanner
115
Printer
116
Interfaces
117
Computer Requirements
118
Consumable Items
119
Network (LAN) (DCP-585CW Only)
120
Wireless One-Push Configuration
121
E Glossary
122
Index
123
Advertisement
Brother DCP-585CW Quick Setup Manual (45 pages)
Color printer
Brand:
Brother
| Category:
Printer
| Size: 4.53 MB
Table of Contents
Connect the Power Cord
4
Install the Ink Cartridges
5
Check the Print Quality
7
For Hong Kong Users
7
Set the Date and Time
8
Choose Connection Type
9
Before You Install
10
Connect the Usb Cable
12
For USB Interface Users
14
Connect the Network Cable
17
For Wired Network Interface Users
17
Infrastructure Mode
26
For Wireless Network Interface Users
26
Before You Begin
26
Connecting the Brother Machine to the Wireless Network
28
Infrastructure Mode
28
For Windows Users
29
Wireless Network
32
Windows Vista
32
Install the Drivers & Software
36
Install Optional Applications
39
For Network Users
41
Bradmin Light Utility
41
Install the Bradmin Light Configuration Utility
41
Bradmin Light Utility (for Mac os ® X Users)
42
Restore the Network Settings to Factory Default
43
Entering Text for Wireless Settings
43
Replacement Consumables
44
Ink Cartridge
44
Brother DCP-585CW Quick Setup Manual (29 pages)
Brand:
Brother
| Category:
Printer
| Size: 1.77 MB
Table of Contents
Connect the Power Cord
2
Choose Your Language
2
Install the Ink Cartridges
3
Check the Print Quality
3
Set the Date and Time
4
Before You Install
6
Connect the Usb Cable
6
Wired Network
10
Connect the Network Cable
10
For Wireless Network Interface Users
14
Before You Begin
14
Connecting the Brother Machine to the Wireless Network
16
Infrastructure Mode
16
For Windows Users
17
Wireless Network
18
Windows Vista
18
Install the Drivers & Software
19
Install Optional Applications
20
Restore the Network Settings to Factory Default
21
Entering Text for Wireless Settings
21
Safety and Legal
22
Choosing a Location
22
To Use the Machine Safely
23
Legal Limitations for Copying
27
Brother DCP-585CW Brochure & Specs (2 pages)
4-in-1 Wireless Colour Inkjet Multi-Function Centre
Brand:
Brother
| Category:
All in One Printer
| Size: 0.43 MB
(Spanish) Brother DCP-585CW Guía De Configuración Rápida (43 pages)
Quick Setup Guide - Spanish
Brand:
Brother
| Category:
All in One Printer
| Size: 4.14 MB
Table of Contents
Conexión del Cable de Alimentación
3
Comprobación de la Calidad de Impresión
6
Configuración de la Fecha y la Hora
7
Antes de Realizar la Instalación
10
Instalación de MFL-Pro Suite
10
Windows Vista
10
Red Cableada
17
Antes de Comenzar
25
Red Inalámbrica
31
Para Usuarios en Red
40
Advertisement
Related Products
Brother DCP 540CN - Color Inkjet - All-in-One
Brother DCP-J525W
Brother DCP 385C - Color Inkjet - All-in-One
Brother DCP-185C
Brother DCP-T300
Brother DCP-J152W
Brother DCP-1619
Brother dcp 9020 cdn
Brother DCP-T226
Brother DCP-B7640DW
Brother Categories
Sewing Machine
All in One Printer
Printer
Label Maker
Fax Machine
More Brother Manuals
Login
Sign In
OR
Sign in with Facebook
Sign in with Google
Upload manual
Upload from disk
Upload from URL