Sign In
Upload
Manuals
Brands
AstroNova Manuals
Label Maker
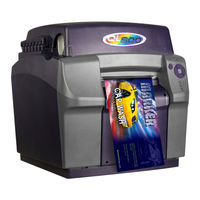
QuickLabel QL800
AstroNova QuickLabel QL800 Label Printer Manuals
Manuals and User Guides for AstroNova QuickLabel QL800 Label Printer. We have
2
AstroNova QuickLabel QL800 Label Printer manuals available for free PDF download: User Manual, Quick Start Manual
AstroNova QuickLabel QL800 User Manual (172 pages)
Brand:
AstroNova
| Category:
Label Maker
| Size: 12.31 MB
Table of Contents
Table of Contents
11
Getting Started
17
About the QL-800
17
Installation and Setup Overview
18
Unpacking the Printer
19
Checking the Included Parts
21
Before Installing the Printer
22
Choosing an Installation Location
22
Installation Precautions
23
System Requirements
23
Powering on
23
Installing the Printer Driver
24
Installing the Printer Driver (USB)
24
Installing the Printer Driver (Network)
25
Changing Printer Networking Settings
26
Using the after Shipping Wizard
26
Preparing the Maintenance Roller
27
Installing Ink Cartridges
28
Installing the Printhead
29
Loading and Unloading Media
32
Loading Media
32
Loading Media with Manual Feed Mode
33
Unloading Media
35
Working with Wide Gap Media
36
Working with Reflective Mark Media
36
Quicklabel Services
36
QL-800 Label Materials
36
Quicklabel BPO Blanket Purchase Order Program
36
Media Specialists
37
QL-800 Overview
39
Printer Part Names and Functions
39
Front View
39
Back View
40
Operation Panel
41
LED Indicators
42
Color Basics
43
Color and Computers
43
Color Profiling
43
Display Profiling
44
Quicklabel QL-800 Color Profiles
44
A Profile for each Device
44
Designing and Printing Labels
45
Designing Labels
45
Label Media Type Overview
45
Choosing Design Software
45
Disabling Anti-Aliasing
46
Planning Full-Bleed and Non-Bleed Labels
46
Setting up the Label Design Software
47
Setting up Labels in CQL Pro
47
Setting up Labels in Third-Party Design Applications
47
Setting up the Printer Driver
48
Setting up General Options
48
Setting up a Custom Label Size
50
Setting up Media Options
52
Using Service Options
54
Saving and Recalling Driver Settings
56
Importing and Exporting Driver Settings
58
Setting up the Driver for Full-Bleed Printing
60
Printing Labels
61
Using the Status Monitor
63
Viewing the Printer Status
63
Viewing the Job Status and Canceling Jobs
64
Viewing Ink and Consumable Levels
65
Estimating Ink Use
65
QL-800 Maintenance Utility
67
About the Maintenance Utility
67
Printer Information Tab
67
Viewing Printer Information
67
Upgrading the Printer Firmware
68
Setting the Clock
69
Print Settings Tab
70
Setting the Vertical Baseline
70
Setting the Horizontal Baseline
71
Setting the Cut/Stop Position
72
Setting up External Unwind Mode
73
Selecting a Transport Fan Speed
74
Cleaning Tab
75
Setting up Auto-Maintenance
75
Updating Cleaning Procedures
76
Cleaning Printheads
77
Preparing for Moving
77
Preparing for Shipping
78
System Logs Tab
79
Viewing the Error History
79
Saving Log Files
79
Parts Replacement Tab
80
Replacing the Printhead
80
Replacing the Cutter
81
Replacing the Aerosol Filter
81
Replacing the Maintenance Cartridge
82
Replacing the Maintenance Roller
83
Advanced Tab
83
Printer Maintenance
85
Replacing Ink Cartridges
85
Cleaning
87
Cleaning the Printer Exterior
87
Cleaning the Input Pinch Rollers
87
Cleaning the Maintenance Tray Area
88
Cleaning the Transport Belts
89
Cleaning the Ink Cartridge Contacts
90
Cleaning the Printhead Manually
92
Powering up after Extended Downtime
93
Upgrading the Printer Driver and Utilities
94
Upgrading the Print Module Firmware
94
Error Messages
97
Error 1001 - Paper Path Error
97
Solutions
97
Error 1002 - no Media at Pinch
97
Error 1003 - Unwind too Slow
98
Solutions
98
Error 1004 - Unwind too Fast
99
Solutions
99
Error 1005 - out of Media
99
Error 1006 - Cutter Jam
99
Error 1007 - Reserved
101
Error 1008 - Continuous Media Selected
101
Solutions
101
Error 1009 - Can't Calibrate Media
102
Solutions
102
Error 100A - Main Side Door Open
102
Error 100B - Top Cover Open
103
Solutions
103
Error 100C - Maintenance Cartridge Missing
105
Solutions
105
Error 100D - Transport Not Installed
105
Error 100E - Belt Motor Stall
105
Error 100F - Pinch Motor Stall
106
Solutions
106
Error 1010 - Can't Start Vacuum Fans
106
Error 1011 - Unwind over Current
106
Error 1012 - TOF Mark Not Found
107
Solutions
107
Error 1013 - Internal Error
107
Error 1014 - Internal Error
107
Error 1015 - Internal Error
108
Solutions
108
Error 1016 - Can't Tighten Unwind
108
Error 1017 - Print Engine Start Timeout
108
Error 1018 - Reserved
109
Error 1019 - Reserved
109
Error 101A - TOF Calibration
109
Solutions
109
Error 101D - Not Printing Timeout
109
Error 1020 - Shared Memory Read Timeout
109
Error 1021 - Shared Memory Write Timeout
110
Solutions
110
Error 1022 - Shared Memory Response Timeout
110
Error 1023 - System Initialization Timeout
111
Solutions
111
Error 1024 - Unexpected Engine Response
111
Error 1025 - Shutdown Timeout
111
Error 1030 - Can't Erase EEPROM
112
Solutions
112
Error 1031 - Can't Program EEPROM
112
Error 1032 - Invalid EEPROM Checksum
112
Error 1038 - Upgrade Failure
113
Solutions
113
Error 1039 - Upgrade Failure
113
Error 103A - Upgrade Failure
114
Solutions
114
Error 1040 - Failed to Read Job Status
114
Error 1042 - Can't Find Job Parameter
114
Error 1043 - Can't Find Job Parameter
115
Solutions
115
Error 1044 - Can't Find Job Parameter
115
Error 1045 - Can't Find Job Parameter
115
Error 1046 - Can't Find Job Parameter
116
Solutions
116
Error 1050 - the Maint Cartridge Is Full
116
Error 1051 - Not Ready to Print
117
Solutions
117
Error 2001 - Faulty Printhead
117
Error 2002 - Incorrect Printhead
118
Solutions
118
Error 2003 - Printhead Missing
118
Error 2004 - Unlicensed Printhead
118
Error 2005 - Unusable Printhead
119
Solutions
119
Error 2006 - Printhead Unprimed
119
Error 2007 - Maintenance Busy
120
Solutions
120
Error 2008 - 1000 Series Error Occurred
120
Error 2009 - Maintenance Jam
120
Error 200A - Black Cartridge Is Missing
122
Solutions
122
Error 200B - Magenta Cartridge Is Missing
122
Error 200C - Yellow Cartridge Is Missing
123
Solutions
123
Error 200D - Cyan Cartridge Is Missing
123
Error 200E - Multiple Cartridges Are Missing
123
Error 200F - Black Ink out
123
Error 2010 - Magenta Ink out
124
Solutions
124
Error 2011 - Yellow Ink out
124
Error 2012 - Cyan Ink out
124
Error 2013 - Multiple Inks out
124
Error 2014 - Missed TOF
125
Solutions
125
Error 2015 - Page Sequence Error
125
Error 2016 - Cartridge Error
125
Error 2017 - Encoder Error
125
Error Occurs Prior to Media Moving
125
Error Occurs During Printing
126
Error 2100 - Unspecified Paper Path
127
Solutions
127
Error 3XXX - Software Communication Error
127
Troubleshooting
129
Removing a Media Jam
129
Removing a Media Jam in the Input Pinch Rollers
132
Removing a Media Jam in the Transport Unit
133
Removing a Media Jam in the Transport Area Inside the Printer
135
Known Issues
137
Printing Variable Data on Continuous Media Results in Blank Media Feeding
137
Color Shifts or Drops out During Printing
137
Powering on with the Main Side Door Open Results in Incomplete Initialization
137
Resolving Windows 7/8/10 USB Installation Issues
138
Resolving USB Communication Issues
140
Identifying and Resolving Priming Problems
142
Addressing Data Starvation
143
Rewinder
145
Before Installing the Rewinder
145
Installing the Rewinder
146
Installing the Rewinder When Using the External Unwinder
147
Rewinding Labels
148
External Unwinder
151
Before Installing the External Unwinder
151
Installing the External Unwinder
152
Unwinding Labels with the External Unwinder
155
Shipping Precautions
157
Use the before Shipping Feature
157
Pack the Printer Carefully
157
Safety Warnings and Precautions
159
Location
159
Power Supply and Power Cord
160
General Safety
160
Moving the Printer
161
Ink Cartridge and the Maintenance Cartridge
162
Specifications
163
Printer Specifications
163
Label Specifications
166
Index
169
Advertisement
AstroNova QuickLabel QL800 Quick Start Manual (60 pages)
Brand:
AstroNova
| Category:
Label Maker
| Size: 5.23 MB
Table of Contents
Unpacking the Printer
3
Included Parts
5
System Requirements
5
Installing the Printer Driver
5
Using the after Shipping Wizard
6
Preparing the Maintenance Roller
7
Installing Ink Cartridges
8
Installing the Printhead
8
Loading Media
12
Next Steps
13
Piezas Incluidas
17
Requisitos del Sistema
17
Instalación del Cabezal de Impresión
21
Pasos Siguientes
25
Déballage de L'imprimante
27
Pièces Fournies
29
Configuration Minimale Requise
29
Mise Sous Tension
29
Installation des Cartouches D'encre
32
Installation de la Tête D'impression
33
Étapes Suivantes
37
Advertisement
Related Products
AstroNova QuickLabel Kiaro! QL-120
AstroNova QuickLabel QL-850
AstroNova QuickLabel QL-240
AstroNova QuickLabel QL-E100
AstroNova QuickLabel QL-300
AstroNova QuickLabel QL-900
AstroNova RW-300
AstroNova Trojanlabel Trojan T2-C
AstroNova Categories
Label Maker
Industrial Equipment
Printer
Test Equipment
More AstroNova Manuals
Login
Sign In
OR
Sign in with Facebook
Sign in with Google
Upload manual
Upload from disk
Upload from URL