Sign In
Upload
Manuals
Brands
Allen-Bradley Manuals
Controller
PLC-5 series
Allen-Bradley PLC-5 series Manuals
Manuals and User Guides for Allen-Bradley PLC-5 series. We have
7
Allen-Bradley PLC-5 series manuals available for free PDF download: User Manual, Design Manual, Manual, Installation Instructions Manual, Quick Start Manual, Installation Instructions
Allen-Bradley PLC-5 series User Manual (388 pages)
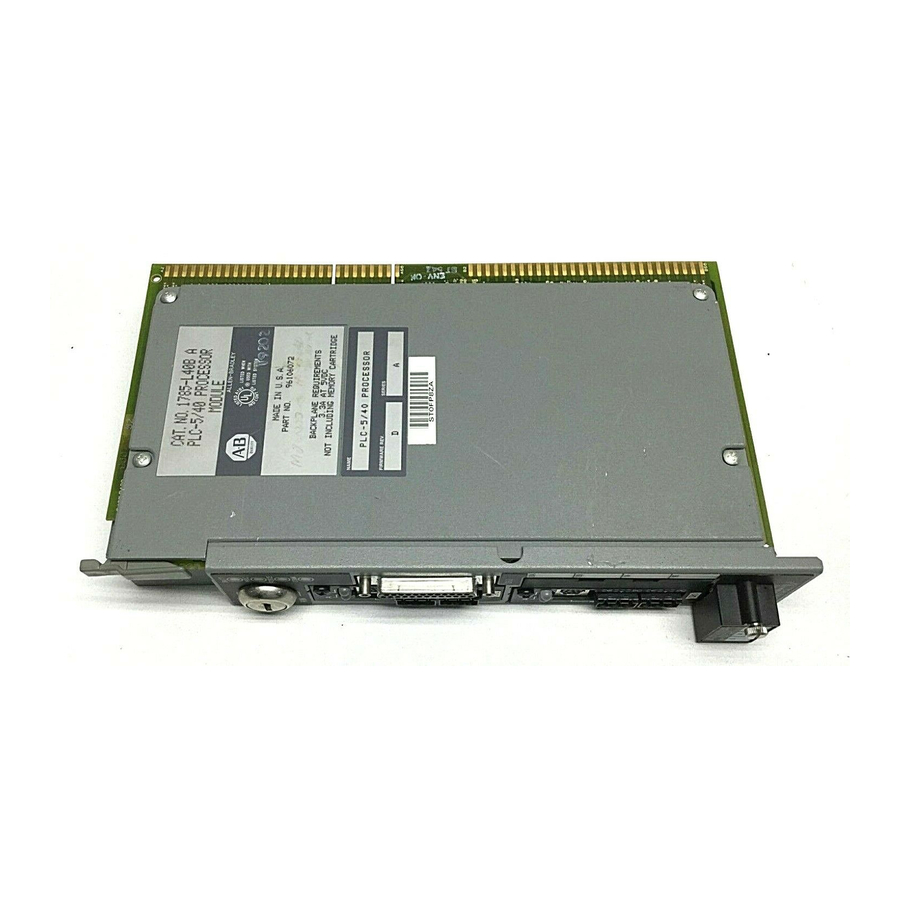
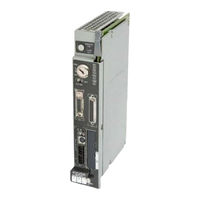
Enhanced and Ethernet PLC-5 Programmable Controllers
Brand:
Allen-Bradley
| Category:
Controller
| Size: 5.12 MB
Table of Contents
Summary of Changes
3
Table of Contents
5
Purpose of this Manual
15
Related PLC-5 Documentation
15
Terms Used in this Manual
16
Manual Overview
17
Chapter 1
19
Using this Chapter
19
Lay out the System
19
Identifying Controller Components
20
PLC-5/11, -5/20, and -5/26 Controller Front Panels
21
Controller Front Panel
22
PLC-5/20E Controller Front Panel
24
PLC-5/40E and -5/80E Controller Front Panels
25
PLC-5/40L and -5/60L Controller Front Panels
26
Programming Features
28
Using a Controller Channel as a Remote I/O Scanner
29
Appendix C Program Scan
29
Using a Controller Channel as a Remote I/O Adapter
30
Using a PLC-5/40L, -5/60L Programmable Controller as an Extended-Local I/O Scanner
32
Chapter 2 Using this Chapter
33
Selecting I/O Modules
33
Guidelines for Selecting I/O Modules
34
Selecting I/O Module Density
34
Placing I/O Modules in a Chassis
35
Using this Chapter
37
Chapter 3
37
Determining the Proper Environment
37
Protecting Your Controller
39
Preventing Electrostatic Discharge
39
Laying out Your Cable Raceway
40
Categorize Conductors
40
Route Conductors
40
Laying out Your Backpanel Spacing
41
Chassis Dimensions (Series B)
41
I/O Chassis and External Power Supply Dimensions
42
Grounding Your System
42
Using this Chapter
45
Chapter 4
45
I/O Addressing Concept
45
Choosing an Addressing Mode
47
Addressing Block-Transfer Modules
51
Addressing Summary
51
Assigning Racks
52
Understanding PLC-5 Controller Memory
54
Understanding Data Storage (Data-Table Files)
55
Addressing File Types
57
Understanding Program-File Storage
59
Addressing
60
Specifying I/O Image Addresses
60
Specifying Logical Addresses
61
Specifying Indirect Addresses
62
Specifying Indexed Addresses
64
Specifying Symbolic Addresses
65
And Controller Memory
66
Effectively Using I/O Memory
68
Chapter 5
69
Using this Chapter
69
Introduction to PLC-5 Controller Scanning
69
Program Scanning
70
Transferring Data to Controller-Resident I/O
71
Transferring Discrete Data to Controller-Resident I/O
71
Transferring Immediate I/O Requests
71
Transferring Block-Transfer Data to Controller-Resident I/O
72
Configuring the System for Controller-Resident I/O
72
Using this Chapter
73
Chapter 6
74
Selecting Devices that You Can Connect
74
Introduction to Remote I/O
75
Designing a Remote I/O Link
76
Configuring a Controller Channel as a Scanner
78
Define an I/O Status File
79
Specify Channel Configuration Information
79
Specify the Scan List
81
Communicating to a Remote I/O Node Adapter
83
Troubleshooting Remote I/O Communication Difficulties
84
Transferring Block Data
85
Block-Transfers of Remote I/O Data
87
Block-Transfer Sequence with Status Bits
89
Block-Transfer Programming Considerations
91
General Considerations
91
For Controller-Resident Local Racks
92
Monitoring Remote I/O Scanner Channels
93
Monitoring Transmission Retries
93
Addressing the I/O Status File
96
Chapter 7 Using this Chapter
99
Configuring Communication to a PLC-5 Adapter Channel
99
Adapter Channel Configuring Communication to a PLC-5 Adapter Channel
100
Address, and Rack Size
101
Specify an Adapter Channel's Communication Rate
101
Specify the Discrete Transfer Configuration Files
103
Programming Discrete Transfers in Adapter Mode
108
Programming Block-Transfers of Data to an Adapter Channel
108
Configure Block-Transfer Requests
109
Examples of Block-Transfer Ladder Logic
112
Effects of Programming Block-Transfers to an Adapter-Mode
113
Controller Channel on Discrete Data Transfer
113
Monitoring the Status of the Adapter Channel
115
Monitoring the Status of the Supervisory Controller
116
Monitoring Remote I/O Adapter Channels
117
Chapter 8 Using this Chapter
119
Selecting Devices that You Can Connect
119
Cabling
120
Addressing and Placing I/O
120
Transferring Data
122
Discrete Data Transfer
123
Transferring Block Data
124
Calculating Block-Transfer Completion Time
125
Considerations for Extended-Local Racks
126
Configuring the Controller as an Extended-Local I/O Scanner
127
Monitoring Extended-Local I/O Status
130
Chapter 9 Using this Chapter
133
Selecting Devices that You Can Connect
133
Link Design
134
Configuring the Channel for DH+ Communication
135
Using the Global Status Flag File
137
Monitoring DH+ Communication Channels
139
Monitoring Data Sent with Acknowledgment
140
Monitoring Data Sent Without Acknowledgment
142
Monitoring General Status
143
Estimating DH+ Link Performance
144
Nodes
145
Size and Number of Messages
145
Message Destination
146
Internal Processing Time
147
Average DH+ Link Response Time Test Results
148
Application Guidelines
149
Using this Chapter
151
Chapter 10
152
Configuring the Controller
152
Serial Port
152
Using Channel 0
152
User Mode
152
System Mode
152
Master Station to Remote Station Communication Methods
154
Polling Inactive Priority Stations
155
Changing Modes
155
Cabling
155
Configuring Channel 0
156
Configure Channel 0 for DF1 Point-To-Point
156
Configure Channel 0 as a Slave Station
159
Configure Channel 0 as a Master Station
162
Configure Channel 0 for User Mode (ASCII Protocol)
168
Configure Channel 0 for a Communication Mode Change
171
Monitoring Channel 0 Status
172
Using the System Mode Status Display
172
Using the User Mode (ASCII) Status Display
174
Using this Chapter
175
Chapter 11
175
Media and Cabling
175
Assigning Your IP Address
176
Network Addressing
176
Configuring Channel 2 for Ethernet Communication
176
Manually Configuring Channel 2
176
Using BOOTP to Enter Configuration Information
179
Editing the BOOTPTAB Configuration File
181
Using Advanced Ethernet Functions
183
Using Broadcast Addressing
183
Using Subnet Masks and Gateways
185
Manually Configuring Channel 2 for Controllers on Subnets
186
For Controllers on Subnets
187
Using Domain Name Service
189
Using the Embedded Web Server
190
Generating User Provided Web Pages
196
Importing User Page Files to the PLC-5 Controller
200
Using Multihop Messaging
203
Multihop Examples
204
Over Ethernet
206
Communicating with Controllogix Devices
206
Tcp/Ip
206
Interpreting Error Codes
207
Interpreting Ethernet Status Data
208
Monitoring General Ethernet Status
209
Monitoring Ethernet Commands
210
Monitoring Ethernet Replies
210
Ethernet PLC-5 Performance Considerations
211
Performance: Host to Ethernet PLC-5 Controller
211
Performance: Ethernet PLC-5 Controller to Ethernet
212
PLC-5 Controller
212
Using this Chapter
213
Chapter 12
214
About Passwords and Privileges
214
Defining Privilege Classes
215
Assigning a Privilege Class to a Channel or Offline File
216
Assigning a Privilege Class to a Node
216
Assigning Read/Write Privileges to a Program File
217
Assigning Read/Write Privileges to a Data File
217
Chapter 13
219
Using this Chapter
219
Forcing
219
Forcing Inputs and Outputs
219
Forcing SFC Transitions
220
Extended Forcing
220
Increased Program Scan Time
222
I/O Force Privileges
222
Using Protected Controllers
223
Using Selectable Timed Interrupts (Stis) and Controller Input Interrupts (Piis)
223
Setting up and Using Extended Forcing
223
Step 1 - Select Which Group of Data You Want to Force
224
Step 2 - Use the Programming Software to Enter or Edit the Data You Want to Force in the Extended Force Configuration Table
225
Step 3 - Use the Programming Software to Enter Force Values for the Specified Data Table Files
226
Step 4 - Enable or Disable the Forces
226
Using Extended Forcing with Time-Critical Applications
226
Using Special Programming Routines
228
Priority Scheduling for Interrupts and Mcps
229
Program Execution States
230
Influencing Priority Scheduling
232
Defining and Programming Interrupt Routines
233
Programming Considerations
219
Chapter 14
235
Using this Chapter
235
Setting Power-Up Protection
235
Allowing or Inhibiting Startup
236
Defining a Controller Power-Up Procedure
236
Using this Chapter
239
Preparing Power-Up Routines
235
Chapter 15 Understanding the Fault Routine Concept
239
Responses to a Major Fault
239
Understanding Controller-Detected Major Faults
240
Fault in a Controller-Resident or Extended-Local I/O Rack
241
Fault in a Remote I/O Chassis
241
Defining a Fault Routine
242
Defining a Watchdog Timer
243
Avoiding Multiple Watchdog Faults
244
Programming a Fault Routine
244
Setting an Alarm
245
Clearing a Major Fault
245
Changing the Fault Routine from Ladder Logic
247
Using Ladder Logic to Recover from a Fault
248
Block-Transfers in Fault Routines
249
Testing a Fault Routine
249
Monitoring Faults
249
Monitoring Major/Minor Faults and Fault Codes
250
Interpreting Major Faults
250
Interpreting Minor Faults
250
Monitoring Status Bits
251
Using this Chapter
253
Chapter 16
253
Selecting Main Control Programs
253
Understanding How the Controller Interprets Mcps
254
Configuring Mcps
255
Monitoring Mcps
257
Using this Chapter
259
Chapter 17 Using a Selectable Timed Interrupt
259
Writing STI Ladder Logic
259
STI Application Example
260
Block-Transfers in Selectable Timed Interrupts (Stis)
260
Defining a Selectable Timed Interrupt
261
Monitoring Selectable Timed Interrupts
262
Using this Chapter
263
Chapter 18 Using a Processor Input Interrupt
263
Writing PII Ladder Logic
264
PII Application Examples
264
Block-Transfers in Processor Input Interrupts (Piis)
265
Design Considerations
266
Defining a Controller Input Interrupt
267
Monitoring Controller Input Interrupts
268
Appendix A
269
Controller Specifications
269
Memory and Channel Specifications
270
Memory Backup Devices
272
EEPROM Compatibility
272
Appendix B
277
S:3-10
277
S:11
278
S:12
279
S:13-S:24
283
S:26-S:35
284
S:36-S:78
285
S:79-S:127
286
Effects of False Logic Versus True Logic on Logic Scan Time
288
Effects of Different Input States on Logic Scan Time
288
Effects of Different Instructions on Logic Scan Time
289
Effects of Using Interrupts on Logic Scan Time
289
Effects of Housekeeping Time
290
Editing While in Remote Run Mode
290
Using Global Status Flag Files
291
Calculating Throughput
291
I/O Backplane Transfer
291
Input and Output Modules Delay
291
Remote I/O Scan Time
291
Communication Rate
293
Number of Rack Entries
293
Block-Transfers
293
Calculating Worst-Case Remote I/O Scan Time
295
Optimizing Remote I/O Scan Time
295
Controller Time
297
Example Calculation
298
Performance Effects of Online Operations
298
Effect of Inserting Ladder Rungs at the 56K-Word Limit
299
Using Program Control Instructions
300
Using JMP/LBL Instructions
300
Using FOR/NXT Instructions
300
Appendix D
301
Compare Instructions
301
Compute Instructions
301
Counter Instructions
301
Relay Instructions
301
Timer Instructions
301
Relay Instructions
302
Counter Instructions
304
Compare Instructions
305
Compute Instructions
307
Logical Instructions
314
Conversion Instructions
315
Bit Modify and Move Instructions
316
File Instructions
317
Diagnostic Instructions
319
Shift Register Instructions
320
Sequencer Instructions
321
Program Control Instructions
322
Block Transfer Instructions
325
Process Control, Message Instructions
325
Publication 1785-UM012D-EN-P - July
325
ASCII Instructions
327
Bit and Word Instructions
330
File, Program Control, and ASCII Instructions
332
Appendix E Controller Switches
340
Switch 1
340
Switch 2
340
I/O Chassis Backplane
342
PLC-5 Controller in the I/O Chassis
342
Extended-Local I/O Adapter
343
I/O Chassis Configuration Plug
344
ASB Series C and D) Without Complementary I/O
345
Remote I/O Adapter Module
345
Extended-Local I/O Adapter Module
347
ALX) Configuration Plug
348
Appendix F PLC-5 Controller
349
Troubleshooting
349
General Problems
350
Controller Communication Channel Troubleshooting
352
Extended-Local I/O Troubleshooting
353
Ethernet Status Indicator
353
Ethernet Transmit LED
354
Remote I/O System
354
Adapter Module
354
Adapter Module (Continued)
356
Extended-Local I/O System
357
Troubleshooting Guide for the 1771-ALX Adapter Module
357
Unexpected Operation When Entering Run Mode
358
Instructions with Unique Prescan Operations
358
Suggested Action
359
Publication 1785-UM012D-EN-P - July
359
Appendix G
361
Channel 0 Pin Assignments
361
Connecting Diagrams
361
Programming Cable Specifications
361
Serial Cable Pin Assignments
361
Using this Chapter
361
Connecting Diagrams
363
Programming Cable
365
Specifications
365
Ethernet Cable Connections
369
Advertisement
Allen-Bradley PLC-5 series Design Manual (195 pages)
Brand:
Allen-Bradley
| Category:
Control Systems
| Size: 1.63 MB
Table of Contents
Table of Contents
5
Using this Manual
11
Information in the Appendices
12
We've Simplified Your Wiring Documentation
12
Terms and Abbreviations
13
Chapter Objectives
15
The Application Package
15
Software and Documentation
15
Typical Hardware (for the Cat. No. 6556 Pxxxk Application Package)
16
Related Safety Information
16
Control by Redundant Processors
17
How the Software Controls Your Press
18
Organization of Program Files
18
Scanning Program Files
18
Protected Memory in PLC 5/X6 Processors
20
Passwords and Levels of Memory Protection
20
Functional Block Diagram
21
Modes of Control System Operation
21
Clutch/Brake Control Functions
22
Required Input Switches
23
Choice of Position Monitoring Devices
24
Control System Outputs
24
System Response Time
24
Internal Timers
25
Options to Suit Your Application
26
Selecting Factory Configured Options
26
Programming Ladder Logic Commands
26
Wiring Your Control System
27
Information on Diskette
27
Wiring Drawings
27
Control System Specifications
28
Define Your Control System Characteristics
29
Chapter Objectives
29
Verify Your Factory Configured Options
29
Assign Valves to Specific Outputs
30
Select the Type of Valve Fault Detection
30
Select the Type of Position Sensor
31
Rotary Cam Limit Switches
31
Resolver
31
Record On/Off Positions of Rotary Cam Limit Switches
32
Select Input Switches
32
Select Command Bits for C/B Interface Logic
32
Select Other Options
34
Reduce Watchdog Timer Presets (Optional)
34
Verify Your Factory Configured Options
35
Assign Outputs
35
Record the Type(S) of Valve Fault Detection
36
Select the Type and Location of Position Monitors
36
Record On/Off Positions of Rotary Cam Limit Switches
36
Select Input Switches
37
Select Optional Command Bits for C/B Interface Logic
38
Select Options that Affect System Wiring
39
Reduce Watchdog Timer Presets as an Option
40
10. Select Options that Require Programming
41
Customize the Wiring to Suit Your Application
43
Chapter Objectives
43
How to Customize the Default Wiring
43
Install Your Wiring Drawing Diskettes
44
Generalized Instructions to Customize Your Wiring
45
Customizing an Ungrounded AC System
45
Customize a Grounded AC System
54
Notes
62
Write Ladder Logic
63
Chapter Objectives
63
Overview of Memory Organization
63
Reserved Program and Data Files
64
How Command Bits Act on Control Logic in Protected Memory
64
Select from These Command Bits
65
Steps to Write Ladder Logic
67
Programming Command Bits
68
Soft" Clutch and Brake
75
Exchanging Data between Processors
80
Using Fault and Prompt Bits
81
Programming Shorter Presets for Your Internal Timers
82
Programming Press Ready to Start Indicators
84
Programming a Brake Monitor (Patent Pending)
84
Selecting the Interrupt Period
84
Programming a Variable Speed Top Stop
90
Assigning Passwords to Your Program and Data Files
93
Chapter Objectives
93
What Can Privilege Classes Protect
93
How We Assigned Privileges to Privilege Classes
94
Privilege Classes
94
Data Table Privileges
95
Program File Privileges
96
Communication Channel Privileges
97
Assigning Passwords to Classes
98
Gaining Access to Protected Memory Files
98
Install and Wire the Clutch/Brake Control System
99
Chapter Objectives
99
Set Jumpers and Switches
99
PLC 5/X6 Processors
99
Jumper and Switch Settings for I/O Chassis a and B
102
Keying the Backplane
102
1771 ID16 Input Modules
103
Install PLC Processors, I/O Modules, and Power Supplies
103
Connect PLC Processors and Programming Terminal
105
Convert Controller OK Relay Contacts from N.O. to N.C
106
Wire Your Control System
106
Set up or Simulate Rotary Cam Limit Switches
107
Chapter Objectives
107
Setting up Position Monitoring Devices
107
Setup if Using Rotary Cam Limit Switches (Omit if Using Only Resolvers)
110
Setup if Using Resolvers (Omit if Using Only Rclss)
110
Ladder Logic to Simulate Rotary Cam Limit Switches
111
How Bits Indicate Shaft Position
114
How Transition Faults Stop the Press
115
Troubleshoot the Setup of Your Position Monitoring Devices
116
Notes
118
Test Your Clutch/Brake Control System
119
Chapter Objectives
119
Static Wiring Tests
119
Controller OK Test
119
CRM Relay Test
120
Seal Relay Test
120
Crowbar Relay Test (if Using Crowbar Relays)
121
Test Run Buttons (All Four Stations)
121
Test Inch Buttons
122
Test Stop on Top and Arm Continuous Buttons
122
Test Mode Selector Switch
122
Valves and Valve Feedback
123
Dynamic Tests of Operating Modes
126
Inch Mode
126
Single Stroke Mode
127
Continuous Mode with Arm Continuous
127
Continuous Mode with Stroke and a Half
128
Switch Tests
128
Air Pressure Switch
128
Main Motor Forward Switch
129
Motion Detector Switch
129
Chain Break Switch
130
Description of Operating Modes
131
Operating Modes of the Clutch/Brake Controller
131
Off
131
Remote Mode
131
Inch and Micro Inch Modes
132
Single Stroke Mode
133
Continuous Mode
136
Feedback Timing Diagrams
141
Timing Diagrams for Control System Feedback
141
Notes
142
Troubleshooting with Fault Codes, Operator Prompts, and Snapshot Status Bits
143
Prompts for Operating the Press
148
Troubleshooting with Snapshot Status Bits
151
Notes
152
Classes of Memory Protection
153
Class Privileges
153
Read/Write Access by Class
153
Program Files
153
Data Files
154
Mapping of Data and Program Files
155
Reserved Data Files
155
Reserved Files
155
Useable Data
156
Reserved Program Files
156
Programming Considerations for PLC 5 Processors
159
Purpose of this Appendix
159
Program Scan: How the Processor Scans a Program
159
How the Processor Scans the Program
160
The Processor
160
Affect Your Ladder Logic Has on the Program Scan
160
Instructions
160
Processor Family
160
Data Format
162
Addressing
162
How to Program a Faster Response
163
Program a Faster Response with Special Instructions
163
Scan Logic Only When Needed
164
Other Considerations
164
Using Subroutines
164
How Subroutines Are Scanned
165
Using Immediate I/O Instructions
167
Passing Data into and out of a Subroutine
167
Working with Data
168
Types of Data
168
Addressing Your Data
168
Creating Data Storage Files
169
Directly Creating Data Storage Files
169
Data Storage Created by Assigning Addresses
169
Wiring Drawings for an Ungrounded System
173
Wiring Drawings
183
Wiring Drawings for a Grounded System
185
Wiring Drawings
185
Allen-Bradley PLC-5 series User Manual (51 pages)
Ethernet Interface Module
Brand:
Allen-Bradley
| Category:
Adapter
| Size: 0.89 MB
Table of Contents
Table of Contents
3
Quick Start
8
Chapter 1
9
Installing and Configuring the Interface Module
9
What You Have Done
14
What's Next
14
Installing the Interface Module
15
Chapter 2
15
Using this Chapter
15
Before You Begin
16
Necessary Equipment
17
Preventing Electrostatic Discharge Damage (ESD)
17
Complying with European Union Directives
18
EMC Directive
18
Low Voltage Directive
18
Installing the Interface Module
19
Attach the Connector Header to the Processor
19
Connect the Interface Module to the Processor
20
Install the Processor/Interface Module into the Chassis
21
Removing the Interface Module
22
Before You Begin
23
Configuring the
23
Chapter 3
23
Using this Chapter
23
Configuring Channel 3A
24
Designate Channel 3A to Support the Interface Module
24
Specify Ethernet-Specific Information
24
Manually Entering Module Configuration Information
25
Dynamically Supplying Configuration Information Using BOOTP
26
Using the BOOTP Servers on the Utility Disk
27
Install the Dos/Windows BOOTP Server Disk
27
Edit the Dos/Windows BOOTP Configuration File
28
Run the Boot Server Utility
30
Running the DOS-Based Utility
30
Running the Windows-Based Utility
31
Communicating Via the Interface Module4
32
Chapter 4
32
Applying Power to the Chassis
32
Establishing an Ethernet Connection
35
Monitoring Ethernet Status Data
35
Using the Message Instruction
37
Interpreting Error Codes
39
Identifying the Interface Module Within a Network
40
Saving and Restoring Programs
40
Advertisement
Allen-Bradley PLC-5 series Manual (41 pages)
Ethernet Driver
Brand:
Allen-Bradley
| Category:
Network Card
| Size: 0.4 MB
Table of Contents
Table of Contents
2
Overview
5
Setup
6
Channel Properties - General
6
Channel Properties - Ethernet Communications
7
Channel Properties - Write Optimizations
7
Channel Properties - Advanced
8
Channel Properties - Communication Serialization
9
Global Settings
9
Device Properties - Identification
10
Device Properties - Operating Mode
10
Device Properties - Scan Mode
11
Device Properties - Timing
11
Device Properties - Auto-Demotion
12
Device Properties - Communications Parameters
13
Device Properties - Protocol Parameters
13
Device Properties - Slot Configuration
14
Device Properties - Redundancy
14
Modular I/O Selection Guide
15
Optimizing Communications
17
Data Types Description
18
Address Descriptions
19
General Addressing
19
Output Files
19
Input Files
20
Status Files
22
Binary Files
23
Timer Files
23
Counter Files
24
Control Files
25
Integer Files
25
Float Files
26
ASCII Files
26
String Files
27
String Length
28
SLC 5/05 Open Addressing
28
PLC-5 Family and Softplc Addressing
28
BCD Files
28
PID Files
29
Message Files
30
Block Transfer Files
31
Event Log Messages
33
Unable to Read Data Block from Device. Frame Received Contains Errors. | Block Start Address = '<Address
33
Unable to Read Data Block from the Device. Tag Deactivated. | Block Start Address = '<Address>', Status Code = <Code>, Extended Status Code = <Code
33
Unable to Write to Address on Device. Frame Received Contains Errors. | Address = '<Address
34
Unable to Read Data Block from Device. | Block Start Address = '<Address>', Status Code = <Code>, Extended Status Code = <Code
34
Unable to Read Data Block from Device. Tag Deactivated. | Block Start Address = '<Address>', Status Code = <Code
35
Unable to Write to Address on Device. | Address = '<Address>', Status Code = <Code>, Extended Status Code = <Code
35
Unable to Read Data Block from Device. | Block Start Address = '<Address>', Status Code = <Code
36
Unable to Write to Address on Device. | Address = '<Address>', Status Code = <Code
37
Unable to Write to Address on Device. Packet Length Is out of Range. | Address = '<Address>', Expected Packet Length = <Low> to <High> (Bytes)
37
Unable to Write to Address on Device. TNS Is out of Range. | Address = '<Address>', Expected TNS Range = <Low> to <High
37
Index
38
Allen-Bradley PLC-5 series Quick Start Manual (29 pages)
Ethernet PLC-5 Programmable Controller
Brand:
Allen-Bradley
| Category:
Controller
| Size: 2.54 MB
Table of Contents
Quick Start
1
This Manual
4
Table of Contents
6
What You Need to Do
7
Identifying the Processor's Front Panel Components
8
Components You Need
10
Compliance to European Union Directives
10
EMC Directive
10
Low Voltage Directive
10
Install the Hardware
12
Configure the I/O Chassis
12
Ground the I/O Chassis
13
Install the Power Supply
14
Install the PLC-5 Processor
15
Power up the System
16
Install the I/O Modules
16
Connect the Personal Computer to the PLC-5 Processor
16
Install the Software and Set up the Programming System
17
Start the Programming Software
17
Power up the System
18
Use the PLC-5 Processor
19
Status Indicators
19
Troubleshoot General Problems
19
Troubleshoot the Processor Communication Channels
20
Troubleshoot the Ethernet Status Indicators
21
Appendix A
22
General
22
Processor Specifications
23
Battery Specification
24
Battery Type
24
Average Battery Lifetime Specifications
24
Allen-Bradley PLC-5 series Installation Instructions Manual (40 pages)
Firmware Update Instructions
Brand:
Allen-Bradley
| Category:
Controller
| Size: 1.02 MB
Table of Contents
Important User Information
2
Shock Hazard
2
Burn Hazard
2
Preventing Electrostatic Discharge
3
Step 5 - Apply the Firmware Revision Label
11
Step 6 - Complete the Firmware Update
11
Enhanced PLC-5 Programmable Controllers - Series a Thru D
21
Enhanced PLC-5 Programmable Controllers - Series E or Later
25
Controlnet PLC-5 Programmable Controllers - All Series
33
Allen-Bradley PLC-5 series Installation Instructions (4 pages)
Enhanced Programmable Controller Firmware Upgrade
Brand:
Allen-Bradley
| Category:
Controller
| Size: 0.08 MB
Advertisement
Related Products
Allen-Bradley PLC-5/12
Allen-Bradley PLC-5/15
Allen-Bradley PLC-5/25
Allen-Bradley PLC-2/30
Allen-Bradley PLC-3 Series
Allen-Bradley PLC-2/20
Allen-Bradley PF7000A
Allen-Bradley PF7000B
Allen-Bradley PowerFlex AFE
ALLEN BRADLEY PowerFlex 4M
Allen-Bradley Categories
Control Unit
Controller
I/O Systems
Switch
Power Supply
More Allen-Bradley Manuals
Login
Sign In
OR
Sign in with Facebook
Sign in with Google
Upload manual
Upload from disk
Upload from URL