Sign In
Upload
Manuals
Brands
Aerotech Manuals
Industrial Equipment
Npaq DL 4010 Series
Aerotech Npaq DL 4010 Series System Manuals
Manuals and User Guides for Aerotech Npaq DL 4010 Series System. We have
1
Aerotech Npaq DL 4010 Series System manual available for free PDF download: Hardware Manual
Aerotech Npaq DL 4010 Series Hardware Manual (132 pages)
Brand:
Aerotech
| Category:
Industrial Equipment
| Size: 4.66 MB
Table of Contents
Npaq Hardware Manual
1
Table of Contents
3
List of Figures
5
List of Tables
7
EU Declaration of Conformity
9
Agency Approvals
10
Safety Procedures and Warnings
11
Quick Installation Guide
13
Chapter 1: Introduction
15
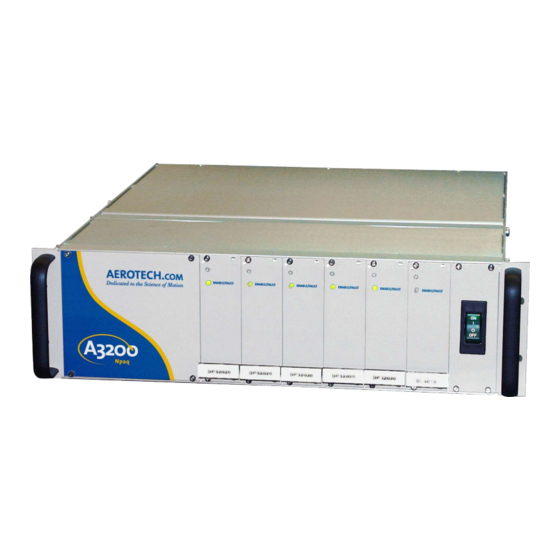
Figure 1-1: Npaq Drive Chassis
15
Table 1-1: Feature Summary
16
Table 1-2: Configurations and Options
17
Figure 1-2: Functional Diagram
20
Electrical Specifications
21
Table 1-3: Chassis Electrical Specifications
21
Table 1-4: Servo Amplifier Electrical Specifications
22
System Power Requirements
23
Mechanical Specifications
24
Figure 1-3: Dimensions
25
Environmental Specifications
26
Drive and Software Compatibility
27
Table 1-5: Drive and Software Compatibility
27
Chapter 2: Installation and Configuration
29
Unpacking the Chassis
29
Electrical Installation
30
Figure 2-1: Power and Control Connections
30
Figure 2-2: Power Switch
30
AC Power Connections
32
Figure 2-3: Power Supply Connection
32
Table 2-1: Main AC Power Input Voltages and Current Requirements
32
I/O and Signal Wiring Requirements
33
Minimizing Conducted, Radiated, and System Noise
33
Communication Channel Settings
34
Figure 2-4: Device Number (S2) Location
34
Table 2-2: Device Number Switch Settings (S2)
35
Soft Start / Voltage Selection Overview
36
Soft-Start Operation
36
Figure 2-5: Soft-Start / Voltage Board
36
Table 2-3: AC Input Power Connector (J1) Pin Assignment
36
Table 2-4: +24 VDC Power Connector (J2) Pin Assignment
37
Table 2-5: Transformer Interface Connectors (J3, J5) Pin Assignment
37
Table 2-6: Fan Interface Connector (J4) Pin Assignment
37
Table 2-7: AC Input Power Connector (J1/MXR Board) Pin Assignment
37
Voltage Selection Operation
38
Table 2-8: AC Input Power Connector (J1) Pin Assignment
38
Motor Output Connectors
39
Figure 2-6: Motor Output Connections
39
Table 2-10: Mating Connector Part Numbers for the Motor Power Output Connector
39
Table 2-9: Motor Power Output Connector Pinout
39
Brushless Motor Connections
40
Figure 2-7: Brushless Motor Configuration
40
Figure 2-8: Encoder and Hall Signal Diagnostics
41
Powered Motor Phasing
41
Figure 2-10: Brushless Motor Phasing Goal
42
Figure 2-9: Motor Phasing Oscilloscope Example
42
Unpowered Motor and Feedback Phasing
42
DC Brush Motor Connections
43
DC Brush Motor Phasing
43
Figure 2-11: DC Brush Motor Configuration
43
Figure 2-12: Clockwise Motor Rotation
43
Stepper Motor Connections
44
Stepper Motor Phasing
44
Figure 2-13: Stepper Motor Configuration
44
Figure 2-14: Clockwise Motor Rotation
44
Motor Feedback Connectors
45
Table 2-11: Motor Feedback Connector Pinout
45
Table 2-12: Mating Connector Part Numbers for the Motor Feedback Connector
45
Encoder Interface (J1-J6)
46
Table 2-13: Encoder Interface Pins on the Motor Feedback Connector
46
Figure 2-15: Line Driver Encoder Interface
47
Line Driver Encoder (Standard)
47
Table 2-14: Encoder Specifications
47
Figure 2-16: Analog Encoder Phasing Reference Diagram (-MXR Option)
48
MXR Option (Analog Encoder Interface)
48
Table 2-15: Analog Encoder Specifications
48
Figure 2-17: MXR Analog Encoder Interface
49
Encoder Phasing
50
Figure 2-18: Encoder Phasing Reference Diagram (Standard)
50
Figure 2-19: Position Feedback in the Diagnostic Display
51
Figure 2-20: Hall-Effect Inputs
52
Hall-Effect Interface
52
Table 2-16: Hall-Effect Feedback Pins on the Motor Feedback Connector
52
Figure 2-21: Thermistor Interface Input
53
Table 2-17: Thermistor Pin on the Motor Feedback Connector
53
Thermistor Interface
53
End of Travel Limit Input Interface
54
Figure 2-22: End of Travel Limit Input Connections
54
Table 2-18: End of Travel Limit Input Pins on the Motor Feedback Connector
54
Figure 2-23: End of Travel Limit Interface Input
55
End of Travel Limit Phasing
56
Figure 2-24: Limit Input Diagnostic Display
56
Encoder Fault Interface
57
Figure 2-25: Encoder Fault Interface Input
57
Table 2-19: Encoder Fault Pin on the Motor Feedback Connector
57
Brake Output
58
Table 2-20: Brake Output Pins on the Motor Feedback Connector
58
Position Synchronized Output (PSO) Connector
59
Table 2-21: PSO Interface Connector Pinout (J7)
59
Table 2-22: Mating Connector Part Numbers for the PSO Connector
59
Figure 2-26: PSO Output Sources Current
60
Figure 2-27: PSO Output Sinks Current
60
PSO Opto Output (J7)
60
Table 2-23: PSO Output Polarity Settings for JP16
60
Table 2-24: Output Specifications
60
Figure 2-28: PSO Output 1 and 2 Differential Outputs
61
Figure 2-29: PSO Opto-Isolated Output and PSO Open Collector Outputs
61
PSO Differential Outputs (J7)
61
Figure 2-30: PSO Interlock Opto Input and Reset Output
62
PSO Interlock (J7)
62
Table 2-25: PSO Interlock Specifications
62
Table 2-26: Reset Specifications
62
Figure 2-31: SYNCOUT (1-6) Outputs
63
Figure 2-32: SYNCIN (1-6) Outputs
63
Pso Sync Io (J7)
63
Table 2-27: SYNCOUT Specifications
63
Table 2-28: SYNCIN Specifications
63
High-Speed I/O Connector (J8)
64
Table 2-29: High-Speed I/O Connector Pinout (J8)
64
Table 2-30: Mating Connector Part Numbers for the High-Speed I/O Connector
64
High-Speed Differential Outputs (J8)
65
Table 2-31: High-Speed Differential Output Pins on the High-Speed I/O Connector (J8)
65
Figure 2-33: High Speed Differential Outputs
66
High-Speed Differential Inputs (J8)
67
Table 2-32: High-Speed Differential Input Pins on the High-Speed I/O Connector (J8)
67
Figure 2-34: High-Speed Differential Inputs
68
Figure 2-35: High-Speed Bidirectional I/O
69
High-Speed Bidirectional I/O (J8)
69
Digital Opto-Isolated I/O Connector (J9)
70
Table 2-33: Digital Opto-Isolated I/O Connector Pinout (J9)
70
Table 2-34: Mating Connector Part Numbers for the Digital Opto-Isolated I/O Connector
70
Digital Outputs (J9)
71
Table 2-35: Digital Output Specifications (Outputs 0-7)
71
Table 2-36: Digital Output Pins on the Digital Opto-Isolated Output Connector (J9)
71
Figure 2-36: Digital Outputs Connected in Current Sinking Mode
72
Figure 2-37: Digital Outputs Connected in Current Sourcing Mode
72
Digital Inputs (J9)
73
Table 2-37: Digital Input Specifications
73
Table 2-38: Digital Input Pins on the Digital Opto-Isolated I/O Connector (J9)
73
Figure 2-38: Digital Inputs Connected in Current Sinking Mode
74
Figure 2-39: Digital Inputs Connected in Current Sourcing Mode
74
Analog I/O Connector (J10)
75
Table 2-39: Analog I/O Connector Pinout (J10)
75
Table 2-40: Mating Connector Part Numbers for the Analog I/O Connector (J10)
75
Analog Outputs (J10)
76
Figure 2-40: Analog Outputs (J10)
76
Table 2-41: Analog Output Specifications (J10)
76
Table 2-42: Analog Output Pins on the Analog I/O Connector (J10)
76
Analog Inputs (J10)
77
Figure 2-41: Analog Inputs (J10)
77
Table 2-43: Differential Analog Input 1 Specifications (J10)
77
Table 2-44: Analog Input Pins on the Analog I/O Connector (J10)
77
Joystick Connector (J11)
78
Table 2-45: Joystick Connector Pinout
78
Table 2-46: Mating Connector Part Numbers for the Joystick Connector
78
Figure 2-42: Joystick Inputs (J11)
79
Figure 2-43: Joystick Interface
80
Miscellaneous I/O Connector (J12)
81
User Interrupt Input (UINT) (J12)
82
Figure 2-44: User Interrupt Inputs (J12)
82
Emergency Stop Sense Input (J12)
83
Figure 2-45: Emergency Stop Sense Input Connections (J12)
83
Brake Option (J12)
84
Figure 2-46: Brake Option Connections (Internal) (J12)
84
Solid State Relay Specifications
86
Firewire Interface
87
Ethernet Interface
88
Figure 2-47: Ethernet Connection
88
PC Configuration and Operation Information
89
Chapter 3: Options
91
External / Fan Tray Cooling Options
92
AC Line Filter Option
93
Emergency Stop Options (ESTOP1,2,3)
94
Figure 3-1: ESTOP Option Interface
95
Shunt Option
98
Analog I/O Board Option [Archive]
99
Power Configuration for the -AIO Option [Archive]
100
Analog Inputs on the -AIO Option Board (AIN4-AIN6) [Archive]
101
Analog Outputs on the -AIO Option Board (AOUT4-AOUT9) [Archive]
102
Resolver Option [Archive]
103
Chapter 4: Maintenance
105
Control Board
107
Drive Interface Board Assembly
109
Rear Panel Interface Board Assembly
111
MXR Board Assembly
113
Soft-Start Board Assembly
114
Analog I/O Board Assembly [Archive]
115
RDP Board Assembly [Archive]
116
Fuse Replacement
117
Preventative Maintenance
118
Appendix A: Warranty and Field Service
119
Appendix B: Revision History
121
Appendix C: Avertissements
123
Index
129
Advertisement
Advertisement
Related Products
Aerotech Npaq DP 32010 Series
Aerotech Npaq DP 32020 Series
Aerotech Npaq DP 32030 Series
Aerotech Npaq DP Series
Aerotech DS8020
Aerotech DR300
Aerotech DR500
Aerotech DT01
Aerotech A3200 Nmark GCL
Aerotech ABL1500 Series
Aerotech Categories
Industrial Equipment
DC Drives
Controller
Engine
Amplifier
More Aerotech Manuals
Login
Sign In
OR
Sign in with Facebook
Sign in with Google
Upload manual
Upload from disk
Upload from URL