Sign In
Upload
Manuals
Brands
ACU-RITE Manuals
Control Systems
MILLPWR G2
ACU-RITE MILLPWR G2 Manuals
Manuals and User Guides for ACU-RITE MILLPWR G2. We have
6
ACU-RITE MILLPWR G2 manuals available for free PDF download: Technical Manual, User Manual, Software Update
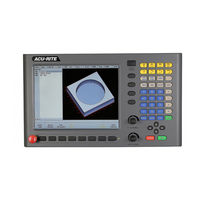
ACU-RITE MILLPWR G2 Technical Manual (546 pages)
Brand:
ACU-RITE
| Category:
Controller
| Size: 7.67 MB
Table of Contents
Table of Contents
3
1 Update Information
13
General Information
13
2 Introduction
15
Meaning of the Symbols Used in this Manual
15
Proper Operation
15
Trained Personnel
15
Grounding, and Connections
15
General Information
16
Overview of Components
17
MILLPWR G2 Control
17
Keys on Visual Display Unit
18
Data Entry Keys
18
Function Keys
18
Power Control Keys
18
Axis Keys
19
Numerical Keys
19
Soft Keys
19
Navigation Keys
20
Calculator Function Keys
20
Potentiometer for Feed Rate
20
Milling Function Keys
21
Peripherals Supported
21
Touch Probe Systems
22
Documentation
24
Brief Description
25
Accessories
29
Software Options
29
Software
30
Designation of the Software
30
Type
30
PLC Software
30
Enabling Software Options
30
Enabling Software Options
31
Updating Software
32
Procedure for Updating the Software
33
Data Backup
34
Software Releases
34
NC Software 751 005-XX
34
NC Software 751 005-01
34
PC Software Utilities
35
Support
35
Management
39
Save Service Files
39
3 Mounting and Electrical Installation
41
General Information
41
Safety Precautions
41
Degrees of Protection
42
Electromagnetic Compatibility
42
Likely Sources of Interference
42
Protective Measures
42
Environmental Conditions
43
Storage and Operating Temperatures
43
Limit Value for Temperature Inside the Console
43
Limit Values
43
Humidity During Operation
44
Storage Temperatures
44
Heat Generation and Cooling
44
Installation Elevation
44
Mechanical Vibration
44
Console Back Panel
45
Power Supply
46
Buffer Battery
47
Encoder Connections
48
General Information
48
Touch Probe Systems
48
Triggering Touch Probe for Workpiece Measurement
49
Touch Probe Connection
49
Data Interfaces
51
General Information
51
Ethernet Interface RJ45 Connection
52
Rs-232-C/V.24
53
Data Interface
53
USB Interface
54
Front/Rear Panel
54
USB Hub
54
Cable Specifications
55
Dimensions
56
Millpwr G2
56
Adapter Block for the Data Interface
57
USB Hub
58
Touch Probe Systems
59
Adapter Cable for TS
59
Adapter Cable for TS 120/TS 220
60
SE 640 Transmitter-Receiver Unit
61
SE 540 Transmitter-Receiver Unit
62
4 Machine Parameters
65
General Information
65
Managing Parameters
67
Entering and Editing Machine Parameters
67
Icons in the Object Tree
68
Displaying Help Texts
70
Copy/Paste Value Function in Configeditor
71
Deleting Objects
71
Entering and Editing Parameters
71
Inserting and Copying Objects
71
Limit Values
71
Changing Key Names
72
Saving Input Values
72
Find Function
73
Finish Editing
75
Managing Configuration Files
75
Sort File Content
75
Attribute Information
76
Access Rights
76
Reaction to Change
77
Update Rules
77
Remove Syntax Error
78
Reset Update Version
78
Backup of Parameters
79
Allocation of Configuration Data
81
3-Axis System
82
Multiple Variants
82
Structure of a Parameter File
83
Rules for Entries
83
Machine Parameter Subfiles
85
Syntax of MP Subfile
85
Activating MP Subfiles
85
Activation in the Configuration Editor
85
Activation by the PLC
87
Displaying/Editing Data Records in the Configuration
88
Basic Data
89
Effective Data
89
Loaded Subfile(S)
89
Temporary Data
89
Unload Subfile
89
Read or Change Machine Parameters Via a PLC Module
90
Overview of the Machine Parameters
93
System" Group
93
Channels" Group
181
Axes" Group
201
Keysynonym
241
Usersetup Parameters
241
Software Version
245
5 Configuring the Axes
246
Machine Structure
246
Definition of Axes
247
Special Kinematics Axes
249
Configuration of Machining Channels
250
Axes of Machining Channel
251
Error Behavior of Machining Channel
252
Traversing the Reference Marks
253
Moving to Restore Position
254
Configuration of Axes
255
Axis Designations and Coordinates
256
Standard Coordinates
257
Programmable Axes
258
Index for Sysread and Syswrite
259
Physical Axes
260
Activate Axis
261
Assigning Parameter Blocks
262
Kinematics Properties of Axes
263
Axis System
264
Encoders
265
Signal Period
267
Distance-Coded Reference Marks
269
Encoder Connections
270
Position Encoder Signal
271
Defining the Traverse Direction
273
Encoder Monitoring
274
Analog Axes
276
Rapid Traverse for Analog Axes
277
Reading Axis Information
278
Reading the Axis Coordinates
279
Traverse Ranges
280
Controlling Axes by PLC
281
Axis Error Compensation
284
Backlash Compensation
285
Linear Axis Error Compensation
287
Nonlinear Axis Error Compensation
289
Compensation Value Tables
291
Entering Compensation Values
292
Importing Data from Calibration Software
293
Activate Error Compensation
294
Compensation of Thermal Expansion
297
Machine Kinematics
299
Reference Marks
308
Traversing the Reference Marks
309
Renewed Traversing of the Reference Marks
310
5.12.3 Defining the Process of Traversing the Reference
311
Position Encoder with Distance-Coded Reference Marks
313
Linear Measurement through Rotary Encoder
315
Pass over Reference Point" Mode of Operation
317
Machine Datum
318
The Control Loop
319
Distance
321
Geometry Filter
322
Look-Ahead
324
Contour Smoothing
325
Path- Specific Limit Values
326
Axis-Specific Limit Values
329
Tolerance for Corners and Arcs
331
Interpolator
332
Filter before Position Control Loop
333
Function of the Filters before the Position Control Loop
335
Position Controller
338
Feedback Control
339
Feedback Control with Following Error
340
Interrelation of K V Factor, Feed Rate, and Following Error
341
Feedback Control with Velocity Feedforward
342
Rapid Traverse and Feed Rate Limitation
344
Activating and Deactivating Position Control Loops
346
Clamping the Axes
347
Actual-To-Nominal Value Transfer
348
Feed-Rate Enable
349
Controller Parameters for Manual Traverse
350
Controller Parameters for Analog Axes
351
Characteristic Curve Kink Point (Only for Analog Axes)
352
Acceleration Feedforward Control for Analog Axes
353
Compensation of Reversal Peaks
356
Analog Offset
358
Position Loop Resolution for Analog Axes
359
Switching Parameter Blocks
360
Monitoring the Drives
362
Switching off Monitoring Functions for Individual Axes
363
Position Monitoring
364
Clamped Axes, Hanging Axes
366
Movement Monitoring
367
Standstill Monitoring
369
Positioning Window
370
Axes in Position
371
Axes in Motion
372
Temperature Monitoring
373
Momentary Utilization of Drive Motors
374
EMERGENCY STOP Monitoring
376
Flowcharts
377
Fundamentals
378
Sampling Rate
379
Prepare Recording
380
Setup for Digital Signals
383
Record Signals
384
Trigger Conditions
385
Analyze Recording
386
Changing the Display
387
Second Cursor
388
Configure the Colors of the Oscilloscope Display
389
6 Machine Integration
393
Software Version
393
Display and Operation
394
Unit of Measurement for Display and Operation
395
Switching the Control On/Off
397
Customer-Specific Logo
398
Starting the Control with Empty PLC Partition
399
Shutting down the Control
400
System Language
405
Programming Station Mode
407
Control Operation in the Operating Mode Group
409
Start/Stop of the Machining Channels
410
Control Operation in the Machining Channel
411
Retract Tool at NC Stop
412
NC Program Run
413
Automatic NC Program Start
414
Terminating the NC Program
416
Moving the Axes During Program Interruption
418
Block Scan (Start Block Search)
419
M, S or T Function in Parallel with Traverse Motion
420
Error Status
421
Assignments in Manual Modes of Operation
422
Error Messages and Log Files
423
Deleting Errors
424
Error Log File
426
Current and Previous Error Log File
427
Keystroke Log File
429
Current and Previous Keystroke Log File
430
Saving Service Files
431
PLC Error Messages
432
Error Text File
433
Structure of the Error Text File
434
Entering Data in Log Files
439
Keystroke Simulation
441
Codes for Keystroke Simulation
447
Override
449
Compensation for Potentiometers
451
Override Functions
452
Feedrate Override
453
Rapid Traverse Override
455
Incremental Jog Positioning
456
Measuring Operating Times
458
System Time
463
Selection of the Touch Probe
465
Using the Touch Probes
466
Maximum Probing Feed Rate
467
Introduction
469
Operation of the OLM
470
Screen Layout
471
Units
472
Status Display
473
Selecting Axes and Channels
474
IPO-Internal Variables (Ipo Act Data)
475
Data from the Ipooffset Module (Offset Data)
481
Nominal Status of the Axes (Plc Nom State)
483
Deleting the Following Error (Clear Peaklag)
488
Group of NC Channels
489
Internal Data of the Offset Interface (Offset Data)
492
Current Status of the Channel (Act State)
493
Hardware Group
494
Auxiliary Group
498
Generating Error Messages (Set Error)
501
PLC Group
502
Plc Trace
504
Queue-Trace
505
Activating a Q Trace
506
Frequent Causes of Error
507
Servo Drive Does Not Move
508
7 Data Interfaces
509
Introduction
509
The Ethernet Interface
511
Connecting to the Network
512
Dhcp
513
Static IP Address
514
Configuring Access to a Network Share
515
The USB 2.0 Interface
517
Structure
518
Functionality and Signal Designations
519
The Serial Interface
520
Signal Levels
521
Signal Designations
522
Configuring the Serial Interface
523
Configuration of Interfaces
524
Creating Parameter Blocks, Configuring Interface Ports
526
Baud Rate
527
Communications Protocol
528
Transmission Reliability Parity Bit
529
Synchronization Stop Bits
530
Hardware Handshaking
531
Software Handshaking
532
Defining the File System
533
Block Check Character (BCC)
534
Standard Communications Protocol
535
Output Selected File
536
Communications Protocol with Block Check Character
537
Handshaking
538
Report an Error to the Control
539
Output Selected File
540
LSV2 Transmission Protocol
541
Saving and Downloading Files
542
Advertisement
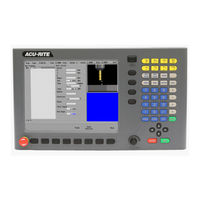
ACU-RITE MILLPWR G2 User Manual (244 pages)
Brand:
ACU-RITE
| Category:
Control Systems
| Size: 10.71 MB
Table of Contents
Keys on Console
2
Motion Control Keys
2
Data Entry Keys
2
Function Keys
2
Numerical Keys
2
Axis Keys
2
Soft Keys
2
Move Table and Navigation Keys
3
Calculator Function Keys
3
Potentiometer for Feed Rate Override
3
Milling Function Keys
3
Peripherals Supported
3
Manual Information
5
Message Symbols
5
Fonts Used in this Manual
6
Model, Software and Features
6
Intended Place of Operation
6
New Functions of Software
7
Changed Functions of Software
8
MILLPWR Access Code
11
MILLPWR G2 Access Code
11
Access Code
11
Access to Machine Parameter Operations
11
Table of Contents
13
Millpwr G2
24
ACU-RITE Conversational and G-Code Format
24
Powering up
25
E-STOP and Shutdown
26
Find Home
28
Disengage Z Axis Feature
29
Disengaging the Z Axis Drive
29
Re-Engaging the Z Axis Drive
29
Writing Programs
30
Overview
30
Operating in 2 Axes and 3 Axes Modes
31
Overview
31
Program Steps on 2 Axis Systems
32
Selecting 2 Axis Mode on 3 Axis Systems
32
1.3 Console
33
Operating Console
33
Rear Panel
33
Screen Navigation
34
DRO Mode Display
34
PGM Mode Display
34
Dialogues and Drop down Menus
35
Operator Prompts
35
Cursor
35
General Operating Guidelines
36
Operating Modes
37
Popup Menus
38
Keyboard
39
Special Characters
39
Navigational Soft Keys
39
Editing Keys
40
Calculator
40
Numeric Keypad
40
Context Sensitive Help
41
Using Context Sensitive Help
41
Console Keypad
42
1.4 Operating Mode Screens
43
Display Navigation
43
DRO Display Screen
43
Program Display Screen
44
1.5 Accessories
44
Electronic Edge Finder
44
2.1 Conventions
46
Axis Conventions
46
Count Direction
46
Axis
46
Y Axis
46
Z Axis
46
Cartesian Coordinates
46
Polar Coordinates
46
Absolute and Incremental Work Piece Positions
47
Absolute Work Piece Positions
47
Incremental Work Piece Positions
47
Setting the Datum
48
Overview
48
2.2 Manual Machine Positioning
49
Move Table
49
Changing the Mode
49
Incremental Moves
49
Continuous Moves
49
Adjusting the Feedrate
50
Preset Moves
50
Zero Incremental
50
3.1 DRO Manual Data Input
52
Overview
52
DRO Screen
53
Status Bar Display
54
Move Table
55
Milling Function
55
Zeroing an Axis
56
Teach Position
56
Electronic Edge Finder
57
Skewing
58
Milling Function Keys
59
DRO Operations
60
Rectangle Milling
60
Rectangle Milling Example
60
Circle Milling
61
Circle Milling Example
61
DRO Mill Cycles
62
3.2 Calculator
63
Accessing the Calculator
63
Using the Calculator to Insert Data
63
Trig Functions
64
Trig Functions
65
Tool Table
67
Overview
68
Tool Compensation Required Data
68
Tool Numbers / Tool Names
69
Locating the Tool Table
69
Tool Table
70
Editing the Tool Table
70
Editing an Existing Tool
71
Tool Table Structure
71
Tool Table: Standard Tool Data
71
4.2 Tool Data
72
Tool-Length Offsets
72
Teaching Tool Length Offsets in the Tool Table
72
Diameter Offset in Tool Table
73
Tool Radius Offset
74
Moving Without Radius Offset
74
Machining with Radius Offset
75
Radius Offset: Machining Corners
76
5.1 Programming Introduction
78
Program Display Mode
78
Display Area
78
Program Function Screen
79
Folder View
79
Program Drawing View
80
Program Screen Display
81
Program Mode Soft Keys
82
Program Functions
83
Program Functions Soft Keys
83
View Hard Key
86
Step Functions Soft Keys
88
Program Steps Soft Keys
89
Clear Program Soft Key
90
Save/Discard Soft Key
90
Run Options Soft Keys
91
Program Saving
92
Saving a Program
92
5.2 Program Mode Functions
93
Program Type Filter
93
USB Access
93
5.3 Creating Programs Overview
94
New Part Program
94
6.1 Conversational Programming
96
Programming Considerations
96
From" and "To" Points
96
Depth of Cut
96
Pass
96
Tool Offset
97
Datum Selection
97
Absolute Vs. Incremental Dimensions
98
Continuous Milling
98
Fundamentals for Creating a Program
99
Entering Milling Steps
99
Adding/Inserting Milling Steps
100
Editing or Deleting a Milling Step
100
Program Errors
101
Program Edited
101
Step Form Validation
102
Running a Program
103
Skewing a Part
103
Establishing a Datum
105
Overview
105
Steps to Establish the Datum
106
Axis Datum
107
Y Axis Datum
107
Z Axis Datum
107
Retract Z
108
Using an Electronic Edge Finder
108
Setting the Datum on an Edge
109
Setting the Datum at the Centerline
110
Setting the Datum at the Center of a Circle
110
Test the Datum Setting
111
Testing a MILLPWR G2 Program
112
Single Step
113
Dry Run
113
Machining Your Part
114
Potentiometer for Feedrate Override
115
Manually Positioning the Quill
116
Folders
117
Folder Functions
117
Creating a Folder
117
Naming a New Folder
118
Deleting a Folder
118
Saving a Program
118
Naming a Program
119
Deleting a Program
119
Loading a MILLPWR G2 (MPT) Program
120
Importing a DXF Drawing
121
G-Code Programs
122
G-Code Editing Capabilities
122
Loading a G-Code Program
123
Running a G-Code Program
123
Starting or Stopping a G-Code Program
124
G-Code and M-Code Definitions
125
G-Code
125
M-Code Definition
129
Additional G-Code Conventions for MILLPWR G2
132
Backing up a Program
133
Copy and Paste Programs
133
Program Errors
134
Demonstration Program
135
Overview
136
Selecting Datum
136
Begin Programming
137
Selecting a Tool
137
Programming a Line
138
Programming an Arc
139
Programming the Connecting Line
140
Programming the Lower Vertical Line
141
Programming the Lower Angle Line
142
Programming the Upper Angle Line
143
Programming a Blend
144
Closing the Contour
145
Tool Change for the Bolt Hole Pattern
146
Programming the Bolt Circle
147
Tool Change for the Rectangular Pocket
148
Programming the Rectangular Pocket
149
Testing the Program
150
Run Options
150
Dry Run with Table Movement
150
Running the Program
151
Tool Changes
152
Clearing the Program
152
Milling and Drilling
153
Overview
154
Selecting a Tool
155
Repeatable Tool Length Offsets
158
Programming a Tool
158
Changing to a Tool of Unknown Length in DRO Mode
159
Changing to a Tool of Unknown Length in a Program
160
Position/Milling
161
Position / Drill
161
Line
162
Arc
163
Blend/Chamfer
164
Contour
167
Rectangular Milling Functions
169
Rectangle Pocket
169
Rectangle Frame
171
Rectangle Face
173
Rectangle Slot
175
Circular Milling Functions
177
Circle Pocket
177
Circle Frame
179
Circle Ring
181
Circle Helix
183
Radial Slot
184
Hole Patterns
185
Row of Holes
185
Hole Frame and Array
187
Bolt Circle Patterns
189
8.2 Additional Milling Functions
190
Step Functions Soft Key
190
Explode
190
Reverse Step
191
Reverse Path
191
Change Steps
192
Shift/Rotate Steps
192
Delete Steps
193
Copy/Move Steps
193
Custom Pockets
194
Custom Pocket
194
Island
195
Advanced Custom Pocket Machining
197
Pilot Drilling
197
Rough Milling
198
Bottom Finishing
199
Side Finishing
200
Repeat, Rotate
201
Repeat
201
Rotate
201
Mirror
202
Other Steps
202
Engrave Line
203
Engrave Arc
204
Comment Step
205
Auxiliary Functions
205
Dwell
207
Reference Point
207
9.1 Geometry Calculator
210
Overview
210
Accessing the Geometry Calculator
210
Geometry Calculator Layout
211
Geometry Listing
211
Geometry Graphic
211
9.2 Geometry User Interface
212
Adding Geometry Features to Listing
212
Geopoint
212
Geoline
212
Geoarc
212
Finding Geometry Solutions
212
Managing Geometry Results
214
Returning Features to the Part Program
215
Geometry Calculator Functions
215
Clear Calculator
215
Loading and Saving Calculator Contents
215
Loading the Part Program into the Geometry Calculator
215
Program Example
216
Locating Points B and C
216
Creating the Program
216
Step 1
216
Step 2
217
Step 3
218
Finding the Points of Tangency
219
Returning the Line Coordinate
219
Returning the Arc Feature
220
Finishing the Program
220
9.3 RPM Calculator
221
RPM Functions
221
Using the RPM Calculator
221
RPM Dialogue
221
Setup
223
Overview
224
10.1 Setup
224
Job Setup
224
Installation Setup
224
Tool Table
224
Message Log
224
Job Setup
225
Scale Factor
226
Feed Rate
227
Display
227
Pecks or Passes Is
227
Job Clock - Parts Counter
228
Probing
228
Tool Table
229
Message Log
229
Service Files
230
Auxiliary Machine Interface (AMI)
231
Machine Functions Menu
232
12.1 Updating System Software
234
Software Update
234
Procedure for Updating the Software
234
13.1 MILLPWR Off-Line Software
236
MILLPWR G2 Off-Line Software
236
Off-Line Simulator
236
System Requirements
236
Installation
237
Operation
237
On Screen Keypad
238
Keyboard Shortcuts
238
Updating
240
ACU-RITE MILLPWR G2 Software Update (7 pages)
Brand:
ACU-RITE
| Category:
Music Mixer
| Size: 0.32 MB
Table of Contents
Installing the Software Onto Your MILLPWR System
1
Procedure for Updating the Software
2
Recovery Drive Compatibility
3
G2 Consoles (ID#745604-NN)
4
G2 Consoles (ID#1113777-NN)
4
Enhancements/Changes
5
Corrections
5
Additional Improvements
6
Advertisement
ACU-RITE MILLPWR G2 Software Update (7 pages)
Brand:
ACU-RITE
| Category:
Music Mixer
| Size: 0.32 MB
Table of Contents
Installing the Software Onto Your MILLPWR System
1
Procedure for Updating the Software
2
Recovery Drive Compatibility
3
G2 Consoles (ID#745604-NN)
4
G2 Consoles (ID#1113777-NN)
4
Enhancements/Changes
5
Corrections
6
ACU-RITE MILLPWR G2 Software Update (6 pages)
Brand:
ACU-RITE
| Category:
Music Mixer
| Size: 0.28 MB
Table of Contents
Installing the Software Onto Your MILLPWR
1
Procedure for Updating the Software
2
Recovery Drive Compatibility
3
These Enhancements/Changes Were Made
4
These Errors Have Been Corrected
5
ACU-RITE MILLPWR G2 Software Update (6 pages)
Brand:
ACU-RITE
| Category:
Music Mixer
| Size: 0.32 MB
Table of Contents
Procedure for Updating the Software
2
Recovery Drive Compatibility
3
G2 Consoles (ID#745604-NN)
4
G2 Consoles (ID#1113777-NN)
4
Enhancements/Changes
5
Advertisement
Related Products
ACU-RITE Categories
Weather Station
Thermometer
Monitor
Measuring Instruments
Music Mixer
More ACU-RITE Manuals
Login
Sign In
OR
Sign in with Facebook
Sign in with Google
Upload manual
Upload from disk
Upload from URL