Sign In
Upload
Manuals
Brands
3ware Manuals
Computer Hardware
9650SE-4LPML
3ware 9650SE-4LPML RAID Controller Manuals
Manuals and User Guides for 3ware 9650SE-4LPML RAID Controller. We have
4
3ware 9650SE-4LPML RAID Controller manuals available for free PDF download: User Manual, Manual, Installation Manual
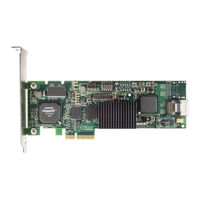
3ware 9650SE-4LPML User Manual (302 pages)
Serial ATA RAID Controller
Brand:
3ware
| Category:
Computer Hardware
| Size: 8.14 MB
Table of Contents
Table of Contents
3
About this User Guide
7
How this User Guide Is Organized
7
Conventions
9
Screenshots
9
Using the 3Ware HTML Bookshelf
9
Chapter 1. Introducing the 3Ware® SATA RAID Controller
11
What's New with 9650SE Models
11
System Requirements
12
Drive Requirements
13
Operating System
13
Understanding RAID Concepts and Levels
14
RAID Concepts
14
Available RAID Configurations
15
Determining What RAID Level to Use
21
3Ware Tools for Configuration and Management
23
Monitoring, Maintenance, and Troubleshooting Features
24
Chapter 2. Getting Started with Your 3Ware RAID Controller
26
Chapter 3. First-Time RAID Configuration Using 3BM
30
Basic Steps for Creating a Unit
30
Specifying a Hot Spare
38
Leaving Individual Drives as Jbods
38
Checking the Motherboard Boot Sequence
39
What Next
39
Chapter 4. Driver Installation
40
Driver Installation under Windows
41
Materials Required
41
Creating a 3Ware Driver Diskette
42
Installing the 3Ware Driver and Windows on a New Unit
42
Installing the Driver on a System that Boots from a Different Device
43
Making Units Managed by a 3Ware Controller Available to Windows
48
Driver Installation under Linux
49
Obtaining 3Ware Linux Drivers
50
Driver Installation under Red hat Linux or Fedora Core 5
51
Driver Installation under Suse Linux
57
Compiling a 3Ware Driver for Linux
60
Driver Installation under Freebsd
60
Obtaining 3Ware Freebsd Drivers
61
Installing the Driver under Freebsd
61
Chapter 5. 3Ware BIOS Manager 2 (3BM 2) Introduction
67
Starting 3BM 2
67
Exiting the 3BM Configuration Utility
69
Working in the 3BM Screens
70
Adjusting BIOS Loading Settings
73
Displaying Controller Information
75
Getting Help While Using 3BM
75
Chapter 6. 3DM 2 (3Ware Disk Manager) Introduction
76
Browser Requirements for 3DM
77
Installing 3DM
78
Starting 3DM and Logging in
78
Logging in to the 3DM Web Application
78
Starting the 3DM Daemon under Linux and Freebsd
80
Starting the 3DM Process under Microsoft Windows
80
Viewing 3DM Remotely Using a Web Browser
81
Working with the 3DM Screens
81
3DM Menus
82
Viewing Information about Different Controllers
84
Refreshing the Screen
84
3DM Screens and What They're Used for
84
Setting up 3DM Preferences
86
Setting and Changing 3DM Passwords
87
Managing E-Mail Event Notification
87
Enabling and Disabling Remote Access
88
Setting the Incoming Port
89
Setting the Frequency of Page Refreshes
89
Chapter 7 Configuring Your Controller
90
Viewing Information about a Controller
90
About Controller Policies
92
Viewing Controller Policies
93
Setting the Auto Rebuild Policy
95
Using Auto-Carving for Multi LUN Support
96
Setting the Size of Volumes Created with Auto-Carving
98
Enabling and Setting up Staggered Spin-Up
99
Exporting JBOD Disks
100
Configuring Units
101
Chapter 8. Configuring Units
101
Configuring a New Unit
101
Configuration Options When Creating a Unit
102
Creating a Unit through 3DM
104
Boot Volume Size
104
Creating a Unit through 3BM
107
Ordering Units in 3BM
110
Partitioning, Formatting, and Mounting Units
111
Creating a Hot Spare
113
Specifying a Hot Spare through 3DM
114
Specifying a Hot Spare through 3BM
114
Naming a Unit
115
Setting Unit Policies
116
Enabling and Disabling the Unit Write Cache
118
Setting Auto Verify for a Unit
119
Setting Continue on Source Error During Rebuild
120
Enabling and Disabling Queuing for a Unit
121
Setting the Storsave Profile for a Unit
122
Changing an Existing Configuration by Migrating
125
RAID Level Migration (RLM) Overview
126
Changing RAID Level
127
Expanding Unit Capacity
128
Informing the Operating System of Changed Configuration
129
Deleting a Unit
130
Deleting a Unit through 3DM
131
Deleting a Unit through 3BM
132
Removing a Unit
133
Removing a Unit through 3DM
134
Removing a Unit through 3BM
135
Moving a Unit from One Controller to Another
136
Moving Units from an 8000 Controller to a 9000 Controller
136
Moving Legacy JBOD Units to a 9000 Controller
137
Moving Units from a 9500S to a 9550SX, 9590SE, or 9650SE Controller
138
Adding a Drive
139
Removing a Drive
140
Rescanning the Controller
141
Maintaining Units
143
Chapter 9. Maintaining Units
143
Checking Unit and Drive Status through 3DM
143
Enclosure LED Status Indicators
145
Unit Statuses
145
Drive Statuses
147
About Degraded Units
147
About Inoperable Units
148
Alarms, Errors, and Other Events
148
Viewing Alarms, Errors, and Other Events
148
Using the Alert Utility under Windows
149
Downloading an Error Log
151
Viewing SMART Data about a Drive
151
Background Tasks
152
About Initialization
153
About Verification
156
Starting a Verify Manually
158
Rebuilding Units
160
Cancelling a Rebuild and Restarting It with a Different Drive
164
Setting Background Task Rate
165
Background Task Prioritization
166
Scheduling Background Tasks
166
Viewing Current Task Schedules
167
Turning on or off Use of a Task Schedule
168
Removing a Task Schedule
169
Adding a New Task Schedule Slot
169
Selecting Self-Tests to be Performed
170
Locating a Drive by Blinking Its LED
171
Chapter 10. Maintaining Your Controller
173
Determining the Current Version of Your 3Ware Driver
173
Updating the Firmware and Driver
174
Downloading the Driver and Firmware
175
Updating the Firmware through 3DM 2
176
Updating the 3Ware Driver and Firmware under Windows
177
Using the Update Utility with Multiple Controllers
181
Updating the 3Ware Driver under Windows XP
182
Updating the 3Ware Driver under Red hat or Fedora Core
188
Updating the 3Ware Driver under Suse
189
Updating the 3Ware Driver under Freebsd
191
Updating the Firmware under Linux and Freebsd
192
Viewing Battery Information
193
Testing Battery Capacity
193
Chapter 11. 3DM 2 Reference
196
Controller Summary Page
197
Controller Details Page
198
Unit Information Page
199
Unit Details Page
200
Drive Information Page
202
Drive Details Window
203
Controller Settings Page
205
Update Firmware
208
Scheduling Page
209
Maintenance Page
212
Unit Information
214
Drive Information
214
Alarms Page
220
Battery Backup Page
221
Enclosure Summary Page
223
Enclosure Details Page
224
3DM 2 Settings Page
225
Remote Access
227
Chapter 12. Troubleshooting
228
Web Resources
228
Before Contacting Customer Support
229
Basic Troubleshooting: Check this First
229
Command Logging
230
Problems and Solutions
230
Enclosure-Related Problems
231
Hardware Installation Problems
231
Software Installation Problems
232
Problems in 3DM and 3BM
233
Error and Notification Messages
234
Table of Contents
235
Error and Notification Message Details
237
C Initialize Started
243
E Initialize Failed
243
F Smart Threshold Exceeded
244
A Drive Inserted
245
Drive Removed
245
E Unit Inoperable
245
Downgrade Udma Mode
246
Upgrade Udma Mode
247
Sector Repair Completed
247
Buffer Integrity Test Failed
248
F Unit Operational
246
Cache Flush Failed; some Data Lost
249
Drive Ecc Error Reported
249
Dcb Checksum Error Detected
250
Dcb Version Unsupported
250
Verify Started
251
A Verify Failed
251
B Verify Completed
252
C Source Drive Ecc Error Overwritten
253
D Source Drive Error Occurred
253
E Replacement Drive Capacity too Small
254
F Verify Not Started; Unit Never Initialized
254
Drive Not Supported
255
Spare Capacity too Small
255
Migration Started
256
Migration Failed
256
Migration Completed
257
Verify Fixed Data/Parity Mismatch
257
So-DIMM Not Compatible
257
So-DIMM Not Detected
258
Buffer Ecc Error Corrected
258
A Drive Power on Reset Detected
259
B Rebuild Paused
259
C Initialize Paused
260
D Verify Paused
260
E Migration Paused
261
F Flash File System Error Detected
261
Flash File System Repaired
262
Unit Number Assignments Lost
262
Primary Dcb Read Error Occurred
262
Backup Dcb Read Error Detected
263
Battery Voltage Is Normal
263
Battery Voltage Is Low
263
Battery Voltage Is High
264
Battery Voltage Is too Low
264
Battery Voltage Is too High
265
Battery Temperature Is Normal
265
A Battery Temperature Is Low
266
B Battery Temperature Is High
266
C Battery Temperature Is too Low
267
D Battery Temperature Is too High
267
E Battery Capacity Test Started
267
F Cache Synchronization Skipped
268
Battery Capacity Test Completed
268
Battery Health Check Started
269
Battery Health Check Completed
269
Battery Capacity Test Is Overdue
269
Battery Charging Started
269
Battery Charging Completed
270
Battery Charging Fault
270
Battery Capacity Is below Error Level
271
Appendices
274
Installing Software from a Graphical User Interface (GUI)
281
Installing Software on Linux and Freebsd from the Command Line
288
Uninstalling Software
289
Uninstalling 3DM under Microsoft Windows
289
Uninstalling 3DM under Linux or Freebsd
289
FCC Radio Frequency Interference Statement
290
Microsoft Windows Hardware Quality Lab
291
European Community Conformity Statement
291
Limited Warranty
292
Warranty Service and RMA Process
293
AMCC Technical Support and Services
294
Sales and Ordering Information
294
Feedback on this Manual
294
Index
295
Advertisement
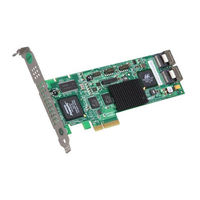
3Ware 9650SE-4LPML User Manual (272 pages)
Serial ATA RAID Controller
Brand:
3Ware
| Category:
Controller
| Size: 6.5 MB
Table of Contents
Table of Contents
3
About this User Guide
7
How this User Guide Is Organized
7
Conventions
9
Screenshots
9
Using the 3Ware HTML Bookshelf
9
Chapter 1. Introducing the 3Ware® SATA RAID Controller
11
What's New with 9650SE Models
11
System Requirements
12
Understanding RAID Concepts and Levels
13
RAID Concepts
14
Available RAID Configurations
15
Determining What RAID Level to Use
20
3Ware Tools for Configuration and Management
22
Monitoring, Maintenance, and Troubleshooting Features
23
Chapter 2. Getting Started with Your 3Ware RAID Controller
26
Chapter 3. First-Time RAID Configuration Using 3BM
30
Basic Steps for Creating a Unit
30
Specifying a Hot Spare
38
Leaving Individual Drives as Jbods
38
Checking the Motherboard Boot Sequence
39
What Next
39
Chapter 4. Driver Installation
40
Driver Installation under Windows
41
Materials Required
41
Creating a 3Ware Driver Diskette
42
Installing the 3Ware Driver and Windows on a New Unit
42
Installing the Driver on a System that Boots from a Different Device
43
Making Units Managed by a 3Ware Controller Available to Windows
48
Driver Installation under Linux
49
Obtaining 3Ware Linux Drivers
50
Driver Installation under Red hat Linux or Fedora Core 5
51
Different Device
54
Driver Installation under Suse Linux
57
Compiling a 3Ware Driver for Linux
60
Driver Installation under Freebsd
60
Obtaining 3Ware Freebsd Drivers
61
Installing the Driver under Freebsd
61
Chapter 5. 3Ware BIOS Manager 2 (3BM 2) Introduction
67
Starting 3BM 2
67
Exiting the 3BM Configuration Utility
69
Working in the 3BM Screens
70
Adjusting BIOS Loading Settings
73
Displaying Controller Information
75
Getting Help While Using 3BM
75
Chapter 6 3DM 2 (3Ware Disk Manager) Introduction
76
Browser Requirements for 3DM
77
Installing 3DM
77
Installing 3DM on a Microsoft Windows System
78
Uninstalling 3DM under Microsoft Windows
81
Installing 3DM for Linux or Freebsd
81
Uninstalling 3DM under Linux or Freebsd
83
Starting 3DM and Logging in
83
Logging in to the 3DM Web Application
84
Starting the 3DM Daemon under Linux and Freebsd
85
Starting the 3DM Process under Microsoft Windows
86
Viewing 3DM Remotely Using a Web Browser
86
Working with the 3DM Screens
87
3DM Menus
88
Viewing Information about Different Controllers
89
Refreshing the Screen
89
3DM Screens and What They're Used for
89
Setting up 3DM Preferences
91
Setting and Changing 3DM Passwords
92
Managing E-Mail Event Notification
92
Enabling and Disabling Remote Access
93
Setting the Incoming Port
94
Setting the Frequency of Page Refreshes
94
Chapter 7 Configuring Your Controller
95
Viewing Information about a Controller
95
About Controller Policies
97
Viewing Controller Policies
99
Setting the Auto Rebuild Policy
100
Using Auto-Carving for Multi LUN Support
101
Setting the Size of Volumes Created with Auto-Carving
103
Enabling and Setting up Staggered Spin-Up
104
Exporting JBOD Disks
105
Configuring Units
106
Chapter 8. Configuring Units
106
Configuring a New Unit
106
Configuration Options When Creating a Unit
107
Creating a Unit through 3DM
109
Boot Volume Size
109
Creating a Unit through 3BM
112
Ordering Units in 3BM
115
Partitioning, Formatting, and Mounting Units
116
Creating a Hot Spare
118
Specifying a Hot Spare through 3DM
119
Specifying a Hot Spare through 3BM
119
Naming a Unit
120
Setting Unit Policies
121
Enabling and Disabling the Unit Write Cache
123
Setting Auto Verify for a Unit
124
Setting Continue on Source Error During Rebuild
125
Enabling and Disabling Queuing for a Unit
126
Setting the Storsave Profile for a Unit
127
Changing an Existing Configuration by Migrating
130
RAID Level Migration (RLM) Overview
131
Changing RAID Level
132
Expanding Unit Capacity
133
Informing the Operating System of Changed Configuration
134
Deleting a Unit
135
Deleting a Unit through 3DM
136
Deleting a Unit through 3BM
137
Removing a Unit
138
Removing a Unit through 3DM
139
Removing a Unit through 3BM
140
Moving a Unit from One Controller to Another
141
Moving Units from an 8000 Controller to a 9000 Controller
141
Moving Legacy JBOD Units to a 9000 Controller
142
Moving Units from a 9500S to a 9550SX, 9590SE, or 9650SE Controller
143
Adding a Drive
144
Removing a Drive
145
Rescanning the Controller
146
Maintaining Units
148
Chapter 9. Maintaining Units
148
Checking Unit and Drive Status through 3DM
148
Enclosure LED Status Indicators
150
Unit Statuses
150
Drive Statuses
152
About Degraded Units
152
About Inoperable Units
153
Alarms, Errors, and Other Events
153
Viewing Alarms, Errors, and Other Events
153
Using the Alert Utility under Windows
154
Downloading an Error Log
156
Viewing SMART Data about a Drive
156
Background Tasks
157
About Initialization
158
About Verification
161
Starting a Verify Manually
163
Rebuilding Units
165
Cancelling a Rebuild and Restarting It with a Different Drive
169
Setting Background Task Rate
170
Background Task Prioritization
171
Scheduling Background Tasks
171
Viewing Current Task Schedules
172
Turning on or off Use of a Task Schedule
173
Removing a Task Schedule
174
Adding a New Task Schedule Slot
174
Selecting Self-Tests to be Performed
175
Locating a Drive by Blinking Its LED
176
Chapter 10. Maintaining Your Controller
178
Determining the Current Version of Your 3Ware Driver
178
Updating the Driver and Firmware
179
Updating the 3Ware Driver and Firmware under Windows
180
Using the Update Utility with Multiple Controllers
185
Updating the 3Ware Driver under Windows XP
186
Updating the 3Ware Driver under Red hat or Fedora Core
191
Updating the 3Ware Driver under Suse
193
Updating the 3Ware Driver under Freebsd
194
Updating the Firmware under Linux and Freebsd
195
Viewing Battery Information
196
Testing Battery Capacity
197
Chapter 11. 3DM 2 Reference
199
Controller Summary Page
200
Controller Details Page
201
Unit Information Page
202
Unit Details Page
203
Drive Information Page
205
Drive Details Window
206
Controller Settings Page
207
Background Task Rate
208
Scheduling Page
211
Maintenance Page
214
Unit Information
216
Drive Information
216
Alarms Page
222
Battery Backup Page
223
Enclosure Summary Page
225
Enclosure Details Page
226
3DM 2 Settings Page
227
Http Settings
229
Chapter 12. Troubleshooting
230
Web Resources
230
Before Contacting Customer Support
231
Command Logging
231
Problems and Solutions
232
Hardware Installation
232
Software Installation
232
Problems in 3DM
233
Error and Notification Messages
234
Table of Contents
235
Controller Error Occurred
237
Controller Reset Occurred
237
Degraded Unit
237
Error and Notification Message Details
237
Incomplete Unit Detected
238
Initialize Completed
238
Rebuild Completed
238
Unclean Shutdown Detected
238
A Drive Error Detected
239
B Rebuild Started
239
Drive Timeout Detected
239
C Initialize Started
240
D Unit Deleted
240
E Initialize Failed
240
F Smart Threshold Exceeded
240
Drive Removed
241
A Drive Inserted
241
Downgrade Udma Mode
241
Upgrade Udma Mode
242
Sector Repair Completed
242
E Unit Inoperable
241
F Unit Operational
241
Cache Flush Failed; some Data Lost
242
Sbuf Memory Test Failed
242
Dcb Checksum Error Detected
243
Dcb Version Unsupported
243
Verify Started
243
Drive Ecc Error Reported
243
A Verify Failed
244
B Verify Completed
244
C Source Drive Ecc Error Overwritten
244
D Source Drive Error Occurred
244
E Replacement Drive Capacity too Small
244
Drive Not Supported
245
Spare Capacity too Small for some Units
245
Migration Started
245
Migration Failed
245
Migration Completed
245
Verify Fixed Data/Parity Mismatch
246
So-DIMM Not Compatible
246
So-DIMM Not Detected
246
F Verify Not Started; Unit Never Initialized
245
A Drive Power on Reset Detected
246
B Rebuild Paused
246
Buffer Ecc Error Corrected
246
C Initialize Paused
247
D Verify Paused
247
E Migration Paused
247
F Flash File System Error Detected
247
Flash File System Repaired
247
Unit Number Assignments Lost
247
Primary Dcb Read Error Occurred
248
Backup Dcb Read Error Detected
248
Battery Voltage Is Normal
248
Battery Voltage Is Low
248
Battery Voltage Is High
248
Battery Voltage Is too Low
249
Battery Voltage Is too High
249
Battery Temperature Is Normal
249
A Battery Temperature Is Low
249
B Battery Temperature Is High
249
C Battery Temperature Is too Low
249
D Battery Temperature Is too High
250
E Battery Capacity Test Started
250
F Cache Synchronization Skipped
250
Battery Capacity Test Completed
250
Battery Health Check Started
250
Battery Health Check Completed
251
Battery Capacity Test Is Overdue
251
Battery Charging Started
251
Battery Charging Completed
251
Battery Charging Fault
251
Appendices
253
FCC Radio Frequency Interference Statement
260
Microsoft Windows Hardware Quality Lab
261
European Community Conformity Statement
261
Limited Warranty
262
Warranty Service and RMA Process
263
AMCC Technical Support and Services
264
Sales and Ordering Information
264
Feedback on this Manual
264
Index
265
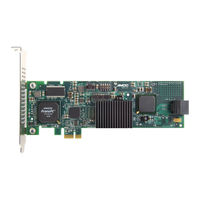
3Ware 9650SE-4LPML Manual (45 pages)
Serial ATA RAID Controller
Brand:
3Ware
| Category:
Controller
| Size: 9.01 MB
Table of Contents
Table of Contents
3
About this Guide
4
Chapter 1. Getting Started
5
Contents of this Package
5
System Requirements
6
9650SE RAID Controller Card Models
8
Cables
11
Safety Information
14
Protecting Equipment and Data
15
Installation Considerations
16
Chapter 2. Installing Your 3Ware RAID Controller
19
Tools You Need
19
Before You Start
19
Step 1 (9650SE-2LP). Connect the Cables to the Controller
20
Step 1 (Multi-Lane Controllers). Connect the Cables to the Controller
21
Step 2. Install the Controller in the Computer
22
Step 3. Connect the Cables to the Drives
24
Step 3. Connect Cables to the SATA/SAS Drive Multi-Lane Backplane
25
Step 4. Connecting Drive Activity LED Indicators (Optional)
25
Step 5. Finishing up the RAID Controller Installation
32
Step 6. Configure Your RAID Arrays
32
Chapter 3. Installing the Battery Backup Unit
33
Tools and Equipment Required
34
Installation Overview
34
Installation Instructions
36
Replacing the Battery
41
Appendix: Technical Support
44
Sales and Ordering Information
44
Feedback on this Manual
44
Advertisement
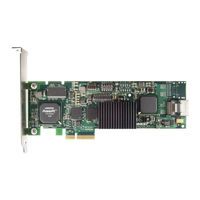
3Ware 9650SE-4LPML Installation Manual (42 pages)
Serial ATA RAID Controller
Brand:
3Ware
| Category:
Controller
| Size: 8.48 MB
Table of Contents
Table of Contents
3
About this Guide
4
Chapter 1. Getting Started
5
Contents of this Package
5
System Requirements
6
9650SE RAID Controller Card Models
8
Cables
10
Safety Information
12
Installation Considerations
14
Chapter 2. Installing Your 3Ware RAID Controller
17
Tools You Need
17
Before You Start
17
Step 1 (9650SE-2LP). Connect the Cables to the Controller
18
Step 1 (Multilane Controllers). Connect the Cables to the Controller
19
Step 2. Install the Controller in the Computer
20
Step 3 (9650SE-2LP). Connect the Cables to the Drives
22
Step 3 (Multilane Controllers). Connect the Cables to the Drives or
23
Backplane
23
Step 4. Connecting Drive Activity LED Indicators (Optional)
24
Step 5. Finishing up the RAID Controller Installation
29
Step 6. Configure Your RAID Arrays
29
Chapter 3. Installing the Battery Backup Unit
30
Tools and Equipment Required
31
Installation Overview
31
Installation Instructions
33
Replacing the Battery
38
Appendix: Technical Support
41
Sales and Ordering Information
41
Feedback on this Manual
41
Advertisement
Related Products
3ware 9650SE-8LPML
3ware 9650SE-4LPMLE
3ware 9650SE-16ML
3ware 9650SE-12ML
3ware 9650SE-24M8
3ware 9650SE-2LPML
3Ware 9500S-8 - Escalade RAID Controller
3ware 9590SE Series
3ware 9550SX Series
3ware 9650SE-4LPME
3ware Categories
Controller
Computer Hardware
Storage
Network Card
Enclosure
More 3ware Manuals
Login
Sign In
OR
Sign in with Facebook
Sign in with Google
Upload manual
Upload from disk
Upload from URL