Table of Contents
Advertisement
Quick Links
Advertisement
Table of Contents

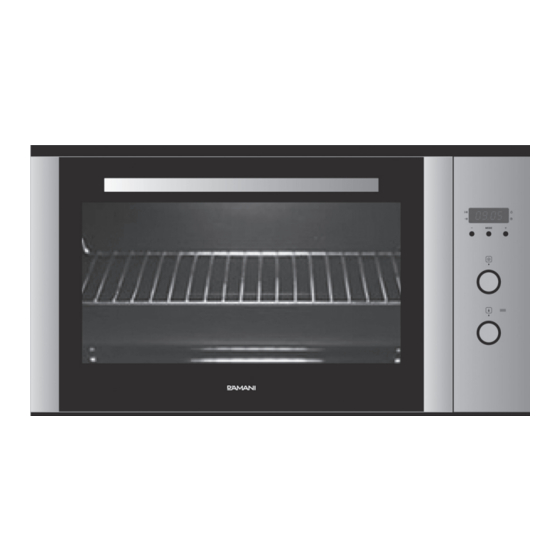
Summary of Contents for D’amani DO99MS
- Page 1 Installation and Instructions for Use DO99MS...
- Page 3 SAFETY INSTRUCTIONS Read this Instruction Manual carefully to obtain the best performance from your oven. Keep this manual so that it can be read by a new owner. Electrical Safety • The oven is supplied with a H05RR-F, H05SS-F or H07RN-F supply cord for connection to the power suply.
- Page 4 • Unplug or disconnect your oven if it malfunctions. • In ovens combined with hobs, only those recommended by the manufacturer may be fitted. Child Safety During use, the appliance becomes hot. Care should be taken to avoid touching heating elements inside the oven WARNING: Accessible parts may become hot during use.
- Page 5 • The oven heats up when in use, so please use oven gloves when performing operations inside the oven and avoid touching the heating elements. • Only use the temperature probe supplied to measure the temperature inside the oven (in models that come with this feature).
- Page 6 Before First Use Other important instructions • The oven must always be operated with the There may be traces of grease and other sub- door closed. stances in the oven as a result of its manu- facturing process. These should be removed •...
- Page 7 Cleaning and Maintenance Caution: Cleaning the Catalytic Panels Disconnect the appliance from mains power supply before any operation. If the remains of food on the enamel cannot be cleaned off using normal (self-cleaning) methods, then: Cleaning the Oven Interior 1 Dismantle the panels and leave them to 1 Easy-to-clean enamel ovens soak long enough to soften the remains.
- Page 8 Cleaning the Oven Door Cleaning the Large Inner Glass Door Do not use metal scouring pads, wire brushes or commercially available or abrasive powder Instructions for Removing / Replacing Inner cleansers to clean the oven door as they could Glass scratch the surface and cause the glass to 1 Open the oven door.
- Page 9 6 Once clean, return the glass panels in the If Something Goes Wrong same order so that the word TERMOGLASS can be read. 7 Replace the upper clasp of the door, making The oven stops working sure that the side tabs fit in point 1. Check the power connection.
- Page 10 Technical Specifications Electrical Connection If the appliance does not work, inform Technical Service of the kind of problem you The installer must ensure that: are experiencing and give the: • The mains power voltage and frequency cor- 1 Serial Number (S-No) respond to what is marked on the identifi- 2 Model of Appliance (Mod.) cation plate.
- Page 11 Oven Description Model DO99MS 9 Door 1 Fixing to Unit 5 Fan 2 Air Outlet 10 Control Panel 6 Grid 3 Fold-down Grill element 7 Cake Tray 11 Light 4 Chromed Support 8 Hinge...
- Page 12 Control Panel Model DO99MS 1 Electronic clock. 3 Heating indicator light. Indicates that heat is being passed to the food and it goes out 2 Function selector. when the set temperature is reached. 4 Temperature selector.
- Page 13 Oven Functions Caution Switch off oven While using the Grill, MaxiGrill or MaxiGrill with fan, the door must be kept closed. Conventional It is used for sponges and cakes where the Turbo heat received must be uniform to achieve a spongy texture.
- Page 14 Use of the Oven Setting the time on the clock Programming the cooking time On connecting the oven, you will notice that 1 Press the MODE button until the indicator 12:00 appears on the clock and that a light above the symbol begins to flash.
- Page 15 Programming the duration and automatic 10 When the programmed finishing time is stop reached, the oven will disconnect, an alarm will sound and the light above the 1 Press the MODE button until the indicator symbol will begin to flash. above the symbol begins to flash.
- Page 16 Shelf positions You should use the shelf position(s) that you find are best suited to your personal cooking preferences. Insert the oven shelf and deep tray between the 2 side rails at any position (1 to 5) on both sides. The oven shelf has safety stops to prevent accidental withdraw.
- Page 17 Figures Fig 1 Fig 2 Fig 3 Fig 4 Fig 5 Fig 6 Fig 7 Fig 8...
- Page 18 Fig 9 Fig 10 Fig 11 Fig 12 Fig 13 Fig 14 Fig 15 Fig 16...
- Page 19 Fig 17 Fig 18 Fig 19 A: 595-455 / B: 590-450 / C: 600-460 Fig 20 min. 40...
- Page 20 Fig 21 Fig 22...
- Page 21 Fig 23...
- Page 24 Think Applia ces Pty Ltd. 416-424 Barry Rd Coolaroo VIC 3048 Sales Telephone 1300 132 824 Service Telephone 1800 444 357 Website www.thinkappliances.com...

Need help?
Do you have a question about the DO99MS and is the answer not in the manual?
Questions and answers