Table of Contents
Advertisement
Advertisement
Table of Contents

Related Manuals for Carl Valentin MICRA


Summary of Contents for Carl Valentin MICRA
- Page 1 MICRA Operating Manual...
- Page 2 No part of this document may be reproduced in any form (print, photocopy or any other method) or edited, copied or distributed electronically without written permission from Carl Valentin GmbH. Due to the constant further development of our devices discrepancies between manual and device can occur.
-
Page 3: Table Of Contents
Table of contents PRINTER DRIVER INSTALLATION ..................1 Windows 95, Windows 98 and Windows Me ......................1 Windows NT ................................3 Windows 2000 Professional ............................ 5 INITIAL OPERATION ......................7 INSTALLATION ........................7 Accessories ................................7 Parts of printer ................................. 8 LOADING OF MATERIAL ....................... - Page 4 Table of contents OPERATING CONDITIONS ....................31 Conditions for the place of installation ........................31 Installation of power supply ........................... 31 Technical data of power supply ..........................31 Stray radiation and immunity from disturbance ...................... 32 Connecting lines to external machines ........................32 Installation data lines .............................
-
Page 5: Printer Driver Installation
Manual PRINTER DRIVER INSTALLATION Windows 95, Windows 98 and Windows Me Start the computer and wait until the operating system is ready. Click the button. Place the cursor first on Settings and then on Printers (see illustration below). The following window appears: Double click Add Printer and the first dialog of the Add Printer Wizard appears. - Page 6 Manual Double click driver and then select one of the available languages. At the moment you can either chose german or english. Depending on your operating system select win95, win98 or winme. The Open dialog box should appear as illustrated below. Confirm the selection with OK and the following window appears.
-
Page 7: Windows Nt
Manual Windows NT Start your computer and wait until the operating system is ready. Click the button. Place the cursor first on Settings and then on Printers (see illustration below). The following window appears: Double click Add Printer and the first dialog of the Add Printer Wizard appears. Select if the printer you want to install is a local printer (My Computer) or a network printer (Network printer service). - Page 8 Manual Double click driver and then select one of the available languages. At the moment you can either chose german or english. Select WinNT and the Locate File dialog should appear as illustrated below Double click the oemsetup.inf file and the following dialog appears. Click again the OK button and select the desired printer from the list.
-
Page 9: Windows 2000 Professional
Manual Windows 2000 Professional Start your computer and wait until the operating system is ready. Click the button. Place the cursor first on Settings and then on Printers (see illustration below). Following dialog box appears: Double click the Add Printer icon and the Add Printer Wizard appears. Select either Local printer if you want to install a local printer or select Network printer if you want to install the printer directly to the network. - Page 10 Manual From the list of available ports, select the one you want the printer to use and confirm your selection with Next. The next page of the Add Printer Wizard appears. Insert the installation CD and then click the Have Disk button. Click the Browse button and the Locate File dialog appears.
-
Page 11: Initial Operation
Manual INITIAL OPERATION Attach the mains desk adapter to an easily accessible shockproof socket. Connect DC connection linen of mains desk adapter with printer (female connector 21). Turn on the DC-switch at the rear of the printer. Load label material and also transfer ribbon (if required). Press and hold feed key as long as status LED is orange and ready LED flashes red. -
Page 12: Parts Of Printer
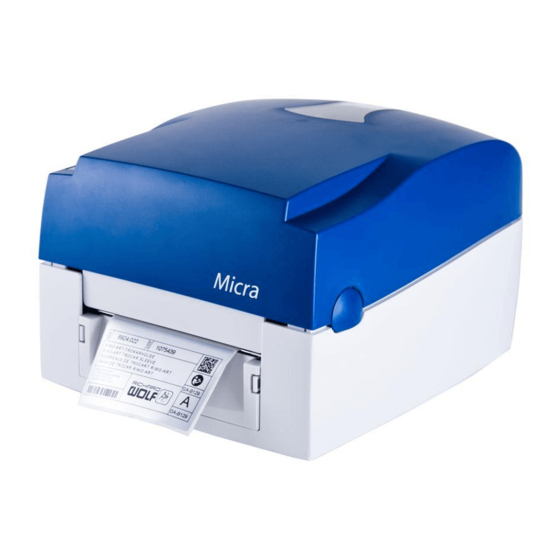
Manual Parts of printer Cover open button Printhead pressure Fan-fold label guiding adjusting screw (left/right) Top cover Ready LED Power switch Label roll core Status LED Power socket Ribbon rewind wheel Feed key USB interface Print mechanism Print line adjusting gear Parallel interface Ribbon supply shaft Serial interface... -
Page 13: Loading Of Material
Manual LOADING OF MATERIAL Loading of labels in standard mode Open the top cover by pressing the cover open button on both sides. Place the label roll onto the label roll core. Loosen and lift the upper print mechanism by pressing the locking tenons. -
Page 14: Installation Of Label Roll Core
Manual Installation of label roll core 1" roll core installation 1,5" roll core installation 3" roll core installation... -
Page 15: Loading Of Transfer Ribbon
Manual Loading of transfer ribbon For the thermal transfer printing method it is necessary to load a ribbon, otherwise when Note: using the printer in direct thermal print it is not necessary to load a ribbon. The ribbons used in the printer have to be at least the same width as the print media. In case the ribbon is narrower than the print media, the printhead is partly unprotected and this could lead to early wear and tear. -
Page 16: Technical Data
Manual TECHNICAL DATA Micra 104/8 Micra 106/12 Print Min. label width 25 mm 25 mm Min. label height 12 mm 12 mm Print width 104 mm 106 mm Max. label width 118 mm 118 mm Max. print height 850 mm / 800 mm (Option Ethernet/LAN) -
Page 17: Functions And Settings
Manual FUNCTIONS AND SETTINGS The Micra only provides one key for operation. The operating status is indicated by two two-coloured LED. Please find the following assignment: Control panel Status Key assignment Both LED lights show no light, i.e. the press short: no function... - Page 18 Manual In normal status of printer it is possible to carry out settings or to release functions. If you press and at the same time hold the Feed key, then the status LED changes its colour every 2 seconds (selection of function). Control panel Procedure Function...
- Page 19 Manual Control panel Procedure Function Press and hold Feed key as long as Reset to default Ready LED flashed red. Release the 4 printer blips Feed key. By means of this function the printer can be reset to the default settings. Press and hold Feed key as long as Port test Ready LED and Status LED flash red.
-
Page 20: Option Dispenser
Manual OPTION DISPENSER Installation of dispenser unit Remove mains plug from shockproof socket in order to separate printer completely from power line, otherwise there is a risk to life and limb from the live wires inside the open printer. Open the top cover by pressing the cover open buttons on both sides. - Page 21 Manual Place the right side in first, and then fit the left side. Hold the dispenser unit and the screws. Peel off the first label, and feed the liner through the roller and the peel off bracket. Flip close the dispenser unit.
-
Page 22: Dispenser Modes
Manual Dispenser modes It is possible to select the desired operating mode either by corresponding printer driver or label design software. The printer supports the following operating modes: It is printed without the labels are dispensed. Photocell: The printer is controlled via photocell. The printer prints automatically a label when the user tears off the label at the tear-off edge. -
Page 23: Option Cutter
Manual OPTION CUTTER There is danger by moving parts. Keep away fingers and other parts of body! Installation of cutter unit Remove mains plug from shockproof socket in order to separate printer completely from power line, otherwise there is a risk to life and limb from the live wires inside the open printer. - Page 24 Manual Flip the cutter module down according to photo in order to open the cutter. Hold the cutter module and lock it with the two side screws. After the screws are locked, flip close the cutter module. Firmly close the print mechanism. Do not cut self-adhesive continuous labels! The remainder of adhesive will pollute the rotary knife and impair safe operation! The service life of cutter is 500,000 cuts with 160g/m paper weight and...
-
Page 25: Cutter Operating Modes
Manual Cutter operating modes It is possible to select the desired operating mode either via the corresponding printer driver or the label design software. The printer supports the following operating modes: It is printed without cutting the labels. Without backfeed A cut is effected after each printed label. -
Page 26: Error Correction
Manual ERROR CORRECTION If the status LED is red, then the printer indicates an error. Press longer than 3 seconds to Note: the FEEd key and the error code (see table below) is printed. Error no. Possible causes Possible error correction Line rises up completely or partly over the Move line down (increase Y value). - Page 27 Manual Error no. Possible causes Possible error correction Received line number is invalid at RS-232 Check sent data. and Centronics. Check connection PC - printer. Invalid length of received mask statement. Check sent data. Check connection PC – printer. Transferred mask statement invalid. Check set data.
- Page 28 Manual Error no. Possible causes Possible error correction Continuous label mode is set. Deselect continuous mode or transfer Printer has received command statement a dummy line with Y coordinates = via interface, number of lines is < 2 label length. Missing label length.
- Page 29 Manual Error no. Possible causes Possible error correction Main directory full Delete files which are no longer used from the main directory. Drive full Delete files which are no longer used from the card. File/directory exists Check the file name and rename it. File too large Invalid graphic file The selected file does not contain...
- Page 30 Manual Error no. Possible causes Possible error correction Faulty definition of shift times Check definition of shift times. (overlapping times). RSS bar code error. Check definition and parameter of RSS bar code. RSS bar code error. Check sent data. Printing creation was still active at print Reduce print speed.
-
Page 31: Maintenance
Manual MAINTENANCE When servicing or repairing, the DC switch has to be turned off and the cable disconnected from shockproof socket! Cleaning of printhead Printing can cause accumulation of dirt at printhead e.g. by colour particles of transfer ribbon, and therefore it is necessary to clean the printhead in regular periods depending on operating hours, environmental effects such as dust etc. -
Page 32: Adjustment Of Printhead
Manual Adjustment of printhead Only experienced staff is allowed to open the printer and to carry out repairs and adjusting operations. When printing with different label materials or using different ribbon types, unbalanced print quality may occur due to the media material differences, this it is necessary to adjust the thermal printhead pressure. -
Page 33: Adjustment Of Printline
Manual Adjustment of printline An important characteristic for a high quality print is the parallelism of the focal line of the thermal printhead to the pressure roll. Because of the fact that the position of focal line of the printhead depends on fluctuations caused by production, it is necessary to set the parallelism. -
Page 34: Adjustment Of Cutter
Manual Adjustment of cutter The label used for cutting is recommended to be at least 30 mm in height. A cutter adjusting hole is present on both sides (where A is pointing to). The cutter will not function properly if there is a paper jam. Turn the power off and use a M3 hexagon wrench inserted into hole A and open the cutter from right to left. -
Page 35: Operating Conditions
Manual OPERATING CONDITIONS Before initial operation and during operation these operating conditions have to be observed to guarantee save and interference-free service of our printers. Therefore please carefully read these operating conditions. Our printers are exclusive for printing on labels, continuous paper and similar materials. In case of questions referring to the practical handling of these conditions please contact us or your after-sales service station. -
Page 36: Stray Radiation And Immunity From Disturbance
Manual Stray radiation and immunity from disturbance Stray radiation according to: DIN EN 50081-2 *DIN EN 55011 / 12.98 *DIN EN 55022 7 4.98 Stray radiation according to EN 61000-6-2:2001 Electromagnetic fields according to DIN EN 61000-4-3:1995 Discharge of static electricity according to DIN EN 61000-4-2:1995 Fast transient burst according to DIN EN 61000-4-4 / 3.96 Line connected disturbance, induced by high-frequent fields according to DIN EN 61000-4-4:1995 Surge according to DIN EN 61000-4-5:1995... -
Page 37: Limit Values
Manual Limit values Protection according to IP: Ambient temperature °C (operation): Min. +5 Max. +35 Ambient temperature °C (storage): Min. −20 Max. +60 Relative air humidity % (operation): Max. 80 Relative air humidity % (storage): Max. 80 (bedewing the printers not allowed) Guarantee We do not take any responsibility for damage caused by: ... -
Page 39: Index
Index INDEX Accessories ..............................7 Air convection ..............................32 Allowable lines ............................... 32 Ambient temperature (operation) ........................33 Ambient temperature (storage) ........................33 Anti-interference measures ........................... 31 Connecting lines (external machines)) ......................32 Cutter adjustment ............................30 Cutter installation (optional) ........................... 19 Cutter modes (optional) .......................... - Page 40 Index Label roll core, installation ..........................10 Limit values Air humidity ..............................33 Protection ..............................33 Temperaturer ............................. 33 Loading labels, standard mode ........................9 Loading, transfer ribbon ..........................11 Maintenance Cutter adjustment ............................30 Printhead adjustment ..........................28 Printhead cleaning ............................. 27 Printline adjustment ...........................
- Page 41 Index Settings ................................. 14 Stray radiation ............................... 32 Technical data ............................... 12 Temperature Ambient (operation) ........................... 33 Ambient (storage) ............................33 Lines ................................32 Tolerance Power line frequency ..........................31 Power line voltage ............................. 31...
- Page 42 Carl Valentin GmbH Neckarstraße 78 – 86 u. 94 . 78056 Villingen-Schwenningen Phone +49 (0)7720 9712-0 . Fax +49 (0)7720 9712-9901 info@carl-valentin.de . www.carl-valentin.de...
Need help?
Do you have a question about the MICRA and is the answer not in the manual?
Questions and answers