Table of Contents
Advertisement
Available languages
Available languages
Quick Links
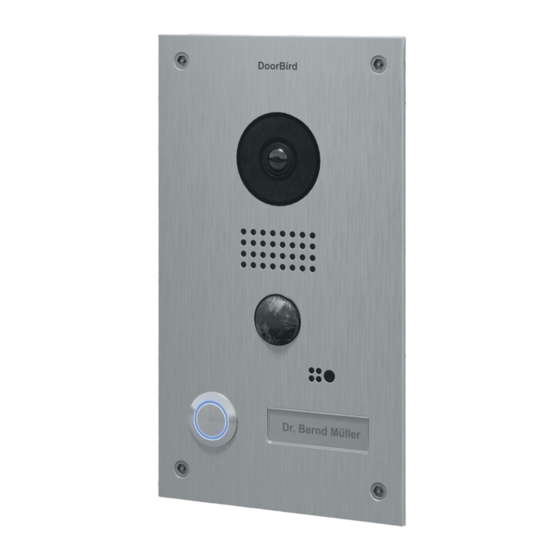
Video Door Station
D20x Series
Video Türstation
D20x Serie
Installation manual
Pages 1-8
Installationsanleitung
Seiten 10-18
Version 1.5, Min. HW 1.01
Advertisement
Table of Contents

Related Manuals for DoorBird D20x Series


Summary of Contents for DoorBird D20x Series
- Page 1 Video Door Station D20x Series Video Türstation D20x Serie Installation manual Pages 1-8 Installationsanleitung Seiten 10-18 Version 1.5, Min. HW 1.01...
- Page 4 The installation of the Video Door Station to a wall or fence requires professional skills and suitable tools e.g. drilling machine, drill, dowels and if necessary spacers. These are not included. Components Contents 1x DoorBird Video Door Station 1x Mounting housing 1x Power supply unit (mains adaptor) with four country-specific adaptors ...
- Page 5 Network speed and network components Please ensure that the upload speed of your Internet connection is at least 0.5 Mbps. You can also carry out a speed test at any time via the DoorBird app. The user experience is only as good as your...
- Page 6 network speed, network stability and quality of your network components, such as your Internet router and WiFi access points or WiFi repeaters. Please also make sure that your network components are no older than two years old, have been manufactured by a well-known manufacturer, and have the latest firmware installed.
- Page 7 Should you have any questions about this, please contact the manufacturer of your door opener. You can find compatible electric door opener sample wiring diagram www.doorbird.com/support...
- Page 8 Conventional door opener button If an electric door opener is connected to the Video Door Station, the Two insulated wires. door opener can be opened by App and also be directly controlled via a zero-potential button to be found in the interior of the building, i.e.
- Page 9 Step 10: Final assembly Applies only to DoorBird Video Door Station D201 and D202: Screw the front panel with the attached Video Door Station to the mounting housing with the safety screws and the appropriate tool. Applies only to DoorBird Video Door Station D203 and D204: Mount the Video Door Station with appropriate screws/dowels on the wall/fence.
- Page 10 If you have finished the WiFi set-up or have connected the Video Door Station to your Internet router by means of a network cable, go to DoorBird App "Settings > Add device" and click on the QR code icon in the "User" field. Scan the user QR code found on the "Digital Passport" that accompanies the Video Door Station.
- Page 11 Pulling on the metal plate will remove the name plate which can then be labeled. Legal notes General remarks Data privacy and data security 1. DoorBird is a registered trademark of Bird Home 1. For maximum security, the device uses the same Automation GmbH. encryption technologies as are used in online banking. For your security, no port forwarding or DynDNS is usedeither.
- Page 12 Video Door Station D20x Series Video Türstation D20x Serie Installation manual Pages 1-8 Installationsanleitung Seiten 10-18 Version 1.5, Min. HW 1.01...
- Page 13 Installationsanleitung Die stets aktuelle Version der Installationsanleitung finden Sie unter www.doorbird.com/de/support Die Montage der Video Türstation an oder in einer Mauer oder Zaunanlage setzt handwerkliche Kenntnisse und geeignetes Werkzeug voraus, z.B. Bohrmaschine, Bohrer, Dübel und ggfs. Abstandshalter. Diese sind im Lieferumfang nicht enthalten.
- Page 14 Drähte, die Sie für die Installation verwenden, über die gesamte Länge unbeschädigt und für die Verwendungsart zugelassen sind. Netzwerkgeschwindigkeit und Netzwerkkomponenten Stellen Sie sicher, dass Ihre Internetverbindung über mindestens 0,5 Mbit/s Uploadgeschwindigkeit verfügt. Sie können über die DoorBird App jederzeit auch einen Geschwindigkeitstest durchführen.
- Page 15 Das Nutzererlebnis ist nur so gut wie Ihre Netzwerkgeschwindigkeit, Netzwerkstabilität und Qualität Ihrer Netzwerkkomponenten, wie z.B. Ihr Internetrouter und W-LAN Access Points oder W-LAN Repeater. Stellen Sie sicher, dass auch Ihre Netzwerkkomponenten nicht älter als 2 Jahre sind, von einem namhaften Hersteller gefertigt wurden und über die neuste Firmware verfügen. Sind diese Voraussetzungen nicht erfüllt, kann es z.B.
- Page 16 Stromversorgung per PoE (alternativ!) Zur Stromversorgung der Video Türstation per PoE Switch (z.B. D-Link DGS-1008P) oder PoE Injektor (z.B. TP-Link TL-PoE150S) nach PoE Standard IEEE 802.3af Mode A werden die vier Drähte mit den Nummern 1, 2, 3 und 6 eines Cat.5 Kabels oder besser benutzt. Es muss zwingend ein Cat.5 Kabel oder besser zum Einsatz kommen, da Netzwerksignale nur über vollständig isolierte, abgeschirmte und verdrillte Kabel übertragen werden können.
- Page 17 Daten Ihres Türöffners entnehmen. Bei Fragen hierzu kontaktieren Sie bitte den Hersteller Ihres Türöffners. Beispiele für kompatible elektrische Türöffner und einen beispielhaften Anschlussplan finden Sie unter www.doorbird.com/de/support Herkömmlicher elektrischer Türgong Wenn jemand bei Ihnen an der Video Türstation klingelt, erhalten Sie Zwei isolierte Drähte.
- Page 18 Schritt 10: Endmontage Gilt nur für DoorBird Video Türstation D201 und D202: Schrauben Sie die Frontplatte mit der daran befestigten Video Türstation an das Montagegehäuse mit den beiliegenden Sicherheitsschrauben und dem dazu passenden Schraub-Tool. Gilt nur für DoorBird Video Türstation D203 und D204: Montieren Sie die Video Türstation mit entsprechenden Schrauben/Dübeln an der Wand/Zaun.
- Page 19 Türstation angeschlossen haben. Schritt 12: Download und Installation der App Laden Sie sich die App "DoorBird" von Bird Home Automation aus dem Apple App Store bzw. Google Play Store auf Ihr mobiles Endgerät. Die stets aktuelle Version der App Bedienungsanleitung finden Sie unter www.doorbird.com/de/support...
- Page 20 Diagnose-Töne Die Video Türstation gibt nach etwa zwei bis fünf Minuten kurze Töne zur Diagnose aus, nachdem man sie mit dem Stromnetz verbunden hat. 1x Diagnose-Ton: Die Video Türstation ist mit dem Internet verbunden 2x Diagnose-Ton: Die Video Türstation kann zwar den Router erreichen, nicht aber das Internet ...
- Page 21 Rechtliche Hinweise Allgemeines Datenschutz und Datensicherheit 1. DoorBird ist ein registriertes Warenzeichen der Bird 1. Für maximale Sicherheit verwendet das Gerät dieselben Home Automation GmbH. Verschlüsselungstechnologien wie beim Onlinebanking. Zu Ihrer Sicherheit sind auch keine Portweiterleitungen oder 2. Apple, das Apple Logo, Mac, Mac OS, Macintosh, iPad, DynDNS im Einsatz.
- Page 24 www.doorbird.com...
Need help?
Do you have a question about the D20x Series and is the answer not in the manual?
Questions and answers