Advertisement
Quick Links
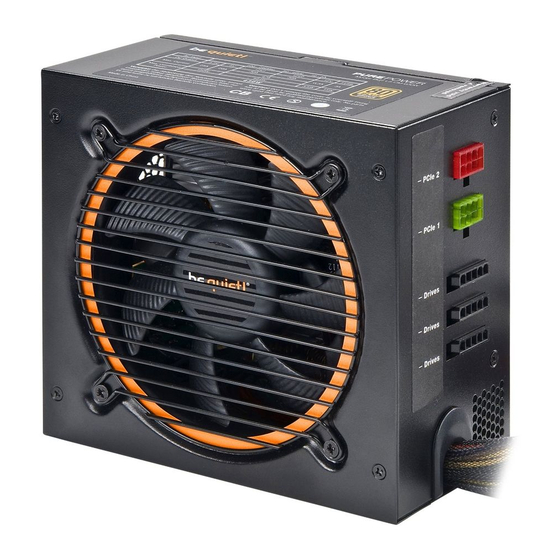
PURE POWER L8
USER MANUAL | L8-CM-430W & L8-CM-530W »
1. WARNINGS AND SAFETY INSTRUCTIONS
▪ Never unscrew or disassemble the power supply. It may hold
elements containing high voltages after long periods of disuse and
which could cause serious injury.
▪ A power supply must only be opened by an authorised technician!
▪ Caution! Only use the supplied cable set. Using cables that were not
included (e.g. cables of older power supply unit series) may lead to
defects!
▪ The warranty shall be void if the power supply is opened by an unau-
thorised technician and/or the warranty seal is broken. Never handle
the power supply with wet or damp hands when in operation. Never
insert objects into the openings/fans of the power supply. Operation is
only permitted indoors! Outdoor use may lead to severe damage.
▪ Do not carry out work on the power supply if it is connected to the
mains. Always turn the mains switch to off and pull out the mains
plug.
▪ In the event of a short circuit in the device, remove the mains cable
and do not use the device.
▪ If there are traces of smoke, damaged cables and exposure to liquids,
the power supply must immediately be disconnected from the mains
and must not be used.
▪ This power supply is covered for a voltage range between 100 – 240
V~ and can be used universally.
▪ Do not operate the PC directly next to a heater or another source of
heat, as this reduces the lifespan of all components and may lead to
failures.
▪ Ensure that there is sufficient ventilation in the PC case, for example
by adding additional fans.
▪ Should you want to clean your power supply, disconnect it completely
from the mains and do not use damp cloths or cleaning detergent.
Clean the power supply from the outside using a dry cloth.
▪ Allow hour before using the power supply after it has been in an
ambient air environment as otherwise condensation water could
accumulate in the power supply.
2. COMPATIBILITY
be quiet! Pure Power power supplies are compatible with current power
supply and motherboard specification, such as: Intel ATX12V Power
Supply Design Guide Version 2.4 (and downward compatible to V2.31 /
V2.3 / V 2.01 / V 2.0). ATX System Design Guide Version 2.2 und Version
2.1, BTX Version 1.0a and the Intel C6/C7 status of the current CPU
generation.
3. INSTALLING YOUR NEW POWER SUPPLY
You must read the item "Warnings/safety instructions" before beginning
installation. You will need a screwdriver to fit the power supply in your
PC.
Only use the screws supplied with the power supply, as these have the
suitable thread.
First remove your old power supply. To do this, proceed as fol-
lows:
1. Carefully disconnect your PC from any power sources and pull out all
cables connected to the PC.
2. Open the PC case also following the manufacturer's instructions.
3. Disconnect all plugs from the motherboard and all other components,
such as a FDD, HDD or optical drive. Ensure that there are no plugs
from the old power supply connected to any of the components.
4. Now remove the screws on the rear of the power supply and take it
out carefully. Make especially sure that no cables get caught in the
components and damage them.
Installing your new be quiet! Pure Power power supply:
5. Place the new power supply in the space provided in the case and
mount it to the rear with the four screws provided. Do not use exces-
sive force.
6. Plug the 20/24 pin connector into the socket provided on the mother-
board. If you have a 24 pin connector, put the remaining 4 pins in the
right position before plugging the connector into the socket. If using a
20 pin connector, simply leave the additional 4 pins on the side.
7. Now connect the 4 pin connector, also called the P4 connector, into
the socket provided on the motherboard. This connector is going to
supply your PC with additional power.
8. If required, plug the PCIe connector to your graphic card.
4. DIMENSIONS & INCLUDED ACCESSORIES
Dimensions of Power Supply: 140mm x 150mm x 86mm
This item is delivered with: Power cables, operating instructions, cable
ties, and screws to attach power supply.
5. MANUFACTURER'S DATA & WARRANTY
Our warranty conditions apply, which can be viewed on the internet on
www.bequiet.com.
Your original purchase receipt and serial number will be required before
warranty performance is rendered. Please keep it in a safe place.
Listan GmbH & Co.KG . Biedenkamp 3a . 21509 Glinde . Germany
For further information, you can contact us
via e-mail: service.tw@bequiet.com.
Model description
Article Number Serial Number
BQT L8-CM-530W BN881
S/N (see nameplate for number)
BQT L8-CM-430W BN880
S/N (see nameplate for number)
6. LEGAL NOTICE, COPYRIGHT
Copyright © Listan GmbH & Co. KG 2013. All rights reserved.
Please note the following:
▪ The content of this documentation may not be copied, transmitted,
distributed or stored in any form, whether in whole or in part, without
the prior written approval of Listan.
▪ be quiet! is a registered trademark of Listan GmbH & Co. KG. Other
product and company names mentioned in this documentation may
be trademarks or trade names of their respective owners.
▪ In accordance with its policy, Listan continually develops its products
further. Listan therefore reserves the right to make changes and
improvements to any of the products described in this documentation
without prior notice.
▪ Listan is under no circumstances responsible for the loss of data
and income or for any specific, incidental, indirect or direct damage,
however this may be incurred.
▪ The content of this documentation is presented in its most updated
form. Listan neither expressly nor implicitly assumes any liability for
the accuracy or completeness of the content of this documentation,
including, but not limited to the implicit guarantee of market suitabi-
lity and the appropriateness for a certain purpose, unless applicable
laws or case law prescribe such liability. Listan reserves the right to
make changes to this documentation or to withdraw the documenta-
tion at any time without prior notice.
7. TECHNICAL DATA
POWERLABEL
AC Input
100–240Vac
50–60Hz
DC Output
3.3V
5V
12V1
12V2
28A
20A
Max. Current
24A
15A
BQT
40A
L8-CM-530W
530W
120W
480W
Max. Combined
Power
530W
AC Input
100–240Vac
50–60Hz
DC Output
3.3V
5V
12V1
12V2
22A
20A
Max. Current
24A
15A
BQT
33A
L8-CM-430W
430W
120W
396W
Max. Combined
Power
430W
VOLTAGE REGULATION AND MINIMAL LOAD
DC OUT-
3.3V
5V
12V1
12V2
-12V
PUT
530W
0
0
0.1
0
0
430W
0
0
0.1
0
0
Tolerance
+/-5%
+/-5%
+/-5%
+/-5%
+/-10%
Ripple/
max.
max.
max.
max.
max.
Noise
50mV
50mV
120mV
120mV
120mV
OPERATING CONDITIONS
Environment
Temperature
Rel. Humidity
Operation
0 ~ 40°C
up to 85% (non-condensing)
Storage
-40 ~ 70°C
up to 95% (non-condensing)
CONNECTIVITY AND CABLE LENGTH
50
450mm
100mm
mm
150mm
150mm
4-Pin
24-Pin
20-Pin
12V P4-connector
12V P4-connector
S-ATA
S-ATA
HDD
only for 430W
S-ATA
S-ATA
HDD
PCIe 1 (6+2-Pin)
PCIe 2 (6-Pin)
only for 530W
HDD
HDD
S-ATA
S-ATA
PCIe 1 (6+2-Pin)
PCIe 3 (6+2-Pin)
450mm
24 pin ATX power connector
24 PIN ATX power connector
Pin
Color
Signal
Pin
1
Orange
+3.3VDC
13
10–5A
–12V
5VSB
2
Orange
+3.3VDC
14
0.3A
3A
3
Black
COM
15
4
Red
+5VDC
16
3.6W
15W
5
Black
COM
17
6
Red
+5VDC
18
8–4A
7
Black
COM
19
–12V
5VSB
8
Grey
PWR_OK
20
0.3A
3A
9
Violet
+5VSB
21
10
Yellow
+12VDC
22
3.6W
15W
11
Yellow
+12VDC
23
12
Orange
+3.3VDC
24
Peripheral Devices & FDD power connector
5VSB
Pin
Color
Signal
Pin
0
1
Red
+5VDC
3
0
2
Black
COM
4
+/-5%
max.
SATA power connector
50mV
Pin
Color
Signal
Pin
1
Orange
3.3V
4
2
Black
COM
5
3
Red
+5VDC
PCI express VGA connector
Pin
Color
Signal
Pin
1
Yellow
+12VDC
4
2
Yellow
+12VDC
5
3
Yellow
+12VDC
6
7
Black
COM
8
+12V power connector
Pin
Color
Signal
Pin
12V P8-connector
1
Black
COM
3
2
Black
COM
4
FDD
5
Black
COM
7
6
Black
COM
8
HDD
HDD
S-ATA
Color
Signal
+3.3VDC
Orange
+3.3Vdef.
Brown
sense
Blue
-12VDC
Black
COM
Green
PS_ON/OFF
Black
COM
Black
COM
Black
COM
Red
+5VDC
Red
+5VDC
Red
+5VDC
Black
COM
Color
Signal
Black
COM
Yellow
+12VDC
Color
Signal
Black
COM
Yellow
+12VDC
1
Color
Signal
4
2
5
Black
COM
3
6
7
8
Black
COM
Black
COM
Black
COM
Color
Signal
Yellow
+12VDC
5
7
Yellow
+12VDC
6
8
Yellow
+12VDC
Yellow
+12VDC
Advertisement

Subscribe to Our Youtube Channel
Related Manuals for BE QUIET! PURE POWER L8-CM-430W


Summary of Contents for BE QUIET! PURE POWER L8-CM-430W
- Page 1 PURE POWER L8 USER MANUAL | L8-CM-430W & L8-CM-530W » 1. WARNINGS AND SAFETY INSTRUCTIONS sive force. 7. TECHNICAL DATA 24 pin ATX power connector 6. Plug the 20/24 pin connector into the socket provided on the mother- 24 PIN ATX power connector ▪...
- Page 2 PURE POWER L8 使用說明書 | L8-CM-430W & L8-CM-530W » 1.安全注意事項 5. 製造商資訊與售後保固 7. 產品技術數據 連接腳分配 24 PIN ATX power connector ▪ 切 勿自行打開或拆卸此電源供應器。於長期閒置下內部元 所有保固條件資訊皆詳載於官網,請查閱: www.bequiet.com 顏色 訊號定義 顏色 訊號定義 件有可能帶有高壓電,擅自開啟下會導致嚴重傷害。 電源標示 +3.3VDC ▪ 此 電源供應器僅有經授權的工程技師才可開啟! 請妥善保存您的原始購買憑證,與機身出廠編碼,此為申請保固 交流電輸入 橘 +3.3VDC 橘棕...
Need help?
Do you have a question about the PURE POWER L8-CM-430W and is the answer not in the manual?
Questions and answers