Marantz TT-15S1 User Manual
Marantz user guide turntable tt-15s1
Hide thumbs
Also See for TT-15S1:
- User manual (39 pages) ,
- Service manual (16 pages) ,
- Product information (2 pages)
Table of Contents
Advertisement
Advertisement
Table of Contents

Related Manuals for Marantz TT-15S1


Summary of Contents for Marantz TT-15S1
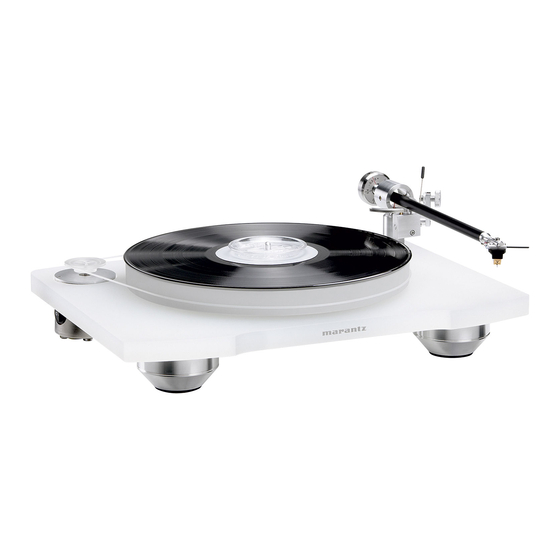
- Page 1 Model TT-15S1 User Guide Turntable...
- Page 2 CAUTION: TO REDUCE THE RISK OF ELECTRIC SHOCK, REFER SERVICING TO QUALIFIED SERVICE PERSONNEL WARNING TO REDUCE THE RISK OF FIRE OR ELECTRIC SHOCK, DO NOT EXPOSE THIS PRODUCT TO RAIN OR MOISTURE. CAUTION: BLADE OF PLUG TO WIDE SLOT, FULLY INSERT. ATTENTION: INTRODUIRE LA LAME LA PLUS LARGE DE LA FICHE DANS LA BORNE CORRESPONDANTE DE LA PRISE ET POUSSER...
-
Page 3: Important Safety Instructions
This product was designed and manufactured to meet strict quality and safety standards. There are, however, some installation and operation precautions which you should be particularly aware of. 1. Read Instructions – All the safety and operating instructions should be read before the product is operated. 2. - Page 4 20. Servicing – Do not attempt to service this product yourself as opening or removing covers may expose you to dangerous voltage or other hazards. Refer all servicing to qualified service personnel. 21. Damage Requiring Service – Unplug this product from the wall outlet and refer servicing to qualified service personnel under the following conditions: a.
-
Page 5: Table Of Contents
CONTENTS CONTENTS ...1 BEFORE USE ...2 ACCESSORIES ...3 ASSEMBLING AND ADJUSTING...5 NAMES AND FUNCTIONS...10 CONNECTIONS AND OPERATION...11 TROUBLE SHOOTING ...12 SPECIFICATIONS AND EXTERNAL DIMENSIONS DIAGRAM ...13 OTHERS ...14... -
Page 6: Before Use
- Any subsequent statutory enactments and orders Do Not Locate in the Following Places To ensure long-lasting use, do not locate the TT-15S1 where: • Exposed to direct sunlight. • Near to sources of heat such as heaters. • Highly humid or poorly ventilated. -
Page 7: Accessories
ACCESSORIES Before using the turntable, please make sure that you have all of the following accessories. 1. Turntable chassis 2. Center shaft 3. Tone arm 4. Turntable 5. Motor 6. Motor pulley (for 60Hz areas) 7. Gloves (pair) 8. Ground wire... - Page 8 ACCESSORIES 9. 2 Drive belts (1 spare belt) 10. Bearing oil 11. Turntable sheet 12. 3 Allen wrenches (large/medium/small) 1 adjustment screwdriver 13. Record clamp (“Clever clamp” produced by Southern Engineering) 14. Counter weight 15. Tone arm height adjustment sheet...
-
Page 9: Assembling And Adjusting
ASSEMBLING AND ADJUSTING 1. Installing the ground wire Connect the ground wire to the turntable shaft base. Turntable shaft base Ground wire 2. Inserting the center shaft Insert the center shaft into the turntable chassis. Center shaft 3. Installing the turntable Place the turntable onto the center shaft. -
Page 10: Attaching The Cartridge
ASSEMBLING AND ADJUSTING b-2) Direction The direction position is correct when the tone arm is parallel with the side of the turntable base. Tone arm b-3) When you have determined the height and direction of the tone arm attachment position, tighten the tone arm fixing screw using the Allen wrench (large). - Page 11 Attach the counter weight to the back of the arm. Remove the cartridge cover. Green Caution: Make sure that the cartridge stylus tip does not touch the turntable etc. and that the stylus tip does not get damaged. Anti-skating adjustment screw Counter weight...
-
Page 12: Anti-Skating Adjustment
ASSEMBLING AND ADJUSTING d) Lower the lifter lever, and rotate the counter weight to balance the tone arm so that it is parallel with the turntable. Tone arm Lifter lever e) After finding the balance, raise the lifter lever and attach the anti-skating adjustment screw. -
Page 13: Installing The Belt
10. Installing the motor From underneath the turntable chassis, place the motor in the hole section at the back left of the turntable chassis. (Do not fix it to the turntable base) Does not touch... -
Page 14: Names And Functions
This is used to balance the toner arm and to adjust the stylus pressure. !1 Record clamp This is effective in holding the record when records are being played without a turntable sheet, or when playing warped records. Use it as shown in the diagram. -
Page 15: Connections And Operation
The tonearm slowly lowers the stylus onto the record, and the record starts to play. Caution • Do not allow the turntable to be jolted or vibrated while playing a record. • Always stop the turntable when changing records. • Always turn down the amplifier volume when placing the stylus on or removing it from the record. -
Page 16: Trouble Shooting
Are each of the connections correct? Are you operating the turntable correctly as described in this instruction manual? If the turntable does not operate correctly, check all of the items in the following table. However, if none of the items in the following table correspond to the problem, it is possible there is a fault with your turntable. -
Page 17: Specifications And External Dimensions Diagram
SPECIFICATIONS AND EXTERNAL DIMENSIONS DIAGRAM Turntable section ...33 1/3 rpm, 45 rpm Drive system ...Belt drive system Turntable ...High density acrylic Turntable depth ...28 mm RPM deviation ...±0.2 % S/N ratio...80 dB Tone Arm section Arm type ...2 point radial tone arm Effective length...239mm... -
Page 18: Others
• wipe the equipment with the damp cloth. • dry the equipment by wiping it with a dry cloth. Repairs In the unlikely event your TT-15S1 should need adjustment or repairs, contact a Marantz Authorized Service Center. Their factory trained technicians have the knowledge, facilities, and access to replacement parts needed for repair and calibration of your turntable. - Page 19 You can find your nearest Marantz Authorized Dealer on our website. U.S.A. Marantz America, Inc. 1100 Maplewood Drive, Itasca, IL 60143, U.S.A. is a registered trademark. Printed in USA 11/2005 00M31BW851250 mzh-d...
Need help?
Do you have a question about the TT-15S1 and is the answer not in the manual?
Questions and answers