
Related Manuals for Lincoln IMPINGER 1300


Summary of Contents for Lincoln IMPINGER 1300
- Page 1 INSTALLATION & OPERATING INSTRUCTIONS ® IMPINGER CONVEYOR OVENS MODEL 1300 SERIES TO BE SERVICED ONLY BY AUTHORIZED PERSONS 1300opsman REV: 1/4/07 Part Number: 2810088...
-
Page 2: Warranty And Safety Information
WARNING AND SAFETY INFORMATION IMPORTANT FOR YOUR SAFETY, DO NOT STORE OR USE GASOLINE OR OTHER FLAMMABLE VAPORS OR LIQUIDS IN THE VICINITY OT THIS OR ANY OTHER APPLIANCE. DO NOT SPRAY AEROSOLS IN THE VICINITY OF THIS APPLIANCE WHILE IT IS IN OPERATION. WARNING: IMPROPER INSTALLATION, ADJUSTMENT, ALTERATION, SERVICE OR MAINTENANCE CAN CAUSE PROPERTY DAMAGE, INJURY OR DEATH. -
Page 3: Table Of Contents
PURCHASER’S RESPONSIBILITY It is the responsibility of the purchaser to: 1. See that the electric services for the oven are installed on site in accordance with the manufacturers specifications. 2. Unload, uncrate, and install the oven in its proper location in accordance with this installation operation manual. 3. -
Page 4: Model Number Key
MODEL NUMBER KEY COUNTRY LANGUAGE CODE NOT USED France French Germany German Italy Italian Spain Spanish United Kingdom English Luxembourg French Portugal Portuguese Denmark Danish Belgium Dutch / French 10. Netherlands Dutch 11. Ireland English 12. Greece Greek 13. Austria German 14. -
Page 5: Exterior Dimensions
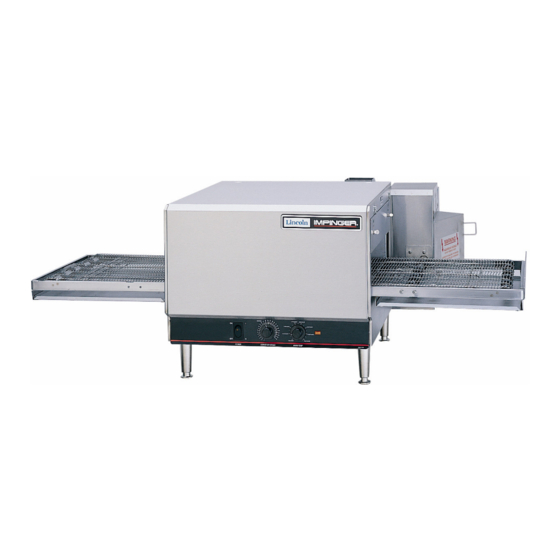
® EXTERIOR DIMENSIONS IMPINGER OVEN MODELS Top oven shown with conveyor #1353 Bottom oven shown with extended conveyor #1346 OVEN ACCESSORIES NOTE: Optional Columnating Plates listed on pages 15-16. #1341 Exit Shelf – 12” Length #1342 Exit Shelf – 4” Length #1343 Entry Incline Shelf –... -
Page 6: Code References
ELECTRICAL GROUNDING INSTRUCTIONS As it pertains to model units 1300, 1301 and 1302 only, this appliance is equipped with a three-prong WARNING (grounding) plug for your protection against shock hazard and should be plugged directly into a properly DOMESTIC: grounded three-prong receptacle. Do not cut or remove the grounding prong from this plug. WARNING This appliance must be properly grounded at time of installation. -
Page 7: Assembly Instructions
® IMPINGER ASSEMBLY INSTRUCTIONS INSTAL LEGS AS SHOWN WARNING: Legs MUST be installed to insure proper operation! CAUTION: Oven must be operated on approved bases only. Bottom unit must always be mounted on legs provided. Before applying power to oven, check to insure that the four (4) CAUTION: finger assemblies and two (2) air duct panels (upper &... -
Page 8: Stacking Instructions
® IMPINGER STACKING INSTRUCTIONS FOR SINGLE AND DOUBLE-STACK OVENS NOTE: When stacking ovens, remove bottom flue cap from top oven. NOTE: Stack ovens so that the small “foot” on top oven fits into the “indentation” on the top of the bottom oven. If you use a double stack, please note that each oven has its own CAUTION: disconnect switch. -
Page 9: Mounting Instructions
COUNTERTOP MOUNTING INSTRUCTIONS Position the oven on the countertop and carefully mark the position of the rear legs. Remove the oven from the countertop and position the mounting rings so that the large (center) hole is where the legs of the oven were marked. -
Page 10: Oven Start-Up And Shutdown
20 minutes. CLEANING INSTRUCTIONS ® The Lincoln Impinger oven contains electrical components. Before cleaning the oven, switch off and disconnect the oven from the electrical supply. No electrical components should be subjected to moisture. It is therefore important that the oven is wiped down carefully. -
Page 11: Operator Maintenance
You must discuss the need for Preventive Maintenance with your Authorized Service Agent to establish a proper program. If there are any questions that the service agent cannot answer, please contact the Lincoln Technical Service department. INFORMATION ON USE OF OVEN ®... -
Page 12: Conveyor Removal
CONVEYOR REMOVAL 1. Remove extension shelves (if applicable). 2. Push coupling away from drive lugs. 3. Remove conveyor from oven cavity. 4. Reassemble in reverse order. 5. Install extension shelves (if applicable). CONVEYOR DISASSEMBLY FOR CLEANING Pull conveyor out the right end. Place on table or work surface. CONNECTING LINKS IN CORRECT... -
Page 13: Conveyor Reassmbly
CONVEYOR REASSEMBLY CONVEYOR BELT INSTALLATION BELT CONVEYOR DRIVE CORRECT INCORRECT 1. Put conveyor belt back on by setting the rolled belt to the left of the conveyor and thread approximately 2/3 of the belt over the bottom slider bed. 2. Put the loose end of the belt around the idler shaft and back on the conveyor. The belt must lie on top of the upper conveyor slider bed. -
Page 14: Finger Removal And Disassembly
FINGERS – REMOVAL AND DISASSEMBLY FOR CLEANING CAUTION: Oven must be cool before proceeding. DISASSEMBLY RETAINING TABS 1. Release -turn fasteners (2 per panel) then 2. Lift finger assembly to clear hanger on front pull back the panel. Lift panel off lower wall of oven. -
Page 15: Finger Columnating Plate Identification
MODEL 1301 & 1302 SERIAL #3002168 AND ABOVE ALL OTHER MODELS SERIAL #3001885 AND ABOVE FINGER COVERS ARE MATCHED AND MAY BE INSTALLED IN ANY LOCATION NOTE: Assembly numbers are stamped on the outer edge of the finger cover. ASSEMBLY ASSEMBLY NO. - Page 16 ® IMPINGER FINGER COLUMNATING PLATES (CONT’D) COLUMNATING PANEL #1349 APPEARANCE: Panel is made from solid metal with 6 rows of larger holes, then covered with perforated metal. EFFECT: Reduces air flow significantly. A relative comparison can be made between a 1349/1736 (Low Profile). COLUMNATING PANEL #1355 APPEARANCE: Panel is made from perforated metal.
-
Page 17: Appendix A: Label Definitions
APPENDIX A – LABEL DEFINITIONS CounterTop - 1300 Series Ops Manual... - Page 18 APPENDIX A – LABEL DEFINITIONS (CONT’D) CounterTop - 1300 Series Ops Manual...
-
Page 19: Warranty
(ii) at Lincoln’s option, the refund of the amount paid for said equipment or services. Any breach by Lincoln with respect to any item or unit of equipment or services shall be deemed a breach with respect to that item or unit or service only... - Page 20 Lincoln Foodservice Products, LLC 1111 North Hadley Road Fort Wayne, Indiana 46804 United States of America Telephone: (260) 459-8200 U.S. Fax: (888) 790-8193 Int’l Fax: (260) 436-0735 Service Hotline: (800) 678-9511 www.lincolnfp.com CounterTop - 1300 Series Ops Manual...
Need help?
Do you have a question about the IMPINGER 1300 and is the answer not in the manual?
Questions and answers
Is my used Lincoln 1301ventless?