Table of Contents
Advertisement
Advertisement
Table of Contents

Related Manuals for Native Instruments Guitar Rig Session


Summary of Contents for Native Instruments Guitar Rig Session
- Page 1 HARDWARE REFERENCE...
- Page 2 The information in this document is subject to change without notice and does not represent a commitment on the part of Native Instruments GmbH. The software described by this document is subject to a License Agreement and may not be copied to other media. No part of this publication may be copied, reproduced or otherwise transmitted or recorded, for any purpose, without prior written permission by Native Instruments GmbH, hereinafter referred to as Native Instruments.
- Page 3 Germany Native Instruments GmbH Schlesische Str. 28 D-10997 Berlin Germany info@native-instruments.de www.native-instruments.de Native Instruments North America, Inc. 5631 Hollywood Boulevard Los Angeles, CA 90028 sales@native-instruments.com www.native-instruments.com © Native Instruments GmbH, 2009. All rights reserved.
-
Page 4: Table Of Contents
Connecting your Instrument and Adjusting the Input Level ....23 4.4.2 Connecting a Second Instrument ............24 4.4.3 The Input Level of GUITAR RIG 4 ............. 25 4.4.4 Connecting the Output ..............25 5 Installation under Mac OS X ....................27 5.1 Software Installation .....................27 5.2 Hardware Installation ....................28 GUITAR RIG SESSION – IV... - Page 5 7.1 Jacks and Sockets ....................42 7.2 Audio Specifications....................42 7.3 Power Supply ......................46 7.4 Dimensions and Weight ..................46 7.5 Environmental Specifications .................46 7.6 System Requirements ....................47 7.6.1 General System Specifications ............47 7.6.2 Supported Driver Formats ..............47 7.6.3 Supported Platforms ............... 47 GUITAR RIG SESSION – V...
-
Page 6: Welcome To Guitar Rig Session
In the following chapters you will learn more about the GUITAR RIG SESSION I/O and how to make the best use of it. Please read this manual carefully in order to get acquainted with the product. -
Page 7: Before You Start - Important Notes
2 Before you Start – Important Notes First things first; before using GUITAR RIG SESSION, it is advised that you read this chapter carefully. 2.1 Serial Numbers & Nameplate GUITAR RIG SESSION comes with two serial numbers. The GUITAR RIG SESSION I/O serial number can be found on the bottom of the hardware, along with the nameplate listing the product model name and other technical information. -
Page 8: Caution
• Do not place the GUITAR RIG SESSION I/O in an unstable position where it is possible the unit could accidentally fall. Remove all connected cables before moving the unit. •... - Page 9 The information contained in this manual is believed to be correct at the time of printing or digital release. However, Native Instruments reserves the right to make changes to the speci- fications at any time without notice or obligation to update existing units.
-
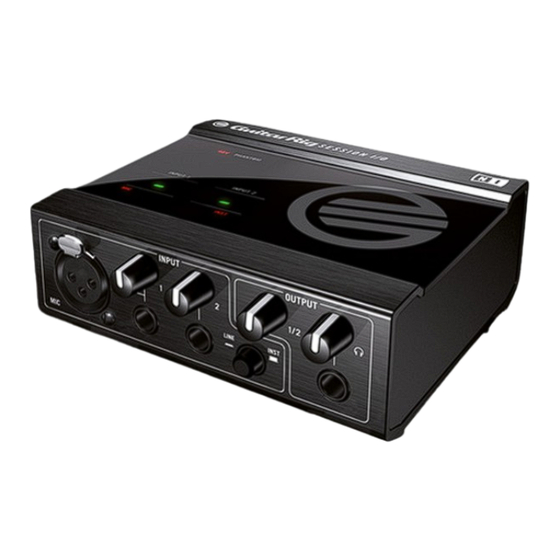
Page 10: The Session I/O Hardware
Line/Inst switch. Connect a guitar, bass guitar, keyboard or the right channel of a stereo device. Note that this input has priority over the XLR input (1). When in use, the XLR input is automatically disabled. GUITAR RIG SESSION – 10... -
Page 11: Top Panel
This knob adjusts the level for the headphones output. 3.2 Top Panel This shows the selected input signal type (Mic, Instrument, Line) for Input 1. This LED shows a present signal at Input 1 / Input 2. GUITAR RIG SESSION – 11... -
Page 12: Rear Panel
The USB port connects the unit to your computer. Your computer must support USB 2.0 in order to work with GUITAR RIG SESSION I/O. The unit also relies on the USB bus power to function. Connect this unit directly to your computer’s USB 2.0 port and avoid using un-powered USB hubs. -
Page 13: Installation Under Windows Xp / Windows Vista
Browse the content of the product CD and locate the setup file. It is called “Guitar Rig 4 Setup”. If you are using a download version of GUITAR RIG 4, you need to extract the setup files first. 2. Double-click “Guitar Rig 4 Setup” to start the installation procedure. GUITAR RIG SESSION – 13... - Page 14 Windows Logo Test” or “Windows can’t verify the publisher of this driver software”. Don’t worry, everything is fine here. Simply click “Continue anyway” (Windows XP) or “Install this driver software anyway” (Windows Vista) to continue the installation. GUITAR RIG SESSION – 14...
- Page 15 • The drivers for the GUITAR RIG SESSION I/O audio interface. If you have never owned a Native Instruments product, you will need to register by following the on-screen instructions. More information about creating a NI User Account and about activating GUITAR RIG 4 is available in the Service Center Quick Start Guide and manual located in the Service Center installation folder.
-
Page 16: Hardware Installation
USB 2.0 hubs. On Windows XP systems, Service Pack 2 or higher is required for the SESSION I/O to work – you can find out about your Windows version in the System Properties window. GUITAR RIG SESSION – 16... - Page 17 Choose not to connect to the “Windows Update Web site”. 2. Choose “Install the software automatically” (Windows XP) or “Locate and install driver software” (Windows Vista). GUITAR RIG SESSION – 17...
-
Page 18: Configuration
This chapter explains how to use the SESSION I/O audio interface with Windows XP / Vista and particularly with GUITAR RIG 4. It is assumed that you have already activated GUITAR RIG 4 using the Service Center – please refer to the Setup Guide for help on this process. GUITAR RIG SESSION – 18... -
Page 19: Configuring Guitar Rig 4
You can access the Driver Control Panel by clicking on “ASIO Config”. In the Driver Control Panel, two status fields on the bottom show whether the SESSION I/O hardware is connected and ready to use. GUITAR RIG SESSION – 19... - Page 20 Sample Rate: Choose a sample rate that is compatible with your music application and suited to your computing power. Per default, the sample rate is set to 44100 Hz (CD-Quality). Higher sample rates may improve sound quality, but cause a higher CPU load as well. GUITAR RIG SESSION – 20...
-
Page 21: Using The Session I/O As Your Default Audio Interface
2. Select the “Audio” tab. 3. In the “Sound playback” and “Sound recording” sections, click on the Default Device menu, and then select SESSION I/O. 4. Click OK to close the “Sounds and Audio Devices” dialog. GUITAR RIG SESSION – 21... - Page 22 3. In the device list, select SESSION I/O and click on “Set Default.” 4. Select the “Recording” tab. 5. In the device list, select SESSION I/O and click on “Set Default.” 6. Click OK to close the dialog. GUITAR RIG SESSION – 22...
-
Page 23: Audio Connections And Levels
4. Completely turn down the volume of the input channel you are not using. Mind that for an instrument that generates a stereo signal, such as a synthesizer keyboard, you need to connect it to both input channels for stereo sound. GUITAR RIG SESSION – 23... -
Page 24: Connecting A Second Instrument
(line or instrument). Just plug the cable of your second instrument into the other input jack and set the right input level as described in the previous section. For instruments generating a stereo signal, the second channel needs to be connected for stereo sound. GUITAR RIG SESSION – 24... -
Page 25: The Input Level Of Guitar Rig 4
Mind that both of them have to be connected for stereo sound. A separate stereo output (TRS) allows for connecting your headphones. GUITAR RIG SESSION – 25... - Page 26 SESSION I/O to the desired level. If your instrument uses only one channel, set the other channel’s Gain Knob to zero. You’re all set now and ready to rock! GUITAR RIG SESSION – 26...
-
Page 27: Installation Under Mac Os X
Browse the content of the product CD and locate the file “Guitar Rig 4 Installer”. If you are using a download version of GUITAR RIG 4, you need to extract the installer file first. 2. Double-click the installer file to start the installation procedure. GUITAR RIG SESSION – 27... -
Page 28: Hardware Installation
• The drivers for the SESSION I/O audio interface. If you have never owned a Native Instruments product, you will need to register by following the on-screen instructions. More information about creating a NI User Account and about activating GUITAR RIG 4 is available in the Service Center Quick Start Guide and manual located in the Service Center installation folder. -
Page 29: Configuration
GUITAR RIG 4 using the Service Center – please refer to the Setup Guide for help on this process. 5.3.1 Configuring GUITAR RIG 4 We will now set up GUITAR RIG 4 to use the SESSION I/O audio interface. Start the software before you proceed. GUITAR RIG SESSION – 29... - Page 30 The buffer size has two effects: The higher it is set, the lower is the probability of dropouts during real-time audio processing. On the other hand, the size of the buffer di- rectly affects the overall latency of your system. The time between the moment you hit a GUITAR RIG SESSION – 30...
-
Page 31: Using Session I/O As Your Default Audio Interface
If you want to use the SESSION I/O for all audio playback (not only for music software), you have to set it as your default audio interface. For Mac OS X, this works as follows: From the Apple menu, select System Preferences. 2. In the panel that opens, click on “Sound.” GUITAR RIG SESSION – 31... -
Page 32: Audio Connections And Levels
4. Completely turn down the volume of the input channel you are not using. Mind that for an instrument that generates a stereo signal, such as a synthesizer keyboard, you need to connect it to both input channels for stereo sound. GUITAR RIG SESSION – 32... - Page 33 The Input LEDs help you by indicating the level of the incoming signal for each channel: LED Status Meaning LED is off No incoming signal LED flashing green Incoming signal LED flashing red Incoming signal is too loud GUITAR RIG SESSION – 33...
-
Page 34: Connecting A Second Instrument
For instruments generating a stereo signal, the second channel needs to be connected for stereo sound. 5.4.3 The Input Level of GUITAR RIG 4 It is assumed that your guitar is connected to the GUITAR RIG SESSION I/O and its input level is properly adjusted (see section 4.4.1). -
Page 35: Connecting The Output
A separate stereo output (TRS) allows for connecting your headphones. Connect the output jacks to the input of your amp with its volume set to your usual level and the output level knob turned down. GUITAR RIG SESSION – 35... - Page 36 SESSION I/O to the desired level. If your instrument uses only one channel, set the other channel’s Gain Knob to zero. You’re all set now and ready to rock! GUITAR RIG SESSION – 36...
-
Page 37: Troubleshooting
Please visit this URL to contact the support team: http://www.native-instruments.com/support/ All products by Native Instruments are tested extensively in real life situations during the development phase. However, if your product needs to be returned, the Technical Support team will assign you an RA (Return Authorization) number to expedite the processing of your return. -
Page 38: Audio Issues
Single-coil pickups are prone to collecting electrical interferences. Humbucker pickups produce much less hum, which is why they got their name. • Your guitar is too close to electrical equipment. To reduce this type of hum, move the guitar further away from the equipment. GUITAR RIG SESSION – 38... -
Page 39: Ground Loops
Hook up a DI box behind the SESSION I/O outputs. Most of these boxes have a ground lift switch, which allows breaking the ground loop and eliminating the noise. 6.2 Hardware-Related Problems Check the Native Instruments website and the NI Service Center for updates of the SESSION I/O driver and more information. 6.2.1 Driver Issues Make sure that the SESSION I/O is connected to the computer and open the Driver Control Panel. -
Page 40: Usb Issues
Go to the Device Manager (Control Panel > System > Hardware) and right click a USB hub to bring up its properties. On the Power Management page, uncheck all boxes. Repeat for each hub and reboot. GUITAR RIG SESSION – 40... -
Page 41: Using The Session I/O With A Laptop
Laptops often are equipped with built-in devices that disturb audio processing, most com- monly a network adapter or a wireless LAN card. You might need to disable these devices while working with GUITAR RIG SESSION. GUITAR RIG SESSION – 41... -
Page 42: Technical Specifications
1 Headphones jack for stereo ¼” (6.3mm) jack • 1 USB 2.0 Type B 7.2 Audio Specifications Audio Inputs (A/D) Channels Sample Rate 44.1, 48, 88.2, 96, 192 kHz Bit Resolution 16, 24 Bit Converter Cirrus Logic GUITAR RIG SESSION – 42... - Page 43 44 kΩ unbalanced & balanced Full Scale Level at Max. Gain -2.19 dBu Maximum Input Level +15 dB unbalanced and balanced SNR (weighted) 96.2 dB THD+N 0.008% Frequency Response 10 - 40000 Hz (-1 dB) GUITAR RIG SESSION – 43...
- Page 44 +9 dB unbalanced SNR (weighted) 95.9 dB THD+N 0.008% Frequency Response 10 - 40000 Hz (-1 dB) Audio Outputs (D/A) Channels Sample Rate 44.1, 48, 88.2, 96, 192 kHz Bit Resolution 16, 24 Bit Converter Cirrus Logic GUITAR RIG SESSION – 44...
- Page 45 10 - 45000 Hz (-0.5 dB) Headphone Output Load Impedance 8 - 600 ohms Maximum Output Level 1.67 V eff @ 100 ohms SNR (weighted) 98.2 dB THD+N (60 Ohms) 0.008% Frequency Response 10 - 40000 Hz (-1 dB) GUITAR RIG SESSION – 45...
-
Page 46: Power Supply
121 x 115 x 40 mm (4.76 x 4.53 x 1.57 in) 0.56 kg (1.235 lb) 7.5 Environmental Specifications Operating temperature: 0°C to 40°C (32°F to 104°F) (85% non-condensing humidity) Storage temperature: -20°C to 50°C (-4°F to 122°F) (85% non-condensing humidity) GUITAR RIG SESSION – 46... -
Page 47: System Requirements
• Mac OS® X: Core Audio™ • Windows®: ASIO® (recommended), DirectSound™, WASAPI™ 7.6.3 Supported Platforms • Mac OS® X: Stand-alone, VST®, Audio Units™, RTAS® (Pro Tools 7/8) • Windows®: Stand-alone, VST®, RTAS® (Pro Tools 7/8) GUITAR RIG SESSION – 47...
Need help?
Do you have a question about the Guitar Rig Session and is the answer not in the manual?
Questions and answers