Advertisement
Quick Links
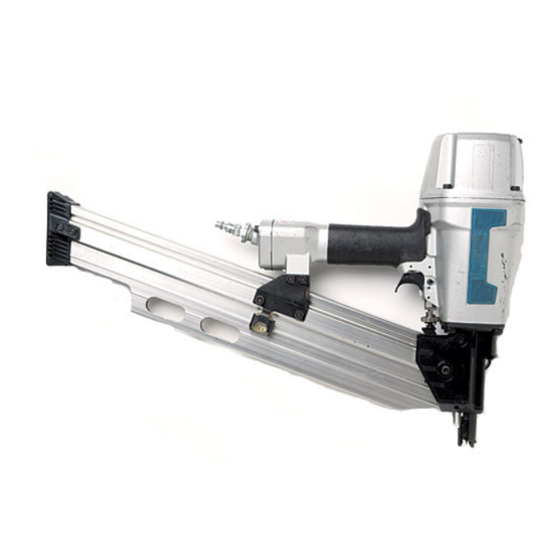
Pneumatic Framing Nailer
540
mm
x 376 mm
x
108 mm
(21-114"
x
14-3/4"
x
4-1/4")
446
mm
x 376 mm x 108 mm
(17-112"
x
14-3/4"
x
4-114")
64
-
74
pes'
-
84
pes'
AN922
4.5
-
8.5 kgflcm2G
(65
-
120 PSIG)
50 mm
-
90 mm
(2"
-
3-1/2")
8.5
mm
(5116")
AN942
MODEL AN922
MODEL AN942
3.8 kg (8.4 Ibs)
INSTRUCTION MANUAL
4ml
AN922
LJ
AN942
SPECIFICATIONS
I
Min. hose diameter
I
Net weight
Dimensions
I
Nail length
I
Nail capacity
I
(L x H
x W)
Model
I
Air pressure
*
Manufacturer reserves the right to change specifications without notice.
*
Note: Specifications may differ from country to country.
WARNING: For your personal safety, READ and UNDERSTAND before using.
CAW=
TUECC
I ~ I C T R I I r T i n h i c Erin
EI ITI IRE
RCCCRCMPC
Advertisement

Related Manuals for Makita AN922


Summary of Contents for Makita AN922
- Page 1 376 mm pes' (21-114” 14-3/4” 90 mm x 376 mm x 108 mm pes' (17-112” 14-3/4” EI ITI IRE RCCCRCMPC MODEL AN922 MODEL AN942 AN942 Min. hose diameter Net weight 108 mm 4-1/4”) (5116”) 3.8 kg (8.4 Ibs) 4-114”)
-
Page 2: Important Safety Instructions
IMPORTANT SAFETY INSTRUCTIONS WARNING: WHEN USING THIS TOOL, BASIC SAFETY PRECAUTIONS SHOULD ALWAYS BE FOLLOWED TO REDUCE THE RISK OF PERSONAL INJURY, INCLUDING THE FOLLOWING: READ ALL INSTRUCTIONS. .For personal safety and proper operation and maintenance of the tool, read this instruction manual carefully before using the tool. - Page 3 *General Handling Guidelines: Tool 1. Always assume that the tool contains fasteners. 2. Do not point the tool toward yourself or anyone whether Do not activate the tool unless the tool is placed firmly against the workpiece. Respect the tool as a working implement. 5.
- Page 4 .Only those involved in the work should be in the vicinity. Children especially must be kept away at all times. .There may be local regulations concerning noise which must be complied with by keeping noise levels within prescribed limits. In certain cases, shutters should be used to contain noise.
- Page 5 *Never use the tool with other than compressed air. If bottled gas (carbon dioxide, oxgen, nitro- gen, hydrogen, air, etc.) or combustible gas (hydrogen, propane, acetylene, etc.) is used as a power source for this tool, the tool will explode and cause serious injury.
- Page 6 *Make sure that the trigger is locked when the change lever is set to the LOCK position. *Check walls, ceilings, floors, roofing and the like carefully to avoid possible electrical shock, gas leakage, explosions, etc. caused by striking live wires, conduits or gas pipes. Use only nails specified in this manual.
- Page 7 Make sure no one is nearby before nailing. Never attempt to nail from both the inside and outside at the same time. Nails may rip through and/or fly off, presenting a grave danger. *Watch your footing and maintain your balance with the tool.
- Page 8 Do not leave the loaded tool or the air compressor under pressure for a long time out in the sun. Be sure that dust, sand, chips and foreign matter will not enter the tool in the place where you leave setting *Do not point the ejection port at anyone in the vicinity.
- Page 9 Stop nailing operations immediately if something wrong or out of the ordinary with the tool. .Always disconnect the air hose and remove all of the nails: When unattended. Before performing any maintenance or repair. 3. Before cleaning a jam. Before moving the tool to a new location. Perform cleaning and maintenance right after finishing the job.
- Page 10 WARNING LABEL. *Do not modify tool without authorization from Makita. Ask Makita’s Factory or Authorized service center for periodical inspection of the tool. To maintain product SAFETY and RELIABILITY, maintenance and repairs should be performed by Makita Authorized or Factory Service Centers, always using Makita replacement parts.
- Page 11 TOOL INSTALLATION INSTRUCTIONS AND USE Selecting compressor The air compressor must comply with the requirements of ANSI B19.3 1981. Select a compressor that has ample pressure and air output assure cost-efficient operation. The graph shows the relation between nailing frequency, applicable pressure and compressor air output.
- Page 12 Nose adapter CAUTION: Always lock the trigger and disconnect the hose before installing or removing the nose adapter. When nailing workpieces with easily-marred surfaces, use the nose adapter. It is stored in the holder on the reverse side of the magazine. Attach the nose adapter to the contact arm (see right).
- Page 13 Unloading nailer CAUTION : Always disconnect the air hose before unloading the nailer. Pull the pusher lever to the rear. Return the pusher lever back while keeping the pusher depressed to disengage it from the strip of nails. Depress the nail stopper and remove the strip of nails from the magazine.
- Page 14 Operation CAUTION: Make sure all safety systems are in working order before operation. 1) To drive a nail, you may place the contact element against the workpiece and pull the trigger, or 2) Pull the trigger first and then place the contact element against the workpiece. No.
- Page 15 Nails Handle nail strips and their box carefully. If the nail strips have been handled roughly, they may be out of shape or their connector breaks, causing poor nail feed. Avoid storing nails very humid or hot place or place in a exposed to direct sunlight.
- Page 16 MAINTENANCE CAUTION: Always disconnect the hose before attempting to perform inspection or maintenance. Maintenance of nailer Always check the tool for its overall condition and loose screws before operation. Tighten as re- quired. With tool disconnected, make daily inspection to assure free movement of the contact element and trigger.
- Page 17 When the tool is not to be used for an extended period of time, lubricate the tool using pneumatic tool oil and store the tool in a safe place. Avoid exposure to direct sunlight and/or a humid or hot environment. Maintenance of compressor, air set and air hose After operation, always drain the compressor tank and the air filter.
- Page 18 To maintain product SAFETY and RELIABILITY, maintenance and repairs should be performed by Makita Authorized or Factory Service Centers, always using Makita replacement parts.
- Page 19 (MEMO)
- Page 20 MAKmA LIMITED ONE YEAR WARRANTY Warranty Policy Every Makita tool is thoroughly inspected and tested before leaving the factory. It is warranted t o be free of defects from workmanship and materials for the period of ONE YEAR from the date of original purchase.