Table of Contents
Advertisement
Advertisement
Table of Contents

Summary of Contents for Vesco AHD DVR
-
Page 1: User Manual
AHD DVR User Manual AHD DVR User Manual... -
Page 2: Table Of Contents
AHD DVR User Manual Important Safeguards and Warnings Do not place heavy objects on the DVR. Do not let any solid or liquid on the DVR. Please brush the printed circuit boards, connectors, fans, machine box and so on regularly. Before cleaning please switch off the power supply and unplug it. - Page 3 AHD DVR User Manual 3.3.6 Version Info ..............................13 3.3.6.1 State..............................13 3.3.6.2 HDD Info ............................14 3.3.6.3 LOG ..............................14 3.3.6.4 BPS ..............................15 3.3.6.5 Version .............................. 15 3.3.6.6 Online Users ............................. 15 ...
- Page 4 AHD DVR User Manual 4.6.1 HDD Management ............................36 4.6.2 PTZ Config ..............................37 4.6.3 Display ................................ 38 4.6.4 Backup ................................ 39 4.6.5 Account Management ..........................40 4.6.6 Default ................................. 43 4.6.7 Auto Maintain .............................. 44 ...
-
Page 5: Production Introduction
1.1 Product Overview 1.1.1 Introduction Congratulations on your purchase of this Vesco DVR. You've made a fine choice for keeping a watchful eye over your home or business. Let's take a moment to talk about some of them. Oh my, this is a big manual. How long will this take? Yes, but you won't have to read all of it - you should be up and running by page 17! It can take a few hours to connect everything and run through the setup procedure. -
Page 6: Installation Guidelines
AHD DVR User Manual them if you've got a really specific plan in mind. You’ll need to read a page or two of this section if: you've got a PTZ capable camera - see page 48. you want to alter the motion detection sensitivity or the areas it applies to (page 42). - Page 7 AHD DVR User Manual Storage . Non-working hard drive processing which is convenient to radiate heat, reduce power and extend the life-span. . Special storage format which insures the data safety. Compression . Real-time compression by individual hard drive which insures the audio and video signal stable synchronization.
-
Page 8: Open-Package Check, Products Understanding And Cable Connection
AHD DVR User Manual 2. Open-package Check, Products Understanding and Cable Connection 2.1 Open-package Check When you receive the DVR, please check first. First, please check whether there is any visible damage to the package appearance. Then, please open the machine and check the data wire in the front panel, power wire, the connection between the fan power and the main board. - Page 9 AHD DVR User Manual...
-
Page 10: Installation Connections Sketch Map
AHD DVR User Manual Connecting Additional Devices The Audio Output can be used to connect The Audio ports can be used to connect audio devices to stereo speakers, headphones or other external the DVR. Obviously, your microphone probably won't look sound device. -
Page 11: Basic Operation
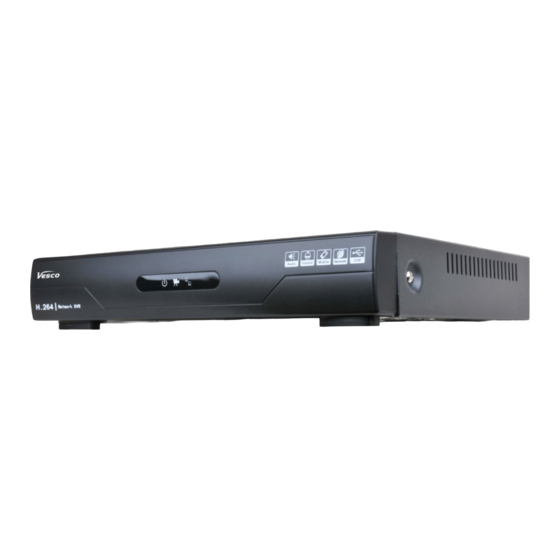
AHD DVR User Manual RS485 RS485 for keyboard or PTZ control DC IN Power input for 12V DC power supply 8-CH DVR ITEM NAME FUNCTION VIDEO IN Video input from up to 4 cameras AUDIO OUT BNC Audio output for amplified speaker... -
Page 12: Preview
AHD DVR User Manual For your system security, please modify the username & password after first login. 3.2 Preview You can right click mouse to choose the switch between the windows. The system date, time and channel name are shown in each viewing window. The surveillance video and the alarm status are shown in each window. - Page 13 AHD DVR User Manual Picture 3.3 Playback 1. HDD Switch 2. Recording Search Calendar 3.Playback Channel Selection 4. Playback Page Switch 5. Playback Time Selection 6. Playback File Type Select a HDD, a certain date in the calendar, and the channels which need to search video, set the recording type, tick off “Playback”...
- Page 14 AHD DVR User Manual Picture 3.4 7. Playback Control Keys 8. Operation hint: Display the function of the cursors place. Button Function Button Function Play/Pause Backward Stop Slow play Fast play Previous frame Next frame Open Sound / Mute Full screen Table 3.2 Playback control key list...
-
Page 15: Record Mode
AHD DVR User Manual Picture 3.5 3.3.2 Record Mode Please check current channel status: “ ” means it is in recording status. (Take 4CH DVR for example) Picture 3.6 record mode Schedule: It records according to the parameters in “Main Menu” “Record Set”“Record Plan”. -
Page 16: Ptz Control
AHD DVR User Manual 3.3.3 PTZ Control Operation interface is as followed. The functions include: PTZ direction control, step, zoom, focus, iris, and set up trace, preset, tour, pattern, auto scan, auto pan and so on. Note : 1. Decoder 485+、485- line connects with DVR 485+、485- line. The connection is right. -
Page 17: Output Adjust
AHD DVR User Manual 3.3.5 Output Adjust Adjust output area parameters (some models with this function only for CVBS output). Picture 3.9 Output adjust 3.3.6 Version Info System Information menu items include: State, HDD Info, Log, BPS, Version, Online Users. -
Page 18: Hdd Info
AHD DVR User Manual 3.3.6.2 HDD Info Display the hard disk state: hard disk type, overall capability, residual capability and so on. Picture 3.11 Hard Disk Information 3.3.6.3 LOG Look up system log according to the set mode. Log information include: system operation, configuration operation, data management, alarm affair, recording operation, user management and so on. -
Page 19: Bps
AHD DVR User Manual 3.3.6.4 BPS Display the code stream (Kb/S) and hard disk capability (MB/H) in real time. Picture 3.13 Code Stream Statistics 3.3.6.5 Version Display the basic information such as hardware information, software version, issue data, SerialNo and so on. -
Page 20: Close System
AHD DVR User Manual Picture 3.15 Online User. 3.3.7 Close System Logout, shutdown the system or reboot up. Logout: Quit the menu. Offer the password for next entrance. Shutdown: Quit the system. Turn off the power supply. When press the shut down button, there is a schedule hint. After three seconds, the system is shut down. Midway cancel is of no effect. -
Page 21: Main Menu
AHD DVR User Manual 4. Main Menu When a user logs in to the system, right click in any place, the shortcut menu will appear at the bottom of the screen, then click the first item to enter the main menu interface. As picture 4.1 shows. -
Page 22: Record Set
AHD DVR User Manual Tour: Set screen tour display, shows tour was opened. Select the display mode and channel combination, set interval time for a certain dwell picture switching to next dwell picture. Picture 4.2 Tour setting 4.2 Record Set Set recording parameter (main stream) and network parameter (extra stream) of video and audio signal. - Page 23 AHD DVR User Manual Channel: Choose the corresponding channel number to set its recording parameters. Set: Recording parameter (main stream) and network parameter (extra stream). Video/Audio: Set whether to record video and audio simultaneously. Resolution: Set recording resolution. The Higher resolution, the better recording quality, occupies more HDD capacity.
- Page 24 AHD DVR User Manual Picture 4.5 Recording Plan Channel: Choose the corresponding channel number to set the recording plan. Pre Record: Record 1-5 seconds before the action. (Time length is decided by the code stream) Set: Click Set button to pop up the Plan window, select one day or all days of recording plan, set recording type and period, then click OK, the recording will start only in the set range.
-
Page 25: Network
AHD DVR User Manual Recording type: Regular: Perform the regular recording in the set time section. The video file type is “R”. Detect: Trigger the “motion detect”, “camera mask” or “video loss” signal. When above alarm is set as opening ... -
Page 26: Pppoe Setup
AHD DVR User Manual Picture 4.8 Network Service 4.3.1 PPPOE Setup Activate the PPPOE function, enter the user name and password provided by ISP (Internet service provider) provides. After saving it reboot up your system. Then the DVR will build a network connection based on PPPOE. The IP address will change into dynamic IP address after above operations well done. -
Page 27: Ddns Setup
AHD DVR User Manual 4.3.2 DDNS Setup Picture 4.10 DDNS Active: Activate the DDNS function. DDNS Type: Choose DDNS supplier. Domain Name: Input the domain name registered by DDNS. User Name: Input the account registered by DDNS. Password: Input the password registered by DDNS. -
Page 28: Ntp Setup
AHD DVR User Manual 4.3.3 NTP Setup Picture 4.11 NTP Server IP: Enter the address of NTP server. Port: Default: 123. You can set the port according to NTP server. Time zone: London GMT+0; Berlin GMT +1; Cairo GMT +2; Moscow GMT +3; New Delhi GMT +5; Bangkok GMT +7;... -
Page 29: Network Transmission, Port, Upnp
AHD DVR User Manual Picture 4.12 IP purview 4.3.5 Network Transmission, Port, UPNP Picture 4.13 Transfer Capability Set: Set the maximum number of connection users, network monitoring and internet download. Port Set: View and set TCP Port, Phone Port and HTTP Port. -
Page 30: Email Setup
AHD DVR User Manual Phone Port: Need to map this port on the router while accessing by mobile phone. HTTP Port: Need to add this port number while browsing by IE. UPNP: UPNP protocol will be automatic port forwarding on the router, before using this feature, make sure UPNP feature is enabled on your router. -
Page 31: Config
AHD DVR User Manual Picture 4.15 FTP Active: Enable the FTP function. Server IP: FTP server's IP address. Port: FTP port, default port is “21”. Alternate IP: Spare FTP server's IP address. User name: A user which has permission to log FTP. -
Page 32: Wireless Net Config
AHD DVR User Manual Picture 4.16 Wireless config 4.3.9 Wireless Net Config Connect to wireless router by wireless module. View the device with IP under the condition that DVR has been connected to WIFI module. Picture 4.17 Wi-Fi Search: Click “Search” button to get the available wireless network in the list. -
Page 33: Alarm Set
AHD DVR User Manual 4.4 Alarm Set Alarm functions include: Motion Detect, Video Loss, Alarm Input, Alarm Output and Abnormality. Picture 4.18 Alarm 4.4.1 Motion Detect When system detects the motion signal that reaches the sensitivity you set, the motion detection alarm and the linkage function are turned on. - Page 34 AHD DVR User Manual Channel: Choose a channel which needs to set the motion detection. Active: Enable the motion detection function. Sensitivity: Adjust the sensitivity of motion detection (six options) according to the practical situation. Region: Click Set button, drag the mouse to draw the detection area. Black block means the unfenced area. Coverage block means the dynamic defensive area.
-
Page 35: Video Loss
AHD DVR User Manual Alarm Out: Start the external equipment of corresponding linkage alarm when the motion detection alarm is turned on. Delay: Delay a few moments to stop when the alarm state is turned off. The range is 10~300 seconds. -
Page 36: Alarm Input
AHD DVR User Manual Picture 4.23 video loss Set method: refer to Chapter 4.4.1. Motion Detect. 4.4.3 Alarm Input When the equipment obtains the external alarm signal, the alarm function is turned on. Picture 4.24 alarm input Set method: refer to Chapter 4.4.1. Motion Detect. -
Page 37: Alarm Output
AHD DVR User Manual 4.4.4 Alarm Output Control the alarm output state of all channels. Picture 4.25 alarm output Schedule: Alarm is turned on according to the schedule configuration. Manual: The relative channel outputs alarm signal no matter the channel in any state. -
Page 38: Switch
AHD DVR User Manual Picture 4.26 Abnormality Select to enable abnormality type, click Process button to set the trigger options. Alarm out, delay, show message, send email and record are refer to Chapter 4.4.1 Motion Detect. Less: Set a threshold value for remaining HDD space. If the threshold value is reached, DVR will have cue as the setting of process. - Page 39 AHD DVR User Manual 1. Choose “Main Menu” “Switch”, show as picture 4.27. Picture 4.27 Switch 2. In channel type list, there are 3 available channel combination ways (picture 4.28). In analog channels, the numbers under resolution means the maximum analogue channels which can be connected under that resolution. In digital channels, the numbers under resolution means the maximum IP camera or other network device channels which can be connected under that resolution.
-
Page 40: System Management
AHD DVR User Manual 4.6 System Management Set the system parameters such as HDD Manage, PTZ, Display, Backup, Account, Default, Auto Maintain, Upgrade and P2P QRCode. Picture 4.29 System 4.6.1 HDD Management Configure and manage the hard disk. The menu displays the current hard disk’s information: type, total space, free space, status, etc. -
Page 41: Ptz Config
AHD DVR User Manual Picture 4.30 HDD Management 4.6.2 PTZ Config Channel: Choose the dome camera’s input channel. Protocol: Choose the corresponding dome protocol (take PELCOD as an example). Address: Set as the corresponding dome address. Default: 1. Baud rate: Choose the corresponding dome baud rate. Default: 9600. -
Page 42: Display
AHD DVR User Manual Picture 4.31 PTZ 4.6.3 Display Picture 4.32 GUI display Channel Name: Click Modify button to enter the channel name menu. Modify the channel name. The 16 Chinese characters and 25 letters are supportive. Time Display: means to display the system data and time in the surveillance window. -
Page 43: Backup
AHD DVR User Manual Boot Guide: means to display the setup guide once the DVR has loaded. It will walk you through some of the more important settings of your DVR. 4.6.4 Backup You can back up the video files to external storage device. -
Page 44: Account Management
AHD DVR User Manual Picture 4.34 Backup Selected Device: Choose a storage device for backing up files. Type: Choose the file type. Channel: Choose a channel or all channels which need to back up data. Time: Choose the start & end time. - Page 45 AHD DVR User Manual Picture 4.35 user management Add user: Click Add User button, input the new user’s name and password, choose the group and permissions, and then click OK. Enabling Reusable function means that this account can be used by multiple users at the same time.
- Page 46 AHD DVR User Manual button to delete the current user. (The default user cannot be deleted, like admin, user and default) Picture 4.37 Modify user Add Group: Click Add Group button, input the new group’s name, choose this group’s permissions, and then click OK.
-
Page 47: Default
AHD DVR User Manual Picture 4.39 modify group Modify Password: Click Password button, select a user and then modify this user’s password. Picture 4.40 modify password Note: The user who possesses the user control permission can modify his/her own or other user password. -
Page 48: Auto Maintain
AHD DVR User Manual Picture 4.41 resume default 4.6.7 Auto Maintain User can set the device to timing reboot the system, and automatically delete the files if they are longer than the specified interval. Picture 4.42 Auto Maintain 4.6.8 Upgrade... -
Page 49: P2P Qr Code
AHD DVR User Manual Copy the upgrade file into the USB disk, and then insert it to USB port on the DVR. Enter into “Main Menu”“System”“Upgrade”, then find the upgrade file in the drop-down box, click OK button to start upgrading. -
Page 50: Network Access Settings And Cloud Technology Introduced
AHD DVR User Manual 5. Network Access Settings and Cloud Technology Introduced 5.1 LAN Access Settings 1、Network connection (1) Before the WEB operation, make sure your DVR is properly connected to the network. (2) Enter DVR “Main Menu” “Network” to set correct IP address, subnet mask, DNS and gateway or set to obtain IP address automatically by DHCP. -
Page 51: Client Iss Software Operation
AHD DVR User Manual 2.By Serial number:Device: enter Serial No of DVR can realize remote access (way to get Serial No: start up and choose “desktop shortcut menu” “info” “version”) 3. By user: need to register a user name, and then enter the user name and password to login; need to add the device... -
Page 52: Appendix 1. Mouse Operation
AHD DVR User Manual Appendix 1. Mouse Operation *Take right hand as an example The mouse in USB connection is supportive. Operation Function Double click one item in the file list to playback the video Double click the playback video to zoom in or out the screen... - Page 53 AHD DVR User Manual Analog High Definition Digital Video Recorder User Manual...
Need help?
Do you have a question about the AHD DVR and is the answer not in the manual?
Questions and answers